


一、ssh框架整合思想
struts2框架:struts-2.3.24-all
spring框架:spring-framework-4.2.4.RELEASE
hibernate框架:hibernate-release-5.0.7.Final
1、三大框架应用在javaee三层结构
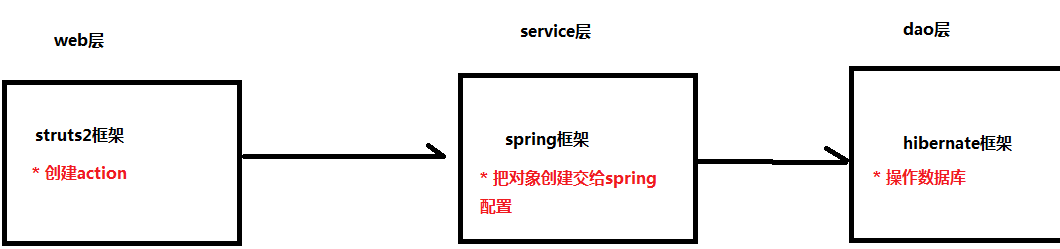
2、整合思想
整合思想:两两之间进行整合
分别是:struts2框架和spring框架整合,spring框架和hibernate框架整合

3、struts2框架和spring框架整合
(1)struts2的action创建交给spring配置,而且配置action是多实例的。
4、spring框架和hibernate框架整合
(1)hibernate的sessionFactory交给spring配置
(2)把hibernate数据库信息配置,交给spring进行管理
二、ssh框架整合过程
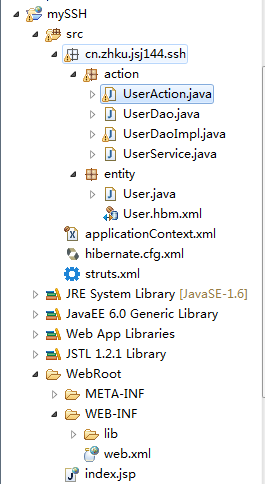
2.1、整合的ssh框架项目:mySSH
整合的项目大致是如下的目录结构
2.2、整合struts2和spring框架
1把struts2的action交给spring管理
2 实现过程
第一步导入struts2的jar包
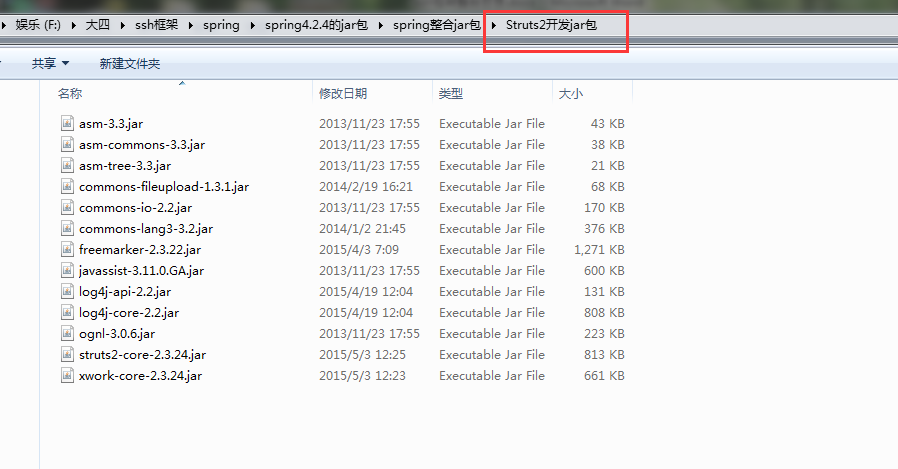
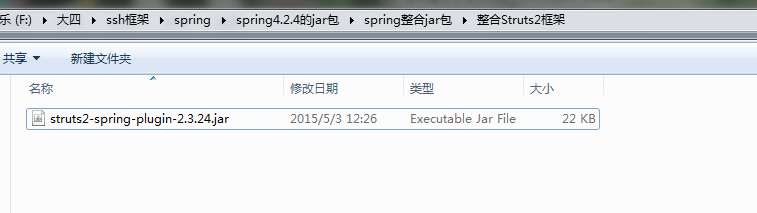
然后,导入用于整合struts2和spring的jar包:struts2-spring-plugin-2.3.24.jar
第二步创建action(UserAction)
代码:
package cn.zhku.jsj144.ssh.action;

import com.opensymphony.xwork2.ActionSupport;

public class UserAction extends ActionSupport{

	private UserService userService;
	public void setUserService(UserService userService) {
		this.userService = userService;
	}

	public String execute() throws Exception{
		System.out.println("action。。。。。。。。。。。。。。。。。。");
		userService.add();
		return NONE;
	}
}
第三步创建struts2核心配置文件,配置action
(1)位置在src下面,名称是struts.xml
代码:
<?xml version="1.0" encoding="UTF-8"?>
<!DOCTYPE struts PUBLIC
	"-//Apache Software Foundation//DTD Struts Configuration 2.3//EN"
	"http://struts.apache.org/dtds/struts-2.3.dtd">
<struts>
	<constant name="struts.i18n.encoding" value="UTF-8"></constant>
	<package name="demo1" extends="struts-default" namespace="/">

		<!-- struts2与spring整合前,struts自己管理action对象 -->
		<action name="userAction" class="cn.zhku.jsj144.ssh.action.UserAction"></action>
	</package>
</struts>
第四步配置struts2过滤器
在web.xml中进行配置
代码:
<?xml version="1.0" encoding="UTF-8"?>
<web-app xmlns:xsi="http://www.w3.org/2001/XMLSchema-instance"
	xmlns="http://java.sun.com/xml/ns/javaee"
	xsi:schemaLocation="http://java.sun.com/xml/ns/javaee http://java.sun.com/xml/ns/javaee/web-app_3_0.xsd"
	id="WebApp_ID" version="3.0">
	<display-name>ssh</display-name>


	<!-- struts2核心过滤器 -->
	<filter>
		<filter-name>struts2</filter-name>
		<filter-class>org.apache.struts2.dispatcher.ng.filter.StrutsPrepareAndExecuteFilter</filter-class>
	</filter>
	<filter-mapping>
		<filter-name>struts2</filter-name>
		<url-pattern>/*</url-pattern>
	</filter-mapping>

	<welcome-file-list>
		<welcome-file>index.html</welcome-file>
		<welcome-file>index.htm</welcome-file>
		<welcome-file>index.jsp</welcome-file>
		<welcome-file>default.html</welcome-file>
		<welcome-file>default.htm</welcome-file>
		<welcome-file>default.jsp</welcome-file>
	</welcome-file-list>
</web-app>
第五步导入spring的jar包
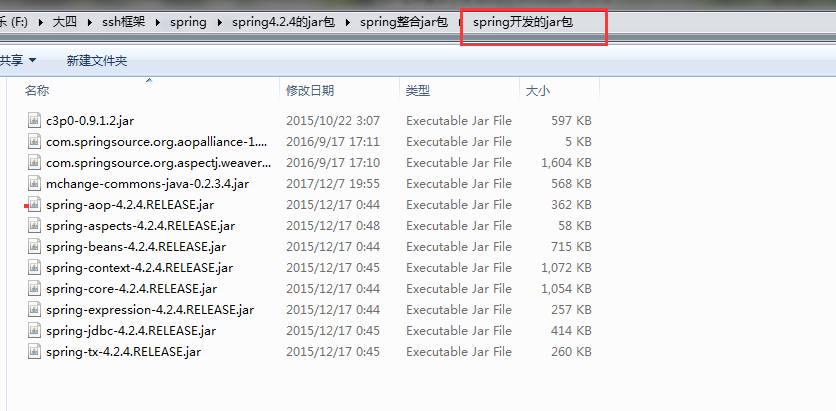
第六步创建spring配置文件
(1) 引入约束
spring的配置文件中:applicationContext.xml引入约束
代码:
<beans xmlns:xsi="http://www.w3.org/2001/XMLSchema-instance"
	xmlns="http://www.springframework.org/schema/beans" xmlns:context="http://www.springframework.org/schema/context"
	xmlns:aop="http://www.springframework.org/schema/aop" xmlns:tx="http://www.springframework.org/schema/tx"
	xsi:schemaLocation="http://www.springframework.org/schema/beans
http://www.springframework.org/schema/beans/spring-beans-4.2.xsd
http://www.springframework.org/schema/context
 http://www.springframework.org/schema/context/spring-context-4.2.xsd
 http://www.springframework.org/schema/aop
  http://www.springframework.org/schema/aop/spring-aop-4.2.xsd
http://www.springframework.org/schema/tx
http://www.springframework.org/schema/tx/spring-tx-4.2.xsd ">
(2) 配置spring监听器
web.xml文件中配置
代码:
<!-- 配置spring监听器 -->
	<listener>
		<listener-class>org.springframework.web.context.ContextLoaderListener</listener-class>
	</listener>
(3) 指定spring配置文件位置
web.xml文件中配置
代码:
<!-- 指定spring配置文件位置 -->
<context-param>
<param-name>contextConfigLocation</param-name>
<param-value>classpath:applicationContext.xml</param-value>
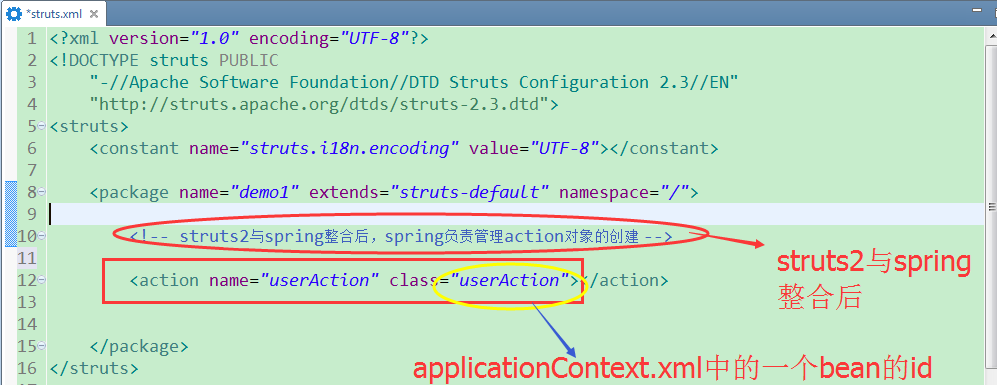
</context-param>第七步把action交给spring进行配置
注意:此处开始,struts2与spring开始进行整合,因为Struts2的action的创建交给spring了
struts2与spring整合的做法是:
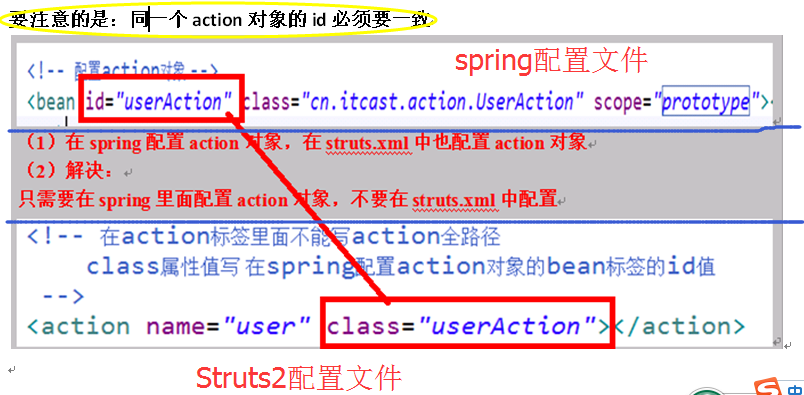
在spring配置action对象,在struts.xml中引用在spring中配置的action对象的id即可。
【实现了:action对象给spring进行管理,创建,而Struts2要使用调用action对象时,只需拿到action对象的id,即可实现调用】
spring中的配置文件:applicationContext.xml
代码:

struts2中的配置文件:struts.xml
代码:
注意:
2.3、Spring框架整合hibernate框架
1、把hibernate核心配置文件中配置数据库信息,把数据库信息在spring进行配置
2、把hibernate里面的sessionFactory创建交给spring管理
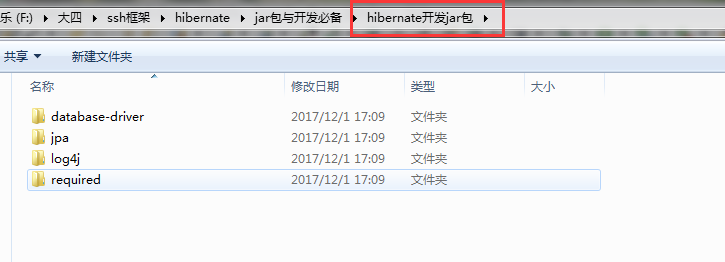
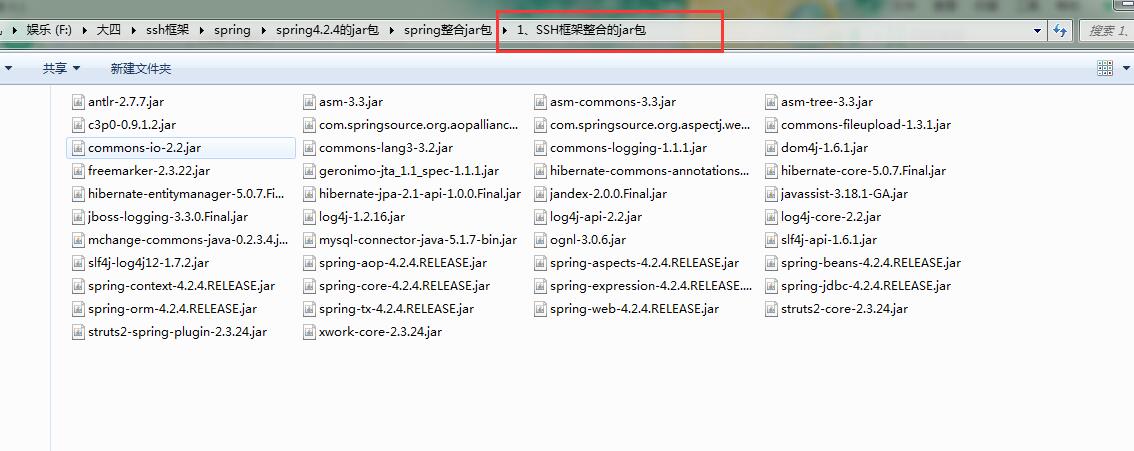
第一步 导入hibernate的jar包
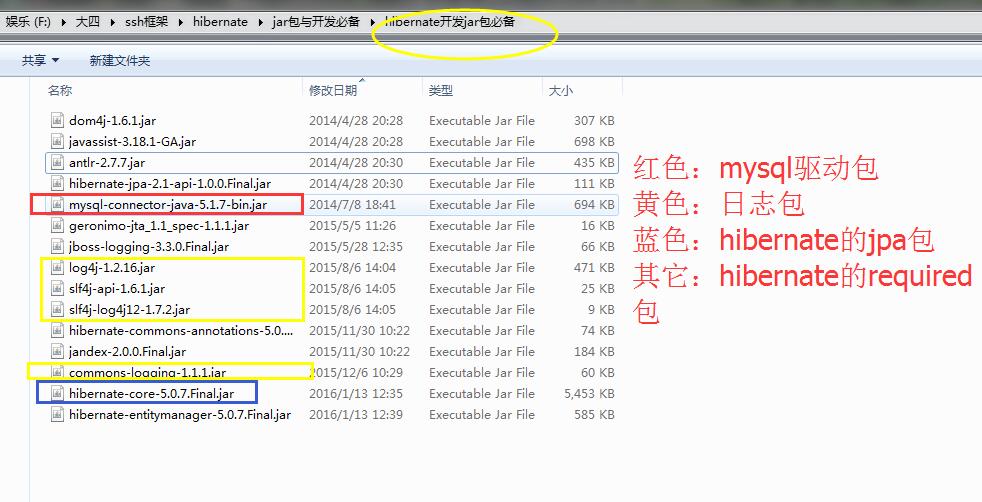
(1)导入struts2和hibernate的jar包时候有jar冲突问题
在struts2里面有jar包:javassist-3.11.0-GA.jar
在hibernate里面有jar包:javassist-3.18.1-GA.jar
删除低版本的jar包:javassist-3.11.0-GA.jar
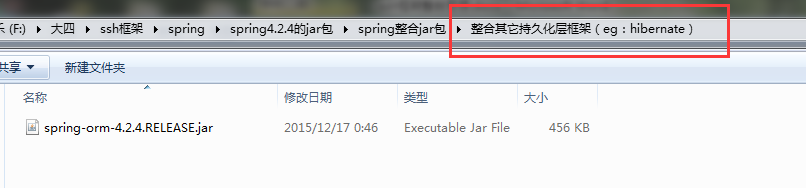
(2)导入spring整合持久化层框架需要导入jar包
第二步 搭建hibernate环境搭建
1 创建实体类:User
代码:
package cn.zhku.jsj144.ssh.entity;

public class User {

	private Long user_id;
	private String user_code;
	private String user_name;
	private String user_password;
	private Character user_state;

	public Long getUser_id() {
		return user_id;
	}
	public void setUser_id(Long user_id) {
		this.user_id = user_id;
	}
	public String getUser_code() {
		return user_code;
	}
	public void setUser_code(String user_code) {
		this.user_code = user_code;
	}
	public String getUser_name() {
		return user_name;
	}
	public void setUser_name(String user_name) {
		this.user_name = user_name;
	}
	public String getUser_password() {
		return user_password;
	}
	public void setUser_password(String user_password) {
		this.user_password = user_password;
	}
	public Character getUser_state() {
		return user_state;
	}
	public void setUser_state(Character user_state) {
		this.user_state = user_state;
	}
}
2 配置实体类映射关系:User.hbm.xml
代码:
<?xml version="1.0" encoding="UTF-8"?>
<!DOCTYPE hibernate-mapping PUBLIC
    "-//Hibernate/Hibernate Mapping DTD 3.0//EN"
    "http://www.hibernate.org/dtd/hibernate-mapping-3.0.dtd">
<hibernate-mapping>

	<class name="cn.zhku.jsj144.ssh.entity.User" table="user">
		<id name="user_id" column="user_id">
			<generator class="native"></generator>
		</id>
		<property name="user_code" column="user_code"></property>
		<property name="user_name" column="user_name"></property>
		<property name="user_password" column="user_password"></property>
		<property name="user_state" column="user_state"></property>

	</class>
</hibernate-mapping>
3 创建核心配置文件:hibernate.cfg.xml
代码:
<?xml version="1.0" encoding="UTF-8"?>
<!DOCTYPE hibernate-configuration PUBLIC

    "-//Hibernate/Hibernate Configuration DTD 3.0//EN"

    "http://www.hibernate.org/dtd/hibernate-configuration-3.0.dtd">

<hibernate-configuration>

	<session-factory>
		<!-- 1、配置数据库信息(必须) -->


		<property name="hibernate.connection.driver_class">com.mysql.jdbc.Driver</property>
		<property name="hibernate.connection.url">jdbc:mysql://localhost:3306/hibernate2</property>
		<property name="hibernate.connection.username">root</property>
		<property name="hibernate.connection.password">1234</property>


		<!-- 2、配置hibernate信息(可选) -->
		<!-- 输出底层sql语句 -->
		<property name="hibernate.show_sql">true</property>
		<!-- 输出底层sql语句格式 -->
		<property name="hibernate.format_sql">true</property>

		<!-- 设置事务的隔离级别
		<property name="hibernate.connection.isolation">4</property> -->

		<!-- hibernate绑定session(保证session是单线程操作) -->
<!-- 		<property name="hibernate.current_session_context_class">thread</property> -->

		<!-- hibernate帮忙进行创建表,需要进行配置才有这个功能 -->
		<!-- update:如果没有,则进行创建;如果有,则进行更新 -->
		<property name="hibernate.hbm2ddl.auto">update</property>

		<property name="hibernate.dialect">org.hibernate.dialect.MySQLDialect</property>

		<!-- 3、把映射文件放到核心配置文件中(必须) -->
		<mapping resource="cn/zhku/jsj144/ssh/entity/User.hbm.xml" />


	</session-factory>

</hibernate-configuration>
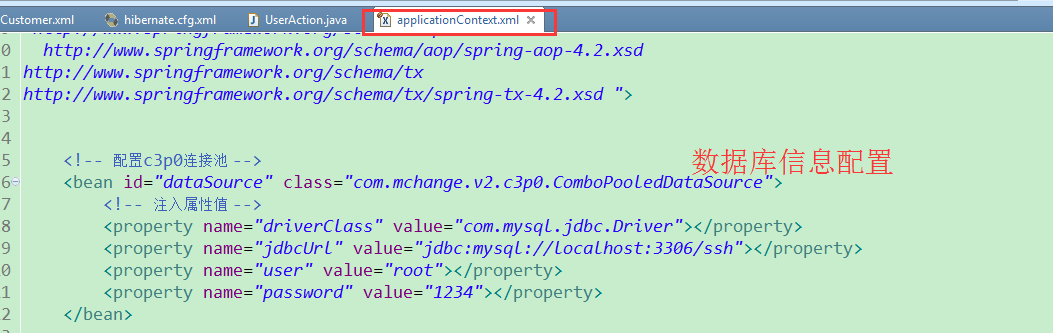
第三步 把hibernate核心配置文件数据库配置,在spring进行配置
(1)数据库配置信息在hibernate.cfg.xml文件(hibernate核心配置文件)去掉,在
applicationContext.xml文件(spring配置文件)进行配置即可(整合)
第四步 把hibernate的sessionFactory交给spring配置
服务器启动时候,加载spring配置文件,把配置文件中对象进行创建。
把sessionFactory对象创建在spring进行配置,因为创建sessionFactory代码不是new出来的,而是多行代码实现的
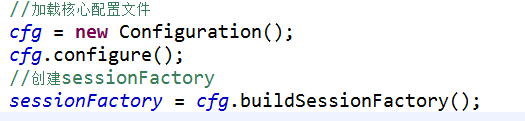
spring里面针对上面情况,封装类,配置类对象可以创建sessionFactory
在web.xml文件中添加一下代码
代码:
<!-- 配置sessionFactory对象 -->
	<bean id="sessionFactory"
		class="org.springframework.orm.hibernate5.LocalSessionFactoryBean">
		<!-- 指定数据库信息 -->
		<property name="dataSource" ref="dataSource"></property>
		<!-- 指定使用hibernate核心配置文件配置 -->
		<property name="configLocations" value="classpath:hibernate.cfg.xml"></property>
	</bean>
第五步 在dao里面使用hibernateTemplate

(1)在dao得到hibernateTemplate的对象
代码:
private HibernateTemplate hibernateTemplate;
	public void setHibernateTemplate(HibernateTemplate hibernateTemplate) {
		this.hibernateTemplate = hibernateTemplate;
}spring的配置文件:applicationContext.xml中配置
<bean id="userDao" class="cn.zhku.jsj144.ssh.action.UserDaoImpl">
<!-- 注入属性 -->
<property name="hibernateTemplate" ref="hibernateTemplate"></property>
</bean>
<bean id="hibernateTemplate" class="org.springframework.orm.hibernate5.HibernateTemplate">
<!-- 注入属性 -->
<property name="sessionFactory" ref="sessionFactory"></property>
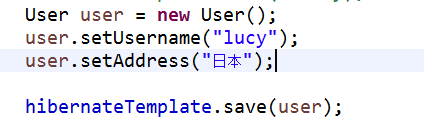
</bean>(2)调用hibernate模板里面save方法添加
没有配置事务,做操作时候,出现异常

(3)UserDao代码
package cn.zhku.jsj144.ssh.action;

interface UserDao {

	public void add();
}
(4)UserDaoImpl代码
package cn.zhku.jsj144.ssh.action;

import java.util.List;

import org.springframework.orm.hibernate5.HibernateTemplate;

import cn.zhku.jsj144.ssh.entity.User;

public class UserDaoImpl implements UserDao{
	private HibernateTemplate hibernateTemplate;
	public void setHibernateTemplate(HibernateTemplate hibernateTemplate) {
		this.hibernateTemplate = hibernateTemplate;
	}

	public void add() {
		System.out.println("daoImpl...................add....");
		User user=new User();
		user.setUser_name("张三");
		user.setUser_password("123");
		hibernateTemplate.save(user);//添加对象

		System.out.println("daoImpl...................get....");
		//get查询
		User user3 = hibernateTemplate.get(User.class,2l );
		System.out.println(user3.getUser_name());

		System.out.println("daoImpl...................find....");
		//find查询
		List<User> list=(List<User>) hibernateTemplate.find("from User");
		for (User user2 : list) {
			System.out.println(user2.getUser_name());
		}

		System.out.println("daoImpl...................find.condition...");
		//find条件查询
		List<User> list2 = (List<User>) hibernateTemplate.find("from User where user_name=?", "张三");
		for (User user2 : list2) {
			System.out.println(user2.getUser_name());
		}
	}

}
(5)UserService代码
package cn.zhku.jsj144.ssh.action;

import org.springframework.transaction.annotation.Transactional;

@Transactional
public class UserService {

	private UserDao userDao;
	public void setUserDao(UserDao userDao) {
		this.userDao = userDao;
	}

	public void add() {

		System.out.println("service..................");
		userDao.add();
	}
}
(6)applicationContext.xml完整代码
<?xml version="1.0" encoding="UTF-8"?>
<beans xmlns:xsi="http://www.w3.org/2001/XMLSchema-instance"
xmlns="http://www.springframework.org/schema/beans" xmlns:context="http://www.springframework.org/schema/context"
xmlns:aop="http://www.springframework.org/schema/aop" xmlns:tx="http://www.springframework.org/schema/tx"
xsi:schemaLocation="http://www.springframework.org/schema/beans
http://www.springframework.org/schema/beans/spring-beans-4.2.xsd
http://www.springframework.org/schema/context
http://www.springframework.org/schema/context/spring-context-4.2.xsd
http://www.springframework.org/schema/aop
http://www.springframework.org/schema/aop/spring-aop-4.2.xsd
http://www.springframework.org/schema/tx
http://www.springframework.org/schema/tx/spring-tx-4.2.xsd ">
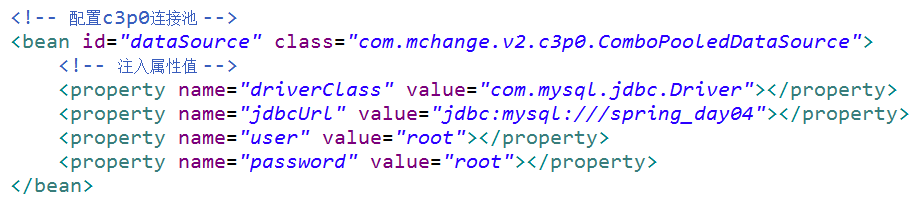
<!-- 配置c3p0连接池 -->
<bean id="dataSource" class="com.mchange.v2.c3p0.ComboPooledDataSource">
<!-- 注入属性值 -->
<property name="driverClass" value="com.mysql.jdbc.Driver"></property>
<property name="jdbcUrl" value="jdbc:mysql://localhost:3306/ssh"></property>
<property name="user" value="root"></property>
<property name="password" value="1234"></property>
</bean>
<!-- 配置sessionFactory对象 -->
<bean id="sessionFactory"
class="org.springframework.orm.hibernate5.LocalSessionFactoryBean">
<!-- 指定数据库信息 -->
<property name="dataSource" ref="dataSource"></property>
<!-- 指定使用hibernate核心配置文件配置 -->
<property name="configLocations" value="classpath:hibernate.cfg.xml"></property>
</bean>
<!-- 配置action对象 -->
<bean id="userAction" class="cn.zhku.jsj144.ssh.action.UserAction" scope="prototype">
<!-- 注入属性 -->
<property name="userService" ref="userService"></property>
</bean>
<bean id="userService" class="cn.zhku.jsj144.ssh.action.UserService">
<!-- 注入属性 -->
<property name="userDao" ref="userDao"></property>
</bean>
<bean id="userDao" class="cn.zhku.jsj144.ssh.action.UserDaoImpl">
<!-- 注入属性 -->
<property name="hibernateTemplate" ref="hibernateTemplate"></property>
</bean>
<bean id="hibernateTemplate" class="org.springframework.orm.hibernate5.HibernateTemplate">
<!-- 注入属性 -->
<property name="sessionFactory" ref="sessionFactory"></property>
</bean>
<!-- 1、配置事务管理器 -->
<bean id="transactionManager"
class="org.springframework.jdbc.datasource.DataSourceTransactionManager">
<!-- 注入数据源,才知道对哪个数据库进行事务管理 -->
<property name="dataSource" ref="dataSource"></property>
</bean>
<!-- 2、开启事务注解 -->
<tx:annotation-driven transaction-manager="transactionManager" />
</beans>
<?xml version="1.0" encoding="UTF-8"?>
<web-app xmlns:xsi="http://www.w3.org/2001/XMLSchema-instance"
	xmlns="http://java.sun.com/xml/ns/javaee"
	xsi:schemaLocation="http://java.sun.com/xml/ns/javaee http://java.sun.com/xml/ns/javaee/web-app_3_0.xsd"
	id="WebApp_ID" version="3.0">
	<display-name>ssh</display-name>

	<!-- 配置spring监听器 -->
	<listener>
		<listener-class>org.springframework.web.context.ContextLoaderListener</listener-class>
	</listener>

<!-- 	指定spring配置文件位置 -->
	<context-param>
	<param-name>contextConfigLocation</param-name>
	<param-value>classpath:applicationContext.xml</param-value>
	</context-param>


	<!-- struts2核心过滤器 -->
	<filter>
		<filter-name>struts2</filter-name>
		<filter-class>org.apache.struts2.dispatcher.ng.filter.StrutsPrepareAndExecuteFilter</filter-class>
	</filter>
	<filter-mapping>
		<filter-name>struts2</filter-name>
		<url-pattern>/*</url-pattern>
	</filter-mapping>

	<welcome-file-list>
		<welcome-file>index.html</welcome-file>
		<welcome-file>index.htm</welcome-file>
		<welcome-file>index.jsp</welcome-file>
		<welcome-file>default.html</welcome-file>
		<welcome-file>default.htm</welcome-file>
		<welcome-file>default.jsp</welcome-file>
	</welcome-file-list>
</web-app>
第六步 配置事务
spring的配置文件applicationContext.xml中配置事务

service层利用注解,配置事务


三、ssh框架整合过程梳理
第一步 导入jar包(ssh框架整合的所有jar包)
第二步 搭建struts2环境
(1)创建action,创建struts.xml配置文件,配置action
(2)在web.xml中配置struts2的过滤器
第三步 搭建hibernate环境
(1)创建实体类
(2)配置实体类和数据库表映射关系
(3)创建hibernate核心配置文件
- 引入映射配置文件
第四步 搭建spring环境
(1)创建spring核心配置文件
(2)让spring配置文件在服务器启动时候加载(web.xml配置)
- 配置监听器

- 指定spring配置文件位置

第五步 struts2和spring整合
(1)把action在spring配置(action多实例的)

(2)在struts.xml中action标签class属性里面写 bean的id值

第六步 spring和hibernate整合
(1)把hibernate核心配置文件中数据库配置,在spring里面配置
(2)把hibernate的sessionFactory在spring配置

第七步 在dao里面使用hibernateTemplate
(1)在dao注入hibernateTemplate对象

(2)在hibernateTemplate对象中注入sessionFactory

第八步 配置事务

四、ssh框架整合实例代码说明
这个ssh框架整合的源码已上传到本人的github上。
github地址:https://github.com/Forever99/mySSH
如有需要,请自行下载。(源码中:包含了整合ssh框架整合后的所需的所有jar包)


 208
208

 被折叠的 条评论
为什么被折叠?
被折叠的 条评论
为什么被折叠?
 到【灌水乐园】发言


