


大家在安装Tensorflow时,一个简单的安装方法就是类似:
pip install --ignore-installed --upgrade https://storage.googleapis.com/tensorflow/mac/tensorflow-0.8.0rc0-py2-none-any.whl
但是这个安装方法需要提前安装相应版本的CUDA和CUDNN,若有一个版本不对,就会出现问题。尤其是最新的Tensorflow 1.0 需要CUDA 8.0版本,但是一般情况下电脑都装的CUDA 7.0 或7.5。因此,本片博客就是介绍如何使用之前安装的CUDA 7.5和CUDNN 5,使用源码编译Tensorflow 1.0。
参考链接:https://github.com/tensorflow/tensorflow/blob/r0.12/tensorflow/g3doc/get_started/os_setup.md
1、首先下载源码:
$git clone https://github.com/tensorflow/tensorflow
2、其次,安装编译工具bazel: https://bazel.build/versions/master/docs/install.html
安装JDK 8
$ sudo add-apt-repository ppa:webupd8team/java
$ sudo apt-get update
$ sudo apt-get install oracle-java8-installer
把bazel加入到源
$ echo "deb [arch=amd64] http://storage.googleapis.com/bazel-apt stable jdk1.8" | sudo tee /etc/apt/sources.list.d/bazel.list
$ curl https://bazel.build/bazel-release.pub.gpg | sudo apt-key add -
安装bazel
$ sudo apt-get update && sudo apt-get install bazel
3、配置Tensorflow,如果编译过程中出现问题,多重复几次
$cd tensorflow
$ ./configure
Please specify the location of python. [Default is /usr/bin/python]:
Do you wish to build TensorFlow with Google Cloud Platform support? [y/N] N
No Google Cloud Platform support will be enabled for TensorFlow
Do you wish to build TensorFlow with GPU support? [y/N] y
GPU support will be enabled for TensorFlow
Please specify which gcc nvcc should use as the host compiler. [Default is /usr/bin/gcc]:
Please specify the Cuda SDK version you want to use, e.g. 7.0. [Leave empty to use system default]: 7.5
Please specify the location where CUDA 7.5 toolkit is installed. Refer to README.md for more details. [Default is /usr/local/cuda]:
Please specify the cuDNN version you want to use. [Leave empty to use system default]: 5
Please specify the location where cuDNN 5 library is installed. Refer to README.md for more details. [Default is /usr/local/cuda]:
Please specify a list of comma-separated Cuda compute capabilities you want to build with.
You can find the compute capability of your device at: https://developer.nvidia.com/cuda-gpus.
Please note that each additional compute capability significantly increases your build time and binary size.
[Default is: "3.5,5.2"]: 3.0
Setting up Cuda include
Setting up Cuda lib
Setting up Cuda bin
Setting up Cuda nvvm
Setting up CUPTI include
Setting up CUPTI lib64
Configuration finished
4、产生pip包,并安装,如果编译过程中出现问题,多重复几次
# To build with GPU support:
$ bazel build -c opt --config=cuda //tensorflow/tools/pip_package:build_pip_package
$ bazel-bin/tensorflow/tools/pip_package/build_pip_package /tmp/tensorflow_pkg
# 在/tmp/tensorflow_pkg/文件夹下查找.whl文件,并pip安装,如名字为:tensorflow-1.0.0-cp27-cp27mu-linux_x86_64.whl
$ sudo pip install /tmp/tensorflow_pkg/tensorflow-1.0.0-cp27-cp27mu-linux_x86_64.whl
此时,终端会出现错误,如下:
tensorflow-1.0.0-cp27-cp27mu-linux_x86_64.whl is not a supported wheel on this platform.
Storing debug log for failure in /home/jiaqi/.pip/pip.log
处理方法为:进入/tmp/tensorflow_pkg/文件夹下,将tensorflow-1.0.0-cp27-cp27mu-linux_x86_64.whl文件名修改为tensorflow-1.0.0-cp27-none-linux_x86_64.whl即可。
$sudo mv tensorflow-1.0.0-cp27-cp27mu-linux_x86_64.whl tensorflow-1.0.0-cp27-none-linux_x86_64.whl
5、最后,设置Tensorflow,并安装到python中
# To build with GPU support:
$bazel build -c opt --config=cuda //tensorflow/tools/pip_package:build_pip_package
$mkdir _python_build
$cd _python_build
$ln -s ../bazel-bin/tensorflow/tools/pip_package/build_pip_package.runfiles/org_tensorflow/* .
$ln -s ../tensorflow/tools/pip_package/* .
$sudo python setup.py develop
6、此时Tensorflow 源码编译成功。
7、若出现如下问题:
AttributeError: type object 'NewBase' has no attribute 'is_abstract'
出现这个问题,应该是six包安装有问题,可以卸载原有版本,重新安装:参照:http://www.cnblogs.com/xiaodi914/p/5687477.html
$ sudo pip uninstall six
$ sudo pip install six --upgrade
一般来说six包的安装位置是/usr/lib/python2.7/dist-packages,建议先试前者(工作站上也是前者),如果six版本还是没有改变,则指定安装位置,如下:
$ sudo pip install six --upgrade --target="/usr/lib/python2.7/dist-packages"
pip install --ignore-installed --upgrade https://storage.googleapis.com/tensorflow/mac/tensorflow-0.8.0rc0-py2-none-any.whl
但是这个安装方法需要提前安装相应版本的CUDA和CUDNN,若有一个版本不对,就会出现问题。尤其是最新的Tensorflow 1.0 需要CUDA 8.0版本,但是一般情况下电脑都装的CUDA 7.0 或7.5。因此,本片博客就是介绍如何使用之前安装的CUDA 7.5和CUDNN 5,使用源码编译Tensorflow 1.0。
参考链接:https://github.com/tensorflow/tensorflow/blob/r0.12/tensorflow/g3doc/get_started/os_setup.md
1、首先下载源码:
$git clone https://github.com/tensorflow/tensorflow
2、其次,安装编译工具bazel: https://bazel.build/versions/master/docs/install.html
安装JDK 8
$ sudo add-apt-repository ppa:webupd8team/java
$ sudo apt-get update
$ sudo apt-get install oracle-java8-installer
把bazel加入到源
$ echo "deb [arch=amd64] http://storage.googleapis.com/bazel-apt stable jdk1.8" | sudo tee /etc/apt/sources.list.d/bazel.list
$ curl https://bazel.build/bazel-release.pub.gpg | sudo apt-key add -
安装bazel
$ sudo apt-get update && sudo apt-get install bazel
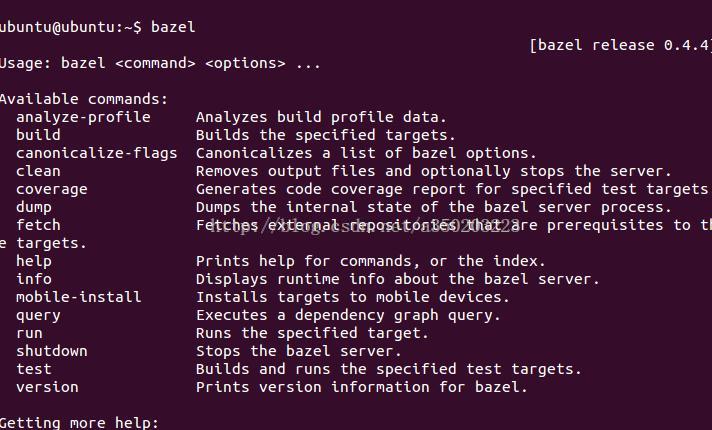
在终端输入bazel测试是否安装成功,效果如下:
3、配置Tensorflow,如果编译过程中出现问题,多重复几次
$cd tensorflow
$ ./configure
Please specify the location of python. [Default is /usr/bin/python]:
Do you wish to build TensorFlow with Google Cloud Platform support? [y/N] N
No Google Cloud Platform support will be enabled for TensorFlow
Do you wish to build TensorFlow with GPU support? [y/N] y
GPU support will be enabled for TensorFlow
Please specify which gcc nvcc should use as the host compiler. [Default is /usr/bin/gcc]:
Please specify the Cuda SDK version you want to use, e.g. 7.0. [Leave empty to use system default]: 7.5
Please specify the location where CUDA 7.5 toolkit is installed. Refer to README.md for more details. [Default is /usr/local/cuda]:
Please specify the cuDNN version you want to use. [Leave empty to use system default]: 5
Please specify the location where cuDNN 5 library is installed. Refer to README.md for more details. [Default is /usr/local/cuda]:
Please specify a list of comma-separated Cuda compute capabilities you want to build with.
You can find the compute capability of your device at: https://developer.nvidia.com/cuda-gpus.
Please note that each additional compute capability significantly increases your build time and binary size.
[Default is: "3.5,5.2"]: 3.0
Setting up Cuda include
Setting up Cuda lib
Setting up Cuda bin
Setting up Cuda nvvm
Setting up CUPTI include
Setting up CUPTI lib64
Configuration finished
4、产生pip包,并安装,如果编译过程中出现问题,多重复几次
# To build with GPU support:
$ bazel build -c opt --config=cuda //tensorflow/tools/pip_package:build_pip_package
$ bazel-bin/tensorflow/tools/pip_package/build_pip_package /tmp/tensorflow_pkg
# 在/tmp/tensorflow_pkg/文件夹下查找.whl文件,并pip安装,如名字为:tensorflow-1.0.0-cp27-cp27mu-linux_x86_64.whl
$ sudo pip install /tmp/tensorflow_pkg/tensorflow-1.0.0-cp27-cp27mu-linux_x86_64.whl
此时,终端会出现错误,如下:
tensorflow-1.0.0-cp27-cp27mu-linux_x86_64.whl is not a supported wheel on this platform.
Storing debug log for failure in /home/jiaqi/.pip/pip.log
处理方法为:进入/tmp/tensorflow_pkg/文件夹下,将tensorflow-1.0.0-cp27-cp27mu-linux_x86_64.whl文件名修改为tensorflow-1.0.0-cp27-none-linux_x86_64.whl即可。
$sudo mv tensorflow-1.0.0-cp27-cp27mu-linux_x86_64.whl tensorflow-1.0.0-cp27-none-linux_x86_64.whl
5、最后,设置Tensorflow,并安装到python中
# To build with GPU support:
$bazel build -c opt --config=cuda //tensorflow/tools/pip_package:build_pip_package
$mkdir _python_build
$cd _python_build
$ln -s ../bazel-bin/tensorflow/tools/pip_package/build_pip_package.runfiles/org_tensorflow/* .
$ln -s ../tensorflow/tools/pip_package/* .
$sudo python setup.py develop
此时,安装成功,可以在python 中加载一下。

6、此时Tensorflow 源码编译成功。
7、若出现如下问题:
AttributeError: type object 'NewBase' has no attribute 'is_abstract'
出现这个问题,应该是six包安装有问题,可以卸载原有版本,重新安装:参照:http://www.cnblogs.com/xiaodi914/p/5687477.html
$ sudo pip uninstall six
$ sudo pip install six --upgrade
一般来说six包的安装位置是/usr/lib/python2.7/dist-packages,建议先试前者(工作站上也是前者),如果six版本还是没有改变,则指定安装位置,如下:
$ sudo pip install six --upgrade --target="/usr/lib/python2.7/dist-packages"


 1万+
1万+


 被折叠的 条评论
为什么被折叠?
被折叠的 条评论
为什么被折叠?
 到【灌水乐园】发言


