android api Demo之自定义Animation,实现3D旋转效果

android的API Demo提供了很多有趣+有用的Demo,本系列将学习基于4.4.2版本的API,其中涉及到的代码大部分是出于android 自带的Demo,本人根据自己的学习、理解,加以注释。

public class Rotate3DAnimation extends Animation {
	private final float mFromDegrees;//开始角度
    private final float mToDegrees;//结束角度
    private final float mCenterX;//中心X点
    private final float mCenterY;//中心Y点
    private final float mDepthZ;//深度Z,越大缩放越明显
    private final boolean mReverse;//是否相反,true:视角由近到远 false:视角由远到近(缩放效果)
    private Camera mCamera;
   
	public Rotate3DAnimation(float mFromDegrees, float mToDegrees,
			float mCenterX, float mCenterY, float mDepthZ, boolean mReverse) {
		super();
		this.mFromDegrees = mFromDegrees;
		this.mToDegrees = mToDegrees;
		this.mCenterX = mCenterX;
		this.mCenterY = mCenterY;
		this.mDepthZ = mDepthZ;
		this.mReverse = mReverse;
	}
	
	
	@Override
	public void initialize(int width, int height, int parentWidth,
			int parentHeight) {
		super.initialize(width, height, parentWidth, parentHeight);
		mCamera=new Camera();
		// 动画时间
		setDuration(500);
		// 动画完成后保持完成的状态
		setFillAfter(true);
		
	}
	//当动画开始时,会不断调用applyTransformation,这个过程是动态的,不断在变化
    //interpolatedTime 代表当前方法掉用时,动画进行的一个时间点,这个值的范围是0到1,也就是说动画刚开始的时候
	//传进来的interpolatedTime为0,动画进行中的时候,传进来的是0到1之间的小数,动画结束的时候传进来的是1。
	@Override
	protected void applyTransformation(float interpolatedTime, Transformation t) {
		final float fromDegrees = mFromDegrees;
		//计算每次变化的角度
		float degrees = fromDegrees + ((mToDegrees - fromDegrees) * interpolatedTime);
		final float centerX = mCenterX;
	    final float centerY = mCenterY;
	    final Camera camera = mCamera;
	    //获取原始矩阵
	    final Matrix matrix = t.getMatrix();
	    
	    camera.save();
	    if(mReverse){//视图离镜头越来越远,即缩小视角
	    	camera.translate(0.0f, 0.0f, mDepthZ*interpolatedTime);
	    }else{//视图离镜头越来越近,即放大视角
	    	camera.translate(0.0f, 0.0f, mDepthZ*(1.0f-interpolatedTime));
	    }
	    //以Y轴为旋转中心轴,旋转degrees角度
	    camera.rotateY(degrees);
	    camera.getMatrix(matrix);
	    camera.restore();
	    //pre是前乘,参数给出的矩阵乘以当前的矩阵。在旋转之前,先平移(-centerX, -centerY)
	    matrix.preTranslate(-centerX, -centerY);
	    //post是后乘,当前的矩阵乘以参数给出的矩阵。旋转之后,在平移(centerX, centerY)
	    matrix.postTranslate(centerX, centerY);
	    //总的来说,就是在绕Y轴旋转之前,先把旋转中心点从(0,0)移到(centerX,centerY),然后以Y轴为轴线,
	    //(centerX,centerY)为轴心旋转degrees后,将中心点复原为(0,0),这样看起来就是以视图的中心,绕Y轴旋转了。
	}
}

Rotate3DAnimation是封装了3D旋转动画效果的类,注释是我对其的理解

public class Transition3dActivity extends Activity implements
		OnItemClickListener, OnClickListener {
	private ListView mPhotosList;
	private ViewGroup mContainer;
	private ImageView mImageView;

	// Names of the photos we show in the list
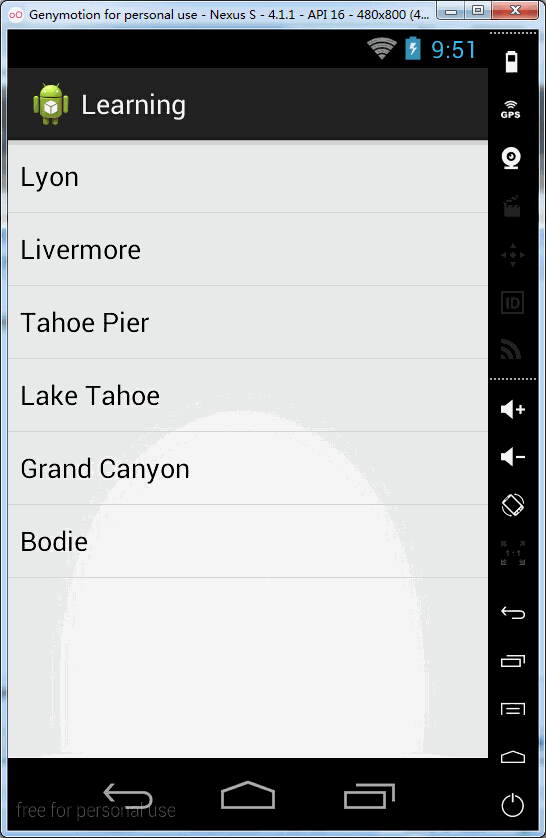
	private static final String[] PHOTOS_NAMES = new String[] { "Lyon",
			"Livermore", "Tahoe Pier", "Lake Tahoe", "Grand Canyon", "Bodie" };
	// 显示的图片资源
	private static final int[] PHOTOS_RESOURCES = new int[] {
			R.drawable.photo1, R.drawable.photo2, R.drawable.photo3,
			R.drawable.photo4, R.drawable.photo5, R.drawable.photo6 };

	@Override
	protected void onCreate(Bundle savedInstanceState) {
		// TODO Auto-generated method stub
		super.onCreate(savedInstanceState);
		setContentView(R.layout.animations_main_screen);

		mPhotosList = (ListView) findViewById(android.R.id.list);
		mImageView = (ImageView) findViewById(R.id.picture);
		mContainer = (ViewGroup) findViewById(R.id.container);

		// Prepare the ListView
		final ArrayAdapter<String> adapter = new ArrayAdapter<String>(this,
				android.R.layout.simple_list_item_1, PHOTOS_NAMES);

		mPhotosList.setAdapter(adapter);
		mPhotosList.setOnItemClickListener(this);

		// Prepare the ImageView
		mImageView.setClickable(true);
		mImageView.setFocusable(true);
		mImageView.setOnClickListener(this);

		// Since we are caching large views, we want to keep their cache
		// between each animation(缓存)
		mContainer.setPersistentDrawingCache(ViewGroup.PERSISTENT_ANIMATION_CACHE);
	}

	/**
	 * 3D旋转视图 2014-11-13 下午1:31:06
	 * 
	 * @param position
	 *            item位置
	 * @param start
	 *            开始角度
	 * @param end
	 *            结束角度
	 * @TODO
	 */
	private void applyRotation(int position, float start, float end) {
		// 获取视图中心点
		float centerX = mContainer.getWidth() / 2.0f;
		float centerY = mContainer.getHeight() / 2.0f;
		// 构建3D旋转动画对象
		final Rotate3DAnimation rotation = new Rotate3DAnimation(start, end,
				centerX, centerY, 310.0f, true);
		// 设置动画速度变化曲线为加速
		rotation.setInterpolator(new AccelerateInterpolator());
		// 动画监听
		rotation.setAnimationListener(new DisplayNextView(position));

		mContainer.startAnimation(rotation);
	}

	@Override
	public void onItemClick(AdapterView<?> parent, View view, int position,
			long id) {
		mImageView.setImageResource(PHOTOS_RESOURCES[position]);
		// 每次点击item时,将mContainer根布局旋转角度从0到90(可将自己的左手正面朝上当作mContainer容器,逆时针旋转90度的过程)---①
		applyRotation(position, 0, 90);
	}

	/**
	 * This class listens for the end of the first half of the animation. It
	 * then posts a new action that effectively swaps the views when the
	 * container is rotated 90 degrees and thus invisible.
	 */
	private final class DisplayNextView implements Animation.AnimationListener {
		private final int mPosition;

		private DisplayNextView(int position) {
			mPosition = position;
		}

		public void onAnimationStart(Animation animation) {
		}

		public void onAnimationEnd(Animation animation) {
			// 当ListView动画结束时,ListView隐藏,不显示,此时图片开始显示
			mContainer.post(new SwapViews(mPosition));
		}

		public void onAnimationRepeat(Animation animation) {
		}
	}

	/**
	 * This class is responsible for swapping the views and start the second
	 * half of the animation.
	 */
	private final class SwapViews implements Runnable {
		private final int mPosition;

		public SwapViews(int position) {
			mPosition = position;
		}

		public void run() {
			final float centerX = mContainer.getWidth() / 2.0f;
			final float centerY = mContainer.getHeight() / 2.0f;
			Rotate3DAnimation rotation;

			if (mPosition > -1) {// 点击的是item
				mPhotosList.setVisibility(View.GONE);
				mImageView.setVisibility(View.VISIBLE);
				mImageView.requestFocus();
				// 由于第①步的旋转,此时mContainer是处于90度的,再次旋转90度,从90到180,
				// 等于此时的mContainer已经旋转了180度,处于“背面”向上-----②
				// (相当于左手手心起始向右,向下转动的过程,直至手心向下,手背在上面,而这个过程正是图片从无到有,ListView从有到无的过程)
				rotation = new Rotate3DAnimation(90, 180, centerX, centerY,
						310.0f, false);
			} else {// 点击的是ImageView(mPosition=-1)
				mImageView.setVisibility(View.GONE);
				mPhotosList.setVisibility(View.VISIBLE);
				mPhotosList.requestFocus();
				// 由于第③步,此时的mContainer处于90度,然后再次旋转90度,从90到0,复原了初始状态(左手手心向右顺时针旋转90度至手心向上的原始状态)
				rotation = new Rotate3DAnimation(90, 0, centerX, centerY,
						310.0f, false);
			}
			// 设置动画速度变化曲线为减速
			rotation.setInterpolator(new DecelerateInterpolator());
			mContainer.startAnimation(rotation);
		}
	}

	@Override
	public void onClick(View v) {
		// 由于第②步的结果,使mContainer处于旋转了180的状态,当点击ImageView时,使mContainer状态复原回去
		// 从180到旋转到90-----③(当点击图片时,左手旋转的动作是一个相反的过程,即从左手手心向下,手背在上的状态,顺时针旋转90度至手心向右)
		applyRotation(-1, 180, 90);
	}
}

xml布局animations_main_screen.xml

<FrameLayout xmlns:android="http://schemas.android.com/apk/res/android"
    android:id="@+id/container"
    android:layout_width="match_parent"
    android:layout_height="match_parent">

    <ListView
        android:id="@android:id/list"
        android:persistentDrawingCache="animation|scrolling"
        android:layout_width="match_parent"
        android:layout_height="match_parent"
        />

    <ImageView
        android:id="@+id/picture"
        android:scaleType="fitCenter"
        android:layout_width="match_parent"
        android:layout_height="match_parent"
        android:visibility="gone" />

</FrameLayout>

效果图:


  • 0
    点赞
  • 3
    收藏
    觉得还不错? 一键收藏
  • 2
    评论
Android自定义View 星球运动在dribbble闲逛的时候发现的一个有意思的星球运动的动画,刚好最近时间尚可,就简单实现了一下中间运动的部分,又是因为时间的原因,开头位移的部分没有完成. 这是在dribbble中发现的动画 这是我自己实现效果... 总觉得我这个星球有点胖... 因为胖所以转的慢么这是.速度等细节还有优化的余地设计过程老办法,先分解动画的构成.整个动画可以看做是一个自旋的星球从右上角由小变大的移动到屏幕的中央的.星球的位移及缩放不说(其实是最近有需求,暂时没时间完善),主要完善了星球的旋转及尾部的处理.最底层是背景的星星闪烁,每次在星球一定范围内随机出现,并缩放就好最开始设计尾部效果的时候,是在没列中设计了两端线.再不断的运行及移动.但是实现起来很乱.最后采用了先绘制所有尾部展示的内容,然后在用和背景一样的颜色部分遮盖并移动此部分形成视觉上的效果的方法.(也可以设置PorterDuff模式来展示).设计过程中的效果如下星球的设计,星球的本身使用简单的遮盖和贝塞尔曲线就能完成一个较为满意的星球背景.重点是星球地表的设计以及星球自转下的地表样式的移动.解决的方法是是先绘制三个重复并连续的地表样式,通过移动整个地表样式模拟星球的转动.最后通过PorterDuff来控制展示的部分和星球的位置重合.未开启PorterDuff模式时绘制的样式如下:开启PorterDuff模式后再指定位置展示指定形状的图形如下:最后再移动设置好的星球地貌就可以模拟出星球转动的效果了代码实现背景的星星private fun drawStarts(canvas: Canvas, perIndexInAll: Float) {     //背景的星星在星球附近的一定范围内随机出现     val maxRand = 800     canvas.translate(-maxRand / 2F , -maxRand / 2F)     val Random = Random(perIndexInAll.toInt().toLong())     //绘制背景的星星     for (index in 0..4){         drawStart(canvas ,  Random.nextFloat() * maxRand , Random.nextFloat() * maxRand , perIndex)     }     canvas.translate(maxRand / 2F , maxRand / 2F) } //绘制背景的星星内容 //绘制背景的星星内容 private fun drawStart(canvas: Canvas, x: Float, y: Float, per: Float) {     var per = per     //这个部分是为了让星星实现从小到大后再从大到小的变动     if (per >= 1.0F){         per -= 1F     }     if (per <= 0.5F){         per *= 2     }else{         per = (1 - per) * 2     }     canvas.save()     canvas.translate(x , y)     canvas.scale(per , per)     val paint = Paint()     paint.color = 0xff78D8DF.toInt()     val startLength = 30F     val startOffset = startLength / 3F     //通过路径描绘星星的形状     val path = Path()     path.moveTo(0F , startLength)     path.lineTo(startOffset , startOffset )     path.lineTo(startLength , 0F)     path.lineTo(startOffset  , -startOffset )     path.lineTo(0F , -startLength)     path.lineTo(-startOffset  , -startOffset )     path.lineTo(-startLength , 0F)     path.lineTo(-startOffset  , startOffset )     path.lineTo(0F , startLength)     canvas.drawPath(path , paint)     paint.color = viewBackgroundColor     //通过缩小绘制星星内部形状     canvas.scale(0.3F , 0.3F)     canvas.drawPath(path , paint)     canvas.restore() }星球外部private fun drawGas(canvas: Canvas, index: Float) {     canvas.save()     canvas.rotate(45F)     val gasWidth = 18F     val baseR = baseR * 0.7F     val absBaseR = baseR / 5F     val paint = Paint()     paint.strokeWidth = gasWidth     paint.style = Paint.Style.STROKE     paint.color = 0xff2F3768.toInt()     val paintArc = Paint()     paintArc.color = 0xff2F3768.toInt()     val gasLength = baseR * 2F     canvas.save()     val gsaL = gasWidth / 2F * 3     var maxGasLength = (gasLength   gsaL ) / 2     var index = index     canvas.scale(1F , -1F)     //绘制星球后面的气流情况     //舍不得那么多定义好的变量     //又不想写个参数很多的函数,就这么实现了     canvas.save()     canvas.translate(baseR , baseR * 1.2F)     canvas.translate(0F , absBaseR)     //drawLines函数一个绘制两头带半圆的线段     drawLines(0F, maxGasLength, canvas, paint)     drawWhite( maxGasLength * index, gasWidth , gsaL * 2 , canvas)     drawWhite( maxGasLength * (index - 1 ) * 1.1F, gasWidth , gsaL * 2 , canvas)     drawWhite( maxGasLength * (index   1 ) * 1.1F, gasWidth , gsaL * 2 , canvas)     canvas.restore()     index = index   0.3F     //.....没有写函数就不上重复的代码了     val rectf = RectF(-baseR , -baseR , baseR ,baseR)     canvas.drawArc(rectf , 0F , 180F , false , paint)     canvas.drawLine(baseR ,0F ,  baseR ,  -baseR, paint)     canvas.drawLine(-baseR ,0F ,  -baseR ,  -baseR, paint)     canvas.restore() } //绘制尾部空白部分 private fun drawWhite(offset: Float, gasWidth: Float, gsaL : Float , canvas: Canvas) {     val r = gasWidth / 2F     canvas.save()     canvas.translate( 0F , offset - 2 * gsaL )     val pointPaint = Paint()     pointPaint.strokeWidth = 20F     pointPaint.color = Color.RED     //通过贝塞尔曲线绘制半圆效果     val path = Path()     path.moveTo(-r , gsaL)     path.cubicTo(             - r * C ,  gsaL - r,             r * C ,  gsaL - r,             r , gsaL     )     path.lineTo(r , - gsaL)     path.cubicTo(             r * C ,  - gsaL   r,             -r * C ,  - gsaL   r,             -r , - gsaL     )     path.lineTo(-r , gsaL * 1.5F)     val paint = Paint()     paint.color = viewBackgroundColor     canvas.drawPath(path , paint)     canvas.restore() }星球private fun drawPlanet(canvas: Canvas , index : Float) {     //设置原图层     val srcB = makeSrc(index)     //设置遮罩层     //遮罩层只有一和星球大小一样的圆     val dstB = makeDst(index)     val paint = Paint()     canvas.saveLayer(-baseR, -baseR, baseR , baseR, null, Canvas.ALL_SAVE_FLAG)     //绘制遮罩层     canvas.drawBitmap(dstB,  -baseR / 2F, -baseR / 2F , paint)     //设置遮罩模式为SRC_IN显示原图层中原图层与遮罩层相交部分     paint.xfermode = PorterDuffXfermode(PorterDuff.Mode.SRC_IN)     canvas.drawBitmap(srcB, width / -2F, height / -2F , paint)     paint.xfermode = null } //设置源图层 fun makeSrc(index :Float): Bitmap {     val bm = Bitmap.createBitmap(width, height, Bitmap.Config.ARGB_8888)     val canvas = Canvas(bm)     canvas.translate(width.toFloat() / 2F , height.toFloat() / 2F)     val paint = Paint()     paint.color = 0xff57BEC6.toInt()     paint.style = Paint.Style.FILL     val rectf = RectF(-baseR / 2F, -baseR / 2F, baseR / 2F, baseR / 2F)     canvas.drawArc(rectf , 0F , 360F , true , paint)     canvas.save()     //绘制星球背景     paint.color = 0xff78D7DE.toInt()     var baseR = baseR * 0.9.toFloat()     val rectf2 = RectF(-baseR / 2F, -baseR / 2F, baseR / 2F, baseR / 2F)     canvas.translate(baseR / 6F , baseR / 6F)     canvas.drawArc(rectf2 , 0F , 360F , true , paint)     canvas.restore()     canvas.rotate(-45F)     canvas.save()     val bottomBaseR = baseR / 0.9F / 2     val path = Path()     path.moveTo(-bottomBaseR , 0F)     path.cubicTo(-bottomBaseR , bottomBaseR * 2, bottomBaseR  , bottomBaseR * 2, bottomBaseR , 0F)     path.cubicTo(             bottomBaseR * C,bottomBaseR ,             -bottomBaseR * C,bottomBaseR ,             -bottomBaseR , 0F     )     //绘制星球背景的阴影效果     paint.color = 0xffAAEEF2.toInt()     paint.style = Paint.Style.FILL     canvas.drawPath(path , paint)     //绘制星球的地貌     drawPoints(index , canvas)     canvas.restore()     paint.strokeWidth = 30F     paint.color = 0xff2F3768.toInt()     paint.style = Paint.Style.STROKE     canvas.drawArc(rectf , 0F , 360F , true , paint)     return bm } private fun drawPoints(index: Float, canvas: Canvas) {         val paintB = Paint()         val paintS = Paint()         paintS.style = Paint.Style.FILL         paintS.color = 0xffE7F2FB.toInt()         paintB.style = Paint.Style.FILL         paintB.color = 0xff2F3768.toInt()         val baseRB = baseR / 2F / 3         val baseRS = baseR / 2F / 3 / 3         val rectfB = RectF(-baseRB, -baseRB, baseRB, baseRB)         val rectfS = RectF(-baseRS, -baseRS, baseRS, baseRS)         val pointPaint = Paint()         pointPaint.color = Color.BLACK         pointPaint.strokeWidth = 50F         val coverWidth = baseR         //通过移动坐标原点模拟星球的自转效果         canvas.translate(-coverWidth / 2F , coverWidth * 1.5F)         val index = index         canvas.translate(0F , coverWidth * index )         //重复绘制三次星球的地貌使得星球的自转无缝连接         for (i in 0..2){             canvas.save()             canvas.translate(coverWidth / 3F / 2  , -coverWidth / 3F * 2)             canvas.drawArc(rectfB , 0F , 360F , true , paintB)             canvas.drawArc(rectfS , 0F , 360F , true , paintS)             canvas.restore()             canvas.save()             canvas.translate(coverWidth / 3F *2 , -coverWidth / 3F)             canvas.drawArc(rectfB , 0F , 360F , true , paintB)             canvas.drawArc(rectfS , 0F , 360F , true , paintS)             canvas.restore()             canvas.save()             canvas.translate(coverWidth / 3F *2 , -coverWidth / 8F * 7   -coverWidth / 10F )             canvas.drawArc(rectfS , 0F , 360F , true , paintB)             canvas.restore()             canvas.save()             canvas.translate(coverWidth / 3F *2 , -coverWidth / 8F * 7  - -coverWidth / 10F )             canvas.drawArc(rectfS , 0F , 360F , true , paintB)             canvas.restore()             canvas.translate(0F , -coverWidth)         }     }

“相关推荐”对你有帮助么?

  • 非常没帮助
  • 没帮助
  • 一般
  • 有帮助
  • 非常有帮助
提交
评论 2
添加红包

请填写红包祝福语或标题

红包个数最小为10个

红包金额最低5元

当前余额3.43前往充值 >
需支付:10.00
成就一亿技术人!
领取后你会自动成为博主和红包主的粉丝 规则
hope_wisdom
发出的红包
实付
使用余额支付
点击重新获取
扫码支付
钱包余额 0

抵扣说明:

1.余额是钱包充值的虚拟货币,按照1:1的比例进行支付金额的抵扣。
2.余额无法直接购买下载,可以购买VIP、付费专栏及课程。

余额充值