


1、通过xml文件来获取bean对象(1)
spring的xml文件:
<?xml version="1.0" encoding="UTF-8"?>
<beans xmlns:xsi="http://www.w3.org/2001/XMLSchema-instance"
       xmlns:context="http://www.springframework.org/schema/context"
       xmlns="http://www.springframework.org/schema/beans"
       xsi:schemaLocation="http://www.springframework.org/schema/beans
                        http://www.springframework.org/schema/beans/spring-beans.xsd
                        http://www.springframework.org/schema/context
                        http://www.springframework.org/schema/context/spring-context.xsd">


<!--prototype是原型的意思-->
    <bean id ="user" class = "com.tfjybj.ming.beanPackage.User" scope="prototype"></bean>
    <bean id ="user1" class = "com.tfjybj.ming.beanPackage.User"></bean>
</beans>
User类
public class User {
    public String getName() {
        return name;
    }
    public void setName(String name) {
        this.name = name;
    }
    private String name = "admin";
}
客户端使用的方法:
public class Main {
    public static void main(String[] args) {

    ClassPathXmlApplicationContext classPathXmlApplicationContext = new ClassPathXmlApplicationContext("spring.xml");
    //这个就是spring的bean对象
    User user = classPathXmlApplicationContext.getBean("user", User.class);
    }
}
解释ClassPathXmlApplicationContext
通过它可以找到resource文件下面的指定文件
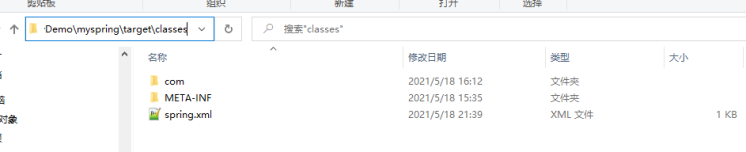
当idea启动的时候,idea会调用java的命令,然后java下面会有一个路径叫做classpath,然后ClassPathXmlApplicationContext 就是在这个路径下面取东西,这个路径下面有target/Classes

2、通过xml文件来获取bean对象(2)
public class Main {
    public static void main(String[] args) {
       FileSystemXmlApplicationContext fileSystemXmlApplicationContext = new FileSystemXmlApplicationContext("myspring/src/main/resources/spring.xml");
       System.out.println(fileSystemXmlApplicationContext.getBean("user",User.class));
    }
}
FileSystemXmlApplicationContext后面的路径是整个文件的相对路径
3、通过config配置类来创建bean对象
config类
方法的名字就是要创建bean的名字
public class Config {
    @Bean
    public User user() {
        return new User();
    }
}
User类,见2中的User类
客户端使用方法:
public class Main {
    public static void main(String[] args) {

      AnnotationConfigApplicationContext annotationConfigApplicationContext = new AnnotationConfigApplicationContext(Config.class);
      User user = annotationConfigApplicationContext.getBean("user", User.class);
      System.out.println(user);
    }
}
4、使用@Component注解
如果调用componmentScan所在的类,会扫描该该注解后面包路径下面所有的类,只要有类被@Component修饰(表示该类是一个组件),就会为该类创建一个bean
Config类
@ComponentScan("com.tfjybj.ming.beanPackage")
public class Config {

}
User类
@Component("user")
public class User {
    public String getName() {
        return name;
    }
    public void setName(String name) {
        this.name = name;
    }
    private String name = "admin";
}
客户端使用类
public class Main {
    public static void main(String[] args) {

      AnnotationConfigApplicationContext annotationConfigApplicationContext = new AnnotationConfigApplicationContext(Config.class);
      User user = annotationConfigApplicationContext.getBean("user", User.class);
      System.out.println(user);
    }
}
5、使用BeanDefinition创建bean对象
spring是根据BeanDefinition来创建bean对象的,上面2、3、4产生bean的底层都是基于BeanDefinition方式的。
public class Main {
    public static void main(String[] args) {
     AnnotationConfigApplicationContext annotationConfigApplicationContext = new AnnotationConfigApplicationContext();
     //清空容器
     annotationConfigApplicationContext.refresh();
     AbstractBeanDefinition abstractBeanDefinition = BeanDefinitionBuilder.genericBeanDefinition().getBeanDefinition();
     abstractBeanDefinition.setBeanClass(User.class);
     //向容器里面注册bean
     annotationConfigApplicationContext.registerBeanDefinition("user",abstractBeanDefinition);
     //从容器里面获取bean
     User user2 = annotationConfigApplicationContext.getBean("user", User.class);
     System.out.println(user2);
    }
}
如果该application是继承的 GenericApplicationContext,那么该application就是不可刷新的
如果是继承的AbstractRefreshableApplicationContext ,那么该就是可刷新的
刷新的效果就会清除bean容器里面的所有的bean的对象
用途就是当修改了spring的bean文件之后,可以通过refresh来更新bean文件,就可以获取新的bean了。
6、使用BeanFactory来创建bean对象
public class Main {
    public static void main(String[] args) {
        DefaultListableBeanFactory beanFactory = new DefaultListableBeanFactory();
        //向beanFactory注入bean
        beanFactory.registerSingleton("user",new User());
        User user4 = beanFactory.getBean("user", User.class);
        System.out.println(user4.getName());
    }
}


 444
444


 被折叠的 条评论
为什么被折叠?
被折叠的 条评论
为什么被折叠?
 到【灌水乐园】发言


