


向导
1. 安装前的准备
- 安装依赖
yum install asciidoc cyrus-sasl-devel cyrus-sasl-gssapi cyrus-sasl-plain gcc gcc-c++ \
krb5-devel libffi-devel libtidy libxml2-devel libxslt-devel make mysql mysql-devel \
openldap-devel python-devel sqlite-devel openssl-devel gmp-devel -y
2. 安装
- 上传tar报:hue-4.8.0.tgz
- 以非root登录并进入目录
- tar vf hue-4.8.0.tgz
- cd hue-4.8.0
- 系统需要python2.7+或者python3.6+的环境和nodejs环境,然后直接make apps(大概需要3-10分钟)
3. 修改配置
- 进入到desktop/conf目录下,找到hue.ini文件
- 修改hue.ini文件
#secret_key可以在官网找到
#https://docs.gethue.com/administrator/configuration/server/#specifying-the-secret-key
secret_key=jFE93j;2[290-eiw.KEiwN2s3['d;/.q[eIW^y#e=+Iei*@Mn<qW5o
http_host=xxx
http_port=8888
time_zone=Asia/Shanghai
4. 启动
- build/env/bin/supervisor
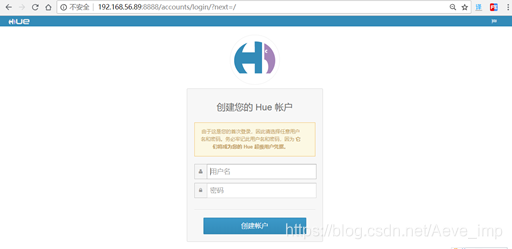
- 访问HUE服务主页:http://xxx:8888/
- 首次登录需要创建用户,且该用户既是最高权限用户
5. 集成
5.1 元数据信息集成mysql
- 先在mysql里面创建数据库hue
create database hue default character set utf8 default collate utf8_general_ci;

grant all on hue.* to 'hue'@'%' identified by 'admin';
-- 这里我使用了之前创建hue用户的密码admin
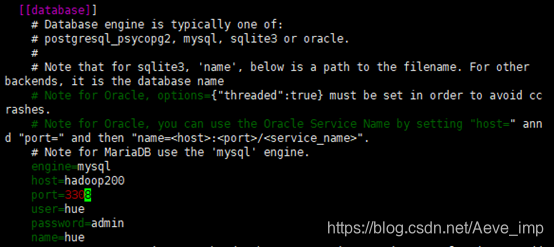
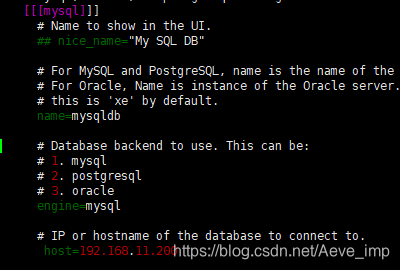
- 修改hue.ini(两个地方,一个database下,一个librdbms下)
- 初始化和迁移数据库
build/env/bin/hue syncdb
build/env/bin/hue migrate
- 重启即可
5.2 集成mysql数据源
官网地址:https://docs.gethue.com/administrator/configuration/connectors/
官网介绍,Except [impala] and [beeswax] which have a dedicated section, all the other ones should be appended below the [[interpreters]] of [notebook] e.g.:
即,除了impala和hive,其他的数据源都需要配置interpreters。
- 安装mysql-client
./build/env/bin/pip install mysqlclient
- 配置interpreters
[[[mysql]]]
name=MySQL
interface=sqlalchemy
options='{"url": "mysql://root:root@localhost:3306/hue"}'
- 或者用jdbc的连接方式,则使用如下配置:
[[[mysqljdbc]]]
name=MySql JDBC
interface=jdbc
options='{"url": "jdbc:mysql://localhost:3306/hue", "driver": "com.mysql.jdbc.Driver", "user": "root", "password": "root"}'
- 重启服务
5.3 集成hive
- 配置hue.ini
[beeswax]
hive_server_host=localhost
hive_server_port=10000
5.4 集成clickhouse
- 安装sqlalchemy-clickhouse
./build/env/bin/pip install sqlalchemy-clickhouse
- 配置interpreters
[[[clickhouse]]]
name = Clickhouse
interface=sqlalchemy
options='{"url": "clickhouse://..."}'
- 或者用jdbc的连接方式,则使用如下配置:
[[[clickhouse]]]
name=ClickHouse
interface=jdbc
options='{"url": "jdbc:clickhouse://localhost:8123", "driver": "ru.yandex.clickhouse.ClickHouseDriver", "user": "readonly", "password": ""}'
- 重启服务
5.5 集成druid
- 安装pydruid
./build/env/bin/pip install pydruid
- 配置interpreters
[notebook]
[[interpreters]]
[[[druid]]]
name = Druid
interface=sqlalchemy
options='{"url": "druid://druid-host.com:8082/druid/v2/sql/?header=true"}'
- 重启服务


 341
341


 被折叠的 条评论
为什么被折叠?
被折叠的 条评论
为什么被折叠?
 到【灌水乐园】发言


