


在之前搭建spring mvc项目这篇的基础上继续集成,引入hibernate支持
一、添加jar包引用
修改pom.xml文件,加入:
<dependency>
    <groupId>org.springframework</groupId>
    <artifactId>spring-orm</artifactId>
    <version>${spring.version}</version>
</dependency>
<dependency>
    <groupId>org.springframework</groupId>
    <artifactId>spring-jdbc</artifactId>
    <version>${spring.version}</version>
</dependency>

<!-- hibernate -->
<dependency>
    <groupId>org.hibernate</groupId>
    <artifactId>hibernate-core</artifactId>
    <version>4.2.21.Final</version>
</dependency>

<!-- jdbc driver -->
<dependency>
    <groupId>mysql</groupId>
    <artifactId>mysql-connector-java</artifactId>
    <version>5.1.38</version>
    <scope>runtime</scope>
</dependency>
二、添加配置文件
1、在"src/main/resources"代码文件夹中新建文件"demo.properties",内容为:
#mysql database setting
jdbc.type=mysql
jdbc.driver=com.mysql.jdbc.Driver
jdbc.url=jdbc:mysql://localhost:3306/springmvc?useUnicode=true&characterEncoding=utf-8
jdbc.username=root
jdbc.password=123456

#hibernate settings
hibernate.show_sql=true
2、在"src/main/resources"代码文件夹中新建文件"spring-context-hibernate.xml",内容为:
<?xml version="1.0" encoding="UTF-8"?>
<beans xmlns="http://www.springframework.org/schema/beans"
    xmlns:util="http://www.springframework.org/schema/util"
    xmlns:aop="http://www.springframework.org/schema/aop"
    xmlns:tx="http://www.springframework.org/schema/tx"
    xmlns:context="http://www.springframework.org/schema/context"
    xmlns:xsi="http://www.w3.org/2001/XMLSchema-instance"
    xsi:schemaLocation="http://www.springframework.org/schema/beans
    http://www.springframework.org/schema/beans/spring-beans-3.2.xsd
    http://www.springframework.org/schema/util
    http://www.springframework.org/schema/util/spring-util-3.2.xsd
    http://www.springframework.org/schema/aop
    http://www.springframework.org/schema/aop/spring-aop-3.2.xsd
    http://www.springframework.org/schema/context
    http://www.springframework.org/schema/context/spring-context-3.2.xsd
    http://www.springframework.org/schema/tx
    http://www.springframework.org/schema/tx/spring-tx-3.2.xsd ">

    <description>Hibernate Configuration</description>

    <!-- 使用Annotation自动注册Bean -->
    <context:component-scan base-package="org.xs.demo1" use-default-filters="false">
        <!-- 在父上下文中注册Repository -->
        <context:include-filter type="annotation" expression="org.springframework.stereotype.Repository" />
    </context:component-scan>

    <!-- 加载配置属性文件 -->
    <context:property-placeholder ignore-unresolvable="true" location="classpath*:/demo.properties" />

    <!-- 配置数据源 -->
    <bean id="dataSource" class="org.springframework.jdbc.datasource.DriverManagerDataSource">
        <property name="driverClassName" value="${jdbc.driver}"></property>
        <property name="url" value="${jdbc.url}"></property>
        <property name="username" value="${jdbc.username}"></property>
        <property name="password" value="${jdbc.password}"></property>
    </bean>

    <!-- 配置SessionFactory -->
    <bean id="sessionFactory" class="org.springframework.orm.hibernate4.LocalSessionFactoryBean">
        <property name="dataSource" ref="dataSource" />
        <property name="hibernateProperties">
            <props>
                <prop key="hibernate.dialect">org.hibernate.dialect.MySQLDialect</prop>
                <prop key="hibernate.hbm2ddl.auto">none</prop>
                <prop key="hibernate.show_sql">${hibernate.show_sql}</prop>
                <prop key="hibernate.format_sql">true</prop>
            </props>
        </property>
        <!-- 动态映射字段 -->
        <property name="namingStrategy">
            <bean class="org.hibernate.cfg.ImprovedNamingStrategy" />
        </property>
        <!-- 注解扫描的包 -->
        <property name="packagesToScan" value="org.xs.demo1" />
    </bean>
</beans>
动态映射字段ImprovedNamingStrategy配置以后,Entity实体类里的属性就不需要一个个加@Column注解了,只要命名和表里的一致
三、添加hibernate session过滤器
修改web.xml文件,加入:
<!-- hibernate session过滤器 -->
<filter>
    <filter-name>openSessionInViewFilter</filter-name>
    <filter-class>org.springframework.orm.hibernate4.support.OpenSessionInViewFilter</filter-class>
</filter>
<filter-mapping>
    <filter-name>openSessionInViewFilter</filter-name>
    <url-pattern>/*</url-pattern>
</filter-mapping>
默认情况下server中的方法调用完成后,session就会关闭,等到显示层调用的时候会报错,OpenSessionInViewFilter的效果就是把session的关闭延迟到显示层
四、运行测试
1、建数据库表
CREATE TABLE `test` (
  `id` int(11) NOT NULL AUTO_INCREMENT,
  `name` varchar(255) DEFAULT NULL,
  PRIMARY KEY (`id`)
);
INSERT INTO `test` VALUES ('1', '233');
INSERT INTO `test` VALUES ('2', '666');
2、增加Entity类
package org.xs.demo1;

import javax.persistence.Entity;
import javax.persistence.Id;
import javax.persistence.Table;


@Entity
@Table(name="test")
public class testInfo {

    @Id
    private String id;

    private String name;

    public String getId() {
        return id;
    }

    public void setId(String id) {
        this.id = id;
    }

    public String getName() {
        return name;
    }

    public void setName(String name) {
        this.name = name;
    }
}
在"src/main/java"代码文件夹的"org.xs.demo1"的包下新建"testInfo.java"类
3、增加Repository类
package org.xs.demo1;

import java.util.List;

import org.hibernate.Query;
import org.hibernate.SessionFactory;
import org.springframework.beans.factory.annotation.Autowired;
import org.springframework.stereotype.Repository;

@Repository
public class testDao {

    @Autowired
    private SessionFactory sessionFactory;

    @SuppressWarnings("unchecked")
    public List<testInfo> getList() {

        String hql = "from testInfo";
        Query query = sessionFactory.getCurrentSession().createQuery(hql);

        return query.list();
    }
}
在"src/main/java"代码文件夹的"org.xs.demo1"的包下新建"testDao.java"类
4、添加Controller方法
@Autowired
private testDao testDao;

@RequestMapping("mysql")
public String mysql(HttpServletRequest request) {

    List<testInfo> list = testDao.getList();

    request.setAttribute("testList", list);
    request.setAttribute("say", "Hello Mysql!");

    return "index3";
}
在HelloController.java中增加"testDao"属性和"mysql"方法
5、增加jsp页面
<%@ page language="java" contentType="text/html; charset=UTF-8" pageEncoding="UTF-8"%>
<!DOCTYPE html PUBLIC "-//W3C//DTD HTML 4.01 Transitional//EN"
    "http://www.w3.org/TR/html4/loose.dtd">
<html>
    <head>
        <meta http-equiv="Content-Type" content="text/html;charset=utf-8" />
        <title>Insert title here</title>
    </head>
    <body>
        <p>${say}</p>
        <table border="1" width="100px">
            <tr>
                <th>列1</th>
                <th>列2</th>
            </tr>
            <tr>
                <td>${testList[0].id}</td>
                <td>${testList[0].name}</td>
            </tr>
            <tr>
                <td>${testList[1].id}</td>
                <td>${testList[1].name}</td>
            </tr>
        </table>
    </body>
</html>
在WEB-INF的views文件夹中新建"index3.jsp"页面
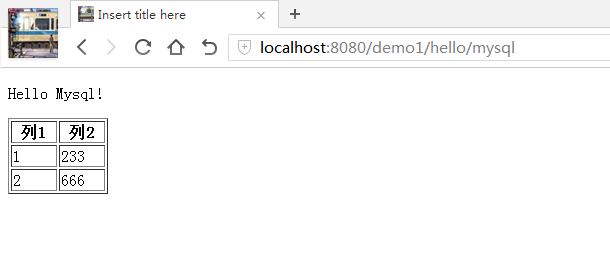
6、运行测试
实例代码地址:https://github.com/ctxsdhy/cnblogs-example


 561
561


 被折叠的 条评论
为什么被折叠?
被折叠的 条评论
为什么被折叠?
 到【灌水乐园】发言


