


最近项目要使用websocket构建web端实时推送应用,必需要使用Spring4,Spring3是不支持websocket的。Spring websocket和Spring MVC结合还是紧密的,所以这篇文章先解决下如何配置Spring MVC,后续博客在给出websocket的配置。
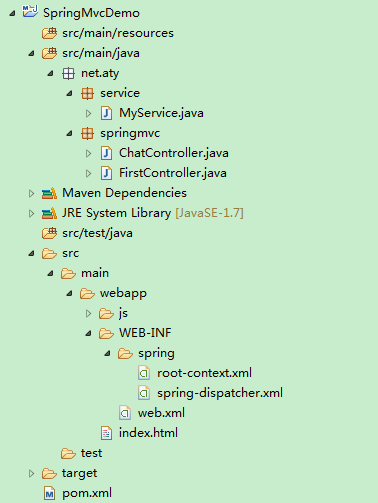
代码目录结构如下:
pom.xml配置如下:
<project xmlns="http://maven.apache.org/POM/4.0.0" xmlns:xsi="http://www.w3.org/2001/XMLSchema-instance"
	xsi:schemaLocation="http://maven.apache.org/POM/4.0.0 http://maven.apache.org/maven-v4_0_0.xsd">
	<modelVersion>4.0.0</modelVersion>
	<groupId>net.aty.springmvc</groupId>
	<artifactId>SpringMvcDemo</artifactId>
	<packaging>war</packaging>
	<version>1.0-SNAPSHOT</version>
	<name>SpringMvcDemo Maven Webapp</name>
	<url>http://maven.apache.org</url>

	<properties>
		<project.build.sourceEncoding>UTF-8</project.build.sourceEncoding>
		<spring.version>4.2.4.RELEASE</spring.version>
	</properties>

	<dependencies>
		<dependency>
			<groupId>org.springframework</groupId>
			<artifactId>spring-webmvc</artifactId>
			<version>${spring.version}</version>
		</dependency>
	</dependencies>

	<build>
		<finalName>SpringMvcDemo</finalName>
	</build>
</project>
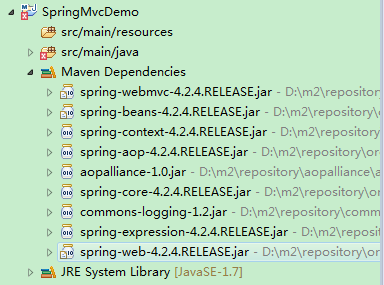
我们只配置了spring-webmvc模块,可以看到maven会自动帮我们下载它的依赖,使用maven避免了我们自己去寻找jar和依赖的麻烦。
web.xml配置:
<?xml version="1.0" encoding="UTF-8"?>

<web-app version="3.0" xmlns="http://java.sun.com/xml/ns/javaee"
	xmlns:xsi="http://www.w3.org/2001/XMLSchema-instance"
	xsi:schemaLocation="http://java.sun.com/xml/ns/javaee http://java.sun.com/xml/ns/javaee/web-app_3_0.xsd">

	<context-param>
		<param-name>contextConfigLocation</param-name>
		<param-value>/WEB-INF/spring/root-context.xml</param-value>
	</context-param>

	<listener>
		<listener-class>org.springframework.web.context.ContextLoaderListener</listener-class>
	</listener>

	<servlet>
		<servlet-name>dispatcher</servlet-name>
		<servlet-class>org.springframework.web.servlet.DispatcherServlet</servlet-class>
		<init-param>
			<param-name>contextConfigLocation</param-name>
			<param-value>/WEB-INF/spring/spring-dispatcher.xml</param-value>
		</init-param>
		<load-on-startup>1</load-on-startup>
	</servlet>
	<servlet-mapping>
		<servlet-name>dispatcher</servlet-name>
		<url-pattern>/*</url-pattern>
	</servlet-mapping>

</web-app>
我们有2个spring配置文件:root-context.xml和spring-dispatcher.xml。为什么要配置2个呢?这是因为:spring mvc是系统的边界,直接跟浏览器交互,里面用到的很多东西别的模块是不会使用的。所以spring采用如下架构:
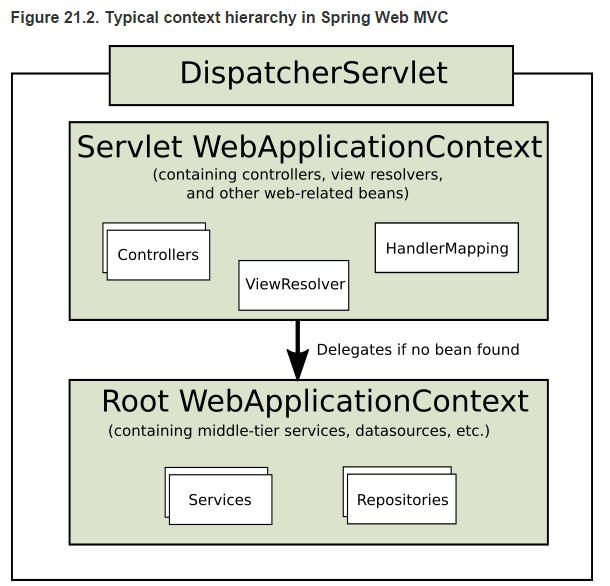
简单解释下:spring会创建2个ApplicationContext,一个是Servlet专用的,一个是公用的。servlet专用的context是可以访问root context的。
root-context.xml配置如下:这个跟我们平时配置的spring.xml是一样的,和Spring MVC没有半点关系。
<?xml version="1.0" encoding="UTF-8"?>
<beans xmlns="http://www.springframework.org/schema/beans"
	xmlns:xsi="http://www.w3.org/2001/XMLSchema-instance"
	xmlns:context="http://www.springframework.org/schema/context"
	xsi:schemaLocation="
        http://www.springframework.org/schema/beans
        http://www.springframework.org/schema/beans/spring-beans.xsd
        http://www.springframework.org/schema/context
        http://www.springframework.org/schema/context/spring-context.xsd">

	<context:component-scan base-package="net.aty.service" />


</beans>
spring-dispatcher.xml配置如下:
<?xml version="1.0" encoding="UTF-8"?>
<beans xmlns="http://www.springframework.org/schema/beans"
	xmlns:mvc="http://www.springframework.org/schema/mvc" xmlns:context="http://www.springframework.org/schema/context"
	xmlns:xsi="http://www.w3.org/2001/XMLSchema-instance"
	xsi:schemaLocation="
        http://www.springframework.org/schema/beans
        http://www.springframework.org/schema/beans/spring-beans.xsd
        http://www.springframework.org/schema/context
        http://www.springframework.org/schema/context/spring-context.xsd
        http://www.springframework.org/schema/mvc
        http://www.springframework.org/schema/mvc/spring-mvc.xsd">

	<mvc:annotation-driven />

	<context:component-scan base-package="net.aty.springmvc" />

	<mvc:resources location="/" mapping="/**/*.html" />
	<mvc:resources location="/" mapping="/**/*.js" />
	<mvc:resources location="/" mapping="/**/*.css" />
	<mvc:resources location="/" mapping="/**/*.png" />
	<mvc:resources location="/" mapping="/**/*.gif" />

</beans>
controller和service代码如下:
package net.aty.springmvc;
import net.aty.service.MyService;
import org.springframework.beans.factory.annotation.Autowired;
import org.springframework.stereotype.Controller;
import org.springframework.web.bind.annotation.RequestMapping;
import org.springframework.web.bind.annotation.RequestParam;
import org.springframework.web.bind.annotation.ResponseBody;
@Controller
public class FirstController {
@Autowired
private MyService service;
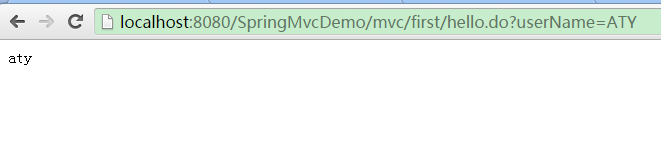
@RequestMapping("/mvc/first/hello.do")
@ResponseBody
public String hello(@RequestParam("userName") String userName) {
return service.process(userName);
}
}package net.aty.service;
import org.springframework.stereotype.Service;
@Service
public class MyService {
public MyService() {
System.out.println("bean MyService");
}
public String process(String name) {
return name.toLowerCase();
}
}


 428
428


 被折叠的 条评论
为什么被折叠?
被折叠的 条评论
为什么被折叠?
 到【灌水乐园】发言


