


1.使用IP注册服务
a) 修改服务提供者和服务消费者的yml配置文件
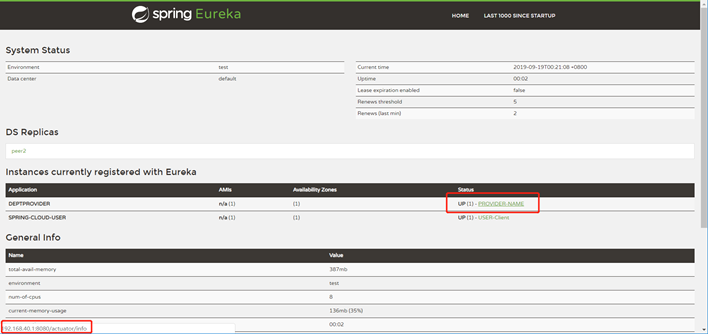
eureka:
  instance:
    hostname: localhost
    prefer-ip-address: true #使用IP地址注册到注册中心
    instance-id: PROVIDER-NAME #注册到注册中心的名称
  client:
    service-url:
      defaultZone: http://localhost:7001/eureka
b) prefer-ip-address: true 使用IP地址注册到注册中心
在访问Eureka注册中心的时候,注册到注册中心的服务的访问的IP就不会是127.0.0.1和localhost,而是192.168.xx.x
2.服务之间的调用(通信)
a) 建立服务提供者和消费者的公共模块
b) 在消费者和提供者添加对公共服务模块的依赖
c) 在服务提供者模块定义接口(Controller层)
d) 在服务消费者定义controller调用服务提供者controller
i. 通过restFul风格SpringMVC提供的远程调用工具RestTemplete实现,在主配置类里面配置RestTemplete这个bean交给Spring管理,然后在Controller注入RestTemplete对象.调用服务.
3.Eureka集群:解决单节点故障
a) 修改hosts文件: C:\Windows\System32\drivers\etc\hosts
添加两个服务注册的本地IP域名
127.0.0.1 eureka-7001.com
127.0.0.1 eureka-7002.com
b) 修改Eurake配置文件配置
spring:
  application:
    name: spring-cloud-eureka
server:
  port: 7001
eureka:
  instance:
    hostname: eureka-7001.com
  client:
    #不向Eureka注册自己
    register-with-eureka: false
    #不检查其他的EurekaServer节点
    fetch-registry: false
    service-url:
      #设置eureka服务器所在的地址,查询服务和注册服务程序都注册到这个地址(服务暴露的地址)
      defaultZone: http://eureka-7002.com:7002/eureka/
c) 搭建另一个注册中心,修改yml配置文件
spring:
  application:
    name: spring-cloud-eureka
server:
  port: 7002
eureka:
  instance:
    hostname: eureka-7002.com
  client:
    #不向Eureka注册自己
    register-with-eureka: false
    #不检查其他的EurekaServer节点
    fetch-registry: false
    service-url:
      #设置eureka服务器所在的地址,查询服务和注册服务程序都注册到这个地址(服务暴露的地址)
      defaultZone: http://eureka-7001.com:7001/eureka/
d) 修改客户端注册到Eurake的路径
spring:
  application:
    name: SPRING-CLOUD-USER //如果服务提供者做了集群的时候这里的name必须相同
server:
  port: 8001   //服务提供者
eureka:
  instance:
    hostname: localhost
    prefer-ip-address: true #使用IP地址注册到注册中心
    instance-id: USER-CLIENT// 如果服务提供者做集群的时候这个instance-id 一定不能相同
client: service-url: #设置eureka服务器所在的地址,查询服务和注册服务程序都注册到这个地址(服务暴露的地址)
#defaultZone: http://${eureka.instance.hostname}:${server.port}/eureka/
defaultZone: http://peer1:7001/eureka,http://peer2:7002/eureka  //向两个注册中心注册服务
4.负载均衡的实现
负载均衡:降低服务提供者的压力,对服务提供者做集群,防止服务崩溃
a) 负载均衡的算法
1)轮询算法,随机算法,按照权重,按照响应权重,iphash
b)ribbon实现负载均衡
1)新建了一个公共模块,服务消费者和提供者在pom里面依赖这个模块,用于服务提供者和消费者的调用
a)domain
package cn.itsource.domian;

public class Employee {
    private Long id;

    private String name;

    public Long getId() {
        return id;
    }

    public void setId(Long id) {
        this.id = id;
    }

    public String getName() {
        return name;
    }

    public void setName(String name) {
        this.name = name;
    }

    @Override
    public String toString() {
        return "Employee{" +
                "id=" + id +
                ", name='" + name + '\'' +
                '}';
    }

    public Employee() {
    }

    public Employee(Long id, String name) {
        this.id = id;
        this.name = name;
    }
}
b)向前台返回的json数据
package cn.itsource.utils;

public class JsonResult {

    private boolean success = true;

    private String message;

    private Object data;

//    返回当前对象
    public static JsonResult me(){
        return new JsonResult();
    }

    public String getMessage() {
        return message;
    }

    public JsonResult setMessage(String message) {
        this.message = message;
        return this;
    }

    public Object getData() {
        return data;
    }

    public JsonResult setData(Object data) {
        this.data = data;
        return this;
    }

    public boolean isSuccess() {

        return success;
    }

    public JsonResult setSuccess(boolean success) {
        this.success = success;
        return this;
    }
}
2)引入springboot与ribbon集成的jar包
<!--客户端负载均衡实现 ribbon-->
        <dependency>
            <groupId>org.springframework.cloud</groupId>
            <artifactId>spring-cloud-starter-netflix-ribbon</artifactId>
        </dependency>
3)对服务提供者做集群,对服务者压力大的做集群,集群时一定要修改yml配置文件的instance-id的名字为不同,如果不修改就会将前一个服务覆盖掉
spring:
  application:
    name: SPRING-CLOUD-USER
server:
  port: 8001      //其中的一个yml配置文件
eureka:
  instance:
    hostname: localhost
    prefer-ip-address: true #使用IP地址注册到注册中心
    instance-id: USER-CLIENT
  client:
    service-url:
      #设置eureka服务器所在的地址,查询服务和注册服务程序都注册到这个地址(服务暴露的地址)
#      defaultZone: http://${eureka.instance.hostname}:${server.port}/eureka/
      defaultZone: http://peer1:7001/eureka,http://peer2:7002/eureka
spring:
  application:
    name: SPRING-CLOUD-USER
server:
  port: 8002      //另一个yml配置文件
eureka:
  instance:
    hostname: localhost
    prefer-ip-address: true #使用IP地址注册到注册中心
    instance-id: USER-CLIENT01
  client:
    service-url:
      #设置eureka服务器所在的地址,查询服务和注册服务程序都注册到这个地址(服务暴露的地址)
#      defaultZone: http://${eureka.instance.hostname}:${server.port}/eureka/
      defaultZone: http://peer1:7001/eureka,http://peer2:7002/eureka
4)自定义一个配置类配置RestTemplate这个bean交给Spring管理,在这个bean上打上@loadBalanced注解,就赋予了负载均衡的能力了
@Configuration
public class RestTemplateConfigBean {

    @Bean
    @LoadBalanced //开启负载均衡器
    public RestTemplate restTemplate(){
        return new RestTemplate();
    }
}
5)在消费者调用的时候用服务提供者yml配置文件的服务服务名进行通信
@RestController
public class EmployeeController {

    @Autowired
    private RestTemplate restTemplate;

    @RequestMapping("/consumer/{id}")
    public JsonResult getEmployee(@PathVariable("id") Long id){
        System.out.println("EmployeeController.getEmployee被调用了......");
        //调用远程服务 http请求
        String url = "http://SPRING-CLOUD-USER/employee/"+id; //这里的服务名要与服务提供者的服务名对应上

        Employee employee = restTemplate.getForObject(url, Employee.class);
        return JsonResult.me().setData(employee);
    }
}
6) 总结:微服务之间的通信是服务消费者通过http协议(即封装的TCP协议)向服务提供者发送HTTP请求获取数据
c)feign实现负载均衡:Feign的底层还是Ribbon,它只是对Ribbon做了封装
1.前3步和ribbon的步骤一样,唯一不同的就是第2步引入的jar包不同
      <!--feign的支持-->
        <dependency>
            <groupId>org.springframework.cloud</groupId>
            <artifactId>spring-cloud-starter-openfeign</artifactId>
        </dependency>
2.在主配置类上打上一个注解@EnableFeignClients就开启了feign
package cn.itsource;

import org.springframework.boot.SpringApplication;
import org.springframework.boot.autoconfigure.SpringBootApplication;
import org.springframework.cloud.netflix.eureka.EnableEurekaClient;
import org.springframework.cloud.openfeign.EnableFeignClients;

@SpringBootApplication
@EnableEurekaClient
@EnableFeignClients //开启feign负载均衡的支持
//@ImportResource("RestTemplateConfigBean.class")//可写可不写,@SpringBootApplication可以扫到这个配置类
public class SpringBootApplicationConfig_8088 {

    public static void main(String[] args) {
        SpringApplication.run(SpringBootApplicationConfig_8088.class,args);
    }
}
3.定义一个接口client.EmployeeFeignClient:用于消费者调用提供者的接口,在这个接口上面打上@FeignClient(“用户服务提供者的服务名”)
注意在消费端接口调用服务端接口的方法要与服务提供端的方法一模一样.
package cn.itsource.client;

import cn.itsource.domian.Employee;
import org.springframework.cloud.openfeign.FeignClient;
import org.springframework.web.bind.annotation.PathVariable;
import org.springframework.web.bind.annotation.RequestMapping;

/**
 * 实现负载均衡的接口,SPRING-CLOUD-USER表示要调用提供者的服务名
*/
@FeignClient(value = "SPRING-CLOUD-USER")
public interface EmployeeFeignClient {
  @RequestMapping("/employee/{id}")
  Employee getById(@PathVariable("id") Long id); //注意这个方法要与服务提供端控制层的方法一模一样
}
5.断路器的实现
a)雪崩现象:其中一个微服务发生故障,其他调用这个微服务的服务都发生故障,导致整个服务不可用
b)为了解决这个雪崩现象,我们可以使用断路器(Hystrix)来实现
c)断路器的作用:资源隔离,熔断,服务降级,缓存
- 资源隔离:隔离消费者发送的请求
a) 资源隔离模式
i. 线程池隔离模式:给定的线程数全部都在使用时,没有空闲的线程就会对消费者发送的请求进行隔离
ii. 信号量隔离模式:计数器(默认是100个),当型号量达到一百个的时候,就会对消费者发送的请求进行隔离
2.熔断:多次请求微服务超时就标记该微服务为短路状态,其他服务不会再调用该短路的服务,我们通常在yml配置文件里面开启熔断,当服务在yml配置的规定的时间内没有恢复服务,断路器就会将该服务标记为熔断,以后消费者发送的请求都不会在调用这个服务了
3.降级:为了保证微服务中主要的服务不出问题,会人为的关掉(或者是服务死掉的时候)一些无关紧要的服务,然后返回一个拖底数据,给用户一个友好的提示
4.缓存:Hystrix内部会将请求做缓存
d)ribbon实现Hystrix
1.导入Hystrix的包
        <!--开启器短路器的依赖-->
        <dependency>
            <groupId>org.springframework.cloud</groupId>
            <artifactId>spring-cloud-starter-netflix-hystrix</artifactId>
        </dependency>
2. 在主配置类打上@EnableCircuitBreaker//开启Hystrix
@SpringBootApplication
@EnableEurekaClient
@EnableCircuitBreaker //开启断路器
//@ImportResource("RestTemplateConfigBean.class")//可写可不写,@SpringBootApplication可以扫到这个配置类
public class SpringBootApplicationConfig_8080 {

    public static void main(String[] args) {
        SpringApplication.run(SpringBootApplicationConfig_8080.class,args);
    }
}
3.在服务消费者的controller层方法上打上 @HystrixCommand(fallBackMethod=”方法名”)注解,然后在Controller添加fallBackMethod=”方法名”这个方法.
@RestController
public class EmployeeController {

    @Autowired
    private RestTemplate restTemplate;

    @RequestMapping("/consumer/{id}")
    @HystrixCommand(fallbackMethod = "getEmployeeFallBack")//托底方法一定要与拖底的方法名对应
    public JsonResult getEmployee(@PathVariable("id") Long id){
        System.out.println("EmployeeController.getEmployee被调用了......");
        //调用远程服务 http请求
        String url = "http://SPRING-CLOUD-USER/employee/"+id;

        Employee employee = restTemplate.getForObject(url, Employee.class);
        return JsonResult.me().setData(employee);
    }

    public JsonResult getEmployeeFallBack(@PathVariable("id") Long id){//这个参数必须与消费者调用服务提供者方法参数一致
        //当该服务提供者出现问题就调用这个拖地方法\
        return JsonResult.me().setSuccess(false).setMessage("服务展示不可用,请一会儿重试[服务降级]");
    }
}
e) feign与Hystrix的实现
1.在yml开启Hystrix的配置
feign:
  hystrix:
    enabled: true #开启熔断支持,当在规定的时间服务没有恢复,熔断器就会将这个服务熔断,不再被调用
  client:
    config:
      remote-service:          #服务名,填写default为所有服务
        connectTimeout: 30000
        readTimeout: 30000
hystrix:
  command:
    default:
      execution:
        isolation:
          thread:
            timeoutInMilliseconds: 30000  #表示,某个无法调用的服务超过这个时间就会对这个服务开启熔断
2.自定义的负载均衡的接口的实现类交给spring管理
@Component
public class EmployeeClientHystrixFallback implements EmployeeFeignClient {

    @Override
    public Employee getById(Long id) {
        System.out.println("执行托底数据的方法");
        return new Employee(-1L,"托底数据");
    }
}
3.在feign集成的负载均衡的接口中打了@EnableFeignClients中加上fallback=这个接口的实现类的字节码对象
/**
 * 实现负载均衡的接口
 */
@FeignClient(value = "SPRING-CLOUD-USER",fallback = EmployeeClientHystrixFallback.class)
public interface EmployeeFeignClient {

     @RequestMapping("/employee/{id}")
     Employee getById(@PathVariable("id") Long id);
}
f)SpringCloud Zuul:服务网关,微服务的入口(网路关卡)
1.作用:实现可以对请求分发,鉴权,限流.负载均衡
2.导入Zuul集成的jar包
<!--服务网关的支持-->
<dependency>
    <groupId>org.springframework.cloud</groupId>
    <artifactId>spring-cloud-starter-netflix-zuul</artifactId>
</dependency>
3.在主配置类上打上@EnableZuulProxy开启网关
@SpringBootApplication
@EnableEurekaClient
@EnableZuulProxy
public class SpringBootApplicationZuul_6001 {

    public static void main(String[] args) {
        SpringApplication.run(SpringBootApplicationZuul_6001.class,args);
    }
}
4.修改yml配置文件,为了安全,不使用服务名访问,配置禁止服务名访问,配置zuul访问路径
spring:
  application:
    name: ZUUL-SERVER
server:
  port: 6001
eureka:
  instance:
    hostname: localhost
    prefer-ip-address: true #使用IP地址注册到注册中心
    instance-id: ZUUL-SERVIER
  client:
    service-url:
      #设置eureka服务器所在的地址,查询服务和注册服务程序都注册到这个地址(服务暴露的地址)
#      defaultZone: http://${eureka.instance.hostname}:${server.port}/eureka/
      defaultZone: http://peer1:7001/eureka,http://peer2:7002/eureka
zuul:
  ignored-services: '*'
  routes:
    SPRING-CLOUD-USER: /employee/**
5.Zuul实现原理:Filter,分为三个阶段:前置过滤,路由过滤器,后置过滤器
package com.example.zuul.filter;

import com.alibaba.fastjson.JSON;
import com.netflix.zuul.ZuulFilter;
import com.netflix.zuul.context.RequestContext;
import com.netflix.zuul.exception.ZuulException;
import org.springframework.http.HttpStatus;
import org.springframework.stereotype.Component;

import javax.servlet.http.HttpServletRequest;
import javax.servlet.http.HttpServletResponse;
import java.io.IOException;
import java.util.HashMap;

@Component //交给Spring管理
public class SpringCloudZuulFilter extends ZuulFilter {
    @Override
    public String filterType() {
        // 登录校验,肯定是在前置拦截
        return "pre";
    }

    @Override
    public int filterOrder() {
        // 顺序设置为1
        return 1;
    }

    @Override
    public boolean shouldFilter() {
        // 返回true,代表过滤器生效。
//        获取请求对象
        HttpServletRequest request = RequestContext.getCurrentContext().getRequest();
//        判断访问的路径
        if (request.getRequestURI().contains("login")) {
            return false;   //返回false表示要不去调用run方法
        }
        return true;  //返回true表示要去调用run方法,表示还没有登录,需要进行验证
    }

    //    拦截方法
    @Override
    public Object run() throws ZuulException {
        // 登录校验逻辑。
        // 1)获取Zuul提供的请求上下文对象
        RequestContext ctx = RequestContext.getCurrentContext();
        // 2) 从上下文中获取request对象
        HttpServletRequest req = ctx.getRequest();
        // 3) 从请求中获取token
        String token = req.getParameter("access-token");
        // 4) 判断
        if (token == null || "".equals(token.trim())) {
//            获取响应对象
            HttpServletResponse response = ctx.getResponse();

            response.setContentType("text/json;charset=utf-8");
            HashMap<String, Object> map = new HashMap();

            map.put("success", false);
            map.put("message", "兄弟你没有权限");
            String string = JSON.toJSONString(map);//json对象转字符串
            try {
                response.getWriter().write(string);//向页面做一个响应
            } catch (IOException e) {
                e.printStackTrace();
            }
            // 没有token,登录校验失败,拦截,阻止放行
            ctx.setSendZuulResponse(false);
            // 返回401状态码。也可以考虑重定向到登录页。
            ctx.setResponseStatusCode(HttpStatus.UNAUTHORIZED.value());
        }
        // 校验通过,可以考虑把用户信息放入上下文,继续向后执行
        return null;
    }

}
g).SpringCloud分布式配置中心
1.新建模块导包config服务端的依赖包
<!--Config服务依赖-->
<dependency>
    <groupId>org.springframework.cloud</groupId>
    <artifactId>spring-cloud-config-server</artifactId>
</dependency>
2.打一个开启配置服务的标签(主配置类上)
@SpringBootApplication
@EnableEurekaClient
@EnableConfigServer
public class SpringConfigServer_2000 {

    public static void main(String[] args) {
        SpringApplication.run(SpringConfigServer_2000.class,args);
    }
}
3. 在yml配置在GitHub上创建的仓库地址和GitHub上面的用户名和密码(前提是仓库为私有的时候),仓库是共有的就不用配置用户名和密码
server:
  port: 2000
spring:
  application:
    name: CONFIG-SERVER #在注册中心生成的服务的名称
  cloud:
    config:
      uri:
      server:
        git:
          username: 1806274414@qq.com
          password: Lihuibin123456
          uri: https://gitee.com/li_hui_bin/springcloud.git  #远程配置中心的仓库地址
eureka:
  instance:
    hostname: localhost
    prefer-ip-address: true #使用IP地址注册到注册中心
    instance-id: CONFIG-SERVER
  client:
    service-url:
      defaultZone: http://peer1:7001/eureka,http://peer2:7002/eureka
4.远程仓库新建消费者的yml配置文件,远程仓库新建的文件名: application-employee-dev.yml
server:
  port: 8088
spring:
  application:
    name: DEPTPROVIDER #在注册中心生成的服务的名称
eureka:
  instance:
    hostname: localhost
    prefer-ip-address: true #使用IP地址注册到注册中心
    instance-id: PROVIDER-NAME01
  client:
    service-url:
      defaultZone: http://peer1:7001/eureka,http://peer2:7002/eureka

feign:
  hystrix:
    enabled: true #开启熔断支持
  client:
    config:
      remote-service:          #服务名,填写default为所有服务
        connectTimeout: 30000
        readTimeout: 30000
hystrix:
  command:
    default:
      execution:
        isolation:
          thread:
            timeoutInMilliseconds: 30000
5.修改服务消费者的配置文件:将之前的application.yml文件改为bootstrap.yml
a)导入config的客户端依赖包
<!--config客户端的支持-->
<dependency>
    <groupId>org.springframework.cloud</groupId>
    <artifactId>spring-cloud-config-client</artifactId>
</dependency>
b)在消费者的bootstrop.yml配置文件中配置远程配置中心的地址和远程仓库的文件.
spring:
  cloud:
    config:
      uri: http://localhost:2000 #远程仓库中心去拿消费者的配置文件的访问地址
      name: application-employee
      profile: dev  #注意这里一定要与远程仓库的配置文件对应上
label: master


 2626
2626


 被折叠的 条评论
为什么被折叠?
被折叠的 条评论
为什么被折叠?
 到【灌水乐园】发言


