


$.说明:
1.IDEA创建maven SSM web项目
2.导入依赖
一.IDEA创建maven SSM项目
对于初入IDEA的人来说此篇博客适用于不会创建maven 项目的人
首先下载IDEA 附上官方网站:https://www.jetbrains.com/idea/download/#section=windows
在这里不再演示破解IDEA的方法和安装方法。
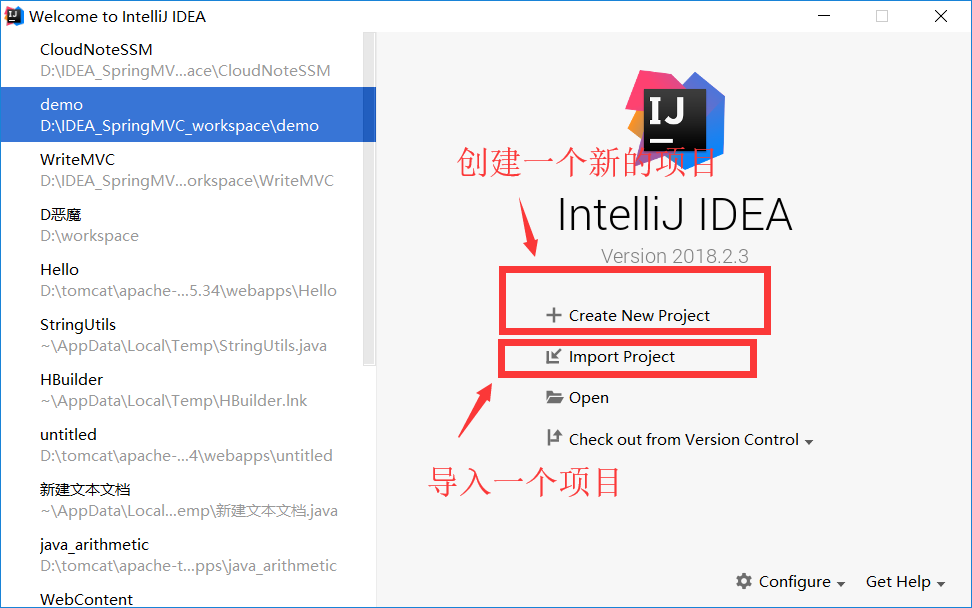
本人用的2018.2.3的版本 首先 创建一个新项目 点击 Create New Project
1.进入新建项目的界面 找到 maven项目
2.有很多创建maven项目的方法,博主不建议新手去勾选这个选项(maven模板)这个地方不勾。
3.找到你安装的jdk已经有的可以跳过这一步。没有的 点击 New找到你安装jdk的目录。
4.点击next

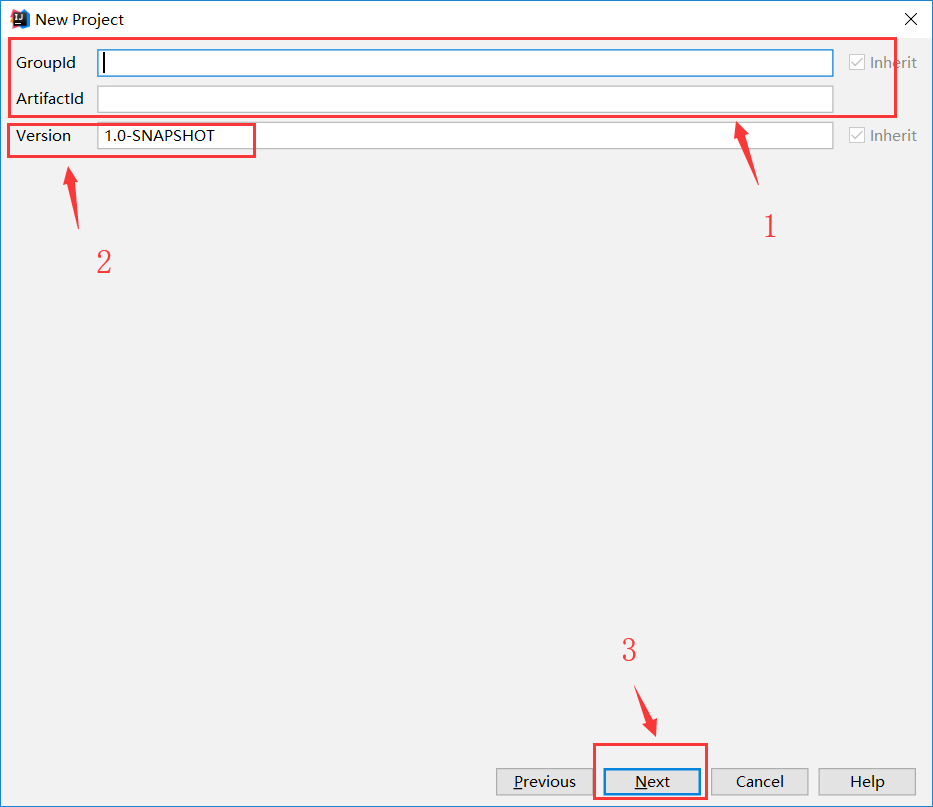
1.这里GruupId 和 ArtfactId 不做多余讲解 附上一个链接:https://blog.csdn.net/zhangxingyu126/article/details/81013315
2.版本号默认即可 。
3.next
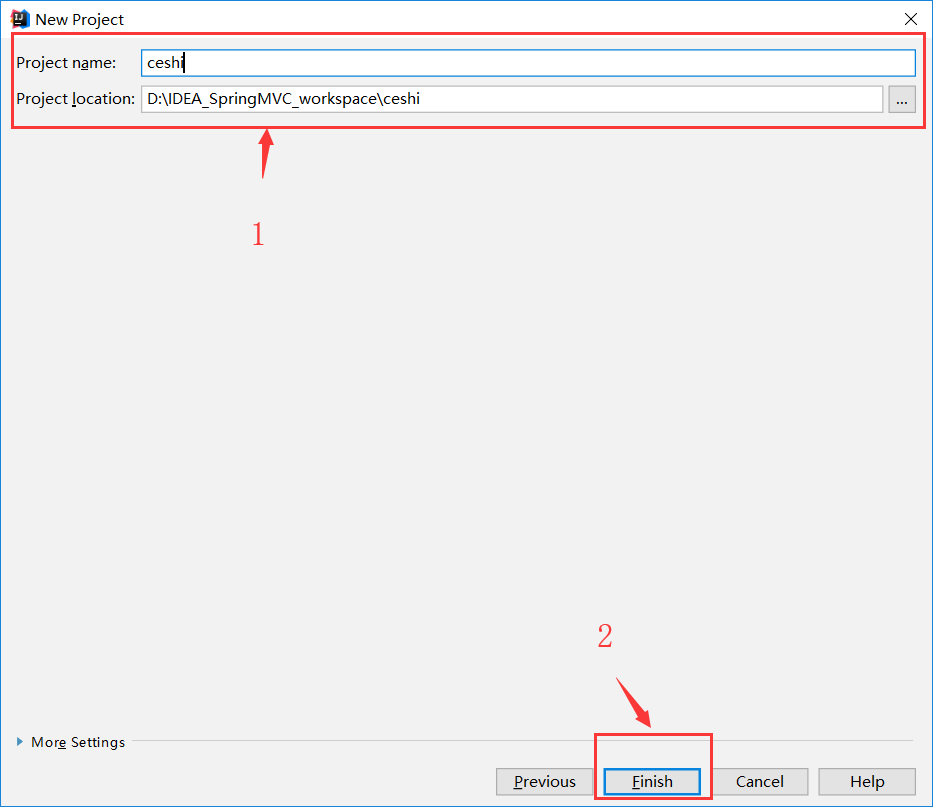
1. 填写项目的名称 和项目所放的路径 在GruupId 和 ArtfactId 中我填写的“ceshi” 所以下面自动出现的
可以根据自己的喜欢定义合法的命名。
2.点击完成。
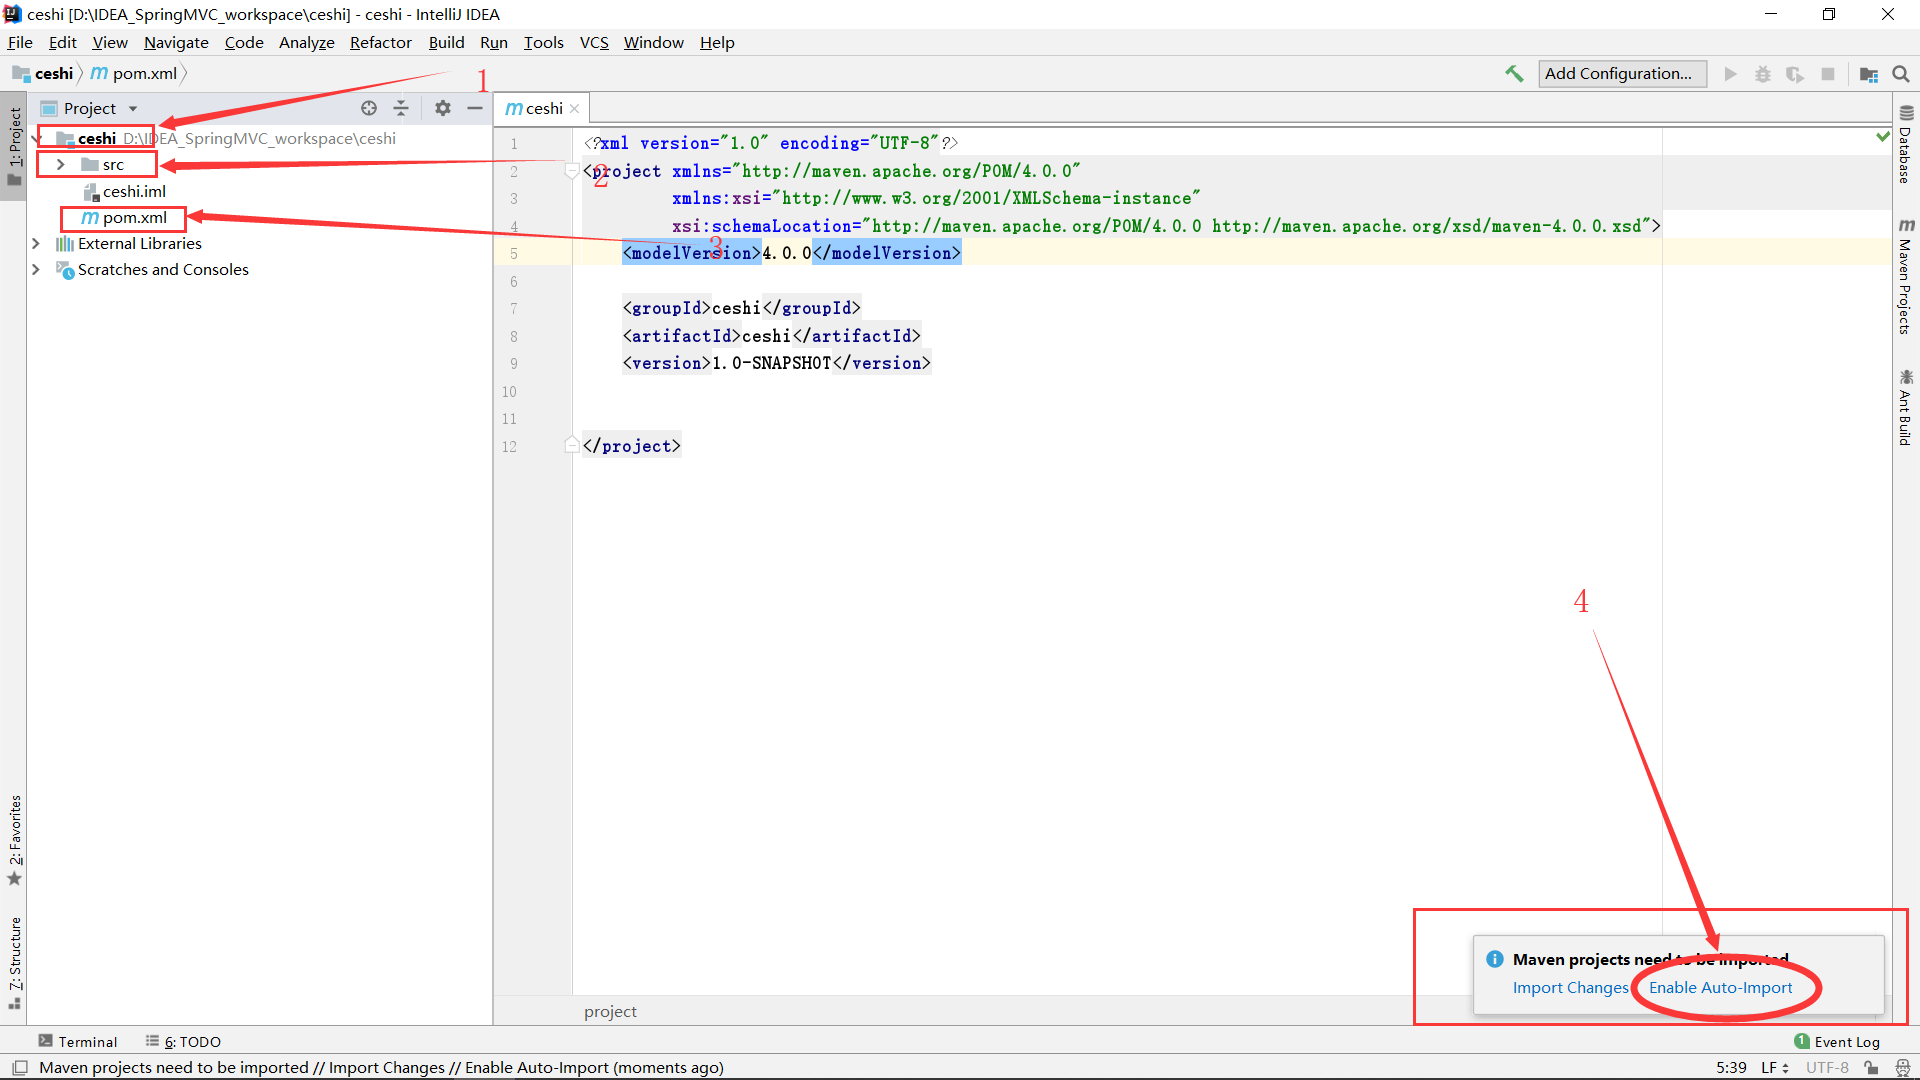
1.项目名称
2.源代码等结构目录
3.maven填写依赖的jar包的xml(自动导入依赖的jar包配置写入其中)
4.选择画圈的自动导入jar包(只需要在pom.xml中添加依赖,可以自动下载)
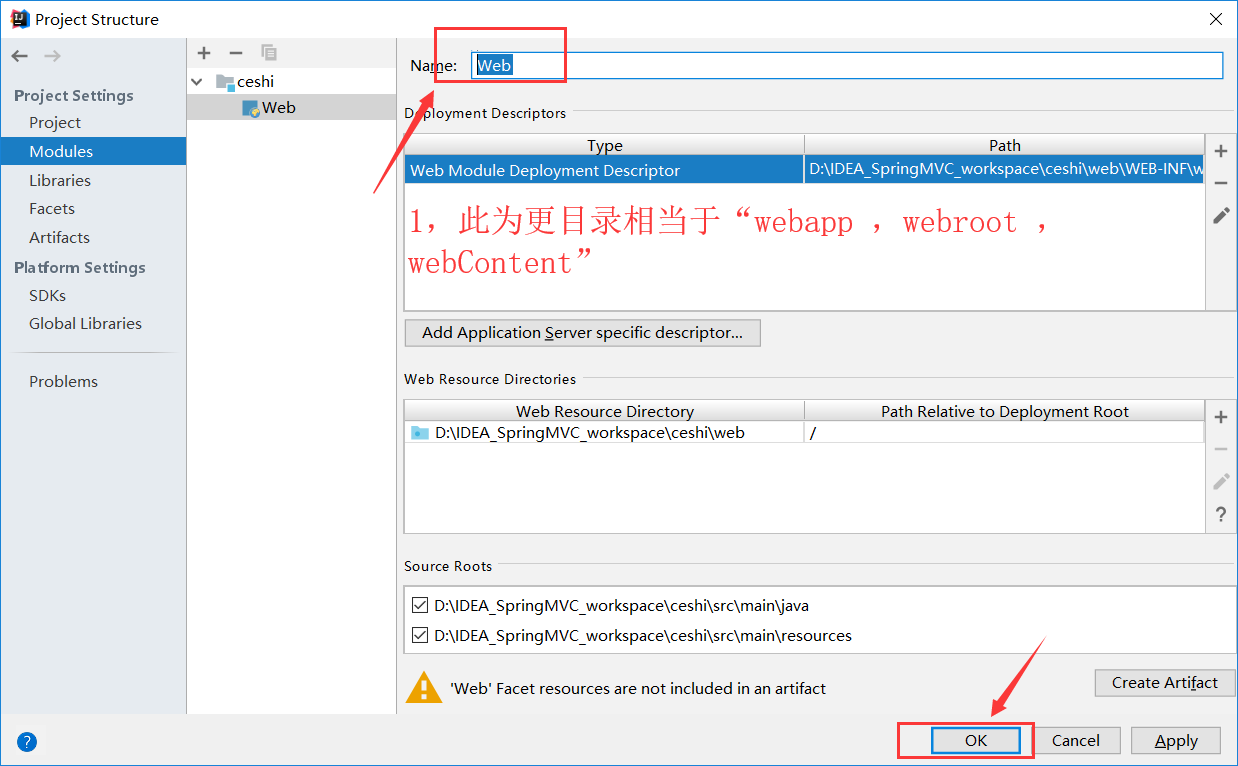
1.点击这个图标 弹出(Project Structure)
2.另一种方法 :点击file >> Project Structure 同样弹出
‘3,选择modules
4.点击“+” 下滑
5.选择 Web

1可以更换为自己设定的合法的命名。完成点击 OK。
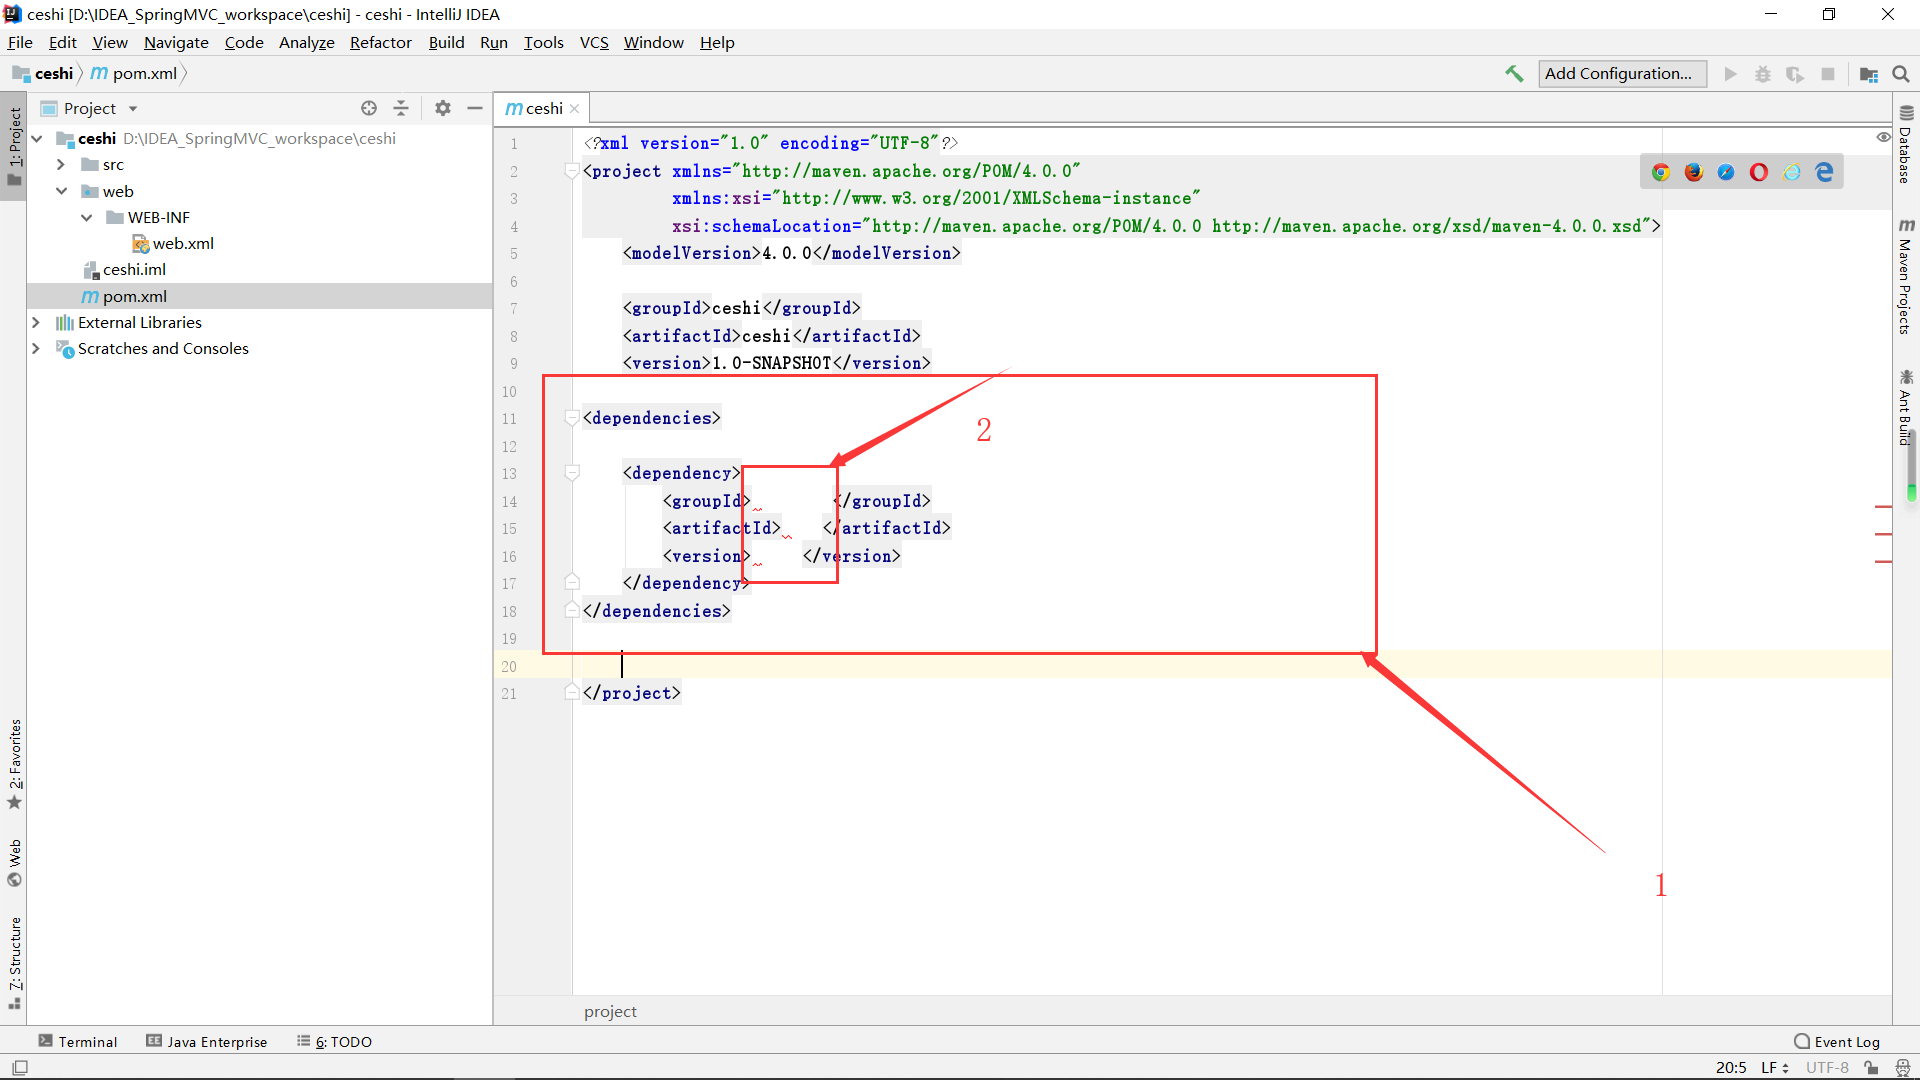
1.在pom.xml文件中加入如下代码 jIDEA自动会下载所需要的jar包
附上 maven仓库地址 ;https://mvnrepository.com/ ( 右下角显示下载进度条)
 1 <dependencies>
 2 <!--Spring MVC 及其依赖包-->
 3     <dependency>
 4         <groupId>org.springframework</groupId>
 5         <artifactId>spring-webmvc</artifactId>
 6         <version>5.0.3.RELEASE</version>
 7     </dependency>
 8     <dependency>
 9         <groupId>org.aspectj</groupId>
10         <artifactId>aspectjweaver</artifactId>
11         <version>1.9.2</version>
12     </dependency>
13     <dependency>
14         <groupId>org.springframework</groupId>
15         <artifactId>spring-jdbc</artifactId>
16         <version>5.0.3.RELEASE</version>
17     </dependency>
18     <!-- springmvc 默认使用jstl 标签 -->
19     <dependency>
20         <groupId>javax.servlet</groupId>
21         <artifactId>jstl</artifactId>
22         <version>1.2</version>
23     </dependency>
24     <!-- mybatis 核心包 -->
25     <dependency>
26         <groupId>org.mybatis</groupId>
27         <artifactId>mybatis</artifactId>
28         <version>3.4.5</version>
29     </dependency>
30
31     <!-- mybatis 与 spring 的整合包 -->
32     <dependency>
33         <groupId>org.mybatis</groupId>
34         <artifactId>mybatis-spring</artifactId>
35         <version>1.3.2</version>
36     </dependency>
37     <!-- 配置连接mysql 的驱动包 -->
38     <dependency>
39         <groupId>mysql</groupId>
40         <artifactId>mysql-connector-java</artifactId>
41         <version>5.1.6</version>
42     </dependency>
43     <dependency>
44         <groupId>commons-logging</groupId>
45         <artifactId>commons-logging</artifactId>
46         <version>1.1.3</version>
47     </dependency>
48     <!-- https://mvnrepository.com/artifact/log4j/log4j -->
49     <dependency>
50         <groupId>log4j</groupId>
51         <artifactId>log4j</artifactId>
52         <version>1.2.17</version>
53     </dependency>
54     <dependency>
55         <groupId>org.slf4j</groupId>
56         <artifactId>slf4j-log4j12</artifactId>
57         <version>1.7.2</version>
58     </dependency>
59     <dependency>
60         <groupId>javax.servlet</groupId>
61         <artifactId>javax.servlet-api</artifactId>
62         <version>3.1.0</version>
63         <scope>provided</scope>
64     </dependency>
65     <dependency>
66         <groupId>javax.servlet.jsp</groupId>
67         <artifactId>javax.servlet.jsp-api</artifactId>
68         <version>2.3.1</version>
69         <scope>provided</scope>
70     </dependency>
71
72 </dependencies>
$总结
这种创建方式不使用maven模板
IDEA对于快速编写代码具有很高的效率,
本文关于GruupId 和 ArtfactId 没有讲明实际作用。
如果不会 maven 和 IDEA 的也可以使用 。
对于创建后的 .idea文件 可在设置中隐藏 。所以我没有显示.idea文件


 386
386


 被折叠的 条评论
为什么被折叠?
被折叠的 条评论
为什么被折叠?
 到【灌水乐园】发言


