


复制于此博客 戳戳戳
1.准备工作
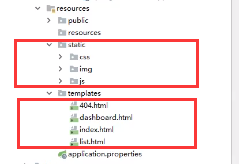
1、前端页面的放置
-
将html页面放入templates目录
-
将css,js,img放入到static目录
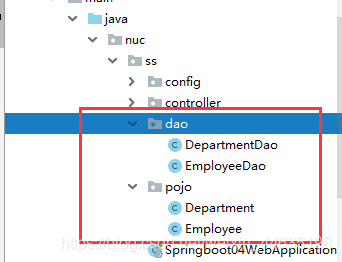
2、实体类的编写
-
Department
//部门表 @Data @AllArgsConstructor @NoArgsConstructor public class Department { private Integer id; private String departmentName; } 12345678 -
Employee
//员工表
@Data
@NoArgsConstructor
public class Employee {
    private Integer id;
    private String lastName;
    private String email;
    private Integer gender; //0:女,1:男

    private Department department;
    private Date birth;

    public Employee(Integer id, String lastName, String email, Integer gender, Department department) {
        this.id = id;
        this.lastName = lastName;
        this.email = email;
        this.gender = gender;
        this.department = department;
        //默认的创建日期
        this.birth = new Date();
    }
}
12345678910111213141516171819202122
3、dao层模拟数据库
-
DepartmentDao
//部门Dao @Repository public class DepartmentDao { //模拟数据库数据 private static Map<Integer, Department> departments = null; static { departments = new HashMap<Integer, Department>();//创建一个部门表 departments.put(101,new Department(101,"教学部")); departments.put(102,new Department(102,"市场部")); departments.put(103,new Department(103,"教研部")); departments.put(104,new Department(104,"运营部")); departments.put(105,new Department(105,"后勤部")); } //获得所有部门信息 public Collection<Department> getDepartment() { return departments.values(); } //通过id得到部门 public Department getDepartmentById(Integer id) { return departments.get(id); } } 12345678910111213141516171819202122232425262728 -
EmployeeDao
//员工Dao
@Repository
public class EmployeeDao {

    //模拟数据库数据
    private static Map<Integer, Employee> employees = null;
    //员工所属部门
    @Autowired
    private DepartmentDao departmentDao;

    static {
        employees = new HashMap<Integer, Employee>();//创建一个员工表

        employees.put(1001,new Employee(1001,"AA","A123456@qq.com",1,new Department(101,"教学部")));
        employees.put(1002,new Employee(1002,"BB","B123456@qq.com",0,new Department(102,"市场部")));
        employees.put(1003,new Employee(1003,"CC","C123456@qq.com",1,new Department(103,"教研部")));
        employees.put(1004,new Employee(1004,"DD","D123456@qq.com",0,new Department(104,"运营部")));
        employees.put(1005,new Employee(1005,"EE","E123456@qq.com",1,new Department(105,"后勤部")));
    }

    //主键自增
    private static Integer ininId = 1006;

    //增加一个员工
    public void save(Employee employee) {
        if (employee.getId() == null) {
            employee.setId(ininId++);
        }
        employee.setDepartment(departmentDao.getDepartmentById(employee.getDepartment().getId()));

        employees.put(employee.getId(),employee);
    }

    // 查询全部员工信息
    public Collection<Employee> getAll() {
        return employees.values();
    }

    // 通过id查询员工
    public Employee getEmployeeById(Integer id) {
        return employees.get(id);
    }

    //删除员工通过id
    public void delete(Integer id) {
        employees.remove(id);
    }
}
123456789101112131415161718192021222324252627282930313233343536373839404142434445464748
4、目录结构
2.首页实现
第一种方式
创建一个IndexController,写一个返回首页的方法(不建议使用)
@Controller
public class IndexController{
    @RequestMapping({"/","/index.html"})
    public String index() {
        return "index";
    }
}
1234567
第二种方式
创建一个config目录,在里面写一个MyMvcConfig,里面重写addViewControllers方法
@Configuration
public class MyMvcConfig implements WebMvcConfigurer{
    @Override
    public void addViewControllers(ViewControllerRegistry registry) {
        registry.addViewController("/").setViewName("index");
        registry.addViewController("/index.html").setViewName("index");
}
1234567
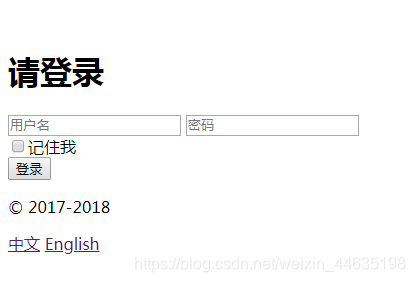
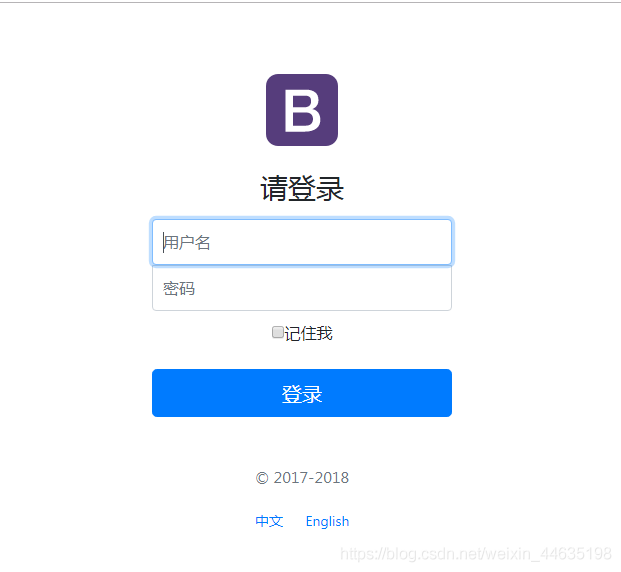
首页页面展示:
加载静态资源
1、导入thymeleaf包
<html lang="en" xmlns:th="http://www.thymeleaf.org">
1
2、将所有页面的静态资源使用thymeleaf接管
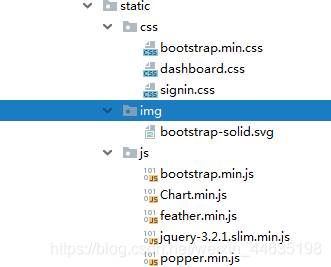
<!-- css的导入 -->
<link th:href="@{/css/bootstrap.min.css}" rel="stylesheet">
<link th:href="@{/css/signin.css}" rel="stylesheet">

<!-- 图片的导入 -->
<img class="mb-4" th:src="@{/img/bootstrap-solid.svg}" alt="" width="72" height="72">

<!-- js导入 -->
<script type="text/javascript" th:src="@{/js/jquery-3.2.1.slim.min.js}"></script>
<script type="text/javascript" th:src="@{/js/popper.min.js}"></script>
<script type="text/javascript" th:src="@{/js/bootstrap.min.js}"></script>

<script type="text/javascript" th:src="@{/js/feather.min.js}"></script>

<script type="text/javascript" th:src="@{/js/Chart.min.js}"></script>
123456789101112131415
静态资源目录
再次看一下首页页面
3.页面国际化
见页面国际化:https://blog.csdn.net/weixin_44635198/article/details/107581680
4.登录页面
1、首页登录页面表单的修改
<form class="form-signin" th:action="@{/user/login}">
    ......
    <!--如果msg的消息不为空,则显示这个消息-->
    <p style="color: red" th:text="${msg}" th:if="${not #strings.isEmpty({msg})}"></p>
    <input type="text" name="username" class="form-control" th:placeholder="#{login.username}" required="" autofocus="">
    <input type="password" name="password" class="form-control" th:placeholder="#{login.password}" required="">
	......
</form>
12345678
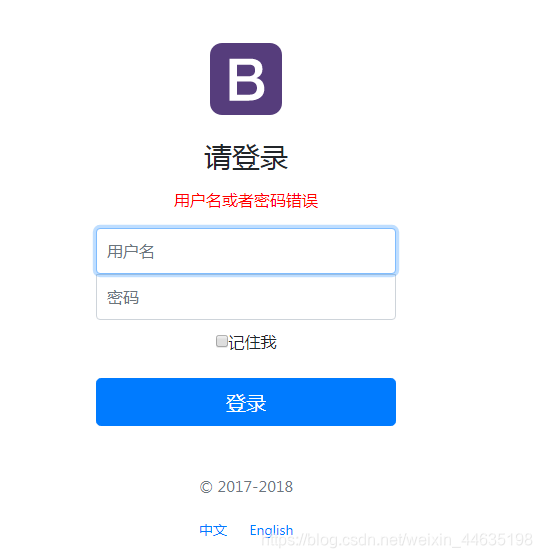
注意:登录失败时的信息显示的书写(第4行内容)
2、写一个LoginController登录验证
@Controller
public class LoginController {

    @RequestMapping("/user/login")
    public String login(@RequestParam("username") String username,
                        @RequestParam("password")String password,
                        Model model,
                        HttpSession session) {
        //具体的业务,登录成功跳转到dashboard页面
        if (!StringUtils.isEmpty(username) && "123456".equals(password)) {
            return "dashboard";
        } else {
            model.addAttribute("msg","用户名或者密码错误");
            return "index";
        }
    }
}
1234567891011121314151617
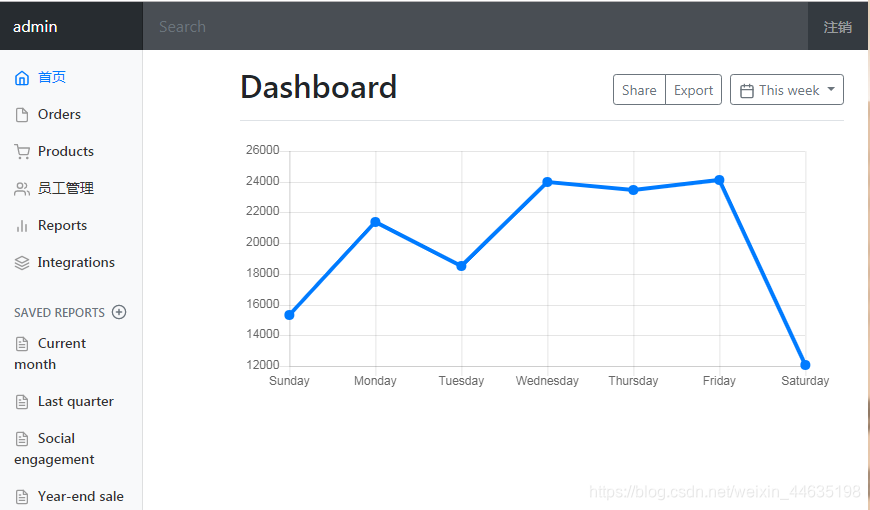
登录成功页面
登录失败页面
3、登录页面不友好(密码泄露)

4、解决3的密码泄露问题
-
加一个main映射在
MyMvcConfig中(第6行)public class MyMvcConfig implements WebMvcConfigurer{ @Override public void addViewControllers(ViewControllerRegistry registry) { registry.addViewController("/").setViewName("index"); registry.addViewController("/index.html").setViewName("index"); registry.addViewController("/main.html").setViewName("dashboard"); } } 12345678 -
修改
LoginController跳转页面代码(redirect跳转)@RequestMapping("/user/login") public String login(@RequestParam("username") String username, @RequestParam("password")String password, Model model) { //具体的业务,登录成功跳转到dashboard页面 if (!StringUtils.isEmpty(username) && "123456".equals(password)) { return "redirect:/main.html"; } else { model.addAttribute("msg","用户名或者密码错误"); return "index"; } } 123456789101112
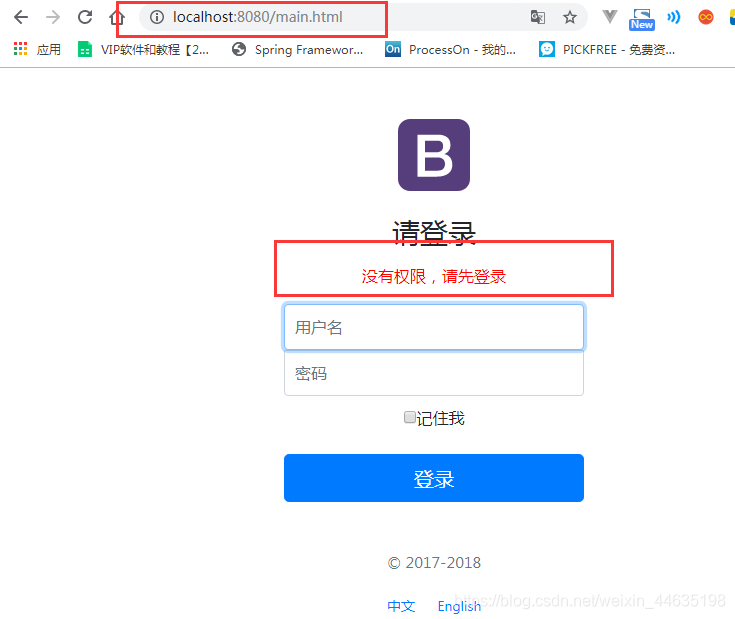
5、是否存在问题?(登录成功才可以进入main页面,否则直接输入http://localhost:8080/main.html就可以访问首页了),需要拦截器实现
5.登录拦截器
1、在LoginController中添加一个session判断登录(第11行)
@Controller
public class LoginController {

    @RequestMapping("/user/login")
    public String login(@RequestParam("username") String username,
                        @RequestParam("password")String password,
                        Model model,
                        HttpSession session) {
        //具体的业务,登录成功跳转到dashboard页面
        if (!StringUtils.isEmpty(username) && "123456".equals(password)) {
            session.setAttribute("loginUser",username);
            return "redirect:/main.html";
        } else {
            model.addAttribute("msg","用户名或者密码错误");
            return "index";
        }
    }
}
123456789101112131415161718
2、在config页面写一个LoginHandlerInterceptor拦截器
public class LoginHandlerInterceptor implements HandlerInterceptor {
    @Override
    public boolean preHandle(HttpServletRequest request, HttpServletResponse response, Object handler) throws Exception {

        // 登录成功之后,应该有用户的session
        Object loginUser = request.getSession().getAttribute("loginUser");

        if (loginUser == null) {
            request.setAttribute("msg","没有权限,请先登录");
            request.getRequestDispatcher("/index.html").forward(request,response);
            return false;
        } else {
            return true;
        }
    }
}
12345678910111213141516
3、MyMvcConfig页面重写拦截器方法
@Override
public void addInterceptors(InterceptorRegistry registry) {
    registry.addInterceptor(new LoginHandlerInterceptor())
        .addPathPatterns("/**")
        .excludePathPatterns("/index.html","/","/user/login","/css/**","/js/**","/img/**");
}
123456
注意:静态资源的过滤,否则页面渲染效果会消失
4、在dashboard.html页面修改登录信息为session[[ ${session.loginUser} ]],登录成功之后会显示用户名
5、页面的展示
6.员工列表展示
后台编写
员工管理后台Controller编写
@Controller
public class EmployeeController {

    @Autowired
    EmployeeDao employeeDao;

    @RequestMapping("/emps")
    public String list(Model model) {
        Collection<Employee> employees = employeeDao.getAll();
        model.addAttribute("emps",employees);
        return "emp/list";
    }
}

1234567891011121314
提取公共页面
1、员工管理前端页面地址的修改(list.html和dashboard.html)@{/emps}
<li class="nav-item">
    <a class="nav-link" th:href="@{/emps}">
        ......
        员工管理
    </a>
</li>
123456
2、抽取公共的代码(list.html和dashboard.html)
-
dashboard.html页面
<!--顶部导航栏--> <nav class="navbar navbar-dark sticky-top bg-dark flex-md-nowrap p-0" th:fragment="topbar"> <!--...--> </nav> <!--侧边栏--> <nav class="col-md-2 d-none d-md-block bg-light sidebar" th:fragment="sidebar"> <!--...--> </nav> 123456789 -
list.html
<!--顶部导航栏-->
<div th:insert="~{dashboard::topbar}"></div>


<!--侧边栏-->
<div th:insert="~{dashboard::sidebar}"></div>
123456
3、进一步抽取公共的代码
-
在
templates目录下面创建commons目录,在commons目录下面创建commons.html放公共代码<!--只写改变的代码--> <!DOCTYPE html> <html lang="en" xmlns:th="http://www.thymeleaf.org"> <!--顶部导航栏--> <nav class="navbar navbar-dark sticky-top bg-dark flex-md-nowrap p-0" th:fragment="topbar"> ............. </nav> <!--侧边栏--> <nav class="col-md-2 d-none d-md-block bg-light sidebar" th:fragment="sidebar"> <div class="sidebar-sticky"> <ul class="nav flex-column"> <li class="nav-item"> <a class="nav-link active" th:href="@{/index.html}"> ............. 首页 <span class="sr-only">(current)</span> </a> </li> ............. <li class="nav-item"> <a class="nav-link" th:href="@{/emps}"> ............. 员工管理 </a> </li> ............. </ul> ............. </div> </nav> </html> 123456789101112131415161718192021222324252627282930313233 -
dashboard.html和list.html页面一样
<!--顶部导航栏-->
<div th:replace="~{commons/commons::topbar}"></div>

<!--侧边栏-->
<div th:replace="~{commons/commons::sidebar}"></div>
12345
注意:replace和insert的效果一样,只不过insert会多套一层div
4、添加侧边栏点中高亮
-
在dashboard.html和list.html页面中侧边栏传参(在括号里面直接传参)
<!--侧边栏--> <div th:replace="~{commons/commons::sidebar(active='list.html')}"></div> 12 -
在commons.html中接收参数并判断
<!--侧边栏-->
<nav class="col-md-2 d-none d-md-block bg-light sidebar" th:fragment="sidebar">
    <div class="sidebar-sticky">
        <ul class="nav flex-column">
            <li class="nav-item">
               <a th:class="${active=='main.html'?'nav-link active':'nav-link'}" th:href="@{/main.html}">

                  	.............
                    首页 <span class="sr-only">(current)</span>
                </a>
            </li>
            .............
            <li class="nav-item">
            	<a th:class="${active=='list.html'?'nav-link active':'nav-link'}" th:href="@{/emps}">

                    .............
                    员工管理
                </a>
            </li>
            .............
        </ul>
        .............
    </div>
</nav>
</html>
12345678910111213141516171819202122232425
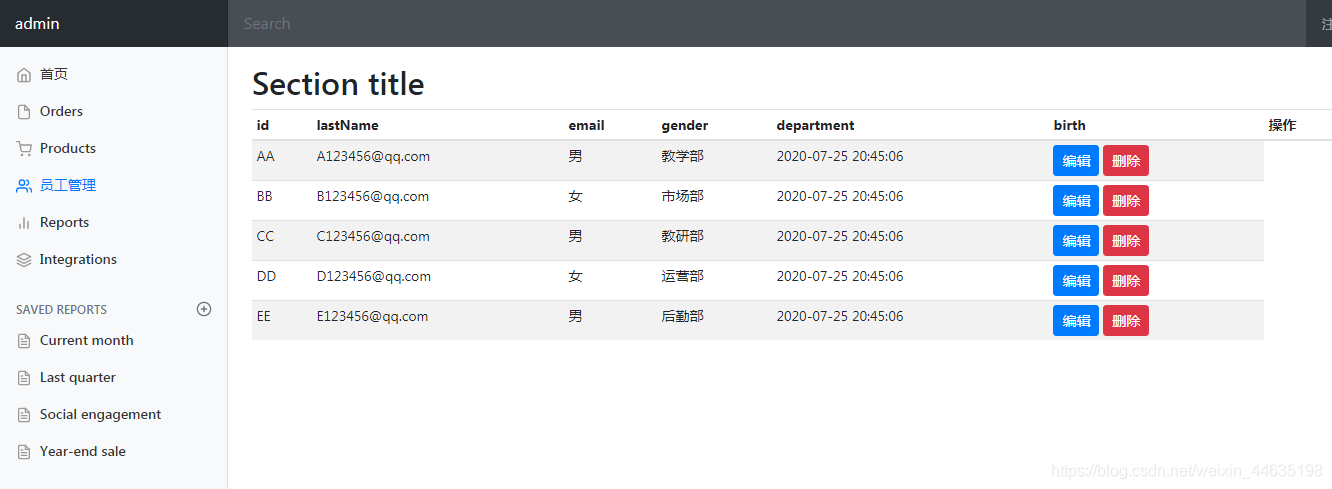
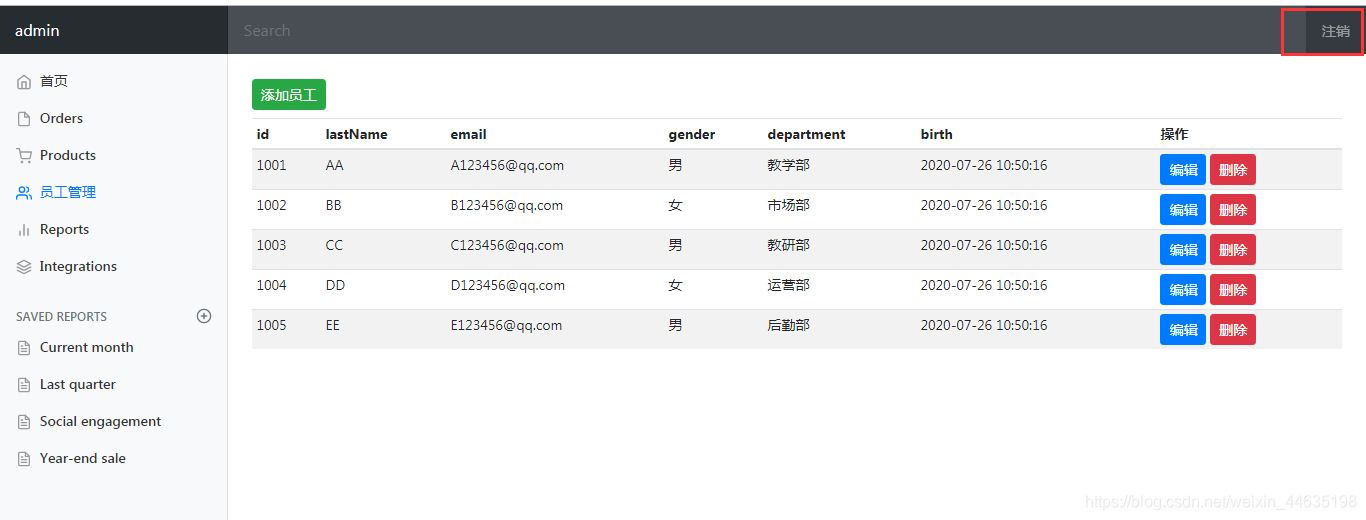
列表循环展示
员工列表循环(list.html)
<!--侧边栏-->
<div th:replace="~{commons/commons::sidebar(active='list.html')}"></div>

<main role="main" class="col-md-9 ml-sm-auto col-lg-10 pt-3 px-4">
    <h2>Section title</h2>
    <div class="table-responsive">
        <table class="table table-striped table-sm">
            <thead>
                <tr>
                    <th>id</th>
                    <th>lastName</th>
                    <th>email</th>
                    <th>gender</th>
                    <th>department</th>
                    <th>birth</th>
                    <th>操作</th>
                </tr>
            </thead>
            <tbody>
                <tr th:each="emp:${emps}">
                    <td th:text="${emp.getLastName()}"></td>
                    <td th:text="${emp.getEmail()}"></td>
                    <td th:text="${emp.getGender()==0?'女':'男'}"></td>
                    <td th:text="${emp.department.getDepartmentName()}"></td>
                    <td th:text="${#dates.format(emp.getBirth(),'yyyy-MM-dd HH:mm:ss')}"></td>
                    <td>
                        <button class="btn btn-sm btn-primary">编辑</button>
                        <button class="btn btn-sm btn-danger">删除</button>
                    </td>
                </tr>
            </tbody>
        </table>
    </div>
</main>
12345678910111213141516171819202122232425262728293031323334
页面展示
7.添加员工信息
按钮提交
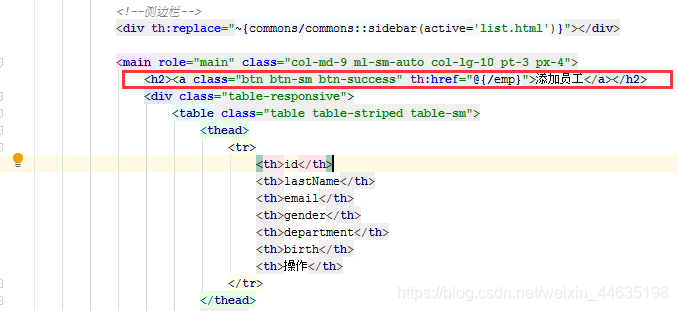
list.html页面编写
<h2><a class="btn btn-sm btn-success" th:href="@{/emp}">添加员工</a></h2>
1
添加的位置
跳转到添加页面
1、后台页面的编写(跳转到add.html页面 )
@GetMapping("/emp")
public String toAddPage(Model model) {
    //查出所有部门的信息
    Collection<Department> department = departmentDao.getDepartment();
    model.addAttribute("departments",department);
    return "emp/add";
}
1234567
2、add.html页面的编写(其他部分和list.html页面一样,只改main中的代码即可)
<main role="main" class="col-md-9 ml-sm-auto col-lg-10 pt-3 px-4">
    <form th:action="@{/emp}" method="post">
        <div class="form-group">
            <label>LastName</label>
            <input type="text" name="lastName" class="form-control" placeholder="海绵宝宝">
        </div>
        <div class="form-group">
            <label>Email</label>
            <input type="email" name="email" class="form-control" placeholder="1176244270@qq.com">
        </div>
        <div class="form-group">
            <label>Gender</label><br>
            <div class="form-check form-check-inline">
                <input class="form-check-input" type="radio" name="gender" value="1">
                <label class="form-check-label">男</label>
            </div>
        </div>
        <div class="form-check form-check-inline">
            <input class="form-check-input" type="radio" name="gender" value="0">
            <label class="form-check-label">女</label>
        </div>
        <div class="form-group">
            <label>department</label>
            <select class="form-control" name="department.id">
                <!--我们在controller接收的是一个Employee,所以我们需要提交的是其中的一个属性-->
                <option th:each="dept:${departments}" th:text="${dept.getDepartmentName()}" th:value="${dept.getId()}">1</option>
            </select>
        </div>
        <div class="form-group">
            <label>Birth</label>
            <input type="text" name="birth" class="form-control" placeholder="2020/07/25 18:00:00">
        </div>
        <button type="submit" class="btn btn-primary">添加</button>
    </form>
</main>
1234567891011121314151617181920212223242526272829303132333435
注意:下拉框提交的时候应提交一个属性,因为其在controller接收的是一个Employee,否则会报错
页面:
添加员工成功
后台页面的编写
@Autowired
DepartmentDao departmentDao;

@PostMapping("/emp")
public String addEmp(Employee employee) {
    employeeDao.save(employee);//调用底层业务方法保存员工信息
    return "redirect:/emps";
}
12345678
添加信息页面
添加成功页面
日期格式的修改
1、如果输入的日期格式为2020-01-01,则报错
2、application.properties文件中添加配置
-
2.2.x版本之前
spring.mvc.date-format=yyyy-MM-dd 1 -
2.2.x版本之后
spring.mvc.format.date=yyyy-MM-dd
1
8.修改员工信息
按钮提交
list.html页面编辑按钮的编写(’+‘ 报红别管)
<a class="btn btn-sm btn-primary" th:href="@{/emp/}+${emp.getId()}">编辑</a>
1
跳转到修改页面
1、后台页面的接收参数(Restful风格)
// 去到员工的修改页面
@GetMapping("/emp/{id}")
public String toUpdateEmp(@PathVariable("id") Integer id, Model model) {
    //查出原来的数据
    Employee employee = employeeDao.getEmployeeById(id);
    model.addAttribute("emp",employee);
    //查出所有部门的信息
    Collection<Department> department = departmentDao.getDepartment();
    model.addAttribute("departments",department);
    return "emp/update";
}
1234567891011
2、update.html页面(main里面修改,其他和list.html页面一样)
<main role="main" class="col-md-9 ml-sm-auto col-lg-10 pt-3 px-4">
    <form th:action="@{/updateEmp}" method="post">
        <input type="hidden" name="id" th:value="${emp.getId()}">
        <div class="form-group">
            <label>LastName</label>
            <input th:value="${emp.getLastName()}" type="text" name="lastName" class="form-control" placeholder="海绵宝宝">
        </div>
        <div class="form-group">
            <label>Email</label>
            <input th:value="${emp.getEmail()}" type="email" name="email" class="form-control" placeholder="1176244270@qq.com">
        </div>
        <div class="form-group">
            <label>Gender</label><br>
            <div class="form-check form-check-inline">
                <input th:checked="${emp.getGender()==1}" class="form-check-input" type="radio" name="gender" value="1">
                <label class="form-check-label">男</label>
            </div>
        </div>
        <div class="form-check form-check-inline">
            <input th:checked="${emp.getGender()==0}" class="form-check-input" type="radio" name="gender" value="0">
            <label class="form-check-label">女</label>
        </div>
        <div class="form-group">
            <label>department</label>
            <select class="form-control" name="department.id">
                <!--我们在controller接收的是一个Employee,所以我们需要提交的是其中的一个属性-->
                <option th:selected="${dept.getId()==emp.getDepartment().getId()}" th:each="dept:${departments}" th:text="${dept.getDepartmentName()}" th:value="${dept.getId()}"></option>
            </select>
        </div>
        <div class="form-group">
            <label>Birth</label>
            <input th:value="${#dates.format(emp.getBirth(),'yyyy-MM-dd HH:mm:ss')}" type="text" name="birth" class="form-control" placeholder="2020-07-25 00:00:00">
        </div>
        <button type="submit" class="btn btn-primary">修改</button>
    </form>
</main>
123456789101112131415161718192021222324252627282930313233343536
修改员工成功
修改员工信息成功
@PostMapping("/updateEmp")
public String updateEmp(Employee employee) {
    employeeDao.save(employee);
    return "redirect:/emps";
}
12345
9.删除员工信息
按钮提交
list.html页面删除按钮的修改
<a class="btn btn-sm btn-danger" th:href="@{/delemp/}+${emp.getId()}">删除</a>
1
接收参数删除用工信息
// 删除员工
@GetMapping("/delemp/{id}")
public String deleteEmp(@PathVariable("id") Integer id) {
    employeeDao.delete(id);
    return "redirect:/emps";
}
123456
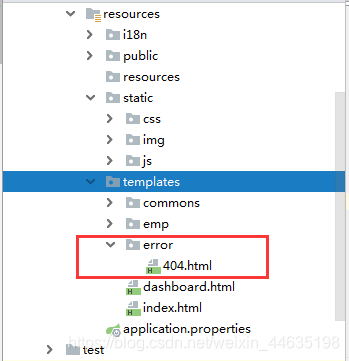
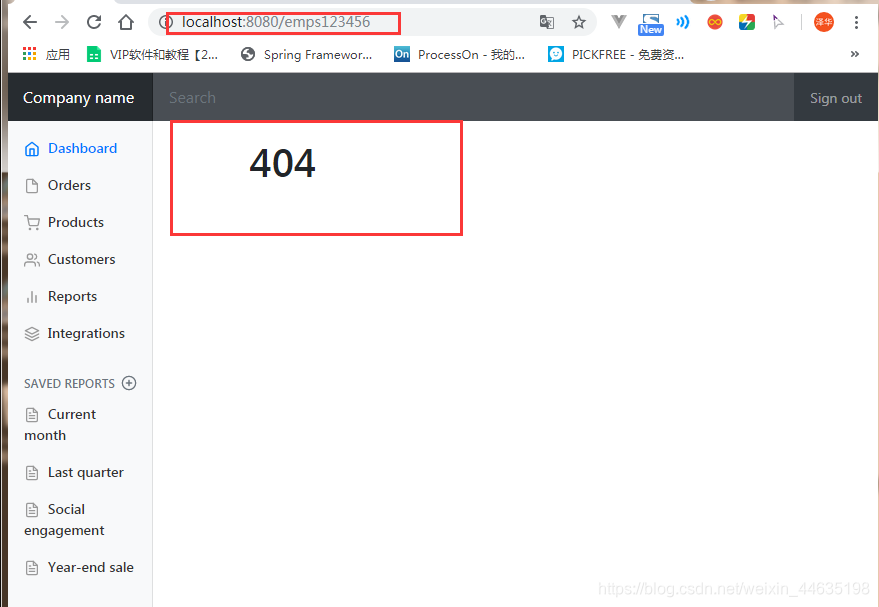
10.404页面
将404.html页面放入到templates目录下面的error目录中
错误运行页面
11.注销功能的实现
1、在commons.html中修改注销按钮
<a class="nav-link" th:href="@{/user/logout}">注销</a>
1
2、在LoginController.java中编写注销页面代码
@RequestMapping("/user/logout")
public String logout(HttpSession session) {
    session.invalidate();
    return "redirect:/index.html";
}
12345
12.如何写一个网站
- 前端搞定:页面长什么样子
- 设计数据库(数据库设计难点)
- 前端让他能够自动运行,独立化工程
- 数据接口如何对接:json,对象,all in one!
- 前后端联调测试
模板:
- 有一套自己熟悉的后台模板:工作必要!x-admin
- 前端页面:至少自己能够通过前端框架,组合出来一个网站页面
- index
- about
- blog
- post
- user
- 让这个网站能够独立运行!


 1067
1067


 被折叠的 条评论
为什么被折叠?
被折叠的 条评论
为什么被折叠?
 到【灌水乐园】发言


