


原文:http://blog.csdn.net/qiantujava/article/details/18708121
本来上网想下载spring的,可以不提供下载。。只能用maven管理下载。。。
现在很多很多项目都是用maven来管理了,我们有必要学习一下maven,不深究,先入门。
Eclipse是自带有maven的,如果不熟的话,可以直接使用。
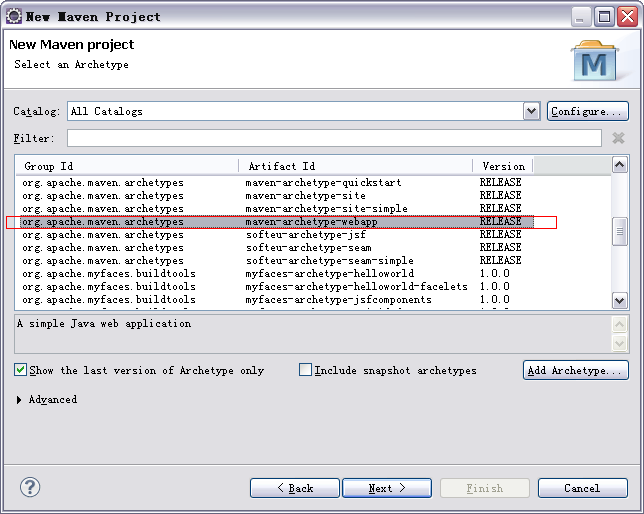
1、new 一个maven项目。(这里是web项目)
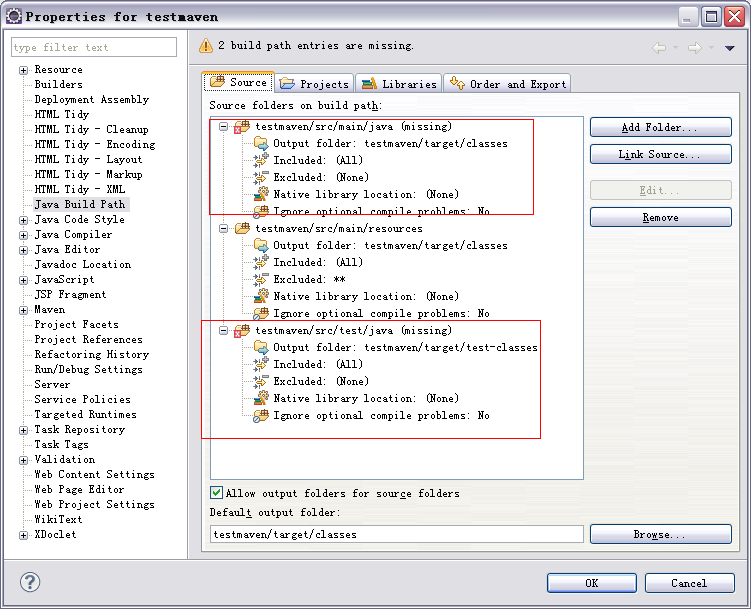
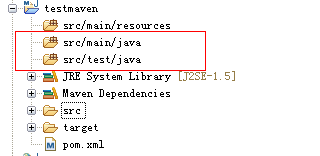
2、右击项目更目录,build path,configure build path... ,把打叉的删掉,也就是项目里不存在的删掉。然后返回,再自己添加进去。(根据约定俗成的目录来开发)
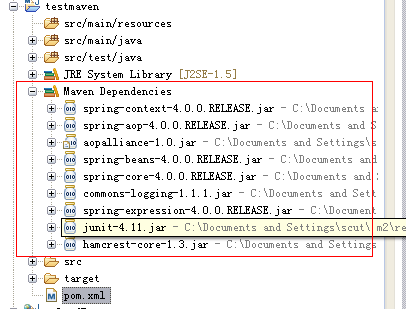
3、在pom.xml里面添加spring-context-xxx.jar。
(并把junit换成官网的最新版https://github.com/junit-team/junit/wiki/Download-and-Install)
- <project xmlns="http://maven.apache.org/POM/4.0.0" xmlns:xsi="http://www.w3.org/2001/XMLSchema-instance"
- xsi:schemaLocation="http://maven.apache.org/POM/4.0.0 http://maven.apache.org/maven-v4_0_0.xsd">
- <modelVersion>4.0.0</modelVersion>
- <groupId>com.qiantu</groupId>
- <artifactId>testmaven</artifactId>
- <packaging>war</packaging>
- <version>0.0.1-SNAPSHOT</version>
- <name>testmaven Maven Webapp</name>
- <url>http://maven.apache.org</url>
- <dependencies>
- <!-- 添加这个 -->
- <dependency>
- <groupId>org.springframework</groupId>
- <artifactId>spring-context</artifactId>
- <version>4.0.0.RELEASE</version>
- </dependency>
- <!-- 换成最新版4.11 -->
- <dependency>
- <groupId>junit</groupId>
- <artifactId>junit</artifactId>
- <version>4.11</version>
- <scope>test</scope>
- </dependency>
- </dependencies>
- <build>
- <finalName>testmaven</finalName>
- </build>
- </project>
保存之后就会发现多了很多包
4、然后写代码测试一下:
ApplicationConfig.java(这个类相当于 applicationContext.xml)
- package maven;
- import org.springframework.context.annotation.ComponentScan;
- import org.springframework.context.annotation.Configuration;
- @Configuration//表明这是一个配置文件,相当于applicationContext.xml
- @ComponentScan//自动扫描
- public class ApplicationConfig {
- //下面部分对于这个测试是不需要的。
- //只是记录一下 @Configuration + @Bean 的使用
- //相当于xml的<bean id=userService class=xxx />
- /*
- @Bean
- public UserService userService() {
- return new UserService();
- }
- */
- }
User.java
- package maven;
- public class User {
- private String name;
- public User(String name) {
- super();
- this.name = name;
- }
- public String getName() {
- return name;
- }
- public void setName(String name) {
- this.name = name;
- }
- }
UserDAO.java
- package maven;
- import org.springframework.stereotype.Component;
- @Component
- public class UserDAO {
- public User getUser() {
- return new User("qiantujava");
- }
- }
UserService.java
- package maven;
- import org.springframework.beans.factory.annotation.Autowired;
- import org.springframework.stereotype.Component;
- @Component
- public class UserService {
- //用@Autowired注解的属性不需要写set/get方法
- @Autowired
- private UserDAO userDAO;
- public void printUser() {
- User user = userDAO.getUser();
- System.out.println(user.getName());
- }
- }
UserServiceTest.java
- package maven;
- import org.junit.Test;
- import org.springframework.context.ApplicationContext;
- import org.springframework.context.annotation.AnnotationConfigApplicationContext;
- import junit.framework.TestCase;
- public class UserServiceTest extends TestCase {
- @Test
- public void testPrintUser() {
- ApplicationContext ctx =
- new AnnotationConfigApplicationContext(ApplicationConfig.class);
- UserService userService = ctx.getBean(UserService.class);
- userService.printUser();
- //用 @Configuration + @Bean 的时候用这个获取bean
- // UserService userService = (UserService) ctx.getBean("userService");
- }
- }


 443
443


 被折叠的 条评论
为什么被折叠?
被折叠的 条评论
为什么被折叠?
 到【灌水乐园】发言


