


整个应用效果
项目开始
- 新建一个Maven项目,前提是你的机器里已经下载了这个东西。新建可以参考这篇博客:入门JAVAEE:环境配置。
- 修改Pom.xml配置和依赖
  1 <project xmlns="http://maven.apache.org/POM/4.0.0" xmlns:xsi="http://www.w3.org/2001/XMLSchema-instance"
  2     xsi:schemaLocation="http://maven.apache.org/POM/4.0.0 http://maven.apache.org/maven-v4_0_0.xsd">
  3     <modelVersion>4.0.0</modelVersion>
  4     <groupId>yangxin</groupId>
  5     <artifactId>SSM_Learning</artifactId>
  6     <packaging>war</packaging>
  7     <version>0.0.1-SNAPSHOT</version>
  8     <name>SSM_Learning Maven Webapp</name>
  9     <url>http://maven.apache.org</url>
 10     <dependencies>
 11
 12         <!-- 原来是3.8,需要改成4.11,因为Junit3是依赖于java代码,Junit4是依赖于注解实现的。 -->
 13         <dependency>
 14             <groupId>junit</groupId>
 15             <artifactId>junit</artifactId>
 16             <version>4.12</version>
 17             <scope>test</scope>
 18         </dependency>
 19         <!-- 补全项目依赖 -->
 20         <!-- 1:日志依赖有:java日志、slf4j,logback,common-logging -->
 21         <!-- slf4j是规范的借口 -->
 22         <!-- 日志实现log4j、logback、common-logging 被项目使用的是:slf4j+logback -->
 23         <dependency>
 24             <groupId>org.slf4j</groupId>
 25             <artifactId>slf4j-api</artifactId>
 26             <version>1.7.12</version>
 27         </dependency>
 28
 29         <dependency>
 30             <groupId>ch.qos.logback</groupId>
 31             <artifactId>logback-core</artifactId>
 32             <version>1.1.1</version><!-- 1.1.1 -->
 33         </dependency>
 34         <!-- 实现slf4j接口并且整合 -->
 35         <dependency>
 36             <groupId>ch.qos.logback</groupId>
 37             <artifactId>logback-classic</artifactId>
 38             <version>1.1.1</version>
 39         </dependency>
 40
 41         <!-- 数据相关的依赖 -->
 42
 43         <dependency>
 44             <groupId>mysql</groupId>
 45             <artifactId>mysql-connector-java</artifactId>
 46             <version>5.1.35</version>
 47             <scope>runtime</scope>
 48         </dependency>
 49         <!-- 连接池 -->
 50         <dependency>
 51             <groupId>c3p0</groupId>
 52             <artifactId>c3p0</artifactId>
 53             <version>0.9.1.2</version>
 54         </dependency>
 55
 56         <!-- Dao层的依赖 Mybatis依赖 -->
 57
 58         <dependency>
 59             <groupId>org.mybatis</groupId>
 60             <artifactId>mybatis</artifactId>
 61             <version>3.4.5</version>
 62         </dependency>
 63
 64         <!-- mybatis自身为自己提供的依赖 -->
 65         <dependency>
 66             <groupId>org.mybatis</groupId>
 67             <artifactId>mybatis-spring</artifactId>
 68             <version>1.3.1</version>
 69         </dependency>
 70
 71         <!-- ServletWEB相關依赖 -->
 72
 73         <dependency>
 74             <groupId>taglibs</groupId>
 75             <artifactId>standard</artifactId>
 76             <version>1.1.2</version>
 77         </dependency>
 78
 79         <dependency>
 80             <groupId>jstl</groupId>
 81             <artifactId>jstl</artifactId>
 82             <version>1.2</version>
 83         </dependency>
 84
 85         <dependency>
 86             <groupId>com.fasterxml.jackson.core</groupId>
 87             <artifactId>jackson-databind</artifactId>
 88             <version>2.9.6</version><!-- 2.5.4 -->
 89         </dependency>
 90
 91         <dependency>
 92             <groupId>javax.servlet</groupId>
 93             <artifactId>javax.servlet-api</artifactId>
 94             <version>3.1.0</version>
 95         </dependency>
 96
 97         <!-- spring依赖 -->
 98         <!-- spring核心依赖 -->
 99         <dependency>
100             <groupId>org.springframework</groupId>
101             <artifactId>spring-core</artifactId>
102             <version>5.1.1.RELEASE</version><!-- 5.0.2 -->
103         </dependency>
104
105
106         <dependency>
107             <groupId>org.springframework</groupId>
108             <artifactId>spring-beans</artifactId>
109             <version>5.1.1.RELEASE</version>
110         </dependency>
111
112         <dependency>
113             <groupId>org.springframework</groupId>
114             <artifactId>spring-context</artifactId>
115             <version>5.1.1.RELEASE</version>
116         </dependency>
117
118         <!-- spring DAO层依赖 -->
119
120         <dependency>
121             <groupId>org.springframework</groupId>
122             <artifactId>spring-jdbc</artifactId>
123             <version>5.1.1.RELEASE</version>
124         </dependency>
125
126         <dependency>
127             <groupId>org.springframework</groupId>
128             <artifactId>spring-tx</artifactId>
129             <version>5.1.1.RELEASE</version>
130         </dependency>
131         <!-- springWeb的依赖 -->
132
133         <dependency>
134             <groupId>org.springframework</groupId>
135             <artifactId>spring-web</artifactId>
136             <version>5.1.1.RELEASE</version>
137         </dependency>
138
139         <dependency>
140             <groupId>org.springframework</groupId>
141             <artifactId>spring-webmvc</artifactId>
142             <version>5.1.1.RELEASE</version>
143         </dependency>
144         <!-- spring Test相关的依赖 -->
145         <dependency>
146             <groupId>org.springframework</groupId>
147             <artifactId>spring-test</artifactId>
148             <version>5.1.1.RELEASE</version>
149         </dependency>
150
151         <!-- Jboos -->
152         <!-- https://mvnrepository.com/artifact/org.jboss/jboss-vfs -->
153         <dependency>
154             <groupId>org.jboss</groupId>
155             <artifactId>jboss-vfs</artifactId>
156             <version>3.2.11.Final</version>
157         </dependency>
158
159     </dependencies>
160     <build>
161         <finalName>SSM_Learning</finalName>
162         <plugins>
163             <plugin>
164                 <groupId>org.apache.maven.plugins</groupId>
165                 <artifactId>maven-compiler-plugin</artifactId>
166                 <version>3.1</version>
167                 <configuration>
168                     <source>1.8</source>
169                     <target>1.8</target>
170                 </configuration>
171             </plugin>
172         </plugins>
173     </build>
174 </project>
项目分析:

商家对库存业务分析
商家对库存有下面两个操作:①添加。②调整。
用户对库存业务分析
用户对产品的秒杀,都有下面两个操作。
秒杀成功:库存-1;
记录购买明细;
注意:
- 减库存却没有记录购买明细,会导致商品少卖。
- 记录购买明细却没有减库存,会导致商品超卖。
出现这个问题了怎么办?
这是一个很严重的问题,会造成不可估量的损失,那么一般都会找设计这个事务的程序员背锅,所以这两个情况我们需要一个完整的事务,通过事务来实现数据落地。
目前数据落地的解决方案:①mysql,②nosql。
- MySQL属于关系型数据库,而MySQL内置的事务机制来完成减库存和记录购买明细的过程。
- oSQL属于非关系型数据库,对于事务的支持做的并不是很好,更多追求的是性能、分布式。
难点分析
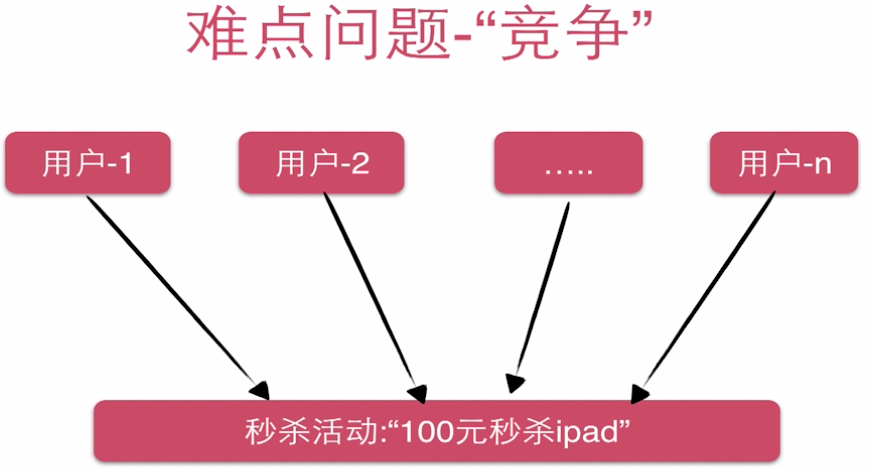
流程:start Transaction->update(数量)->insert(插入购买明细)->commit。
出现问题的环节就是这个update上,在每个用户秒杀商品会导致数量较少,加入库存只有一个商品,上千个用户同时秒杀,那么就会造成竞争。
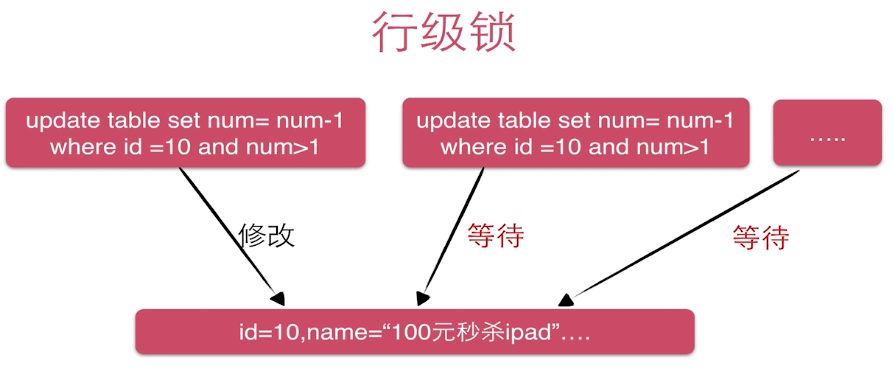
解决方案:加锁(事务+行级锁)
Coding
数据库设计和写数据库初始化脚本
新建一个目录sql用来存放.sql文件。新建一个schem.sql。
首先应创建数据库,再创建表。表里面,应该有一个记录要秒杀商品的信息表seckill,和一个用户秒杀成功的商品记录表。
在seckill表中要有一个:ID,商品名称,库存数量,秒杀开始时间、秒杀结束时间、创建时间。主键是ID,创建开始时间和结束时间,创建时间的索引,因为以后会需要根据索引查找。
 1 --数据库初始化脚本
 2
 3 --创建数据库
 4
 5 CREATE database seckill;
 6
 7 --使用数据库
 8
 9 use seckill;
10
11 --创建秒杀库存表
12
13 create table seckill(
14
15     `seckill_id` bigint NOT NULL AUTO_INCREMENT  COMMENT '商品库存ID',
16     `name` varchar(120) NOT NULL COMMENT '商品的名称',
17     `number` int NOT NULL COMMENT '库存数量',
18     `start_time` timestamp NOT NULL COMMENT '秒杀开始时间',
19     `end_time` timestamp NOT NULL COMMENT '秒杀结束时间',
20     `create_time` timestamp NOT NULL DEFAULT CURRENT_TIMESTAMP COMMENT '创建时间',
21     PRIMARY KEY(seckill_id),
22     key idx_start_time(start_time),
23     key idx_end_time(end_time),
24     key idx_create_time(create_time)
25 )engine=InnoDB auto_INCREMENT=1000 DEFAULT CHARSET=utf8 comment='秒杀库存表';
接下来写seckill的初始化数据,添加一下基础信息。
 1 ---初始化数据
 2 insert into seckill(name,number,start_time,end_time)
 3 values
 4 ('1000元秒杀ipone12X',100,'2018-11-11 00:00:00','2018-11-12 00:00:00'),
 5 ('100元秒杀ipad',100,'2018-11-11 00:00:00','2018-11-12 00:00:00'),
 6 ('1300元秒杀小米',100,'2018-11-11 00:00:00','2018-11-12 00:00:00'),
 7 ('700元秒杀华为mate20',100,'2018-11-11 00:00:00','2018-11-12 00:00:00'),
 8 ('1000元秒杀oppo',100,'2018-11-11 00:00:00','2018-11-12 00:00:00'),
 9 ('600元秒杀女比亚',100,'2018-11-11 00:00:00','2018-11-12 00:00:00'),
10 ('1000元秒杀iponeX',100,'2018-11-11 00:00:00','2018-11-12 00:00:00');
在秒杀成功明细表应该设计:商品ID,用户电话号码,状态标识(-1:无效,0:成功,1:已付款...),创建时间,主键是seckill_id和user_phone的联合主键。
 1 ---秒杀成功明细表
 2 ---用户登录认证相关信息
 3 create table success_killed(
 4     `seckill_id` bigint not null comment '秒杀商品id',
 5     `user_phone` bigint not null comment '用户手机号码',
 6     `state` tinyint not null default -1 comment '状态标识,-1:无效,0:成功,1:已付款,2:已发货..',
 7     `create_time` timestamp not null comment '创建时间',
 8     primary key(seckill_id,user_phone),/*联合主键*/
 9     key idx_crate_time(create_time)
10 )engine=InnoDB DEFAULT CHARSET=utf8 comment='秒杀成功明细表';
连接数据库,将上面的SQL语句执行,创建相应的库和表。
DAO与Entity接口实现
在java下新建两个包:org.seckill.entity和org.seckill.dao。entity是存放和数据库两个表结构一致的类。dao则是他们相应的实现接口。
在org.seckill.entity新建Seckill和SuccessKill两个类,分别表示商品信息和用户秒杀商品记录信息。代码如下
 1 package org.seckill.entity;
 2
 3 public class SecKill {
 4     private long seckillId;
 5     //对于数据库的seckill_id
 6
 7     private String name;
 8     //对于数据库的name
 9
10     private int number;
11     //对于数据库的number
12
13     private Date startTime;
14     //对于数据库的start_time
15
16     private Date endTime;
17     //对于数据库的end_time
18
19     private Date createTime;
20     //对于数据库的create_time
21
22         //相应的get和set方法
23
24         //重写ToString方法
25 }
 1 package org.seckill.entity;
 2
 3 import java.sql.Date;
 4
 5 public class SuccessKill {
 6
 7     private long seckillId;
 8
 9     private long userPhone;
10
11     private short state;
12
13     private Date createTime;
14
15     private SecKill secKill;
16
17     //相应的get和set方法
18
19      //重写ToString方法
20
21 }
在org.seckill.dao新建SeckillDao和SuccessKillDao;他们分别实现对商品信息的操作和对用户订购的详细信息的操作。
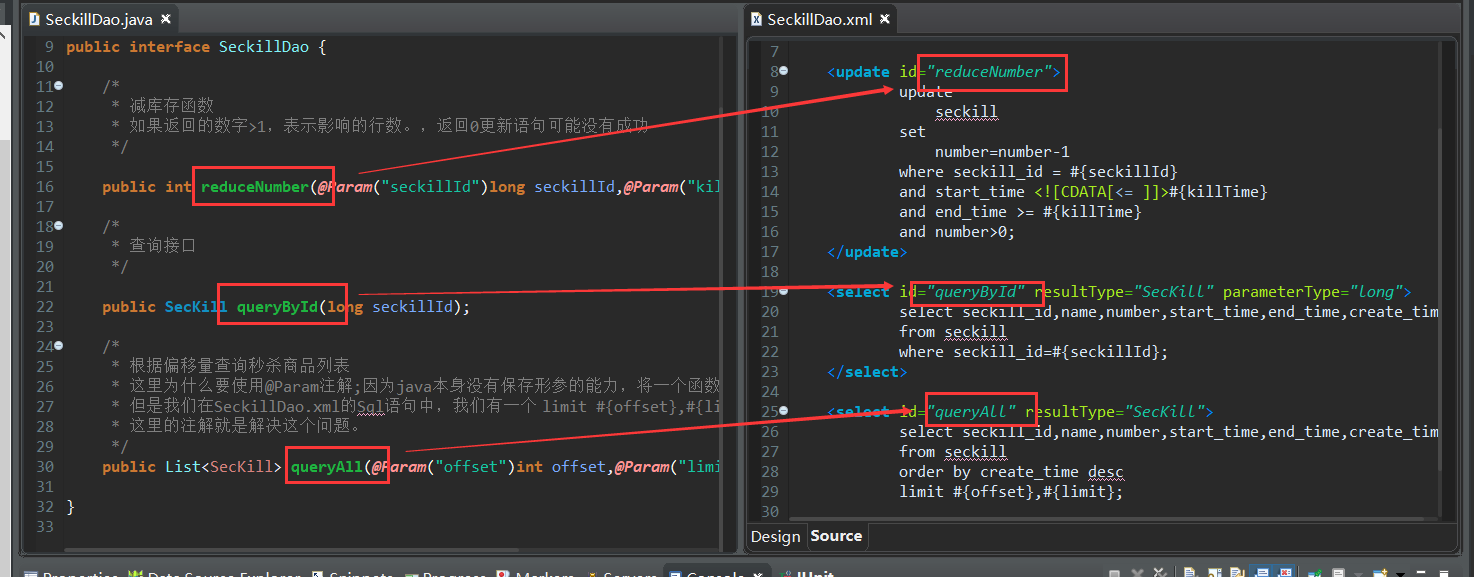
SeckillDao:①要实现用户秒杀一台手机,库存应该减少一台;②必要的查询,根据seckillId来查询具体的商品信息;③在页面显示所有的商品信息,所以还需要获取所有的商品信息,故还需要查询所有的数据。
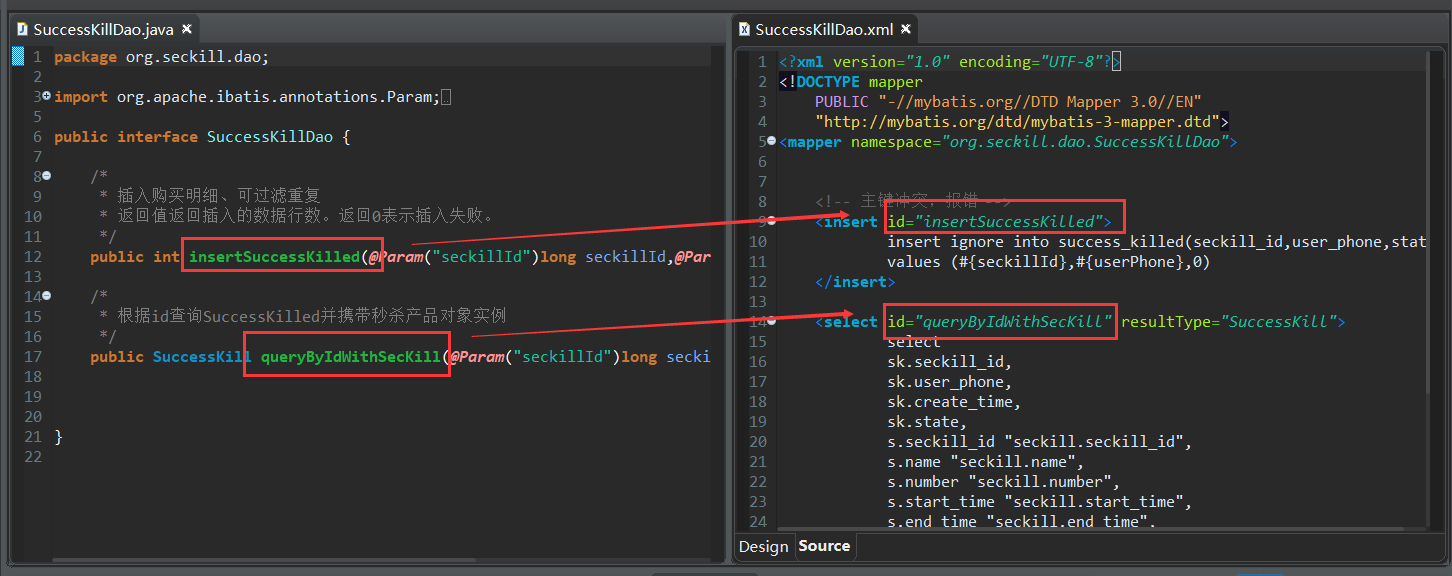
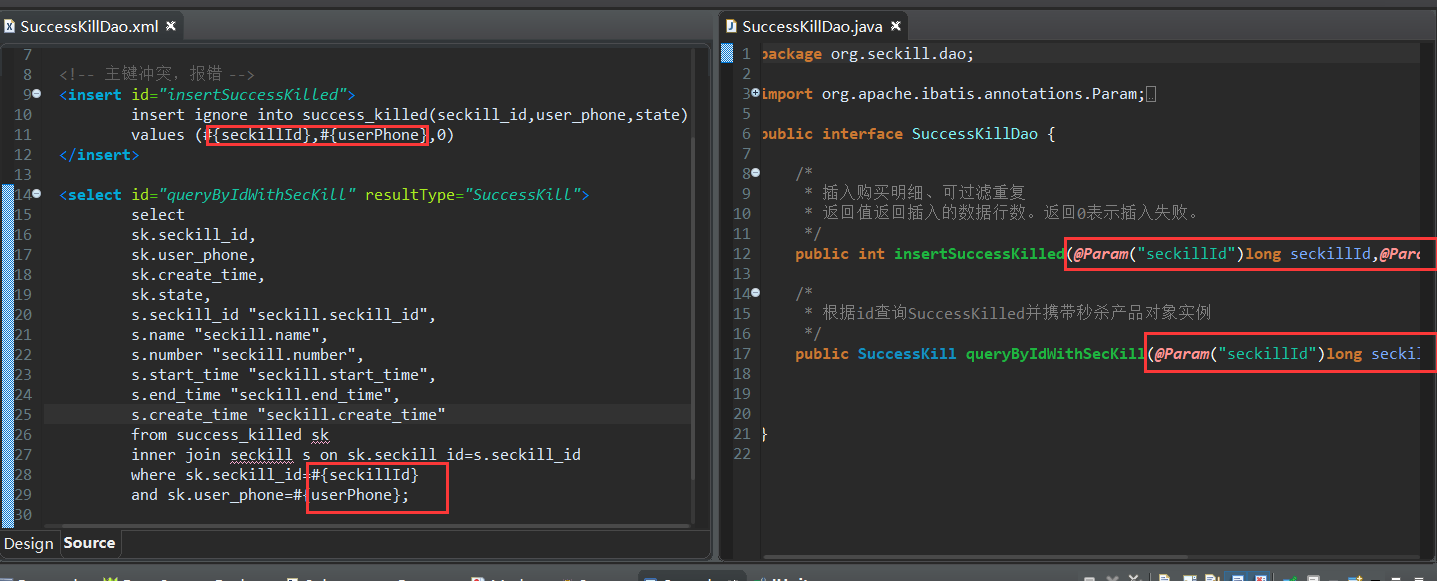
SuccessKillDao:①在用户秒杀到一台商品时,需要在这个表里插入具体数据,主要是:商品ID(seckillId)和用户电话(userPhone)两个字段,state插入默认值为0.②根据id查询SuccessKilled并携带秒杀产品对象实例。
package org.seckill.dao;
public interface SuccessKillDao {

    /*
     * 插入购买明细、可过滤重复
     * 返回值返回插入的数据行数。返回0表示插入失败。
     */
    public int insertSuccessKilled(@Param("seckillId")long seckillId,@Param("userPhone")long userPhone);

    /*
     * 根据id查询SuccessKilled并携带秒杀产品对象实例
     */
    public SuccessKill queryByIdWithSecKill(@Param("seckillId")long seckillId,@Param("userPhone")long userPhone);


}
package org.seckill.dao;


public interface SuccessKillDao {

    /*
     * 插入购买明细、可过滤重复
     * 返回值返回插入的数据行数。返回0表示插入失败。
     */
    public int insertSuccessKilled(@Param("seckillId")long seckillId,@Param("userPhone")long userPhone);

    /*
     * 根据id查询SuccessKilled并携带秒杀产品对象实例
     */
    public SuccessKill queryByIdWithSecKill(@Param("seckillId")long seckillId,@Param("userPhone")long userPhone);


}
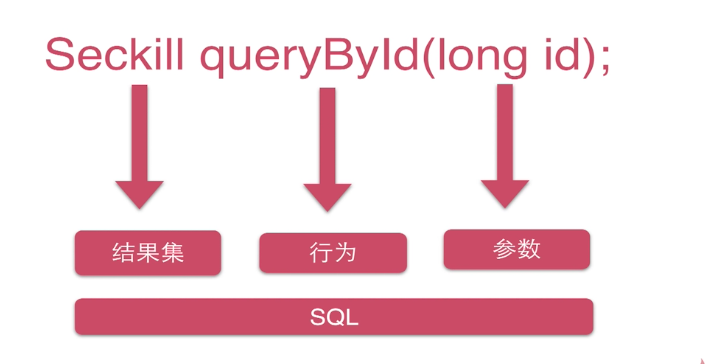
怎么实现数据库和对象之间的映射
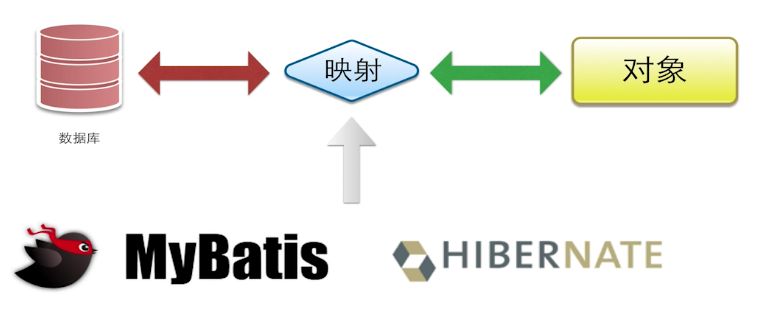
我们在数据库中存储我们需要的数据,创建类模型,我们怎么才能把两者关联起来呢,答案就是Mybatis或者Hibernate,我们使用的是mybatis。
关于SQL语句写在哪儿?
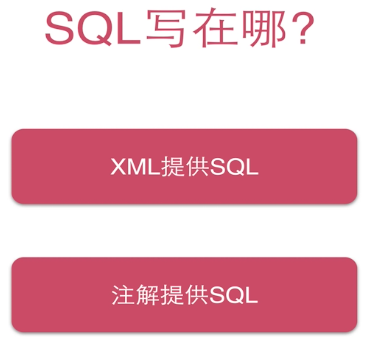
有两种实现的方式:①在XML中以标签的形式写SQL语句;②以JAVA风格的形式用注解写SQL。但是推荐用XML写SQL.Why?因为在很多时候我们的sql语句比较复杂,有连接啥的,在xml写比较方便;虽然使用注解也简单,但是当sql语句复杂时,那么写起了也就没有那么方便了。
怎么实现DAO接口?
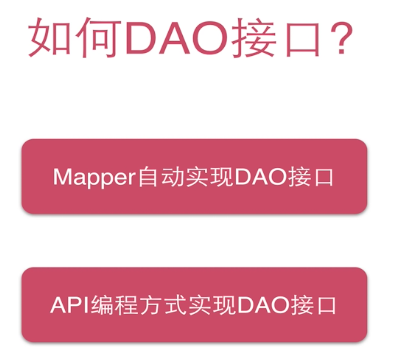
我们采用的是Mapper自动实现DAO的接口,只需要配置一下就可以,大大的减少了代码量。
开始配置
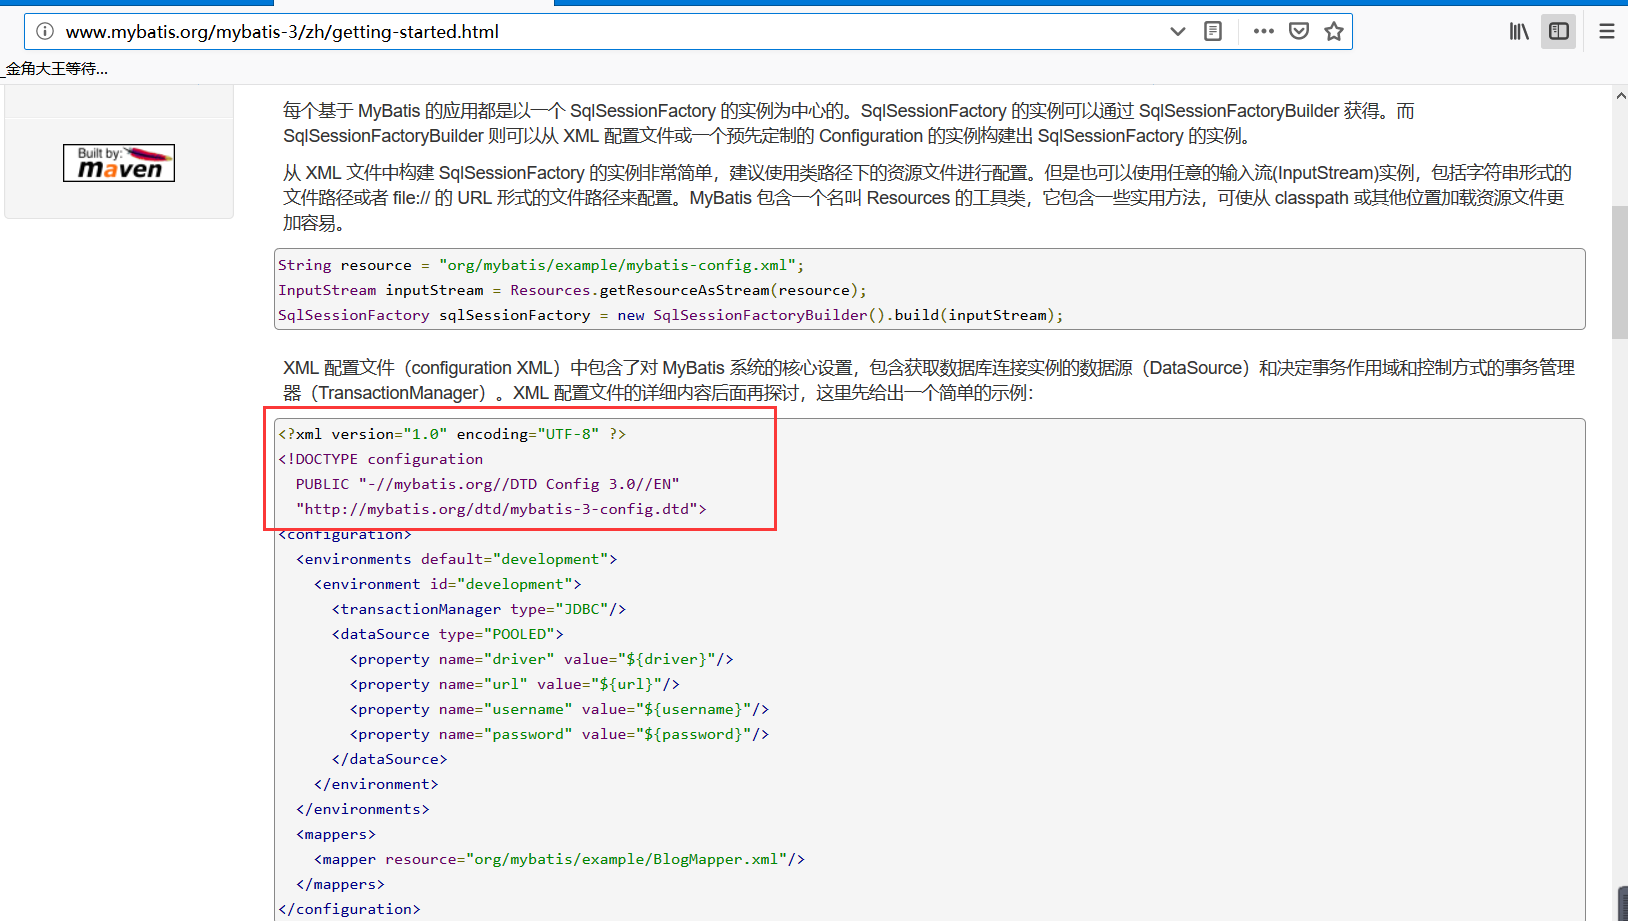
在resources中创建一个mybatis文件夹存放mybatis 的配置;再新建mybatis-config.xml。然后我们参考官网http://www.mybatis.org/mybatis-3/zh/getting-started.html的文档找到他的配置文件头。如下
为什么我们要参照官网配置?
因为官网更具有权威性,而且可以获得最新的变动。
将头文件复制到我们的mybatis-config.xml中。我们需要在这个配置中,要配置列名替换列名、驼峰命名的转换、开启JDBC的getGeneratedKeys获得数据库自增主键值 。
<?xml version="1.0" encoding="UTF-8" ?>
<!DOCTYPE configuration
  PUBLIC "-//mybatis.org//DTD Config 3.0//EN"
  "http://mybatis.org/dtd/mybatis-3-config.dtd">
  <configuration>
          <!-- 配置myBatis全局的属性 -->
          <settings>
              <!-- 默认是false:底层都是使用JDBC,意思是使用JDBC的getGeneratedKeys获得数据库自增主键值 -->
              <setting name="useGeneratedKeys" value="true"></setting>

              <!-- 使用列名替换列名 默认是:true
                  select name as title from table;
              -->
              <setting name="useColumnLabel" value="true"></setting>
              <!-- 开启驼峰命名转换:  -->
              <setting name="mapUnderscoreToCamelCase" value="true"></setting>
          </settings>
  </configuration>
我们开始配置各个DAO的mybatis的mapper适配,命名规则还是和DAO名称一样只是后缀不一样,方面辨认。在resources目录下新建mapper文件夹,再建SeckillDao.xml和SuccessKill.xml。
我们在两个配置文件中分别配置各自的sql语句。仍然参考官网http://www.mybatis.org/mybatis-3/zh/getting-started.html找到mapper的文件头复制。
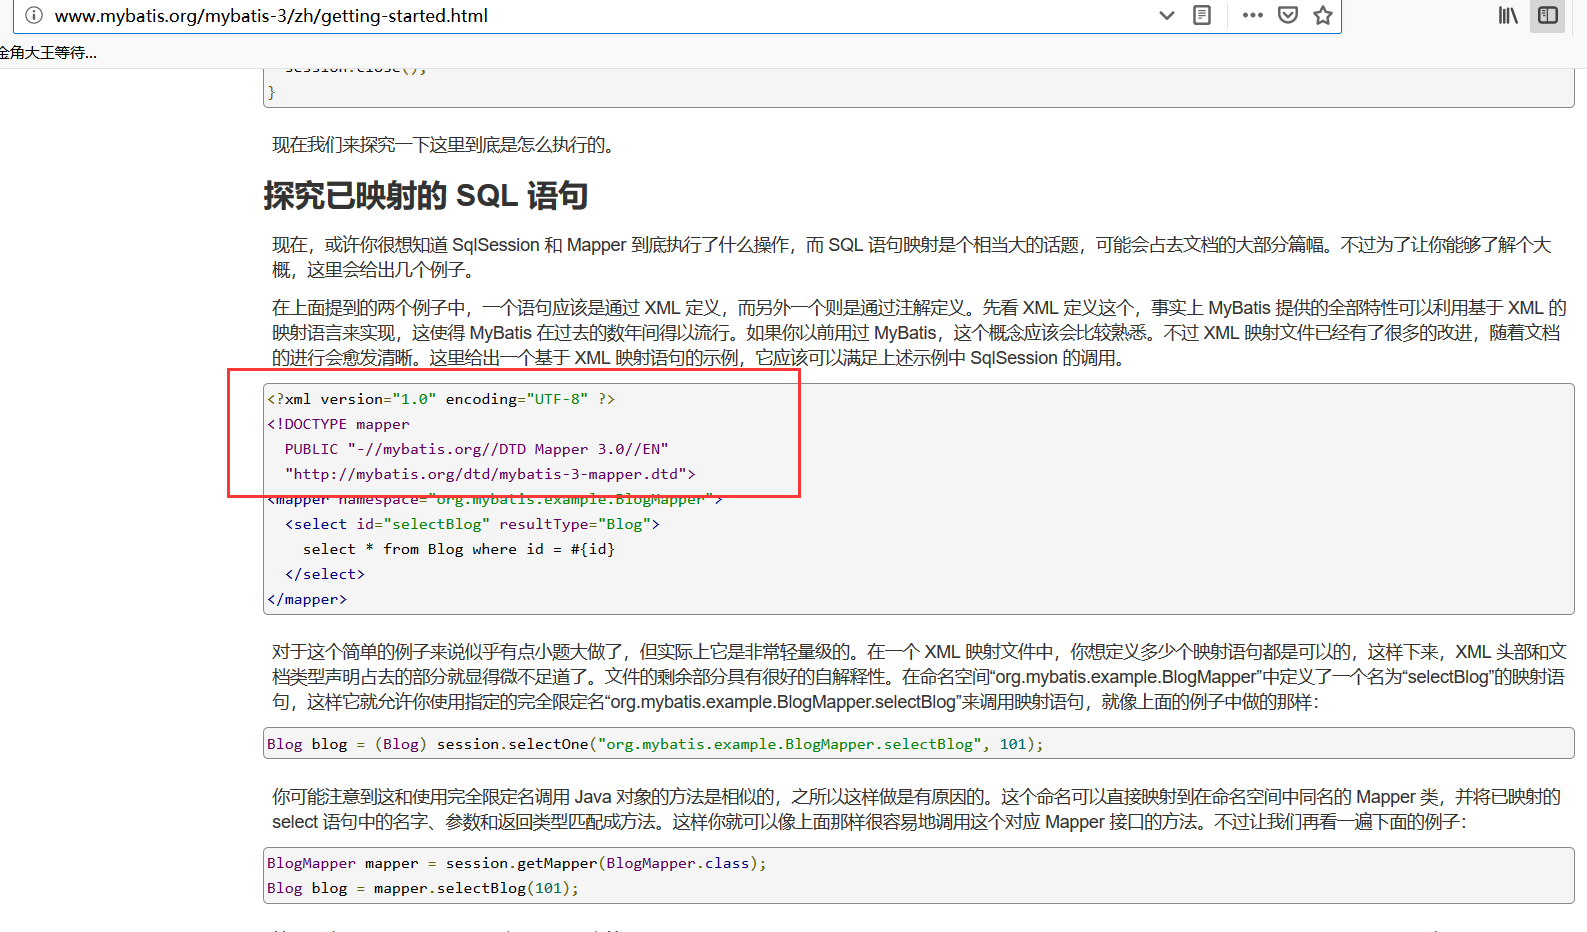
首先我们需要配置mapper,在<mapper></mapper>中添加他们各自的命名空间namespace,来映射,然后具体实现相应的SQL功能。
<?xml version="1.0" encoding="UTF-8"?>
<!DOCTYPE mapper
    PUBLIC "-//mybatis.org//DTD Mapper 3.0//EN"
    "http://mybatis.org/dtd/mybatis-3-mapper.dtd">
<mapper namespace="org.seckill.dao.SeckillDao">
    <!-- 目的:为DAO提供sql语句配置,所以第一个就是命名空间 -->

    <update id="reduceNumber">
            update
                seckill
            set
                number=number-1
            where seckill_id = #{seckillId}
            and start_time <![CDATA[<= ]]>#{killTime}
            and end_time >= #{killTime}
            and number>0;
    </update>

    <select id="queryById" resultType="SecKill" parameterType="long">
            select seckill_id,name,number,start_time,end_time,create_time
            from seckill
            where seckill_id=#{seckillId};
    </select>

    <select id="queryAll" resultType="SecKill">
            select seckill_id,name,number,start_time,end_time,create_time
            from seckill
            order by create_time desc
            limit #{offset},#{limit};

    </select>

</mapper>
<?xml version="1.0" encoding="UTF-8"?>
<!DOCTYPE mapper
    PUBLIC "-//mybatis.org//DTD Mapper 3.0//EN"
    "http://mybatis.org/dtd/mybatis-3-mapper.dtd">
<mapper namespace="org.seckill.dao.SuccessKillDao">


    <!-- 主键冲突,报错 -->
    <insert id="insertSuccessKilled">
            insert ignore into success_killed(seckill_id,user_phone,state)
            values (#{seckillId},#{userPhone},0)
    </insert>

    <select id="queryByIdWithSecKill" resultType="SuccessKill">
            select
            sk.seckill_id,
            sk.user_phone,
            sk.create_time,
            sk.state,
            s.seckill_id "seckill.seckill_id",
            s.name "seckill.name",
            s.number "seckill.number",
            s.start_time "seckill.start_time",
            s.end_time "seckill.end_time",
            s.create_time "seckill.create_time"
            from success_killed sk
            inner join seckill s on sk.seckill_id=s.seckill_id
            where sk.seckill_id=#{seckillId}
            and sk.user_phone=#{userPhone};

    </select>

</mapper>
Mybatis整合Spring
我们需要mybatis和spring整合需要的是更少的配置,比如我们用自动扫描代替配置引入,DAO的自动实现。
在resources中新建spring文件夹来存放我们的springDao-config.xml.
我们首先要配置4个东西:①配置数据库的相关的参数;②配置数据库连接池c3p0;③配置sqlSessionFactory对象用来扫描配置。④配置扫描DAO接口包,并且动态注入到spring的Ioc容器中。
关于Spring的可以去了解下面的博客。传送门奉上,觉得不错点个推荐哦。
新建jdbc.properties。配置mysql基本属性。

springDao-config.xml配置如下:
<?xml version="1.0" encoding="UTF-8"?>
<beans xmlns="http://www.springframework.org/schema/beans"
    xmlns:xsi="http://www.w3.org/2001/XMLSchema-instance" xmlns:context="http://www.springframework.org/schema/context"
    xsi:schemaLocation="http://www.springframework.org/schema/beans
http://www.springframework.org/schema/beans/spring-beans.xsd
http://www.springframework.org/schema/context
http://www.springframework.org/schema/context/spring-context.xsd">
    <!-- 配置整合mybatis过程 -->
    <!-- 1.配置数据库相关参数 -->
    <context:property-placeholder location="classpath:jdbc.properties"/>
    <!-- properties的属性:#{url} -->

    <!-- 2.数据库连接池 -->
    <bean id="dataSource" class="com.mchange.v2.c3p0.ComboPooledDataSource">
            <!-- 配置连接池属性 -->
            <property name="driverClass" value="${jdbc.driver}"></property>
            <property name="jdbcUrl" value="${jdbc.url}"></property>
            <property name="user" value="${jdbc.user}"></property>
            <property name="password" value="${jdbc.pass}"></property>
            <!-- c3p0连接池的私有属性  -->

            <!-- 在小的项目默认是私有属性就已经够用 -->
            <property name="maxPoolSize" value="30"></property>
            <!-- 默认是15 -->
            <property name="minPoolSize" value="10"></property>
            <!-- 默认是3 -->
            <property name="autoCommitOnClose" value="false"></property>
            <!-- 关闭不自动commit 默认值是false -->
            <property name="checkoutTimeout" value="1000"></property>

            <property name="acquireRetryAttempts" value="2"></property>
            <!-- 当获取连接失败重试的次数 -->

    </bean>

    <!-- 3.配置SqlSessionFactory对象 -->
    <bean id="sqlSessionFactory" class="org.mybatis.spring.SqlSessionFactoryBean">
            <!-- 注入数据库连接池 -->
            <property name="dataSource" ref="dataSource"></property>
            <!-- 配置mybatis全局配置文件 -->
            <property name="configLocation" value="classpath:mybatis/mybatis-config.xml"></property>
            <!-- 扫描entity包,使用别名 -->
            <property name="typeAliasesPackage" value="org.seckill.entity"></property>
            <!-- 扫描sql配置文件:mapper需要的Xml文件 -->
            <property name="mapperLocations" value="classpath:mapper/*.xml"></property>
    </bean>

    <!-- 4.配置扫描DAO接口包,目的是动态实现Dao接口并注入到Spring容器中 -->

    <bean class="org.mybatis.spring.mapper.MapperScannerConfigurer">
            <!-- 注入sqlSessionFactory -->
            <property name="sqlSessionFactoryBeanName" value="sqlSessionFactory"></property>
            <!-- 有可能开始的时候拿到的JDBC的数据还没有初始化,采用BeanName的方式后处理。 -->

            <property name="basePackage" value="org.seckill.dao"></property>
    </bean>


</beans>
建立测试类
IDEA是直接在类名右键go->test就可以了,在eclipse中点击类文件new->java->Junit->Junit Test Case。
package org.seckill.dao;/*
 * 配置spring和Junit整合,Junit启动时加载springIOc
 * SPring-test,jUnit
 */
@RunWith(SpringJUnit4ClassRunner.class)
//告诉Junit Spring配置文件
@ContextConfiguration({"classpath:spring/springDao-config.xml"})
public class SeckillDaoTest {

    //注入Dao依赖

    @Resource
    private SeckillDao seckillDao;

    @Test
    public void testQueryById() throws Exception {
        long id=1000;

        SecKill secKill=seckillDao.queryById(id);
        System.out.println(secKill.getName());
        System.out.println(secKill);
        //fail("Not yet implemented");
    }

    @Test
    public void testQueryAll() {
        List<SecKill> list=seckillDao.queryAll(0, 100);
        for(SecKill secKill:list)
            System.out.println(secKill);
    }

    /*
     *
     */

    @Test
    public void testReduceNumber() {
        Date date =new Date();

        int count=seckillDao.reduceNumber(1000, date);

        System.out.println("update:  "+count);
    }


}
@RunWith(SpringJUnit4ClassRunner.class)
@ContextConfiguration({"classpath:spring/springDao-config.xml"})
public class SuccessKillDaoTest {

    @Resource
    private SuccessKillDao successKillDao;

    @Test
    public void testInsertSuccessKilled() {

        long seckillId=1000L;
        long userPhone=18162793488L;
        int count=successKillDao.insertSuccessKilled(seckillId, userPhone);
        System.out.println("Insert Number:"+count);
    }

    @Test
    public void testQueryByIdWithSuccessKill() {
        //System.out.println("dada");
        long seckillId=1000L;
        long userPhone=18162793488L;

        SuccessKill successKill=successKillDao.queryByIdWithSecKill(seckillId, userPhone);
        System.out.println(successKill);
        System.out.println(successKill.getSecKill());

    }

}
测试数据:
SeckillDaoTest
SuccessKillDaoTest
总结
- 无论是类名还是函数名,还是配置的id名,我们都应该按照驼峰规则来写,我们配置了驼峰的自动转换,有些时候有可能会出现问题,比如在entity中的seckillId在mybatis匹配的时候,他会自动转换成seckill_id,这样和数据的字段一样。
- Dao接口类的方法名与mapper.xml中sql标签的id相同:必须保证一致,不然会报找不到这个类的错误
- 使用@Param注解的问题,因为java对函数的形参没有保存能力,将一个函数的形参都表示成args0,args1......所以我们需要用这个注解告诉容器形参名是什么,如果不这样做的话,会导致找不到这个对应的参数而出错。
- 关于JDBC配置的问题,如果使用user在注解中value="${username}",的话,那么容器会去取电脑主机的用户名,那么会导致数据库连接不上的问题,所以我们直接在配置的参数前添加jdbc.。为了美观,都添加。
- 关于Pom依赖包版本问题。这个是一个巨坑,为什么呢。因为eclipse不报错,不报异常,就是没有结果,看日志也看不出来,最后我找我同学帮我看,他用的是IDEA,直接标红报错就解决了,当时直接升级一下版本就可以了。现在我都在想要不要跑去用IDEA算了,哈哈,说不定下一篇博客就是用IDEA写的。
- 另外一个就是自己手残写错名称导致的不必要的错误,这个都简单看日志报错就能找到。
- properties的数据的编码是utf8,不是utf-8。真是写错一个看半天。
我是萌新,博客中估计还会出现缺漏,望大佬们指点指点。
帮我点个赞!鼓励一下呗


 2032
2032


 被折叠的 条评论
为什么被折叠?
被折叠的 条评论
为什么被折叠?
 到【灌水乐园】发言


