


作者:AaronSimon 来源:https://blog.csdn.net/AaronSimon/article/details/83657612
Apollo(阿波罗)是携程框架部门研发的分布式配置中心,能够集中化管理应用不同环境、不同集群的配置,配置修改后能够实时推送到应用端,并且具备规范的权限、流程治理等特性,适用于微服务配置管理场景。
服务端基于Spring Boot和Spring Cloud开发,打包后可以直接运行,不需要额外安装Tomcat等应用容器。
Java客户端不依赖任何框架,能够运行于所有Java运行时环境,同时对Spring/Spring Boot环境也有较好的支持。
.Net客户端不依赖任何框架,能够运行于所有.Net运行时环境。
如果想要深入了解,可以到github上参见Apollo配置中心,官网的介绍很详细。本章主要讲述Spring Boot 2.0 整合Apollo配置中心。
一、Apollo配置中心服务端(来源于官网)
本文的重点在于Apollo在客户端的使用,所以Apollo服务端使用的是官网提供的 Quick Start(针对本地测试使用),后续文章会专门讲述Apollo服务端在分布式环境下的部署。
1.1 准备工作
Java
Apollo服务端要求Java 1.8+,客户端要求Java 1.7+,笔者本地使用的是Java 1.8。MySQL
Apollo的表结构对timestamp使用了多个default声明,所以需要5.6.5以上版本。笔者本地使用的是8.0.13版本下载 Quick Start
官网为我们准备了 Quick Start 安装包。大家只需要下载到本地,就可以直接使用,免去了编译、打包过程。大家可以到github下载,也可以通过百度云盘下载
1.2 安装步骤
1.2.1 创建数据库
Apollo服务端共需要两个数据库:ApolloPortalDB和ApolloConfigDB,官网把数据库、表的创建和样例数据都分别准备了sql文件(在下载的 Quick Start 安装包的sql目录下),只需要导入数据库即可。
1.2.1.1 创建ApolloPortalDB
通过各种Mysql客户端(Navicat,DataGrip等)导入sql/apolloportaldb.sql即可
下面以MySQL原生客户端为例:
source /your_local_path/sql/apolloportaldb.sql导入成功后,可以通过执行以下sql语句来验证:
select `Id`, `AppId`, `Name` from ApolloPortalDB.App;`Id`, `AppId`, `Name` from ApolloPortalDB.App;| Id | AppId | Name |
|---|---|---|
| 1 | SampleApp | Sample App |
1.2.1.2 创建ApolloConfigDB
通过各种Mysql客户端(Navicat,DataGrip等)导入sql/apolloconfigdb.sql即可
下面以MySQL原生客户端为例:
source /your_local_path/sql/apolloconfigdb.sql导入成功后,可以通过执行以下sql语句来验证:
select `NamespaceId`, `Key`, `Value`, `Comment` from ApolloConfigDB.Item;`NamespaceId`, `Key`, `Value`, `Comment` from ApolloConfigDB.Item;| NamespaceId | Key | Value | Comment |
|---|---|---|---|
| 1 | timeout | 100 | sample |
1.2.2 配置数据库连接信息
Apollo服务端需要知道如何连接到你前面创建的数据库,所以需要编辑demo.sh,修改ApolloPortalDB和ApolloConfigDB相关的数据库连接串信息。
#apollo config db infoapollo_config_db_url=jdbc:mysql://localhost:3306/ApolloConfigDB?characterEncoding=utf8apollo_config_db_username=用户名apollo_config_db_password=密码(如果没有密码,留空即可)# apollo portal db infoapollo_portal_db_url=jdbc:mysql://localhost:3306/ApolloPortalDB?characterEncoding=utf8apollo_portal_db_username=用户名apollo_portal_db_password=密码(如果没有密码,留空即可)
apollo_config_db_url=jdbc:mysql://localhost:3306/ApolloConfigDB?characterEncoding=utf8
apollo_config_db_username=用户名
apollo_config_db_password=密码(如果没有密码,留空即可)

# apollo portal db info
apollo_portal_db_url=jdbc:mysql://localhost:3306/ApolloPortalDB?characterEncoding=utf8
apollo_portal_db_username=用户名
apollo_portal_db_password=密码(如果没有密码,留空即可)
1.3 启动Apollo配置中心
1.3.1 确保端口未被占用
Quick Start脚本会在本地启动3个服务,分别使用8070, 8080, 8090端口,请确保这3个端口当前没有被使用。例如,在Linux/Mac下,可以通过如下命令检查:
lsof -i:8080在windows下,可以通过如下命令检查:
netstat -aon|findstr "8080"1.3.2 执行启动脚本
在Quick Start目录下执行如下命令:
./demo.sh start当看到如下输出后,就说明启动成功了!
==== starting service ====Service logging file is ./service/apollo-service.logStarted [10768]Waiting for config service startup.......Config service started. You may visit http://localhost:8080 for service status now!Waiting for admin service startup....Admin service started==== starting portal ====Portal logging file is ./portal/apollo-portal.logStarted [10846]Waiting for portal startup......Portal started. You can visit http://localhost:8070 now!file is ./service/apollo-service.log
Started [10768]
Waiting for config service startup.......
Config service started. You may visit http://localhost:8080 for service status now!
Waiting for admin service startup....
Admin service started
==== starting portal ====
Portal logging file is ./portal/apollo-portal.log
Started [10846]
Waiting for portal startup......
Portal started. You can visit http://localhost:8070 now!
1.3.3 异常排查
如果启动遇到了异常,可以分别查看service和portal目录下的log文件排查问题。
注: 在启动apollo-configservice的过程中会在日志中输出eureka注册失败的信息,如com.sun.jersey.api.client.ClientHandlerException: java.net.ConnectException: Connection refused。需要注意的是,这个是预期的情况,因为apollo-configservice需要向Meta Server(它自己)注册服务,但是因为在启动过程中,自己还没起来,所以会报这个错。后面会进行重试的动作,所以等自己服务起来后就会注册正常了。
1.4 使用Apollo配置中心
1.4.1 查看样例配置
浏览器访问
http://localhost:8070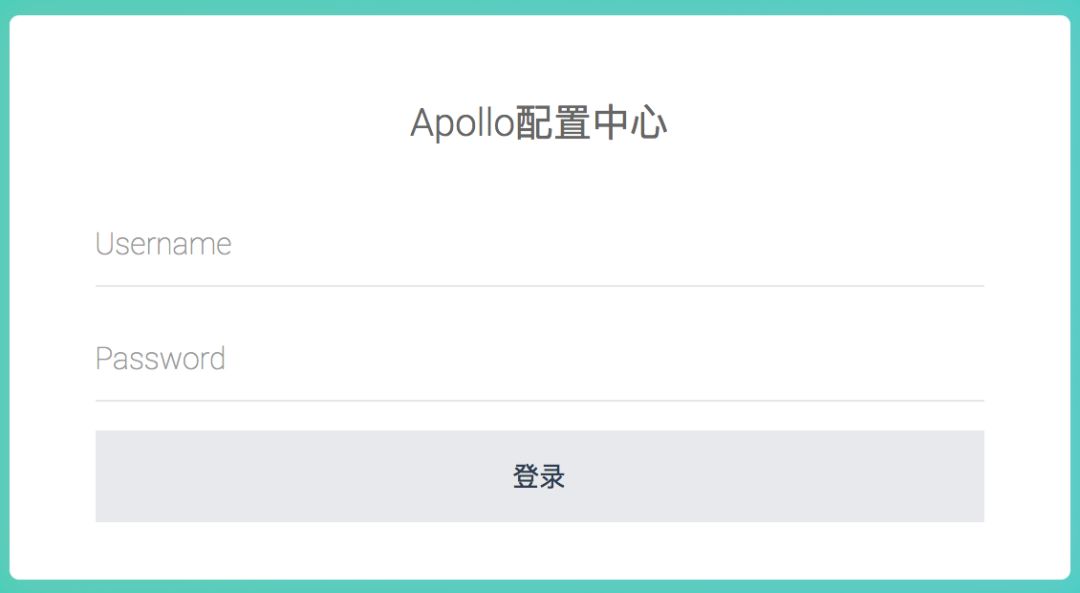
Quick Start集成了Spring Security简单认证,更多信息可以参考Portal 实现用户登录功能输入用户名apollo,密码admin登录
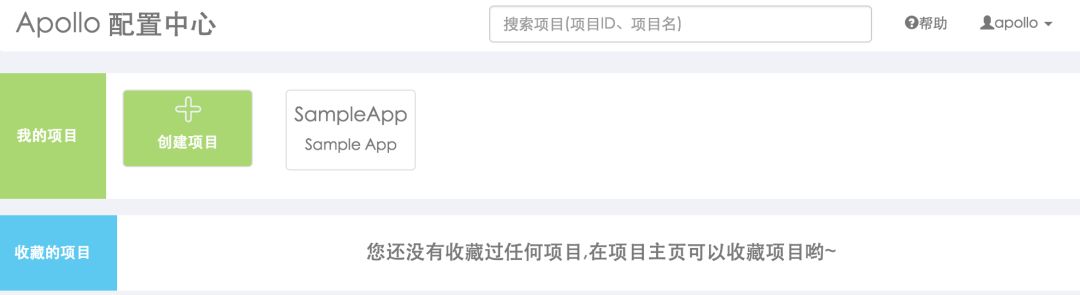
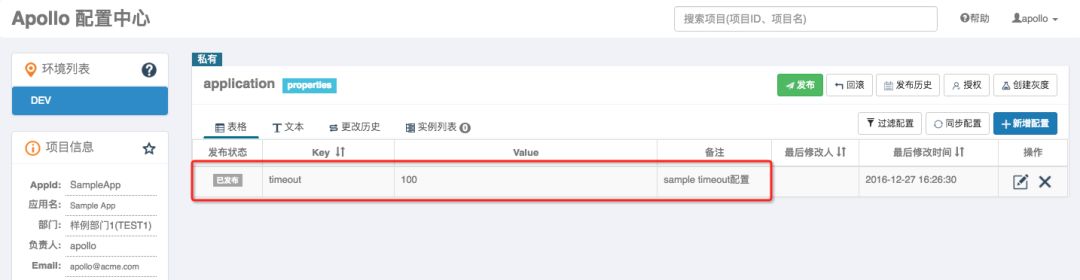
配置中心中包含一个默认的项目SampleApp点击SampleApp进入配置界面,可以看到当前有一个配置timeout=100
如果提示系统出错,请重试或联系系统负责人,请稍后几秒钟重试一下,因为通过Eureka注册的服务有一个刷新的延时。
1.4.2 新增项目配置
我们的客户端使用apollo需要新增相关的项目配置。
点击新建项目
点击提交,创建完成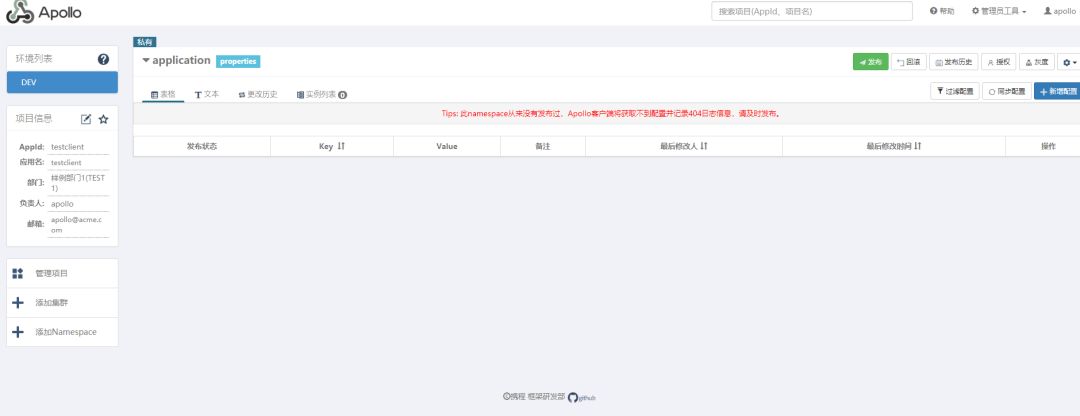
应用ID:这个ID是应用的唯一标识
应用名称:应用的名称,会展示在配置中心的首页上
新增配置信息
点击新增配置,填写配置信息 点击提交,此时配置还未生效。
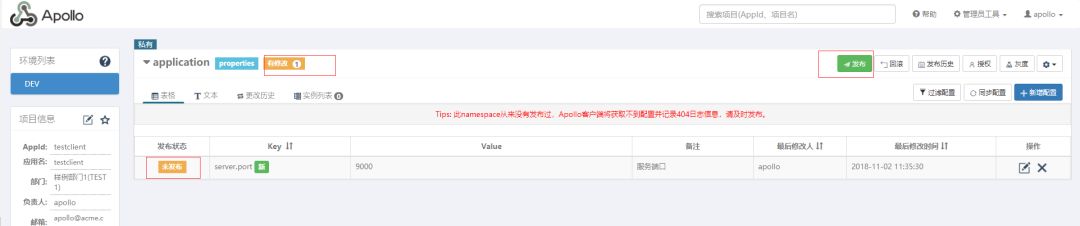
发布配置
点击发布,配置立刻生效
回滚
如果配置做了修改之后,发现配置更改错误,这个时候可以使用回滚功能,回到上一个配置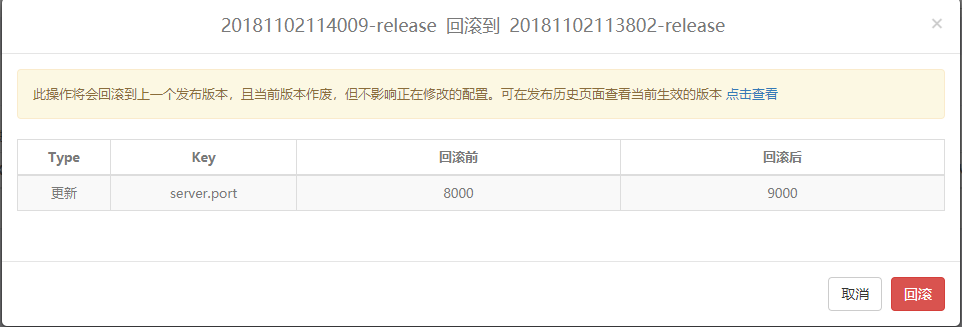
二、Apollo配置中心客户端
我们客户端基于Spring Boot 2.0搭建,开发工具是InteIIij IDEA。新建一个项目,项目名称为apollo-client
2.1 客户端搭建
添加Apollo客户端依赖
<dependency> <groupId>com.ctrip.framework.apollo</groupId> <artifactId>apollo-client</artifactId> <version>1.1.1</version></dependency>
<groupId>com.ctrip.framework.apollo</groupId>
<artifactId>apollo-client</artifactId>
<version>1.1.1</version>
</dependency>
添加配置信息
# 应用ID(在Apollo服务端新增项目添加的应用ID)app.id=testclient# apollo-configservice地址apollo.meta=http://127.0.0.1:8080开启Apollo客户端 应用ID(在Apollo服务端新增项目添加的应用ID)
app.id=testclient
# apollo-configservice地址
apollo.meta=http://127.0.0.1:8080开启Apollo客户端在项目的启动类上添加@EnableApolloConfig注解
新增一个测试接口
@RequestMapping("/index") public String hello(){ return "hello man"; }"/index")
public String hello(){
return "hello man";
 }
启动服务测试
在Apollo配置中心中,我们对该项目有一条配置server.port = 9000,启动服务,访问http://localhost:9000/index,返回hello man。证明,客户端是从服务端获取的配置。
2.2 客户端用法
在上一节,我们简单的搭建了客户端,成功的使用服务端配置。Apollo为我们提供的使用方式有很多种,下面只介绍Spring Boot 2.0环境下的使用方式。
2.2.1 Spring Placeholder的使用
Spring应用通常会使用Placeholder来注入配置,使用的格式形如${someKey:someDefaultValue},如${timeout:100}。冒号前面的是key,冒号后面的是默认值(建议在实际使用时尽量给出默认值,以免由于key没有定义导致运行时错误)。Apollo从v0.10.0开始的版本支持placeholder在运行时自动更新。如果需要关闭placeholder在运行时自动更新功能,可以通过以下两种方式关闭:
通过设置
System Property apollo.autoUpdateInjectedSpringProperties,如启动时传入-Dapollo.autoUpdateInjectedSpringProperties=false通过设置META-INF/app.properties中的
apollo.autoUpdateInjectedSpringProperties=false
2.2.1.1 Java Config使用方式
新建配置类
JavaConfigBean如下:/** * Java Config方式 * * @author simon * @create 2018-11-02 15:00 **/@Configurationpublic class JavaConfigBean { @Value("${timeout:20}") private int timeout; public int getTimeout() { return timeout; }}
@Configuration
public class JavaConfigBean {
@Value("${timeout:20}")
private int timeout;
public int getTimeout() {
return timeout;
}
}新增访问端点
//1.Java Config方式 @Autowired JavaConfigBean javaConfigBean; @RequestMapping("/index1") public String hello1(){ return javaConfigBean.getTimeout()+""; }
@Autowired
 JavaConfigBean javaConfigBean;

@RequestMapping("/index1")
public String hello1(){
return javaConfigBean.getTimeout()+"";
 }
测试
浏览器访问http://127.0.0.1:8080/index1,正确返回配置的值
2.2.1.2 ConfigurationProperties使用方式
Spring Boot提供了@ConfigurationProperties把配置注入到bean对象中。Apollo也支持这种方式,下面的例子会把redis.cache.expireSeconds和redis.cache.commandTimeout分别注入到SampleRedisConfig的expireSeconds和commandTimeout字段中。
新增配置类
SampleRedisConfig如下:/** * ConfigurationProperties使用方式 * * @author simon * @create 2018-11-02 9:30 **/@Configuration@ConfigurationProperties(prefix = "redis.cache")public class SampleRedisConfig { private int expireSeconds; private int commandTimeout; public void setExpireSeconds(int expireSeconds) { this.expireSeconds = expireSeconds; } public void setCommandTimeout(int commandTimeout) { this.commandTimeout = commandTimeout; } public int getExpireSeconds() { return expireSeconds; } public int getCommandTimeout() { return commandTimeout; }}
@Configuration
@ConfigurationProperties(prefix = "redis.cache")
public class SampleRedisConfig {
private int expireSeconds;
private int commandTimeout;
public void setExpireSeconds(int expireSeconds) {
this.expireSeconds = expireSeconds;
}
public void setCommandTimeout(int commandTimeout) {
this.commandTimeout = commandTimeout;
}
public int getExpireSeconds() {
return expireSeconds;
}
public int getCommandTimeout() {
return commandTimeout;
}
}
新增访问端点
//2. ConfigurationProperties使用方式 @Autowired SampleRedisConfig sampleRedisConfig; @RequestMapping("/index2") public String hello2(){ return sampleRedisConfig.getCommandTimeout()+"--"+sampleRedisConfig.getExpireSeconds(); }
@Autowired
 SampleRedisConfig sampleRedisConfig;

@RequestMapping("/index2")
public String hello2(){
return sampleRedisConfig.getCommandTimeout()+"--"+sampleRedisConfig.getExpireSeconds();
 }
测试
浏览器访问http://127.0.0.1:8080/index2,正确返回配置的值
注: @ConfigurationProperties如果需要在Apollo配置变化时自动更新注入的值,需要配合使用EnvironmentChangeEvent或RefreshScope。这个我会在后续文章中详细描述。
2.2.2 Spring Annotation支持
Apollo同时还增加了几个新的Annotation来简化在Spring环境中的使用。
@ApolloConfig用来自动注入Config对象@ApolloConfigChangeListener用来自动注册ConfigChangeListener@ApolloJsonValue用来把配置的json字符串自动注入为对象
2.2.2.1 @ApolloConfig的使用
新增访问端点
// 3. @ApolloConfig使用 @ApolloConfig private Config config; @RequestMapping("/index3") public String hello3(){ Set <String> propertyNames = config.getPropertyNames(); propertyNames.forEach(key -> { System.err.println(key+"="+config.getIntProperty(key,0)); }); return propertyNames.toString(); }
@ApolloConfig
private Config config;

@RequestMapping("/index3")
public String hello3(){
 Set <String> propertyNames = config.getPropertyNames();
 propertyNames.forEach(key -> {
 System.err.println(key+"="+config.getIntProperty(key,0));
 });
return propertyNames.toString();
 }
测试
浏览器访问http://127.0.0.1:8080/index3,正确打印配置的值redis.cache.commandTimeout=3000redis.cache.expireSeconds=20server.port=800timeout=200
server.port=800
timeout=200
@ApolloConfigChangeListener的使用
新增以下代码
@ApolloConfigChangeListener private void someOnChange(ConfigChangeEvent changeEvent) { //update injected value of batch if it is changed in Apollo if (changeEvent.isChanged("timeout")) { System.out.println(config.getIntProperty("timeout", 0)); } }
//update injected value of batch if it is changed in Apollo
if (changeEvent.isChanged("timeout")) {
 System.out.println(config.getIntProperty("timeout", 0));
 }
 }
测试
在Apollo服务端修改timeout配置的值为300,发布后,控制台打印300
2.2.2.3 @ApolloJsonValue的使用
新增User如下:
/** * 用户 * * @author simon * @create 2018-11-02 16:41 **/public class User { private String username; private String password; public String getUsername() { return username; } public void setUsername(String username) { this.username = username; } public String getPassword() { return password; } public void setPassword(String password) { this.password = password; }}
public class User {
private String username;
private String password;

public String getUsername() {
return username;
 }

public void setUsername(String username) {
this.username = username;
 }

public String getPassword() {
return password;
 }

public void setPassword(String password) {
this.password = password;
 }
}
服务端新增配置
jsonBeanProperty=[ { "username": "john", "password": "1234" }, { "username": "simon", "password": "222132" } ]"username": "john", "password": "1234" }, { "username": "simon", "password": "222132" } ]客户端获取配置
//4. @ApolloJsonValue使用@ApolloJsonValue("${jsonBeanProperty:[]}")private List<User> anotherJsonBeans;@RequestMapping("/index4")public void hello4(){ anotherJsonBeans.forEach(item -> { System.err.println(item.getUsername()+"--"+item.getPassword()); });}
@ApolloJsonValue("${jsonBeanProperty:[]}")
private List<User> anotherJsonBeans;

@RequestMapping("/index4")
public void hello4(){
 anotherJsonBeans.forEach(item -> {
 System.err.println(item.getUsername()+"--"+item.getPassword());
 });
}
测试
浏览器访问http://127.0.0.1:8080/index4,正确打印配置的值
源码下载
https://github.com/simondongji/SpringCloudProject/tree/master/apollo
推荐阅读
为什么阿里代码规约要求避免使用 Apache BeanUtils 进行属性复制
Spring Boot MyBatis 动态数据源切换、多数据源,读写分离


 1万+
1万+


 被折叠的 条评论
为什么被折叠?
被折叠的 条评论
为什么被折叠?
 到【灌水乐园】发言


