


文章来源于:https://ssbi-blog.de/technical-topics-english/power-query-editor-using-notepad/
Preface
This post is not new. I published the first version on how to create your own Power Query Editor already in November 2015 on my old blog www.powerbi-usergroup.de. Many things changed since then. First: I changed my blog and created THE SELF-SERVICE-BI BLOG. Second: Many of the details I showed in my older post to create your own editor for Power Query with Notepad++ didn’t work anymore. Several circumstances had changed, so I had to change the post as well. Now let’s go. Get your Power Query Editor ?
Hello Power Query enthusiasts
many of you know that Power Query is an amazing tool for data import and data transformation. It is powerful an easy to use. But there is always a BUT. It is a pain to write custom M code. The Power Query Advanced Editor comes without intellisense (auto completion), no parameter hints, no syntax highlighting, no help texts, which explain what the functions do, no nothing. The fact, that M is case sensitive doesn’t make it easier at all.
In 2015 I read the following article, written by Matt Masson. Matt is a Senior Program Manager at Microsoft and member of the Power BI Developer Team. He showed how to create an editor for Power Query with Notepad++. At that time I did not even know that it was possible to create a custom language in Notepad++. Thanks a lot Matt ?
Matt’s tool already had intellisense and syntax highlighting. What I was still missingwas parameter hints and help texts. The number of Power Query functions are getting more every month and I am always looking for the right function for my specific problem. This is why I was investigating a bit and found a solution, which I hope will be helping others as well.
I use my editor mainly in two scenarios:
Scenario 1: Finding the right function for my problem
Using the editor makes it much easier to find the function that fits your needs. Especially the help texts help you to get more familiar with the M language.
Scenario 2: Taking a look at M code with highlighted keywords and comments

Working with highlighted syntax for Power Query M code
Syntax highlighting helps to keep (or get) an overview over your M code. Commenting becomes more important, the longer and complex your M code gets.
If you are dealing with these scenarios as well and you find my solution interesting, please read further and learn how to get it. It is completely FREE and will take your M Code to the next level ?
Let’s see how to get there.
What you need to do to get your Power Query Editor
Creating your own M editor in Notepad++ is not complicated and can be seperated in the following steps:
- Download Notepad++
- Creating Keywords highlighting via the GUI of Notepad++
- Adding parameter hints and help texts by using a specific XML file
I will guide to create your editor. Stay tuned ?
1. Download Notepad++
Of cause you need to download the free tool Notepad++ (e. g. from here). I installed the first version (“Take this one if you have no idea which one you should take“) on my machine.
2. Creating Keywords highlighting via the GUI of Notepad++
After you installed the software you need to do some modification in Notepad++. Go to Language and choose Define your language…
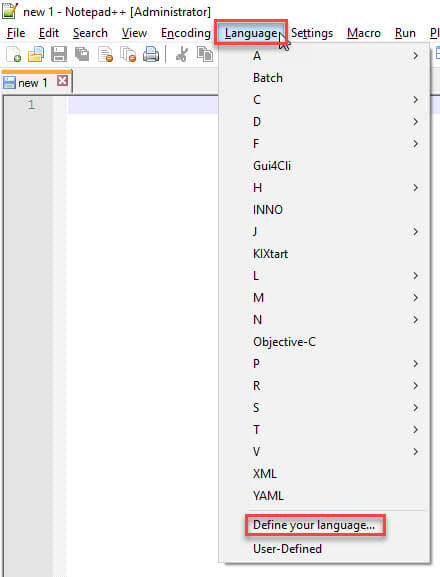
Define your own language
The form for defining the user defined language opens. Choose Create New… and give your language a name. I called it M.
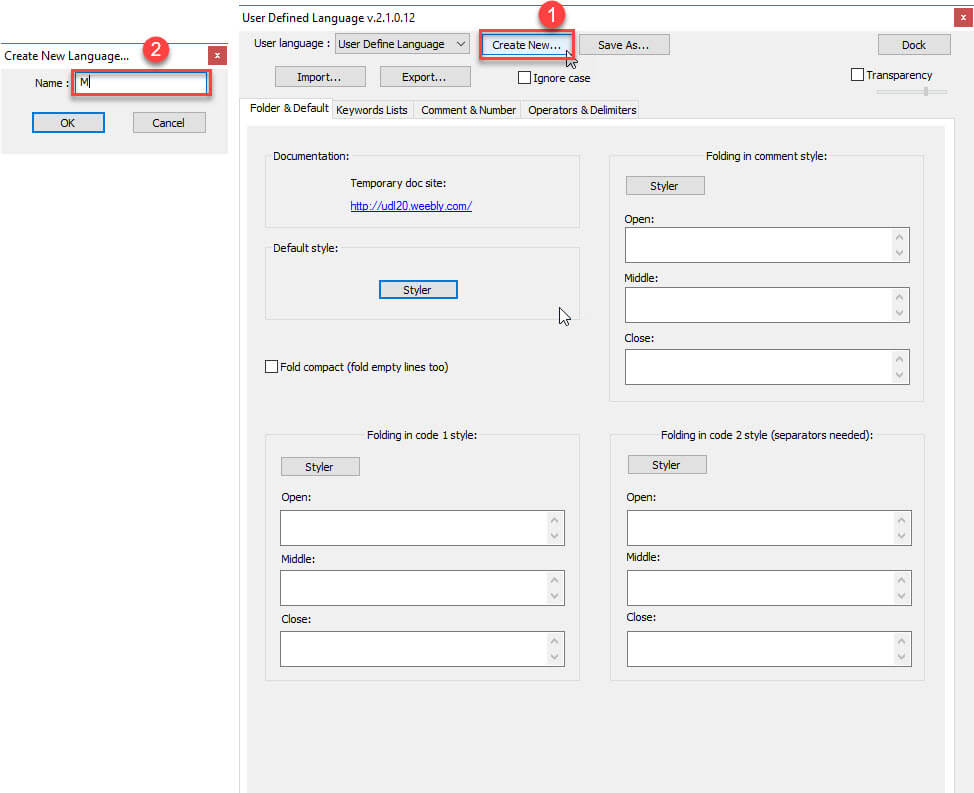
Create a new language: M
Now you have to define special keywords and their styles. Go to tab Keywords Lists and fill the first group with all the functions from Power Query. (I provide this list for you at the very end of this article. Go there and click the link list of functions for keywords highlighting). Mark everything in Excel (ctrl + a), then copy (ctrl + c), move to 1st Group in Notepad++ and paste all the function into that box (ctrl + v). The result looks like this:
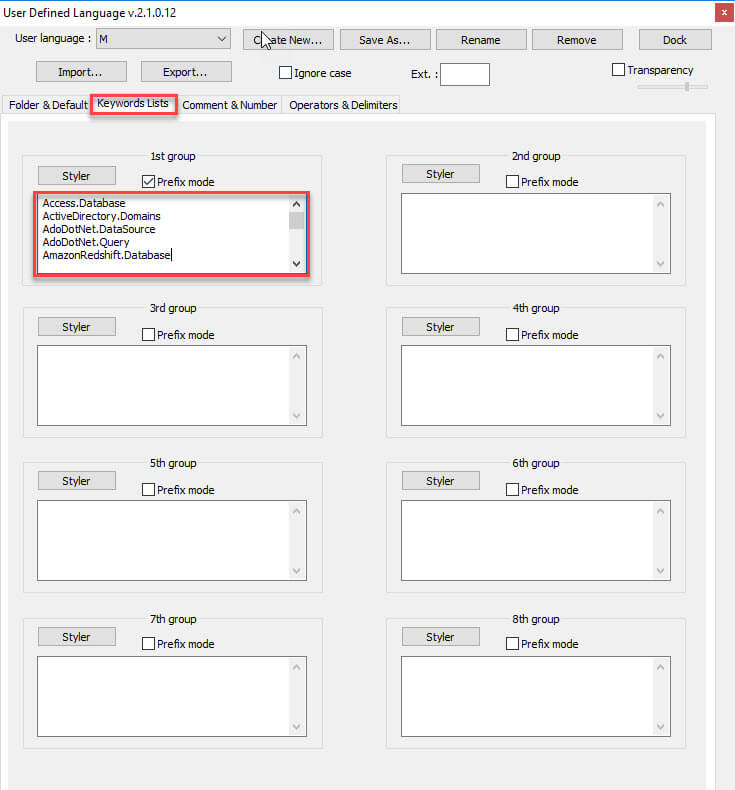
Add all functions as keyword
Then press Styler and style the keywords as you like it. I decide turn all my function keywords in deep blue and bold letter.
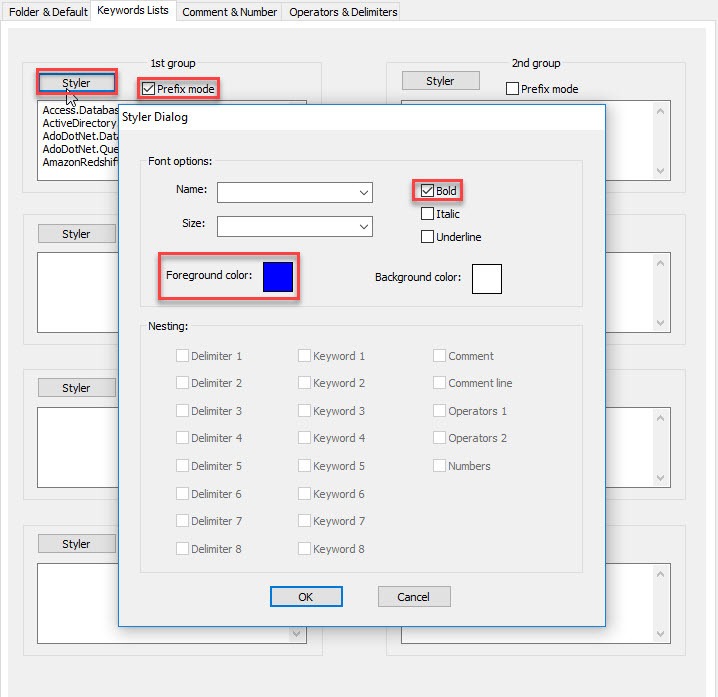
Style your keywords as you like it
Take care also to select the check box for prefix mode. That way your keyword only get styled, when it is used as a prefix. And now comes one of the most important steps: Don’t ignore case ?

M is case sensitive: Don’t ignore case in Power Query
After we have defined all functions as keywords, we need to add some more keywords. The list of keywords is not complete. Feel free to add specific keywords and adjust the styles as you like it.

Define keywords for the Power Query language M
For your convenience copy the following words into the groups:
Group 2: let in
Group 3: each and as error true false is meta not or section shared type
Group 4: if then else
Group 5: try otherwise
Group 6: #binary #date #datetime #datetimezone #duration #infinity #nan #sections #shared #table #time ; Because the elements in the 6th group are used like function, take care to activate Prefix mode.
Now we’re coming to comments:

Adding tokens for commenting
Use Styler in the same way as you did it before. I choose deep green as color for comments. To select Allow folding of comments does exactly what it says. It allows you to fold comments together, if you want to focus on the source code only.
The final step is to define the delimitors. Select the operators and deliminators tab.
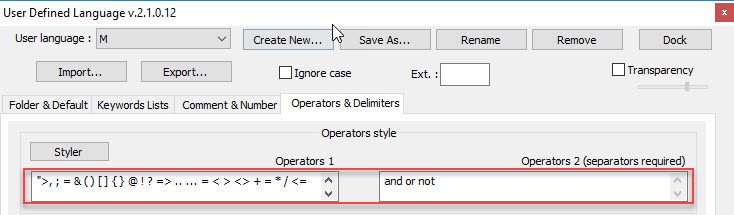
Defining the delimiters
For your convenience copy it from here:
Operators1: “>, ; = & ( ) [ ] { } @ ! ? => .. … = < > <> + = * / <= >=</ #
Operators2: and or not
There is no save button. So just click the cross in the upper right corner to close the dialog.
Adding styles by pushing the button Stylers is recommended… I suggest to use red color for Operators.
Now my code already has intellisense and highlights keywords. But I am still missing parameter hints and help texts.
3. Adding parameter hints and help texts by using a specific XML file
Adding parameter hints and help texts is easy for you. I already created the necessary XML file for you. At the very end of this article you find several links to downloadseveral files. I provide two files for auto completion and help texts: One in German and one in English. Download one of the following two files English auto completion file or German auto completion file from the very end of this article and put it into your APIs folder of Notepad++. On my machine I find it under …
C:\Program Files (x86)\Notepad++\plugins\APIs
Now restart your Notepad++, press ctrl+n for a new window and choose “M” as your language (as you can see in the following screenshot).
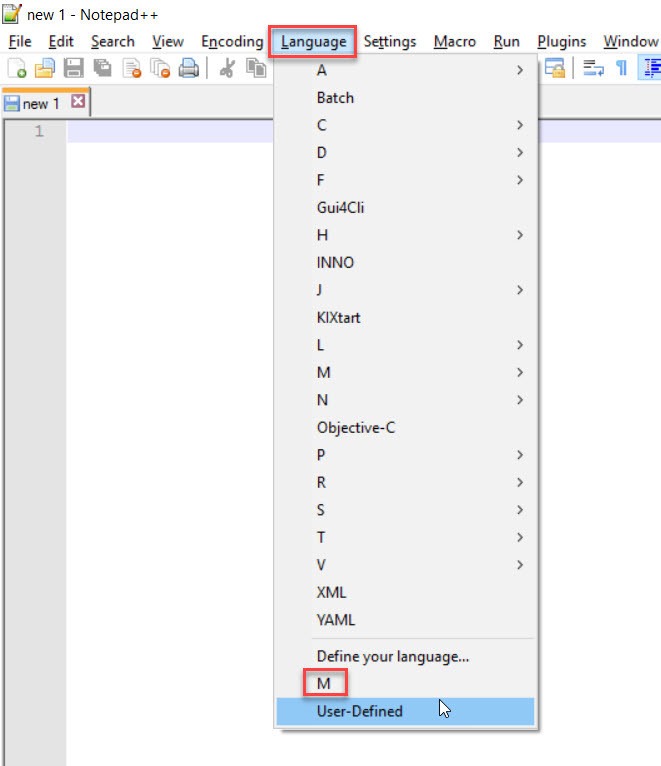
Selecting the M language in Notepad++
Now have fun writing M-statements much easier than before ?
TAKE CARE: The name of the new language and the name of the XML file has to be the same. If you decide to use something different from M, keep this in mind.
After each update of Power BI Desktop I will provide you with new files at the end of this article. Then just do 2 things:
- Download the List of functions for Keywords highlightings. In Notepadd++ go to Language –> Define your language. Then go to tab Keywords Lists, delete all old Keywords from 1st group and put in the new Keywords from the List of functions for Keywords highlightings.

Replacing old Keywords by new
- Download the XML file again and replace the old file (in folder …plugin\APIs\) by the new. That’s it.
See you next time and keep in mind: Sharing is caring. If you liked this article, feel free to share it
Greets from Hamburg,
Lars
Download files
8th of August 2018
This update contains 2 new functions:
- Cdm.MapToEntity()
- Python.Execute()
List of functions for Keywords highlighting


 1366
1366

 被折叠的 条评论
为什么被折叠?
被折叠的 条评论
为什么被折叠?
 到【灌水乐园】发言


