android自定义控件(六) 刷新

转自:http://blog.csdn.net/ethan_xue/article/details/7326395

三种得到LinearInflater的方法

a. LayoutInflater inflater = getLayoutInflater();


b. LayoutInflater localinflater =
  (LayoutInflater)context.getSystemService
(Context.LAYOUT_INFLATER_SERVICE); 


c. LayoutInflater inflater = LayoutInflater.from(context);


onDraw 方法绘图,invalidate刷新界面。
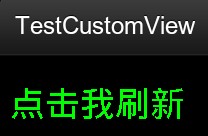
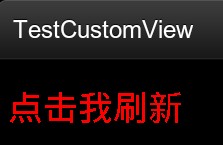
效果图:

点击一下换颜色


onDraw画完图后,给控件设置点击事件 ,将参数传到控件里,然后invalidate刷新

1.onDraw画图,并增加changeColor方法

[java]  view plain copy
  1. public class CusView3 extends View {  
  2.   
  3.     private int color = 0;  
  4.   
  5.     public CusView3(Context context, AttributeSet attrs) {  
  6.         super(context, attrs);  
  7.     }  
  8.   
  9.     @Override  
  10.     protected void onDraw(Canvas canvas) {  
  11.         super.onDraw(canvas);  
  12.         Paint mPaint = new Paint();  
  13.         if (color > 2) {  
  14.             color = 0;  
  15.         }  
  16.         switch (color) {  
  17.         case 0:  
  18.             mPaint.setColor(Color.GREEN);  
  19.             break;  
  20.         case 1:  
  21.             mPaint.setColor(Color.RED);  
  22.             break;  
  23.         case 2:  
  24.             mPaint.setColor(Color.BLUE);  
  25.             break;  
  26.   
  27.         default:  
  28.             break;  
  29.         }  
  30.         mPaint.setStyle(Style.FILL);  
  31.         mPaint.setTextSize(35.0f);  
  32.         canvas.drawText("点击我刷新"1060, mPaint);  
  33.     }  
  34.   
  35.     public void changeColor() { //为了让外面调用  
  36.         color++;  
  37.     }  
  38. }  
2.布局

[html]  view plain copy
  1. <?xml version="1.0" encoding="utf-8"?>  
  2. <LinearLayout xmlns:android="http://schemas.android.com/apk/res/android"  
  3.     android:orientation="vertical"  
  4.     android:layout_width="fill_parent"  
  5.     android:layout_height="fill_parent"  
  6.     >  
  7.     <xue.test.CusView3  
  8.         android:id="@+id/cusview3"  
  9.         android:layout_width="wrap_content"  
  10.         android:layout_height="wrap_content"  
  11.         >  
  12.     </xue.test.CusView3>  
  13. </LinearLayout>  


3.画图后 给控件设置点击事件 ,将参数传到控件里,然后invalidate刷新

[java]  view plain copy
  1. public class TestCustomViewActivity extends Activity {  
  2.     @Override  
  3.     public void onCreate(Bundle savedInstanceState) {  
  4.         super.onCreate(savedInstanceState);  
  5.         setContentView(R.layout.main);  
  6.         view3 = (CusView3) findViewById(R.id.cusview3);  
  7.         // 点击事件  
  8.         view3.setOnClickListener(new View.OnClickListener() {  
  9.   
  10.             @Override  
  11.             public void onClick(View v) {  
  12.                 Message message = new Message();  
  13.                 message.what = 1;  
  14.                 myHandler.sendMessage(message);  
  15.             }  
  16.         });  
  17.     }  
  18.   
  19.     Handler myHandler = new Handler() {  
  20.         // 接收到消息后处理  
  21.         public void handleMessage(Message msg) {  
  22.   
  23.             switch (msg.what) {  
  24.             case 1:  
  25.                 // 调用方法  
  26.                 view3.changeColor();  
  27.                 // 刷新方法  
  28.                 view3.invalidate();  
  29.                 break;  
  30.             }  
  31.             super.handleMessage(msg);  
  32.         }  
  33.     };  
  34.     private CusView3 view3;  
  35.   
  36. }  

至于自定义控件占整屏的问题,可能需要用layoutparams


源码下载: http://download.csdn.net/detail/ethan_xue/4152203

  • 0
    点赞
  • 0
    收藏
    觉得还不错? 一键收藏
  • 1
    评论
Android中常用的自定义刷新方式有两种:下拉刷新和上拉加载更多。 1. 下拉刷新 下拉刷新是指在页面顶部向下拉动时,触发刷新操作,常见的实现方式是使用SwipeRefreshLayout控件,具体实现步骤如下: (1)在布局文件中添加SwipeRefreshLayout控件: ``` <androidx.swiperefreshlayout.widget.SwipeRefreshLayout android:id="@+id/swipe_refresh_layout" android:layout_width="match_parent" android:layout_height="match_parent"> <!-- 添加需要刷新的控件 --> <ListView android:id="@+id/list_view" android:layout_width="match_parent" android:layout_height="match_parent" /> </androidx.swiperefreshlayout.widget.SwipeRefreshLayout> ``` (2)在Activity或Fragment中初始化SwipeRefreshLayout控件,并设置刷新事件: ``` SwipeRefreshLayout swipeRefreshLayout = findViewById(R.id.swipe_refresh_layout); swipeRefreshLayout.setOnRefreshListener(new SwipeRefreshLayout.OnRefreshListener() { @Override public void onRefresh() { // 执行刷新操作 // 刷新完成后调用setRefreshing(false)停止刷新 swipeRefreshLayout.setRefreshing(false); } }); ``` 2. 上拉加载更多 上拉加载更多是指在页面底部向上拉动时,触发加载更多数据的操作,常见的实现方式是使用RecyclerView控件,具体实现步骤如下: (1)在布局文件中添加RecyclerView控件: ``` <androidx.recyclerview.widget.RecyclerView android:id="@+id/recycler_view" android:layout_width="match_parent" android:layout_height="match_parent" /> ``` (2)在Activity或Fragment中初始化RecyclerView控件,并添加滑动监听器: ``` RecyclerView recyclerView = findViewById(R.id.recycler_view); recyclerView.addOnScrollListener(new RecyclerView.OnScrollListener() { @Override public void onScrolled(@NonNull RecyclerView recyclerView, int dx, int dy) { super.onScrolled(recyclerView, dx, dy); // 判断是否已经到达底部 if (!recyclerView.canScrollVertically(1)) { // 加载更多数据 } } }); ``` 需要注意的是,上拉加载更多需要在滑动到底部时才会触发,因此需要在RecyclerView设置adapter时添加FooterView,以提示用户正在加载更多数据。

“相关推荐”对你有帮助么?

  • 非常没帮助
  • 没帮助
  • 一般
  • 有帮助
  • 非常有帮助
提交
评论 1
添加红包

请填写红包祝福语或标题

红包个数最小为10个

红包金额最低5元

当前余额3.43前往充值 >
需支付:10.00
成就一亿技术人!
领取后你会自动成为博主和红包主的粉丝 规则
hope_wisdom
发出的红包
实付
使用余额支付
点击重新获取
扫码支付
钱包余额 0

抵扣说明:

1.余额是钱包充值的虚拟货币,按照1:1的比例进行支付金额的抵扣。
2.余额无法直接购买下载,可以购买VIP、付费专栏及课程。

余额充值