


源码地址 :https://github.com/m15115021148/ShoppingCartDemo
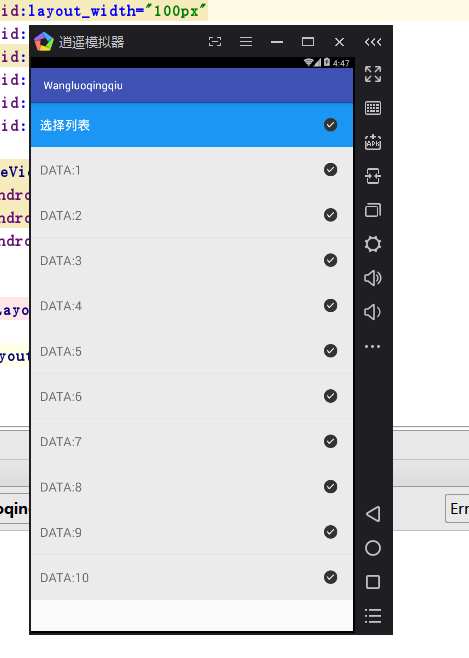
第一步 创建 两个对应的xml 布局 第一个是主布局
<?xml version="1.0" encoding="utf-8"?>
<LinearLayout xmlns:android="http://schemas.android.com/apk/res/android"
    xmlns:app="http://schemas.android.com/apk/res-auto"
    xmlns:tools="http://schemas.android.com/tools"
    android:layout_width="match_parent"
    android:layout_height="match_parent"
    android:orientation="vertical"
    tools:context="com.example.samsung.wangluoqingqiu.CheckActivity">

    <RelativeLayout
        android:layout_width="match_parent"
        android:layout_height="100px"
        android:background="#1c96f5">

        <TextView
            android:layout_width="wrap_content"
            android:layout_height="wrap_content"
            android:layout_alignParentLeft="true"
            android:layout_centerVertical="true"
            android:layout_marginLeft="20px"
            android:text="选择列表"
            android:textColor="#ffffff"
            android:textSize="20sp" />

        <LinearLayout
            android:id="@+id/select_all"
            android:layout_width="100px"
            android:layout_height="match_parent"
            android:layout_alignParentRight="true"
            android:layout_centerVertical="true"
            android:gravity="center"
            android:orientation="vertical">

            <ImageView
                android:layout_width="30px"
                android:layout_height="30px"
                android:background="@drawable/select_bg"
              />

        </LinearLayout>

    </RelativeLayout>

    <ListView
        android:id="@+id/listView"
        android:scrollbars="none"
        android:layout_width="match_parent"
        android:layout_height="match_parent"/>
</LinearLayout>
接下来第二是子布局 对应的是适配器
<?xml version="1.0" encoding="utf-8"?>
<LinearLayout xmlns:android="http://schemas.android.com/apk/res/android"
    android:orientation="vertical"
    android:layout_width="match_parent"
    android:layout_height="match_parent">
    <RelativeLayout
        android:layout_width="match_parent"
        android:layout_height="100px"
        android:background="#55cdcdcd">

        <TextView
            android:id="@+id/name"
            android:layout_width="wrap_content"
            android:layout_height="wrap_content"
            android:layout_alignParentLeft="true"
            android:layout_centerVertical="true"
            android:layout_marginLeft="20px"
            android:text="DATA"
            android:textSize="20sp" />

        <LinearLayout
            android:id="@+id/select"
            android:layout_width="100px"
            android:layout_height="match_parent"
            android:layout_alignParentRight="true"
            android:layout_centerVertical="true"
            android:gravity="center"
            android:orientation="vertical">

            <ImageView
                android:layout_width="30px"
                android:layout_height="30px"
                android:background="@drawable/select_bg"
              />

        </LinearLayout>

    </RelativeLayout>

</LinearLayout>
第二步是对应的主页面 Mainactivity
public class CheckActivity extends AppCompatActivity   implements View.OnClickListener,MyAdapter.OnCallBack{
    private LinearLayout mSelectAll;//选择所有
    private ListView mLv;
    private MyAdapter adapter;
    private List<TypeModel> mList = new ArrayList<>();
    @Override
    protected void onCreate(Bundle savedInstanceState) {
        super.onCreate(savedInstanceState);
        setContentView(R.layout.activity_check);
        mSelectAll = (LinearLayout) findViewById(R.id.select_all);
        mSelectAll.setOnClickListener(this);
        mLv = (ListView) findViewById(R.id.listView);
        for (int i=0;i<10;i++){
            TypeModel model = new TypeModel();
            model.setName("DATA:"+(i+1));
            model.setIsSelect("0");
            mList.add(model);
        }
        initListView();
    }
    private void initListView() {
        adapter = new MyAdapter(this,mList,this);
        mLv.setAdapter(adapter);
    }

    @Override
    public void onClick(View v) {
        if (v == mSelectAll){
            if (mSelectAll.isSelected()){
                mSelectAll.setSelected(false);
                for (TypeModel model:mList){
                    model.setIsSelect("0");
                }
                adapter.notifyDataSetChanged();
            }else{
                mSelectAll.setSelected(true);
                for (TypeModel model:mList){
                    model.setIsSelect("1");
                }
                adapter.notifyDataSetChanged();
            }
        }
    }

    @Override
    public void onSelectedListener(int pos) {
        if (mList.get(pos).getIsSelect().equals("0")){
            mList.get(pos).setIsSelect("1");
        }else{
            mList.get(pos).setIsSelect("0");
            mSelectAll.setSelected(false);
        }
        adapter.notifyDataSetChanged();
    }
}
public class MyAdapter extends BaseAdapter {
    private Context mContext;
    private List<TypeModel> mList;
    private OnCallBack mCallBack;
    private Holder holder;

    public MyAdapter(Context context,List<TypeModel> list,OnCallBack callBack){
        this.mContext = context;
        this.mList = list;
        this.mCallBack = callBack;
    }

    public interface OnCallBack{
        void onSelectedListener(int pos);
    }

    @Override
    public int getCount() {
        return mList.size();
    }

    @Override
    public Object getItem(int position) {
        return mList.get(position);
    }

    @Override
    public long getItemId(int position) {
        return position;
    }

    @Override
    public View getView(final int position, View convertView, ViewGroup parent) {
        if (convertView == null){
            convertView = LayoutInflater.from(mContext).inflate(R.layout.layout,null);
            holder = new Holder();
            holder.name = (TextView) convertView.findViewById(R.id.name);
            holder.select = (LinearLayout) convertView.findViewById(R.id.select);
            convertView.setTag(holder);
        }else{
            holder = (Holder) convertView.getTag();
        }

        holder.name.setText(mList.get(position).getName());
        if (mList.get(position).getIsSelect().equals("0")){
            holder.select.setSelected(false);
        }else{
            holder.select.setSelected(true);
        }

        holder.select.setOnClickListener(new View.OnClickListener() {
            @Override
            public void onClick(View v) {
                if (mCallBack!=null){
                    mCallBack.onSelectedListener(position);
                }
            }
        });

        return convertView;
    }

    private class Holder{
        TextView name;
        LinearLayout select;
    }
}
最后一步也是 坑点 就是对应的两个布局里面的 img_view布局里面调用的图片

解决方法 一: 在上面源码地址下载 里面对应的图片,第二就是对应自己选择自己的需求图片 还有 select.bg.xml 这个布局


 9318
9318

 被折叠的 条评论
为什么被折叠?
被折叠的 条评论
为什么被折叠?
 到【灌水乐园】发言


