首先对LayoutInflater下一个定义吧,Layoutinflater的作用就是将一个xml布局文件实例化为View对象。
获取Layoutinflater对象的方法有三种,招不在多,管用就行,跟踪源码后发现三种方法的本质都是调用了context.getSystemService(),所以建议以后写的时候就用context.getSystemService()。具体写法如下:
LayoutInflater inflater = context.getSystemService(Context.LAYOUT_INFLATER_SERVICE);1、返回值:
View对象,有了View对象我们就能做诸如setContentView()或者在自定义Adapter里面的getView()方法中获取item的布局。
2、参数:
public View inflate (int resource, ViewGroup root)
第一个参数是一个xml文件的R索引,比如R.layout.activity_main。第二个参数如果不为null就是将得到的View对象再放入一个Viewgroup容器中,我这么说可能有的读者还不是很清楚,文章的最后会有一个例子来说明问题。
public View inflate (int resource, ViewGroup root, boolean attachToRoot)
这里的第三个参数的意思是如果第二个参数不为
null,那么为
true则放入第二个参数引用的
Viewgroup中,为
false则不放入第二个参数的
Viewgroup中。
下面用一个实例来说明问题。
布局文件有两个:
activity_main.xml
<LinearLayout xmlns:android="http://schemas.android.com/apk/res/android"
    android:layout_width="match_parent"
    android:layout_height="match_parent"
    android:paddingBottom="@dimen/activity_vertical_margin"
    android:paddingLeft="@dimen/activity_horizontal_margin"
    android:paddingRight="@dimen/activity_horizontal_margin"
    android:paddingTop="@dimen/activity_vertical_margin"
    android:orientation="vertical" >

    <TextView
        android:layout_width="wrap_content"
        android:layout_height="wrap_content"
        android:text="@string/hello_world" />

    <RelativeLayout
        android:id="@+id/viewgroup"
        android:layout_width="wrap_content"
        android:layout_height="wrap_content" >
    </RelativeLayout>

</LinearLayout><?xml version="1.0" encoding="utf-8"?>
<LinearLayout xmlns:android="http://schemas.android.com/apk/res/android"
android:layout_width="fill_parent"
android:layout_height="fill_parent"
android:orientation="vertical" >
<CheckBox
android:layout_width="wrap_content"
android:layout_height="wrap_content"
android:text="inflatedemo" />
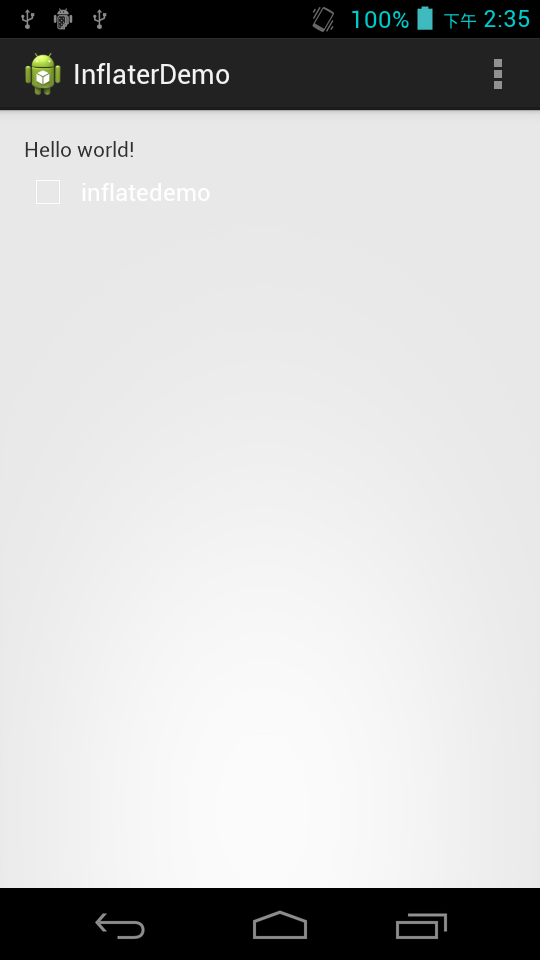
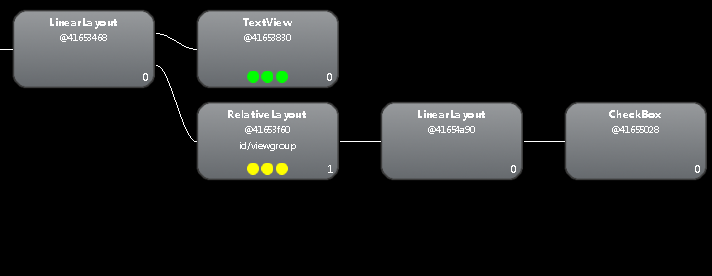
</LinearLayout>或者@Override protected void onCreate(Bundle savedInstanceState) { super.onCreate(savedInstanceState); setContentView(R.layout.activity_main); mViewGroup = (RelativeLayout) findViewById(R.id.viewgroup); mInflater = (LayoutInflater) getApplicationContext().getSystemService( Context.LAYOUT_INFLATER_SERVICE); mInflater.inflate(R.layout.inflatertest, mViewGroup); }
@Override
protected void onCreate(Bundle savedInstanceState) {
	super.onCreate(savedInstanceState);
	setContentView(R.layout.activity_main);
	mViewGroup = (RelativeLayout) findViewById(R.id.viewgroup);
	mInflater = (LayoutInflater) getApplicationContext().getSystemService(
			Context.LAYOUT_INFLATER_SERVICE);
	mInflater.inflate(R.layout.inflatertest, mViewGroup, true);
}

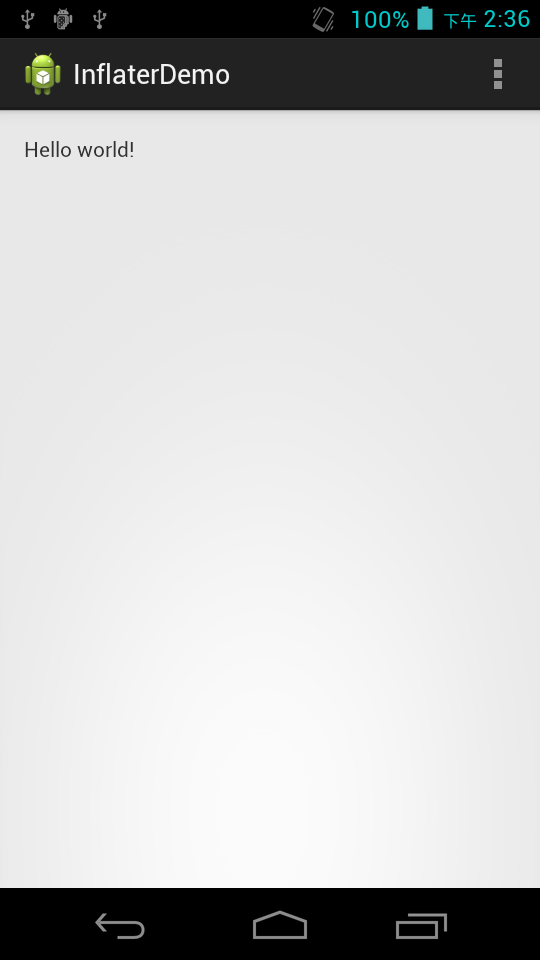
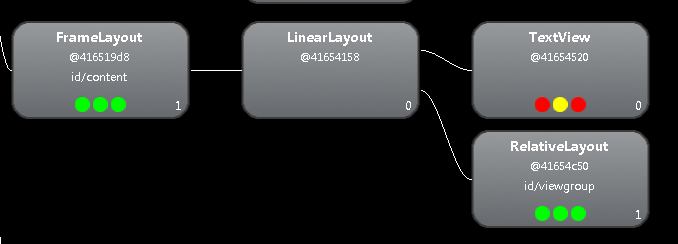
当 Activity中如是写:
@Override
protected void onCreate(Bundle savedInstanceState) {
	super.onCreate(savedInstanceState);
	setContentView(R.layout.activity_main);
	mViewGroup = (RelativeLayout) findViewById(R.id.viewgroup);
	mInflater = (LayoutInflater) getApplicationContext().getSystemService(
			Context.LAYOUT_INFLATER_SERVICE);
	mInflater.inflate(R.layout.inflatertest, mViewGroup, false);
}

今天就到这里,学习框架,一定要掌握函数的返回值和参数的意义,学会总结规律。


 1万+
1万+

 被折叠的 条评论
为什么被折叠?


