


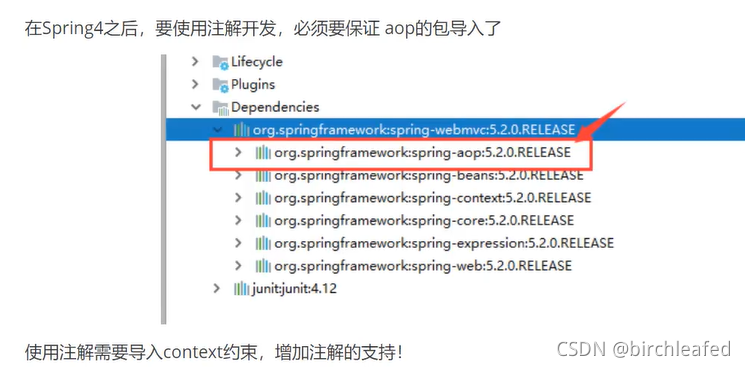
 本文详细介绍了Spring框架的控制反转和面向切面编程特性,包括Maven包引用、优点、模块划分、IOC应用实例和配置详解,以及AOP代理模式、自动装配和Spring与MyBatis整合等内容。
<!-- https://mvnrepository.com/artifact/org.springframework/spring- webmvc -->
<!-- dependency是指依赖-->
<dependency>
    <groupId>org.springframework</groupId>
    <artifactId>spring-webmvc</artifactId>
    <version>5.3.9</version>
    </dependency>
<!-- https://mvnrepository.com/artifact/org.springframework/spring- webmvc -->
<dependency>
    <groupId>org.springframework</groupId>
    <artifactId>spring-jdbc</artifactId>
    <version>5.3.9</version>
</dependency>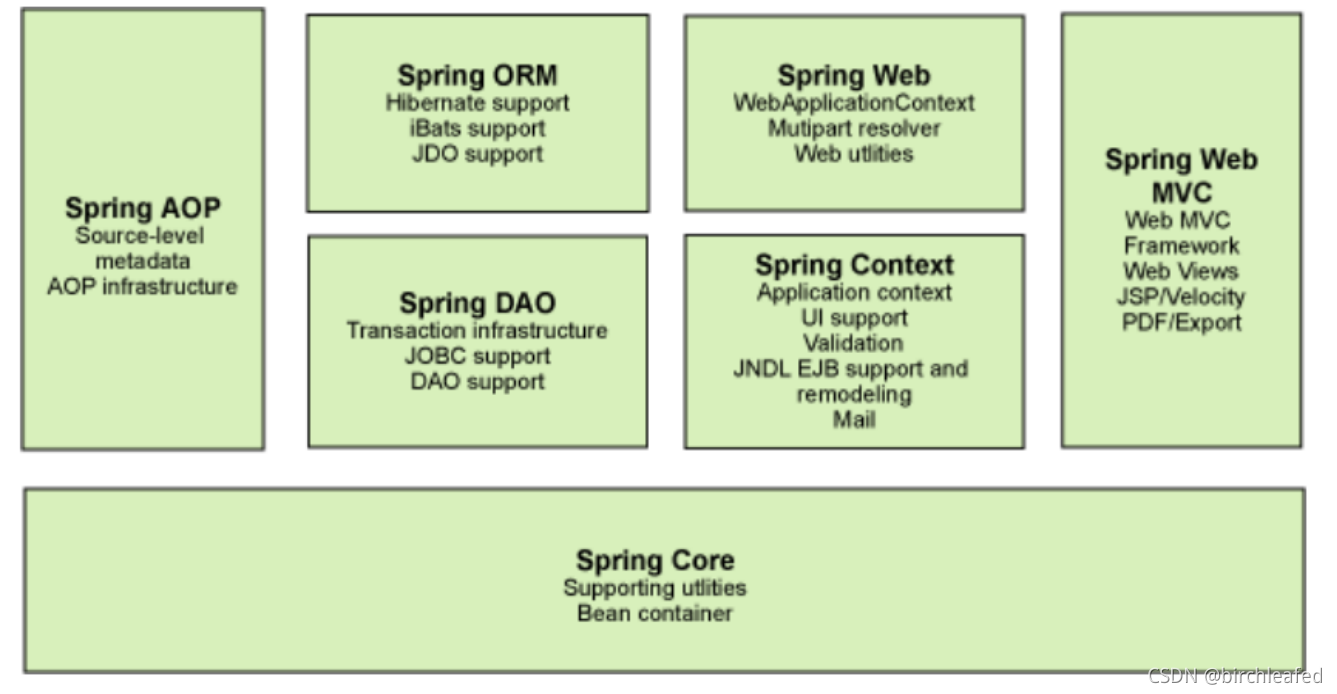
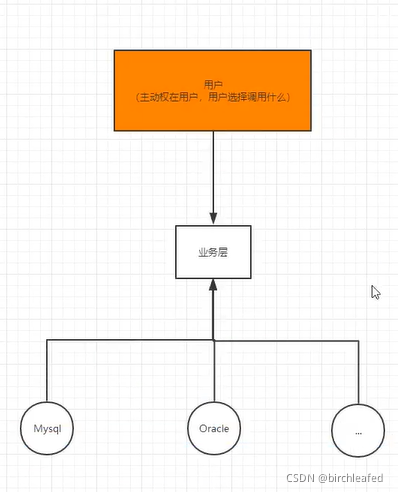
IOC理论推导
1.UserDao接口
2.UserDaoImpl实现
3.UserService业务接口
4.UserServiceImpl业务实现类
    private UserDao userDao ;
    public void setUserDao(UserDao userDao){
        this.userDao = userDao;
    }
HelloSpring
package com.qi.entity;

public class Hello {
    private String str;

    public String getStr() {
        return str;
    }

    public void setStr(String str) {
        this.str = str;
    }

    @Override
    public String toString() {
        return "Hello{" +
                "str='" + str + '\'' +
                '}';
    }
}
<?xml version="1.0" encoding="UTF-8"?>
<beans xmlns="http://www.springframework.org/schema/beans"
       xmlns:xsi="http://www.w3.org/2001/XMLSchema-instance"
       xsi:schemaLocation="http://www.springframework.org/schema/beans
        https://www.springframework.org/schema/beans/spring-beans.xsd">

<!-- 使用Spring创建对象,在Spring这些都称为Bean

     类型 变量名 = new 类型()

     bean==对象 new Hello()

    id = 变量名
    class = new的对象
    property相当于给对象中的属性设置一个值

-->
    <bean id="hello" class="com.qi.entity.Hello">
        <property name="str" value="Spring"/>
    </bean>

</beans>
import com.qi.entity.Hello;
import org.springframework.context.ApplicationContext;
import org.springframework.context.support.ClassPathXmlApplicationContext;
public class MyTest {
public static void main(String[] args) {
//获取Spring的上下文对象
ApplicationContext context = new ClassPathXmlApplicationContext("beans.xml");
//我们的对象都在Spring中管理,使用,直接取出来
Hello hello = (Hello) context.getBean("hello");
System.out.println(hello.toString());
}
}
4IOC创建对象的方式
1.默认的无参构建对象
2假设我们要使用有参构造创建对象
1.下标创建
<!--        下标赋值-->
    <bean id="user" class="com.qi.entity.User">
        <constructor-arg index="0" value="多久啊的空间"/>
    </bean>
2类型创建
<!--   不建议使用 类型创建-->
    <bean class="com.qi.entity.User" id="user">
        <constructor-arg type="java.lang.String" value="按客户的骄傲看到"/>
    </bean>
3按名字创建
<!--    根据名称赋值-->
    <bean id="user" class="com.qi.entity.User">
        <constructor-arg name="name" value="适当"/>
    </bean>
总结:在配置文件加载的时候,容器中管理的对象就已经初始化了!
5Spring配置
别名
<!--    别名,-->
    <alias name="user" alias="userNew"/>
bean配置
<!--
    id: bean的唯一标识符,相当于我们的对象名
    class:bean对象的全限定名:包名+类型
    name:也是别名,name可以同时取多个别名

-->
    <bean id="userT" class="com.qi.entity.UserT" name="t e,r;f">
        <property name="name" value="安康的好看"/>
    </bean>
import
这个一般团队开发,将多个配置导入同一个项目当中。可以使用import将所有人的beans。xml合并到同一个项目中。
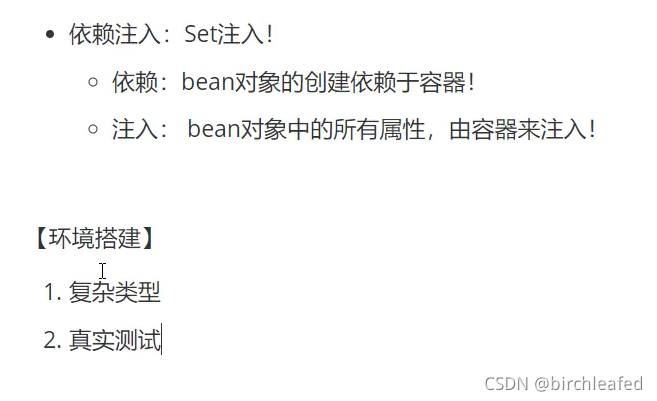
6.依赖注入
1构造器注入
前面已经说过
2.Set方式注入
package com.qi.entity;
//复杂类型
public class Address {
    private String address;

    public String getAddress() {
        return address;
    }

    public void setAddress(String address) {
        this.address = address;
    }
}
package com.qi.entity;

import java.util.*;
//真实类型
public class Student {
    private String name;
    private Address address;
    private String[] books;
    private List<String> hobbys;
    private Map<String,String> card;
    private Set<String> games;
    private String wife;
    private Properties info;

    public String getName() {
        return name;
    }

    public void setName(String name) {
        this.name = name;
    }

    public Address getAddress() {
        return address;
    }

    public void setAddress(Address address) {
        this.address = address;
    }

    public String[] getBooks() {
        return books;
    }

    public void setBooks(String[] books) {
        this.books = books;
    }

    public List<String> getHobbys() {
        return hobbys;
    }

    public void setHobbys(List<String> hobbys) {
        this.hobbys = hobbys;
    }

    public Map<String, String> getCard() {
        return card;
    }

    public void setCard(Map<String, String> card) {
        this.card = card;
    }

    public Set<String> getGames() {
        return games;
    }

    public void setGames(Set<String> games) {
        this.games = games;
    }

    public String getWife() {
        return wife;
    }

    public void setWife(String wife) {
        this.wife = wife;
    }

    public Properties getInfo() {
        return info;
    }

    public void setInfo(Properties info) {
        this.info = info;
    }

    @Override
    public String toString() {
        return "Student{" +
                "name='" + name + '\'' +
                ", address=" + address +
                ", books=" + Arrays.toString(books) +
                ", hobbys=" + hobbys +
                ", card=" + card +
                ", games=" + games +
                ", wife='" + wife + '\'' +
                ", info=" + info +
                '}';
    }
}
beans.xml
<?xml version="1.0" encoding="UTF-8"?>
<beans xmlns="http://www.springframework.org/schema/beans"
       xmlns:xsi="http://www.w3.org/2001/XMLSchema-instance"
       xsi:schemaLocation="http://www.springframework.org/schema/beans
        https://www.springframework.org/schema/beans/spring-beans.xsd">

   <bean id="student" class="com.qi.entity.Student">
       <!-- 第一种,普通值注入-->
       <property name="name" value="杜淇"/>
   </bean>

</beans>
测试类
import com.qi.entity.Student;
import org.springframework.context.ApplicationContext;
import org.springframework.context.support.ClassPathXmlApplicationContext;

public class Mytest {
    public static void main(String[] args) {
        ApplicationContext context = new ClassPathXmlApplicationContext("beans.xml");
        Student student = (Student) context.getBean("student");
        System.out.println(student.getName());
    }
}
完善注入信息
<?xml version="1.0" encoding="UTF-8"?>
<beans xmlns="http://www.springframework.org/schema/beans"
       xmlns:xsi="http://www.w3.org/2001/XMLSchema-instance"
       xsi:schemaLocation="http://www.springframework.org/schema/beans
        https://www.springframework.org/schema/beans/spring-beans.xsd">

    <!--创建address类-->
    <bean id="address" class="com.qi.entity.Address">
        <property name="address" value="湖北武汉"/>
    </bean>


   <bean id="student" class="com.qi.entity.Student">
       <!-- 第一种,普通值注入-->
       <property name="name" value="杜淇"/>
        <!-- 第二种,bean注入 ref-->
       <property name="address" ref="address"/>
       <!-- 第三种,数组注入 -->
        <property name="books">
            <array>
                <value>西游记</value>
                <value>红楼梦</value>
                <value>水浒传</value>
                <value>三国演义</value>
            </array>
        </property>
       <!-- 第四种,List注入 -->
       <property name="hobbys">
           <list>
               <value>看电影</value>
               <value>吃东西</value>
               <value>搞学习</value>
           </list>
       </property>
       <!-- 第五种,Map注入 -->
       <property name="card">
           <map>
               <entry key="身份证" value="232333"/>
               <entry key="银行卡" value="43382378238"/>
           </map>
       </property>
       <!-- 第六种,Set注入 -->
       <property name="games">
           <set>
               <value>LoL</value>
               <value>CF</value>
               <value>DNF</value>
               <value>PUBG</value>
           </set>
       </property>
       <!-- 第七种,Null注入 -->
       <property name="wife">
           <null></null>
       </property>
       <!-- 第⑧种,Properties注入 -->
       <property name="info">
           <props>
               <prop key="学号">202120383</prop>
               <prop key="性别">男</prop>
               <prop key="姓名">小明</prop>
           </props>
       </property>
   </bean>

</beans>
3.拓展方式注入
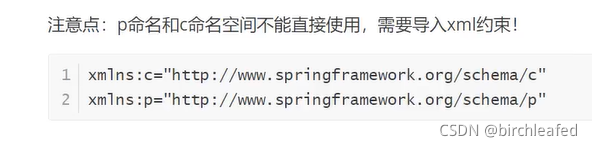
c与p命名:
<beans xmlns="http://www.springframework.org/schema/beans"
    xmlns:xsi="http://www.w3.org/2001/XMLSchema-instance"
    xmlns:p="http://www.springframework.org/schema/p"
    xsi:schemaLocation="http://www.springframework.org/schema/beans
        https://www.springframework.org/schema/beans/spring-beans.xsd">

    <bean name="classic" class="com.example.ExampleBean">
        <property name="email" value="someone@somewhere.com"/>
    </bean>

    <bean name="p-namespace" class="com.example.ExampleBean"
        p:email="someone@somewhere.com"/>
</beans>
使用
<?xml version="1.0" encoding="UTF-8"?>
<beans xmlns="http://www.springframework.org/schema/beans"
       xmlns:xsi="http://www.w3.org/2001/XMLSchema-instance"
       xmlns:p="http://www.springframework.org/schema/p"
       xmlns:c="http://www.springframework.org/schema/c"
       xsi:schemaLocation="http://www.springframework.org/schema/beans
        https://www.springframework.org/schema/beans/spring-beans.xsd">

<!--    p命名空间注入可以直接注入属性的值,property-->
    <bean id="user" class="com.qi.entity.User" p:name="的意思" p:age="23"/>

    <bean id="user2" class="com.qi.entity.User" c:age="13" c:name="都好好的"/>
</beans>
测试
    @Test
    public void test2(){
        ApplicationContext context = new ClassPathXmlApplicationContext("userbeans.xml");
        User user = (User) context.getBean("user2");
        System.out.println(user);
    }
Bean 的作用域
| Scope | Description |
|---|---|
| (Default) Scopes a single bean definition to a single object instance for each Spring IoC container. | |
| Scopes a single bean definition to any number of object instances. | |
| Scopes a single bean definition to the lifecycle of a single HTTP request. That is, each HTTP request has its own instance of a bean created off the back of a single bean definition. Only valid in the context of a web-aware Spring | |
| Scopes a single bean definition to the lifecycle of an HTTP | |
| Scopes a single bean definition to the lifecycle of a | |
| Scopes a single bean definition to the lifecycle of a |
1代理模式默认机制
<bean id="user2" class="com.qi.entity.User" c:age="13" c:name="都好好的" scope="singleton"/>
2原型模式:每次从容器中get 都产生新对象
<bean id="user2" class="com.qi.entity.User" c:age="13" c:name="都好好的" scope="prototype"/>
3其余的request Session application 在web开发中使用
Bean的自动装配
自动装配是Spring满足bean依赖的一种方式
spring会在上下文中自动寻找,并自动给bean装配属性
spring 中有三种装配方式
1在xml中显示的装配
2在Java中显示的装配
3隐式的自动装配bean【重要】
测试spring的自动装配
环境搭建:一个人有两个宠物
ByName自动装配
    <bean id="cat" class="com.qi.entity.Cat"/>
    <bean id="dog" class="com.qi.entity.Dog"/>

<!--
    byName 会自动在容器上下文中查找,和自己对象set方法后面值对应的beanid
    byType 会自动在容器上下文中查找,和自己对象属性类型相同的bean
-->
    <bean id="people" class="com.qi.entity.People" autowire="byName">
        <property name="name" value="杜淇"/>

    </bean>
ByType
    <bean id="cat" class="com.qi.entity.Cat"/>
    <bean id="dog" class="com.qi.entity.Dog"/>

<!--
    byName 会自动在容器上下文中查找,和自己对象set方法后面值对应的beanid
    byType 会自动在容器上下文中查找,和自己对象属性类型相同的bean
-->
    <bean id="people" class="com.qi.entity.People" autowire="byType">
        <property name="name" value="杜淇"/>

    </bean>
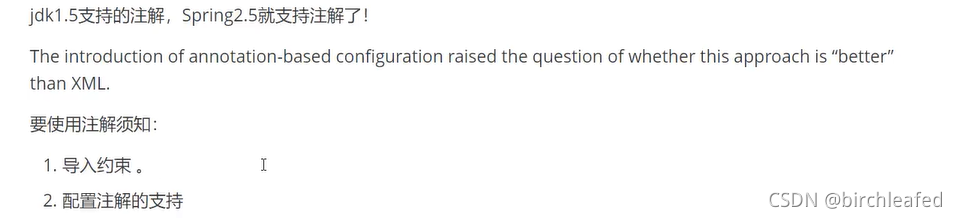
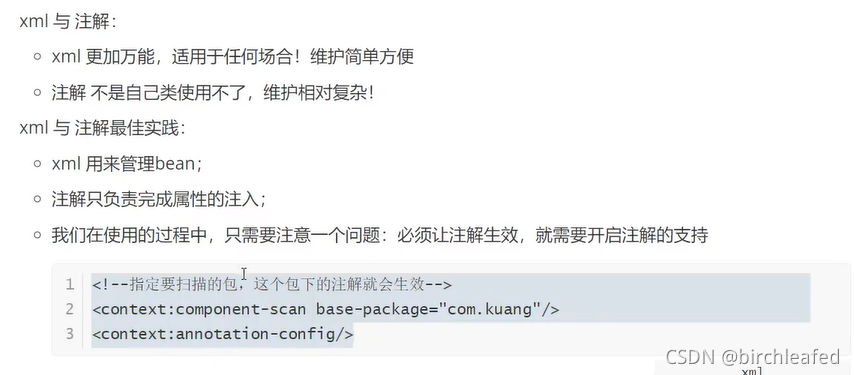
使用注解进行自动装配
<?xml version="1.0" encoding="UTF-8"?>
<beans xmlns="http://www.springframework.org/schema/beans"
xmlns:xsi="http://www.w3.org/2001/XMLSchema-instance"
xmlns:context="http://www.springframework.org/schema/context"
xsi:schemaLocation="http://www.springframework.org/schema/beans
https://www.springframework.org/schema/beans/spring-beans.xsd
http://www.springframework.org/schema/context
https://www.springframework.org/schema/context/spring-context.xsd">
<context:annotation-config/>
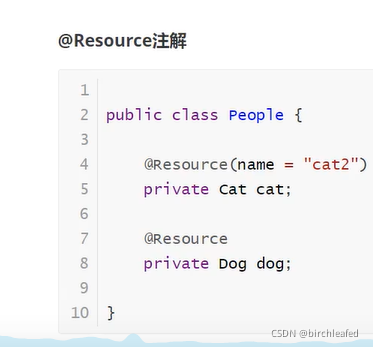
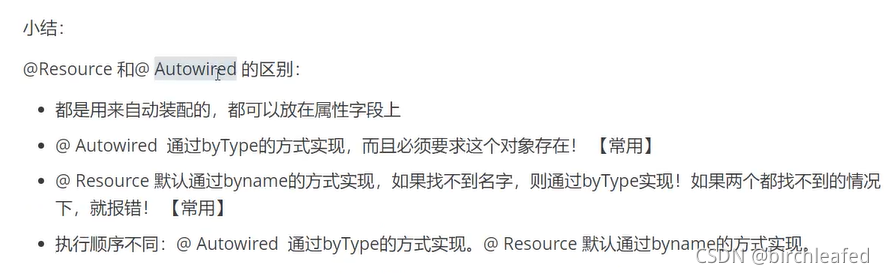
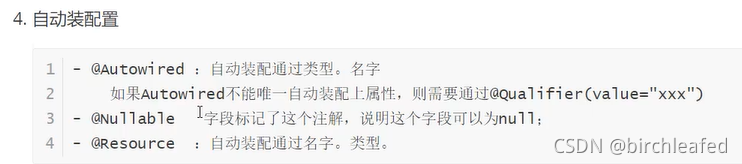
</beans>@Autowired
直接在属性上使用即可,也可以在set方式上使用
使用Autowired我们可以不用编写Set方法,前提是自动装配的属性在IOC(spring)容器中存在,且符合名字byname
    //如果显示的定义了Autowired的required的属性为false,说明这个对象可以为null,否则不允许为空
    @Autowired(required = false)
    private Cat cat;
    @Autowired
    @Qualifier(value = "dog222")
    private Dog dog;
    private String name;
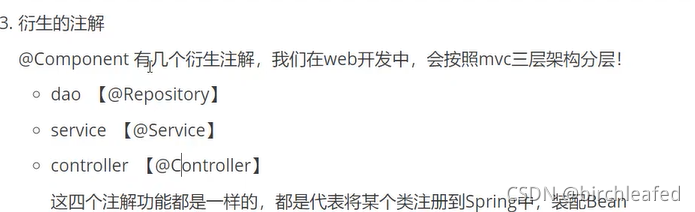
使用注解开发
<?xml version="1.0" encoding="UTF-8"?>
<beans xmlns="http://www.springframework.org/schema/beans"
    xmlns:xsi="http://www.w3.org/2001/XMLSchema-instance"
    xmlns:context="http://www.springframework.org/schema/context"
    xsi:schemaLocation="http://www.springframework.org/schema/beans
        https://www.springframework.org/schema/beans/spring-beans.xsd
        http://www.springframework.org/schema/context
        https://www.springframework.org/schema/context/spring-context.xsd">

    <context:annotation-config/>

</beans>
1bean
5作用域
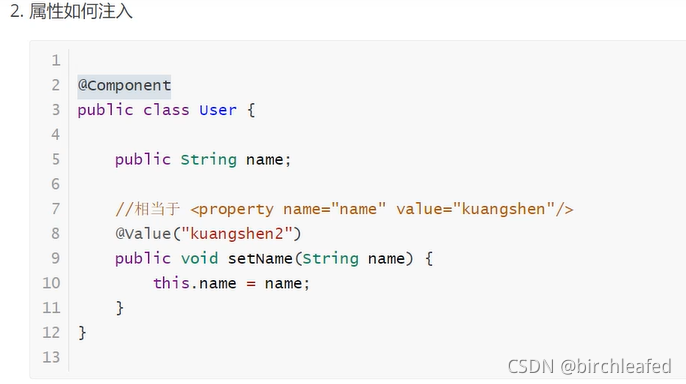
//等价于<bean id = "user" class="com.qi.entity.User"/>
//@Component 等价于组件
@Component
@Scope("prototype")
public class User {

    public String name ;
    //相当于<property name="name" value="duqi"/>
    @Value("duqi")
    public void setName(String name) {
        this.name = name;
    }
}
6.小结
 使用Java的方式配置Spring

实体类
package com.qi.entity;

import org.springframework.beans.factory.annotation.Value;
import org.springframework.stereotype.Component;

//这个注解说明这个类被Spring接管了,注册到了容器当中
@Component
public class User {
    private String name;

    public String getName() {
        return name;
    }

    @Value("dyuayd")
    public void setName(String name) {
        this.name = name;
    }

    @Override
    public String toString() {
        return "User{" +
                "name='" + name + '\'' +
                '}';
    }
}
配置类
package com.qi.config;

import com.qi.entity.User;
import org.springframework.context.annotation.Bean;
import org.springframework.context.annotation.ComponentScan;
import org.springframework.context.annotation.Configuration;
import org.springframework.context.annotation.Import;

//也会被Spring接管本来就是@Component
//代表这是一个配置类与我们之前看到的beans.xml是相同的
@Configuration
@ComponentScan("com.qi.entity")
@Import(MyConfig2.class)
public class MyConfig {

    //注册一个bean 相当于我们之前写的一个bean标签
    //这个方法的名字就相当于bean标签中的id属性
    //这个方法的返回值就相当于bean标签的class属性
    @Bean
    public User getUser(){
        return new User();//就是返回要注入到bean的对象
    }
}
测试类
import com.qi.config.MyConfig;
import com.qi.entity.User;
import org.springframework.context.ApplicationContext;
import org.springframework.context.annotation.AnnotationConfigApplicationContext;


public class MyTest {
    public static void main(String[] args) {
        //如果完全使用配置类方式去做,我们就只能通过AnnotationConfigApplicationContext上下文来获取容器,通过配置类的class对象加载
        ApplicationContext context = new AnnotationConfigApplicationContext(MyConfig.class);
        User getUser = (User) context.getBean("getUser");
        System.out.println(getUser.getName());
    }
}
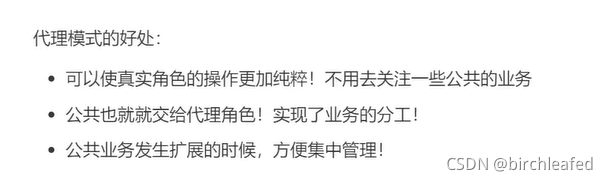
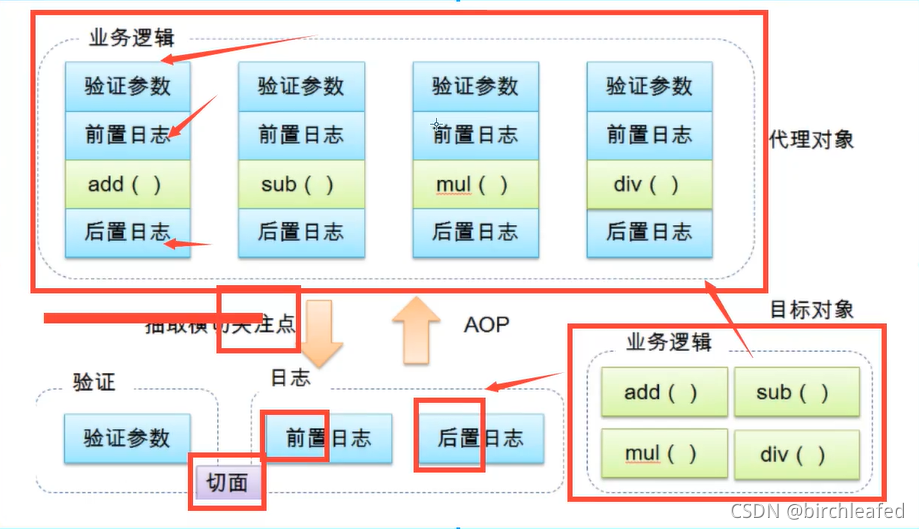
AOP代理模式
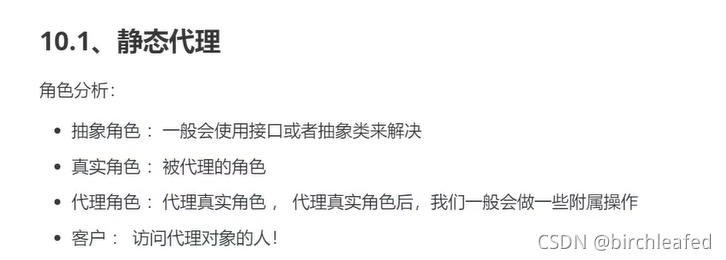
代码步骤
1接口
package com.qi.demo01;

public interface Rent {

    public void rent();

}
2真实角色
package com.qi.demo01;

public class Host implements Rent{

    public void rent(){
        System.out.println("房东租房子");
    }

}
3代理角色
package com.qi.demo01;

public class Proxy implements Rent{

    private Host host;

    public Proxy(){

    }
    public Proxy(Host host){
        this.host = host;
    }

    public void rent(){
        seeHouse();
        host.rent();
        fare();
        hetong();
    }

    public void seeHouse(){
        System.out.println("中介看房");
    }

    public void fare(){
        System.out.println("中介费");
    }

    public void hetong(){
        System.out.println("签合同");
    }

}
4客服端访问代理角色
package com.qi.demo01;

public class Client {
    public static void main(String[] args) {
        Host host = new Host();
        Proxy proxy = new Proxy(host);
        proxy.rent();
    }
}

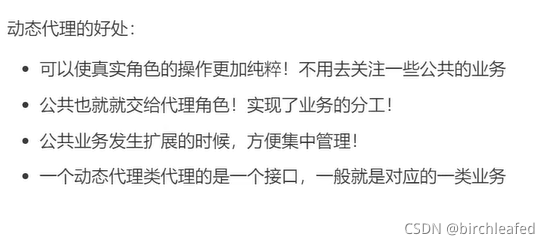
动态代理
底层均为反射
package com.qi.demo04;

import com.qi.demo03.Rent;

import java.lang.reflect.InvocationHandler;
import java.lang.reflect.Method;
import java.lang.reflect.Proxy;

public class ProxyInvocationHandler implements InvocationHandler {

    //被代理的接口
    private Object target;

    public void setTarget(Object target) {
        this.target = target;
    }


    //生成得到代理类
    public Object getProxy(){
        return Proxy.newProxyInstance(this.getClass().getClassLoader(), target.getClass().getInterfaces(),this);
    }

    //处理代理实例,并返回结果
    @Override
    public Object invoke(Object proxy, Method method, Object[] args) throws Throwable {

        //动态代理的本质就是使用反射机制实现
        log(method.getName());
        Object result = method.invoke(target, args);
        return result;
    }

    public void log(String msg){
        System.out.println("执行了" + msg + "方法");
    }

}
package com.qi.demo04;

import com.qi.demo02.UserService;
import com.qi.demo02.UserServiceImpl;

public class Client {
    public static void main(String[] args) {
        //真实角色
        UserServiceImpl userService = new UserServiceImpl();
        //代理角色,不存在
        ProxyInvocationHandler proxyInvocationHandler = new ProxyInvocationHandler();

        proxyInvocationHandler.setTarget(userService);//设置要代理的对象
        //动态生成代理类
        UserService proxy = (UserService) proxyInvocationHandler.getProxy();

        proxy.add();
    }
}
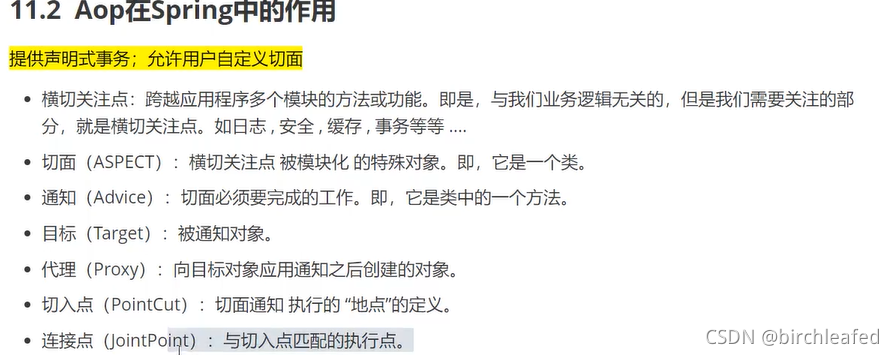
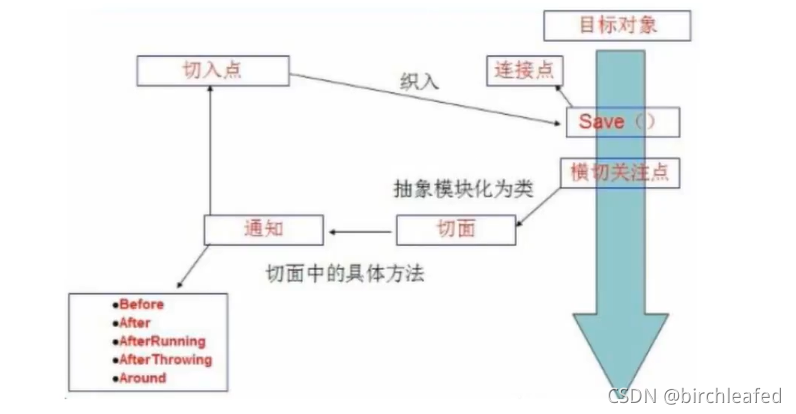
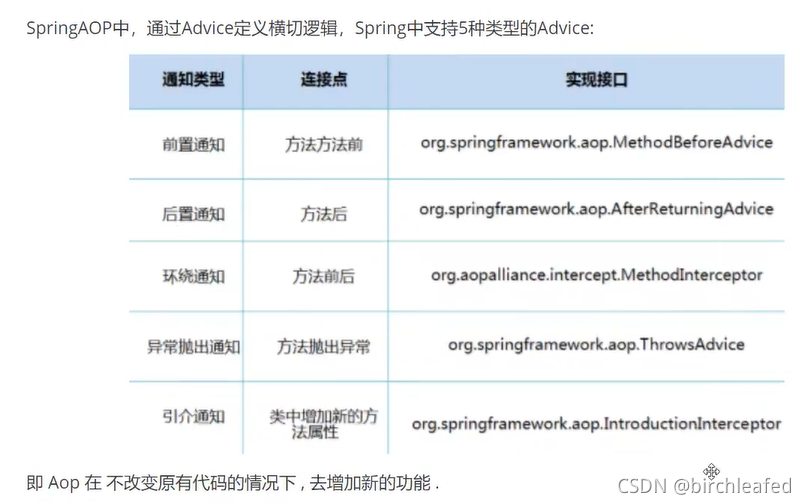
AOP

        <dependency>
            <groupId>org.aspectj</groupId>
            <artifactId>aspectjweaver</artifactId>
            <version>1.9.4</version>
        </dependency>
方式一,使用Spring 的API接口【主要SpringAPI接口实现】
方式二 自定义实现AOP【主要是切面定义】
方式三 使用注解方式实现
整合MyBatis
1.导入相关jar包
·junit
mybatis
mysql
spring
aop织入
2编写配置文件
<?xml version="1.0" encoding="UTF-8"?>
<project xmlns="http://maven.apache.org/POM/4.0.0"
         xmlns:xsi="http://www.w3.org/2001/XMLSchema-instance"
         xsi:schemaLocation="http://maven.apache.org/POM/4.0.0 http://maven.apache.org/xsd/maven-4.0.0.xsd">
    <parent>
        <artifactId>spring-study</artifactId>
        <groupId>org.example</groupId>
        <version>1.0-SNAPSHOT</version>
    </parent>
    <modelVersion>4.0.0</modelVersion>

    <artifactId>spring-10-mybatis</artifactId>

    <properties>
        <maven.compiler.source>8</maven.compiler.source>
        <maven.compiler.target>8</maven.compiler.target>
    </properties>

    <dependencies>
        <dependency>
            <groupId>junit</groupId>
            <artifactId>junit</artifactId>
            <version>4.11</version>
        </dependency>
        <dependency>
            <groupId>mysql</groupId>
            <artifactId>mysql-connector-java</artifactId>
            <version>5.1.47</version>
        </dependency>
        <dependency>
            <groupId>org.mybatis</groupId>
            <artifactId>mybatis</artifactId>
            <version>3.5.2</version>
        </dependency>
        <dependency>
            <groupId>org.springframework</groupId>
            <artifactId>spring-webmvc</artifactId>
            <version>5.3.9</version>
        </dependency>
<!--        spring链接数据库的话还需要一个spring-jdbc 的包-->
        <dependency>
            <groupId>org.springframework</groupId>
            <artifactId>spring-jdbc</artifactId>
            <version>5.3.10</version>
        </dependency>
        <dependency>
            <groupId>org.aspectj</groupId>
            <artifactId>aspectjweaver</artifactId>
            <version>1.9.4</version>
        </dependency>
        <dependency>
            <groupId>org.mybatis</groupId>
            <artifactId>mybatis-spring</artifactId>
            <version>2.0.2</version>
        </dependency>
    </dependencies>

</project>
3测试
回忆mybatis
1.编写实体类
2.编写核心配置文件
3.编写接口
4.编写xml
5.测试
整合Mybatis-spring
1.编写数据源配置
2.sqlSessionFactory
3.sqlSessionTemplate
4.需要给接口加实现类
5.将自己写的实现类,注入到Spring中
6.测试使用即可
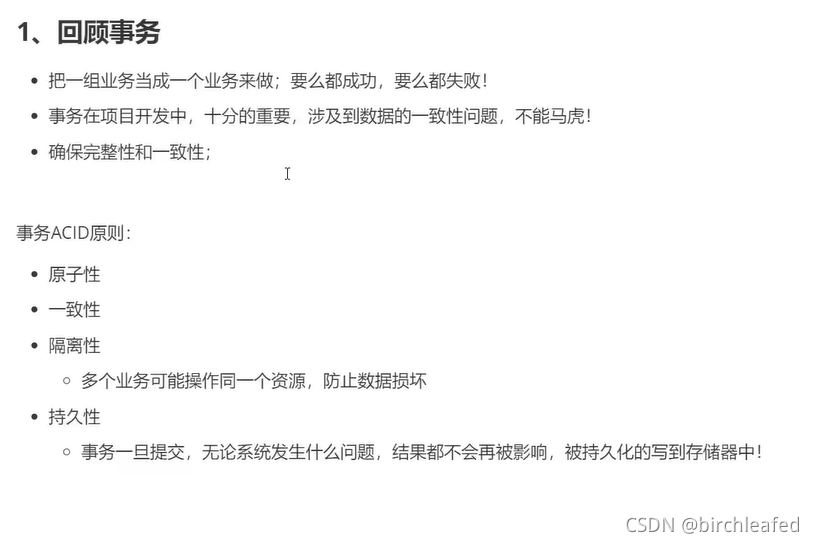
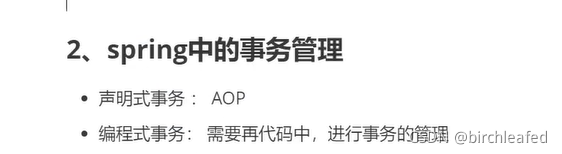
声明式事务


 6972
6972

 被折叠的 条评论
为什么被折叠?
被折叠的 条评论
为什么被折叠?
 到【灌水乐园】发言


