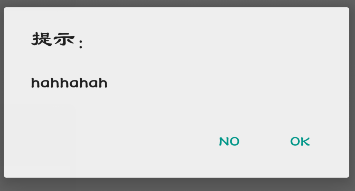
注意:自定义的dialog可以如下图一样AlertDialog.Builder的构造器,如果Dialog是自定义的,那么一定要在自定义里面构造器中传入int theme,然后构造器super(context,theme);
AlertDdialog.Builder builder = new AlertDialog.Builder(DialogActivity.this,AlertDialog.THEME_TRADITIONAL);//传统主题
AlertDialog.Builder builder = new AlertDialog.Builder(DialogActivity.this);//传统主题
Builder builder= new AlertDialog.Builder(DialogActivity.this,AlertDialog.THEME_HOLO_DARK);//使用深色背景 主题
Builder builder = new AlertDialog.Builder(DkalogActivity.this,AlertDialog.THEME_HOLO_LIGHT);//使用浅色背景 主题
Builder builder = new AlertDialog.Builder(DialogActivity.this,AlertDialog.THEME_DEVICE_DEFAULT_DARK);//使用默认设备 深色主题
AlertDialog.Builder builder = new AlertDialog.Builder(DialogActivity.this,AlertDialog.THEME_DEVICE_DEFAULT_NIGHT);//使用默认设备 浅色主题
【总结】
想要实现AlertDialog的窗口背景色的自定义的话,可以:
1.在res/values/styles.xml中,自定义一个style,设置背景色:
| 1 2 3 |
|
注意是
(1)android:background,而不是android:windowBackground
(2)parent,此处是@android:style/Theme.Holo.Dialog,暂时不太清楚,别的,非Dialog的话,是否有效。
2.实现你自己的自定义的AlertDialog类,其中构造函数中,把theme传给super的AlertDialog:
| 1 2 3 4 5 6 |
|
3.创建自定义AlertDialog类时,把对应的之前自己的style传%G9��进去:
| 1 |
|
如此,即可。
注意:
(1)CustomAlertDialogBackground是我们自定义的那个style。
自定义圆形ProgressBar:
效果图:
圆形ProgressBar的样式主要有以下几个,我们这里以progressBarStyleLarge为例进行样式的修改,其他的类似。

<ProgressBar
  android:layout_width="wrap_content"
  android:layout_height="wrap_content"
  style="?android:attr/progressBarStyleLarge"/>
首先看一下style="?android:attr/progressBarStyleLarge"的源码,在 \frameworks\base\core\res\res\values\styles.xml
<style name="Widget.ProgressBar.Large">
  <item name="android:indeterminateDrawable">@android:drawable/progress_large_white</item>
  <item name="android:minWidth">76dip</item>
  <item name="android:maxWidth">76dip</item>
  <item name="android:minHeight">76dip</item>
  <item name="android:maxHeight">76dip</item>
</style>
看到这一行<item name="android:indeterminateDrawable">@android:drawable/progress_large_white</item>
它的源码,在 \frameworks\base\core\res\res\drawable\progress_large_white.xml
<rotate xmlns:android="http://schemas.android.com/apk/res/android"
    android:drawable="@drawable/spinner_white_76"
    android:pivotX="50%"
    android:pivotY="50%"
    android:fromDegrees="0"
    android:toDegrees="360" />
看到这一行 android:drawable="@drawable/spinner_white_76" 我们就明白了,原来它在这里放了一张图片,进行旋转。
接下来我定义自己的ProgressBarStyle:
首先我们先找一张图片加入我们的项目中(如一开始的效果图片),然后在drawable下新建progress_large.xml文件
<?xml version="1.0" encoding="utf-8"?>
<rotate xmlns:android="http://schemas.android.com/apk/res/android"
    android:drawable="@drawable/progress_large"
    android:fromDegrees="0"
    android:pivotX="50%"
    android:pivotY="50%"
    android:toDegrees="360" />
在 \value\style.xml中定义myProgressBarStyleLarge
<style name="myProgressBarStyleLarge" >
  <item name="android:indeterminateDrawable">@drawable/progress_large</item>
  <item name="android:minWidth">76dip</item>
  <item name="android:maxWidth">76dip</item>
  <item name="android:minHeight">76dip</item>
  <item name="android:maxHeight">76dip</item>
</style>
最后在ProgressBar中使用我们自己定义的style,android:indeterminateDuration="700"指定图片旋转的速度,这样我们就可以根据自己的需要来定义ProgressBar的样式。
<ProgressBar
  style="@style/myProgressBarStyleLarge"
  android:layout_width="wrap_content"
  android:layout_height="wrap_content"
  android:indeterminateDuration="700" />
自定义theme样式:
项目的 res / value 目录下 建立xml文件:mytheme.xml 内容如下
<?xml version="1.0""encoding="utf-8"?>
<resources>
<style name="mytheme" parent="android:Theme.Dialog">
然后在这个基础上实现 android:windowNoTitle,也就是不显示标题栏,加上字体大小,字体颜色……
之后的使用和android自带样式使用方法一致。
theme样式使用方法:
(1)将样式代码放置在应用的AndroidManifest.xml即可。
格式:android:theme="@android:styne/这里写样式代码 "
比如:android:theoe="@android:style/Theme.Dialog"
或者(2)在onCreate()调用之前被调用setTheme()函数:
setTheme(R.style.Theme_Dialog);


 被折叠的 条评论
为什么被折叠?


