


学了很久的spring+mybatis+struts.一直都是单个的用他们,或者是两两组合用过,今天总算整合到一起了,配置起来有点麻烦,但是配置完一次之后,就轻松多了,那么框架整合配置详解如下。
1、导入相应的jar包
因为我们建造的是maven的web项目,所有我们在pom.xml中需要导入这些包。
pom.xml 详细注释
- 1
- 2
- 3
- 4
- 5
- 6
- 7
- 8
- 9
- 10
- 11
- 12
- 13
- 14
- 15
- 16
- 17
- 18
- 19
- 20
- 21
- 22
- 23
- 24
- 25
- 26
- 27
- 28
- 29
- 30
- 31
- 32
- 33
- 34
- 35
- 36
- 37
- 38
- 39
- 40
- 41
- 42
- 43
- 44
- 45
- 46
- 47
- 48
- 49
- 50
- 51
- 52
- 53
- 54
- 55
- 56
- 57
- 58
- 59
- 60
- 61
- 62
- 63
- 64
- 65
- 66
- 67
- 68
- 69
- 70
- 71
- 72
- 73
- 74
- 75
- 76
- 77
- 78
- 79
- 80
- 81
- 82
- 83
- 84
- 85
- 86
- 87
- 88
- 89
- 90
- 91
- 92
- 93
- 94
- 95
- 96
- 97
- 98
- 99
- 100
- 101
- 102
- 103
- 104
- 105
- 106
- 107
- 108
- 109
- 110
- 111
- 112
- 113
- 114
- 115
- 116
- 117
- 118
- 119
- 120
- 121
- 122
- 123
- 124
- 125
- 126
- 127
- 128
- 129
- 130
- 131
- 132
- 133
- 134
- 135
- 136
- 137
- 138
- 139
- 140
- 141
- 142
- 143
- 144
- 145
- 146
- 147
- 148
- 149
- 150
- 151
- 152
- 153
这里导入和很多包,大部分是spring+mybatis+struts的 基础包以及他们之间连接的包,因为时maven项目,所有有很多互相依赖的包这里不需要再引用。
导包完毕后我们来回顾一下,
我们学习struts的时候,需要配置一个xml文件叫struts.xml;
学习spring的时候,我们需要配置spring的文件叫beans.xml;
因为我们是web项目,所有我们也需要再次配置web.xml;
所有我们接下来来一个个的配置整合。
2、struts的struts.xml配置
struts.xml
- 1
- 2
- 3
- 4
- 5
- 6
- 7
- 8
- 9
- 10
- 11
- 12
- 13
- 14
- 15
- 16
- 17
因为还没有具体的实现类,所有我们这里没有配置action。
在这个struts的配置中,我们和以前不一样的额地方就是多了一句
- 1
这句代码的意思就是说
struts结合spring的配置意思是 Struts2的action由Spring来负责进行实例化。换句话说就是:
比如下面这个案例

在这个action的配置这里的class部分必须写spring中配置的action的id名,因为这个时候,由spring来生成action对象。
spring的beans.xml

接下来是:
3、 Spring的beans.xml
beans.xml
- 1
- 2
- 3
- 4
- 5
- 6
- 7
- 8
- 9
- 10
- 11
- 12
- 13
- 14
- 15
- 16
- 17
- 18
- 19
- 20
- 21
- 22
- 23
- 24
- 25
- 26
- 27
- 28
- 29
- 30
- 31
- 32
- 33
- 34
- 35
- 36
- 37
- 38
- 39
- 40
- 41
- 42
- 43
- 44
- 45
- 46
- 47
- 48
- 49
- 50
- 51
- 52
具体的在上面的xml中我都写了注释。
值得注意的是,里面有一个
- 1
在jdbc.propertits我们写的是数据连接配置
- 1
- 2
- 3
- 4
- 5
- 6
- 7
- 8
最后呢 是
4、web.xml
- 1
- 2
- 3
- 4
- 5
- 6
- 7
- 8
- 9
- 10
- 11
- 12
- 13
- 14
- 15
- 16
- 17
- 18
- 19
- 20
- 21
- 22
- 23
- 24
- 25
- 26
- 27
- 28
- 29
- 30
- 31
- 32
- 33
- 34
- 35
- 36
- 37
- 38
- 39
- 40
- 41
- 42
- 43
- 44
- 45
- 46
- 47
- 48
配置不同的地方我都写了注释。
值得注意的是:Web.xml配置中context-param
如下:
初始化过程:
1、在启动Web项目时,容器(比如Tomcat)会读web.xml配置文件中的两个节点< listener >和< contex-param >。
2、接着容器会创建一个ServletContext(上下文),应用范围内即整个WEB项目都能使用这个上下文。
3、接着容器会将读取到< context-param>转化为键值对,并交给ServletContext。
4、容器创建< listener>中的类实例,即创建监听(备注:listener定义的类可以是自定义的类但必须需要继承ServletContextListener)。
5、在监听的类中会有一个contextInitialized(ServletContextEvent event)初始化方法,在这个方法中可以通过event.getServletContext().getInitParameter(“contextConfigLocation”) 来得到context-param 设定的值。在这个类中还必须有一个contextDestroyed(ServletContextEvent event) 销毁方法.用于关闭应用前释放资源,比如说数据库连接的关闭。
6、得到这个context-param的值之后,你就可以做一些操作了.注意,这个时候你的WEB项目还没有完全启动完成.这个动作会比所有的Servlet都要早。
===由上面的初始化过程可知容器对于web.xml的加载过程是context-param >> listener >> fileter >> servlet
最后
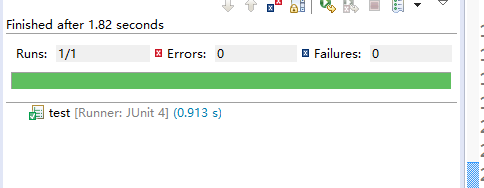
5、测试
- 1
- 2
- 3
- 4
- 5
- 6
- 7
- 8
- 9
- 10
- 11
- 12
- 13
- 14
- 15
- 16
- 17
- 18
- 19
- 20
- 21
- 22
- 23
- 24
- 25
- 26
- 27
- 28
- 29
- 30
- 31
- 32
- 33
美丽的绿色


 464
464

 被折叠的 条评论
为什么被折叠?
被折叠的 条评论
为什么被折叠?
 到【灌水乐园】发言


