


前言
什么是流式布局呢?
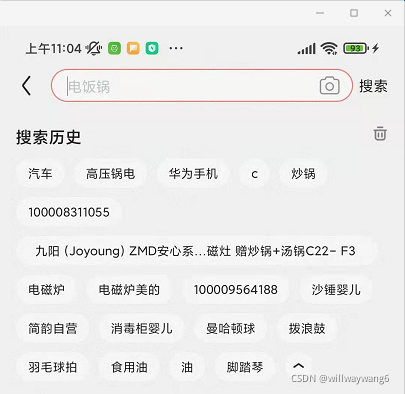
京东app的搜索历史就是使用了流式布局,请看下图:
淘宝app的搜索历史也是使用了流式布局,请看下图:

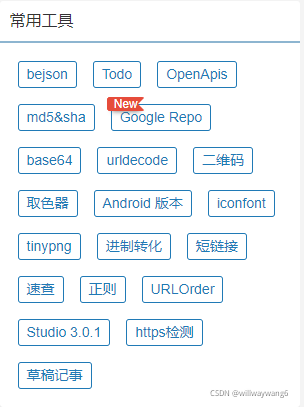
玩Android网站里也用到了流式布局,请看下图:
流式布局有什么好处呢?
流式布局可以有效地利用屏幕空间,使页面内容显示更加紧凑。
那么流式布局的效果是怎么做出来的呢?
使用自定义 ViewGroup 的方式;
使用自定义 LayoutManager 的方式。
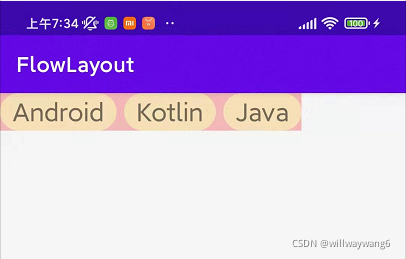
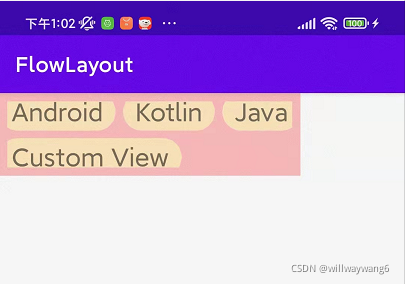
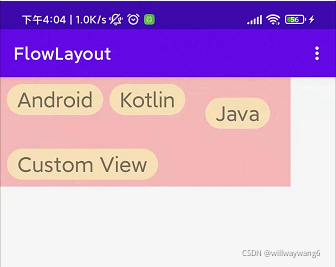
本文采用自定义ViewGroup的方式来实现,最终效果如下:
会从以下几个方面展开来说明:
自定义流式布局的测量过程;
自定义流式布局的布局过程;
自定义流式布局的padding支持;
自定义流式布局对子元素的 layout_margin 的支持;
自定义流式布局动态添加子元素的类型转换异常处理;
自定义流式布局的自定义属性;
自定义流式布局的状态保存与恢复;
自定义流式布局的一些优化。
正文
创建直接继承于ViewGroup的子类FlowLayout
class FlowLayout @JvmOverloads constructor(
    context: Context, attrs: AttributeSet? = null, defStyleAttr: Int = 0
) : ViewGroup(context, attrs, defStyleAttr) {

}
注意到此时FlowLayout的类名下有红色波浪警告线:

原因是ViewGroup是一个抽象类,包含一个抽象方法onLayout:
protected abstract void onLayout(boolean changed,
        int l, int t, int r, int b);
而这里FlowLayout是一个具体的类,所以它必须实现onLayout方法。这样就没有红色波浪线了。
另外,需要注意的是,使用带命名参数的构造方法时,必须在constructor关键字前加@JvmOverloads注解,如果不加的话,会报错:
E/AndroidRuntime: FATAL EXCEPTION: main
    Process: com.blog.flowlayout, PID: 27067
    java.lang.RuntimeException: Unable to start activity ComponentInfo{com.blog.flowlayout/com.blog.flowlayout.MainActivity}: android.view.InflateException: Binary XML file line #12 in com.blog.flowlayout:layout/activity_main: Binary XML file line #12 in com.blog.flowlayout:layout/activity_main: Error inflating class com.example.lib.FlowLayout
        at android.app.ActivityThread.performLaunchActivity(ActivityThread.java:3521)
        at android.app.ActivityThread.handleLaunchActivity(ActivityThread.java:3693)
        at android.app.servertransaction.LaunchActivityItem.execute(LaunchActivityItem.java:85)
        at android.app.servertransaction.TransactionExecutor.executeCallbacks(TransactionExecutor.java:135)
        at android.app.servertransaction.TransactionExecutor.execute(TransactionExecutor.java:95)
        at android.app.ActivityThread$H.handleMessage(ActivityThread.java:2135)
        at android.os.Handler.dispatchMessage(Handler.java:106)
        at android.os.Looper.loop(Looper.java:236)
        at android.app.ActivityThread.main(ActivityThread.java:8060)
        at java.lang.reflect.Method.invoke(Native Method)
        at com.android.internal.os.RuntimeInit$MethodAndArgsCaller.run(RuntimeInit.java:656)
        at com.android.internal.os.ZygoteInit.main(ZygoteInit.java:967)
     Caused by: android.view.InflateException: Binary XML file line #12 in com.blog.flowlayout:layout/activity_main: Binary XML file line #12 in com.blog.flowlayout:layout/activity_main: Error inflating class com.example.lib.FlowLayout
     Caused by: android.view.InflateException: Binary XML file line #12 in com.blog.flowlayout:layout/activity_main: Error inflating class com.example.lib.FlowLayout
     Caused by: java.lang.NoSuchMethodException: com.example.lib.FlowLayout.<init> [class android.content.Context, interface android.util.AttributeSet]
        at java.lang.Class.getConstructor0(Class.java:2332)
        at java.lang.Class.getConstructor(Class.java:1728)
        at android.view.LayoutInflater.createView(LayoutInflater.java:826)
        at android.view.LayoutInflater.createViewFromTag(LayoutInflater.java:1008)
        at android.view.LayoutInflater.createViewFromTag(LayoutInflater.java:963)
        at android.view.LayoutInflater.rInflate(LayoutInflater.java:1125)
        at android.view.LayoutInflater.rInflateChildren(LayoutInflater.java:1086)
        at android.view.LayoutInflater.inflate(LayoutInflater.java:684)
        at android.view.LayoutInflater.inflate(LayoutInflater.java:536)
        at android.view.LayoutInflater.inflate(LayoutInflater.java:479)
        at androidx.appcompat.app.AppCompatDelegateImpl.setContentView(AppCompatDelegateImpl.java:696)
        at androidx.appcompat.app.AppCompatActivity.setContentView(AppCompatActivity.java:170)
        at com.blog.flowlayout.MainActivity.onCreate(MainActivity.kt:9)
        at android.app.Activity.performCreate(Activity.java:8143)
        at android.app.Activity.performCreate(Activity.java:8115)
        at android.app.Instrumentation.callActivityOnCreate(Instrumentation.java:1310)
        at android.app.ActivityThread.performLaunchActivity(ActivityThread.java:3494)
        at android.app.ActivityThread.handleLaunchActivity(ActivityThread.java:3693)
        at android.app.servertransaction.LaunchActivityItem.execute(LaunchActivityItem.java:85)
        at android.app.servertransaction.TransactionExecutor.executeCallbacks(TransactionExecutor.java:135)
        at android.app.servertransaction.TransactionExecutor.execute(TransactionExecutor.java:95)
        at android.app.ActivityThread$H.handleMessage(ActivityThread.java:2135)
        at android.os.Handler.dispatchMessage(Handler.java:106)
        at android.os.Looper.loop(Looper.java:236)
        at android.app.ActivityThread.main(ActivityThread.java:8060)
        at java.lang.reflect.Method.invoke(Native Method)
        at com.android.internal.os.RuntimeInit$MethodAndArgsCaller.run(RuntimeInit.java:656)
        at com.android.internal.os.ZygoteInit.main(ZygoteInit.java:967)
查看日志可以得出原因是没有 FlowLayout(Context context, AttributeSet attrs) 这个构造方法导致的。只有加上 @JvmOverloads 注解才会生成这样的构造方法。
测量过程
我们知道,对于自定义ViewGroup来说,除了完成自己的measure过程以外,还要遍历去调用所有子元素的measure方法,各个子元素再递归去执行measure过程。自定义ViewGroup完成自己的measure过程是指在onMeasure方法里调用了setMeasuredDimension(int measuredWidth, int measuredHeight)方法,参数分别是ViewGroup的测量宽度和测量高度。
对于流式布局来说,是应该先完成自己的measure过程,再去完成子元素的measure过程,还是先完成子元素的measure过程,再去完成自己的measure过程呢?
应该先完成子元素的measure过程,再去完成自己的measure过程,因为流式布局的宽高依赖于子元素。
测量思路如下:
重写onMeasure方法,在onMeasure方法中:
获取流式布局允许的最大宽度;
把所有子元素一行一行地放置,如果当前行已经放不下一个子元素,就把这个子元素移到下一行显示;
行高是一行中所有子元素高度的最大值;
所有行宽度的最大值作为流式布局宽度的参考值;
计算出流式布局所占的区域大小。
// 子元素水平间距
private var itemHorizontalSpacing = 20
// 子元素竖直间距
private var itemVerticalSpacing = 20
/**
 * 记录每一行所有的子 View 的集合
 */
private val allLineViews = ArrayList<ArrayList<View>>()
/**
 * 所有行的行高的集合
 */
private val lineHeights = ArrayList<Int>()
@SuppressLint("DrawAllocation")
override fun onMeasure(widthMeasureSpec: Int, heightMeasureSpec: Int) {
    super.onMeasure(widthMeasureSpec, heightMeasureSpec)
    val widthSize = MeasureSpec.getSize(widthMeasureSpec)
    val widthMode = MeasureSpec.getMode(widthMeasureSpec)
    val heightSize = MeasureSpec.getSize(heightMeasureSpec)
    val heightMode = MeasureSpec.getMode(heightMeasureSpec)
    // 获取流式布局允许的最大宽度
    val maxWidth = widthSize
    var lineWidth = 0 // 行宽
    var maxLineWidth = 0 // 最大行宽
    var lineHeight = 0 // 行高
    var totalHeight = 0 // 总高度
    val childCount = getChildCount()
    var lineViews = ArrayList<View>()
    var lineCount = 0
    for (i in 0 until childCount) {
        val child = getChildAt(i)
        if (child.visibility != View.GONE) {
            // 测量子 View
            val lp = child.layoutParams
            val childWidthMeasureSpec = getChildMeasureSpec(widthMeasureSpec,
                getPaddingLeft() + getPaddingRight(), lp.width)
            val childHeightMeasureSpec = getChildMeasureSpec(heightMeasureSpec,
                getPaddingTop() + getPaddingBottom(), lp.height)
            child.measure(childWidthMeasureSpec, childHeightMeasureSpec)
            // 获取子 View 的测量宽/高
            val childMeasuredWidth = child.getMeasuredWidth()
            val childMeasuredHeight = child.getMeasuredHeight()
            val actualItemHorizontalSpacing = if (lineWidth == 0) 0 else itemHorizontalSpacing
            if (lineWidth + actualItemHorizontalSpacing + childMeasuredWidth <= maxWidth) {
                // 在本行还可以放置一个子 View
                lineWidth += actualItemHorizontalSpacing + childMeasuredWidth
                // 行高为一行中所有子 View 最高的那一个
                lineHeight = max(lineHeight, childMeasuredHeight)
                lineViews.add(child)
            } else {
                // 在本行不可以放置一个子 View,需要换行
                maxLineWidth = max(lineWidth, maxLineWidth)
                lineCount++
                totalHeight += lineHeight + if (lineCount == 1) 0 else itemVerticalSpacing
                lineHeights.add(lineHeight)
                allLineViews.add(lineViews)
                lineWidth = childMeasuredWidth
                lineHeight = childMeasuredHeight
                lineViews = ArrayList<View>()
                lineViews.add(child)
            }
        }
    }
    val measuredWidth = if (widthMode == MeasureSpec.EXACTLY) widthSize else maxLineWidth
    val measuredHeight = if (heightMode == MeasureSpec.EXACTLY) heightSize else totalHeight
    setMeasuredDimension(measuredWidth, measuredHeight)
}
布局过程
流式布局在onLayout方法中确定子元素的位置。
override fun onLayout(changed: Boolean, l: Int, t: Int, r: Int, b: Int) {
    // 获取行数
    val lineCount = allLineViews.size
    // 子元素的左上角横坐标
    var childLeft = 0
    // 子元素的左上角纵坐标
    var childTop = 0
    // 遍历行
    for (i in 0 until lineCount) {
        val lineViews = allLineViews[i]
        val lineHeight = lineHeights[i]
        // 遍历一行中的所有子元素
        for (j in 0 until lineViews.size) {
            val child = lineViews[j]
            val childMeasuredWidth = child.getMeasuredWidth()
            val childMeasuredHeight = child.getMeasuredHeight()
            // 确定子元素的位置
            child.layout(childLeft, childTop, childLeft + childMeasuredWidth, childTop + childMeasuredHeight)
            // 更新 childLeft,作为该行下一个子元素的左上角横坐标
            childLeft += childMeasuredWidth + itemHorizontalSpacing
        }
        // 更新 childTop,作为下一行子元素的左上角纵坐标
        childTop += lineHeight + itemVerticalSpacing
        // 更新 childLeft,作为下一行子元素的左上角横坐标
        childLeft = 0
    }
}
测试一波
设置布局如下:
<?xml version="1.0" encoding="utf-8"?>
<LinearLayout xmlns:android="http://schemas.android.com/apk/res/android"
    xmlns:app="http://schemas.android.com/apk/res-auto"
    xmlns:tools="http://schemas.android.com/tools"
    android:layout_width="match_parent"
    android:layout_height="match_parent"
    android:orientation="vertical"
    tools:context=".MainActivity">

    <com.example.lib.FlowLayout
        android:background="#44ff0000"
        android:layout_width="wrap_content"
        android:layout_height="wrap_content" >

        <TextView
            android:text="Android"
            style="@style/ItemStyle" />

        <TextView
            android:text="Kotlin"
            style="@style/ItemStyle" />

        <TextView
            android:text="Java"
            style="@style/ItemStyle" />

        <TextView
            android:text="Custom View"
            style="@style/ItemStyle" />
    </com.example.lib.FlowLayout>

</LinearLayout>
我们给FlowLayout添加了 4 个子元素。ItemStyle资源如下:
<style name="ItemStyle">
    <item name="android:background">@drawable/shape_button_circular</item>
    <item name="android:paddingLeft">12dp</item>
    <item name="android:paddingRight">12dp</item>
    <item name="android:paddingTop">2dp</item>
    <item name="android:paddingBottom">2dp</item>
    <item name="android:textSize">24sp</item>
    <item name="android:layout_width">wrap_content</item>
    <item name="android:layout_height">wrap_content</item>
</style>
shape_button_circular.xml资源如下:
<?xml version="1.0" encoding="utf-8" ?>
<shape xmlns:android="http://schemas.android.com/apk/res/android"
    android:shape="rectangle">
    <solid android:color="#FFE7BA" />
    <padding android:bottom="8dp"
        android:left="8dp"
        android:right="8dp"
        android:top="8dp"/>
    <!--设置圆角-->
    <corners android:radius="25dp" />
</shape>
在Activity里面没有添加任何代码,运行程序,界面如下:

咦…,怎么看不到子元素呢?流式布局的宽高都是有的,因为我们可以看到它的浅红色的背景。
查看一下代码逻辑,也没有发现什么问题啊。这该怎么办呢?定位问题的思路无非两种:打印日志和debug。
这里我们先打印一些日志:
在onMeasure方法的val measuredWidth = if (widthMode == MeasureSpec.EXACTLY) widthSize else maxLineWidth后面添加:
Log.d(TAG, "onMeasure: lineCount=$lineCount")在onLayout方法的val lineCount = allLineViews.size后面添加:
Log.d(TAG, "onLayout: lineCount=$lineCount")运行程序查看日志:
D/FlowLayout: onMeasure: lineCount=1
D/FlowLayout: onMeasure: lineCount=1
D/FlowLayout: onLayout: lineCount=2
可以看到onMeasure方法执行了两次,打印出的行数每次都是1,onLayout 方法执行了一次,打印出的行数是2 。也就是说,onMeasure方法里测量时得到的行数是1,但是在onLayout方法里得到的行数却是2了。而onLayout方法得到行数是从val lineCount = allLineViews.size来的。allLineViews集合的大小是 2,它应该是 1 才对啊,为什么不是 1 呢?
这是因为allLineViews是成员变量,onMeasure方法每次执行都会向该对象添加数据。而这里的 onMeasure 方法执行了2次,所以向allLineViews添加了2次数据:每次添加1行,所以总共是2行了。
好吧,这就是导致屏幕上看不到子元素的原因吗?
是的。
当allLineViews里有相同的两行时,每一行里包含的子元素是一模一样的;在布局时,就是先把这行元素布局在第1行,然后再把同样的行元素布局在第 2 行。但是,这里我们的流式布局是只显示1行的(这是在onMeasure决定的),所以就看不到子元素了。
解决子元素显示不出来的问题
我们应该在onMeasure方法里开头的地方对成员变量的集合做一次清除操作。在super.onMeasure(widthMeasureSpec, heightMeasureSpec)后添加代码:
allLineViews.clear()
lineHeights.clear()
运行程序,查看效果:
可以看到子元素了!但是,细心的我们记得之前我们给FlowLayout添加了4个子元素,这里怎么才显示3个?第4个子元素:文字显示为Custom View的子元素怎么没有显示出来?
解决子元素行数显示不对的问题
先来仔细看下换行的代码:
for (i in 0 until childCount) {
    val child = getChildAt(i)
    if (child.visibility != View.GONE) {
        // 测量子 View
        val lp = child.layoutParams
        val childWidthMeasureSpec = getChildMeasureSpec(widthMeasureSpec,
            getPaddingLeft() + getPaddingRight(), lp.width)
        val childHeightMeasureSpec = getChildMeasureSpec(heightMeasureSpec,
            getPaddingTop() + getPaddingBottom(), lp.height)
        child.measure(childWidthMeasureSpec, childHeightMeasureSpec)
        // 获取子 View 的测量宽/高
        val childMeasuredWidth = child.getMeasuredWidth()
        val childMeasuredHeight = child.getMeasuredHeight()
        val actualItemHorizontalSpacing = if (lineWidth == 0) 0 else itemHorizontalSpacing
        if (lineWidth + actualItemHorizontalSpacing + childMeasuredWidth <= maxWidth) {
            // 在本行还可以放置一个子 View
            lineWidth += actualItemHorizontalSpacing + childMeasuredWidth
            // 行高为一行中所有子 View 最高的那一个
            lineHeight = max(lineHeight, childMeasuredHeight)
            lineViews.add(child)
        } else {
            // 在本行不可以放置一个子 View,需要换行
            maxLineWidth = max(lineWidth, maxLineWidth)
            lineCount++
            totalHeight += lineHeight + if (lineCount == 1) 0 else itemVerticalSpacing
            lineHeights.add(lineHeight)
            allLineViews.add(lineViews)
            lineWidth = childMeasuredWidth
            lineHeight = childMeasuredHeight
            lineViews = ArrayList<View>()
            lineViews.add(child)
        }
    }
}
如果所有的子元素排列起来不足一行,会被统计为一行吗?
答:不会,目前我们的代码是只有换行的时候,才会统计一行。
最后一行子元素会被统计为一行吗?比如现在有 4 个子元素,其中 3 个放在第一行,最后 1 个放在第二行,那么第二行会被统计上吗?
答:不会的,目前我们的代码是只有换行的时候,才会统计一行。第二行没有达到换行,所以不会被统计进去。
怎么办呢?
从上面的分析可以知道,就目前的代码来看,最后一行子元素是统计不上的。解决办法:如果发现当前遍历到最后一个子元素,就把当前行进行一次统计。代码如下:
if (child.visibility != View.GONE) {
// 省略代码
}
// 在 if (child.visibility != View.GONE) 分支后,添加如下代码
if (i == childCount - 1) {
maxLineWidth = max(lineWidth, maxLineWidth)
lineCount++
totalHeight += lineHeight + if (lineCount == 1) 0 else itemVerticalSpacing
lineHeights.add(lineHeight)
allLineViews.add(lineViews)
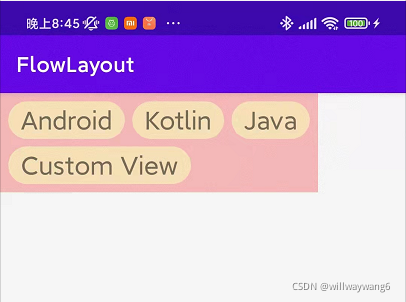
}运行程序,效果如下:

ok 了。
解决流式布局不支持padding的问题
现在我们在xml中给FlowLayout添加padding,代码如下:
<com.example.lib.FlowLayout
    android:background="#44ff0000"
    android:padding="8dp"
    android:layout_width="wrap_content"
    android:layout_height="wrap_content" >
运行程序,查看效果:
怎么子元素显示都不全啊?
这是因为ViewGroup设置了padding时,默认不允许子元素在padding区域绘制。具体来说,是因为clipToPadding属性的默认值是true。而我们布局子元素时并没有考虑padding的因素。
为了解决这一问题,我们在测量以及布局时都要考虑到padding:测量时可用的宽高不包括padding区域,布局时不能把子元素摆放在padding区域。
在onMeasure方法里做出修改
可用的宽度为最大宽度-左右padding ,所以将下面的代码。
if (lineWidth + actualItemHorizontalSpacing + childMeasuredWidth <= maxWidth)修改为:
if (lineWidth + actualItemHorizontalSpacing + childMeasuredWidth <= maxWidth - getPaddingLeft() - getPaddingRight())虽然测量时可用的宽高不包括padding区域,但是padding区域确实是流式布局宽高的一部分,所以在onMeasure方法里的for循环之后,添加如下代码:
maxLineWidth += getPaddingLeft() + getPaddingRight()
totalHeight += getPaddingTop() + getPaddingBottom()
在onLayout方法里做出修改
更新childLeft和childTop的初始值:
// 子元素的左上角横坐标
var childLeft = getPaddingLeft()
// 子元素的左上角纵坐标
var childTop = getPaddingTop()
更新外层for循环里childLeft的值:
// 更新 childLeft,作为下一行子元素的左上角横坐标
childLeft = getPaddingLeft()
修改完毕,运行程序,查看效果:
ok了。
解决流式布局不支持子元素的layout_margin的问题
我们修改xml布局的第3个子元素,给它添加android:layout_margin="16dp":
<TextView
    android:layout_margin="16dp"
    android:text="Java"
    style="@style/ItemStyle" />
先不运行程序,想一下预期的效果是什么样子的?
应该是文本为Java的子元素和周围子元素以及流式布局的间距都会变大。运行程序,查看效果:

居然和对第3个子元素不设置android:layout_margin="16dp"的效果是一毛一样的。
这肯定是有问题的。
原因是在测量和布局过程中,我们压根儿就没有考虑到子元素的margin值,自然就不会有子元素的margin效果了。
怎么办呢?
首先要获取到子元素的margin值,通过把子元素的LayoutParams对象强转为MarginLayoutParams:
val lp = child.layoutParams as MarginLayoutParams为什么要强转为MarginLayoutParams呢?这是因为MarginLayoutParams可以解析margin相关的布局参数,而LayoutParams只可以解析宽高的布局参数。
但是,这样直接强转会不会报类型转换错误呢?先思考一下。
其次在测量时和布局时都使用到获取的子元素margin值参与测量和布局:
在onMeausure方法中处理换行时,使用actualChildWidth和actualChildHeight来替换原来使用的childMeasuredWidth和childMeasuredHeight。
val actualChildWidth = childMeasuredWidth + lp.leftMargin + lp.rightMargin
val actualChildHeight = childMeasuredHeight + lp.topMargin + lp.bottomMargin
val actualItemHorizontalSpacing = if (lineWidth == 0) 0 else itemHorizontalSpacing
if (lineWidth + actualItemHorizontalSpacing + actualChildWidth /*这里替换了childMeasuredWidth*/
<= maxWidth - getPaddingLeft() - getPaddingRight()) {
    // 在本行还可以放置一个子 View
    lineWidth += actualItemHorizontalSpacing + actualChildWidth /*这里替换了childMeasuredWidth*/
    // 行高为一行中所有子 View 最高的那一个
    lineHeight = max(lineHeight, actualChildHeight /*这里替换了childMeasuredHeight*/ )
    lineViews.add(child)
} else {
    // 在本行不可以放置一个子 View,需要换行
    maxLineWidth = max(lineWidth, maxLineWidth)
    lineCount++
    totalHeight += lineHeight + if (lineCount == 1) 0 else itemVerticalSpacing
    lineHeights.add(lineHeight)
    allLineViews.add(lineViews)
    lineWidth = actualChildWidth /*这里替换了childMeasuredWidth*/
    lineHeight = actualChildHeight /*这里替换了childMeasuredHeight*/
    lineViews = ArrayList<View>()
    lineViews.add(child)
}
在onLayout方法中,对子元素进行布局时考虑到子元素的margin值:
for (j in 0 until lineViews.size) {
    val child = lineViews[j]
    val lp = child.layoutParams as MarginLayoutParams
    childLeft += lp.leftMargin
    val childMeasuredWidth = child.getMeasuredWidth()
    val childMeasuredHeight = child.getMeasuredHeight()
    // 确定子元素的位置
    child.layout(childLeft, childTop + lp.topMargin, childLeft + childMeasuredWidth, childTop + lp.topMargin + childMeasuredHeight)
    // 更新 childLeft,作为该行下一个子元素的左上角横坐标
    childLeft += childMeasuredWidth + lp.rightMargin + itemHorizontalSpacing
}
运行一下程序,发现程序崩溃了,报出如下错误了:
Process: com.blog.flowlayout, PID: 24130
    java.lang.ClassCastException: android.view.ViewGroup$LayoutParams cannot be cast to android.view.ViewGroup$MarginLayoutParams
        at com.example.lib.FlowLayout.onMeasure(FlowLayout.kt:49)
        ...
果然是在val lp = child.layoutParams as MarginLayoutParams时报出了类型转换异常。
解决这个问题需要在FlowLayout类中重写ViewGroup的generateLayoutParams(AttributeSet attrs)方法(是在LayoutInflater的rInflate方法中被调用的:final ViewGroup.LayoutParams params = viewGroup.generateLayoutParams(attrs);)。
/**
 * Returns a new set of layout parameters based on the supplied attributes set.
 *
 * @param attrs the attributes to build the layout parameters from
 *
 * @return an instance of {@link android.view.ViewGroup.LayoutParams} or one
 *         of its descendants
 */
public LayoutParams generateLayoutParams(AttributeSet attrs) {
    return new LayoutParams(getContext(), attrs);
}
重写如下:
// 当通过 xml 添加时,会走这个方法获取子 View 的布局参数
// 但是,默认的实现只会从 AttributeSet 里解析 layout_width 和 layout_height 这两个属性
// 这里重写的目的是解析 margin 属性。
override fun generateLayoutParams(attrs: AttributeSet?): LayoutParams {
    return MarginLayoutParams(getContext(), attrs)
}
再次运行程序,效果如下:

Good。
解决动态添加子元素时发生类型转换异常的问题
在实际开发中,除了直接在xml中给流式布局添加子元素,还可以在代码中通过addView方法给流式布局添加子元素,对应代码如下:
binding.flowlayout.addView(TextView(this).apply {
    text = tabArray[tabIndex]
    setBackgroundResource(R.drawable.shape_button_circular)
    setPadding(12.dp2px(), 2.dp2px(), 12.dp2px(), 2.dp2px())
    setTextSize(TypedValue.COMPLEX_UNIT_SP, 24f)
})
运行程序,又崩溃了,查看报错日志:
E/AndroidRuntime: FATAL EXCEPTION: main
    Process: com.blog.flowlayout, PID: 25517
    java.lang.ClassCastException: android.view.ViewGroup$LayoutParams cannot be cast to android.view.ViewGroup$MarginLayoutParams
        at com.example.lib.FlowLayout.onMeasure(FlowLayout.kt:49)
啊…,又是类型转换异常,刚才不是解决了一个了吗?怎么又来一个啊!!!
没事儿,我有办法,在FlowLayout里重载generateDefaultLayoutParams方法:
// 当通过 addView(View) 方法添加子元素,并且子元素没有设置布局参数时,会调用此方法来生成默认的布局参数
// 这里重写返回 MarginLayoutParams 对象,是为了在获取子元素的 LayoutParams 对象时,可以正常强转为 MarginLayoutParams
override fun generateDefaultLayoutParams(): LayoutParams {
    return MarginLayoutParams(LayoutParams.WRAP_CONTENT, LayoutParams.WRAP_CONTENT)
}
再次运行程序,效果如下:

可以了。我们把动态添加子元素的代码修改如下:
binding.flowlayout.addView(TextView(this).apply {
    text = tabArray[tabIndex]
    setBackgroundResource(R.drawable.shape_button_circular)
    setPadding(12.dp2px(), 2.dp2px(), 12.dp2px(), 2.dp2px())
    setTextSize(TypedValue.COMPLEX_UNIT_SP, 24f)
    // 这行代码是新添加的
    layoutParams = ViewGroup.LayoutParams(WRAP_CONTENT, WRAP_CONTENT)
})
再次运行程序,崩溃了,报错如下:
E/AndroidRuntime: FATAL EXCEPTION: main
    Process: com.blog.flowlayout, PID: 13750
    java.lang.ClassCastException: android.view.ViewGroup$LayoutParams cannot be cast to android.view.ViewGroup$MarginLayoutParams
        at com.example.lib.FlowLayout.onMeasure(FlowLayout.kt:49)
怎么又又又是类型转换异常?
没事,我们有办法。
// 检查传入的布局参数是否符合某个条件
override fun checkLayoutParams(p: LayoutParams?): Boolean {
    return p is MarginLayoutParams
}
// addViewInner 中调用,但是布局参数类型无法通过 checkLayoutParams() 判断时,会走这个方法。
override fun generateLayoutParams(p: LayoutParams?): LayoutParams {
    return MarginLayoutParams(p)
}
运行程序,可以正常添加子元素。

自定义流式布局的自定义属性之行内垂直靠顶部,居中,靠底部。目前我们在行内垂直方向上的子元素是靠顶部布局的,希望可以实现靠顶部,居中,靠底部三种效果。定义自定义属性,在res/values文件下新建attrs.xml:
<?xml version="1.0" encoding="utf-8"?>
<resources>
    <declare-styleable name="FlowLayout">
        <attr name="flowlayout_line_vertical_gravity" format="enum">
            <enum name="top" value="0"/>
            <enum name="center_vertical" value="1"/>
            <enum name="bottom" value="2" />
        </attr>
    </declare-styleable>
</resources>
在FlowLayout中解析自定义属性,并定义属性的getter/setter方法:
var lineVerticalGravity: Int = LINE_VERTICAL_GRAVITY_CENTER_VERTICAL
    set(value) {
        field = value
        requestLayout()
    }
init {
    val ta = context.obtainStyledAttributes(attrs, R.styleable.FlowLayout)
    lineVerticalGravity = ta.getInt(R.styleable.FlowLayout_flowlayout_line_vertical_gravity, LINE_VERTICAL_GRAVITY_CENTER_VERTICAL)
    Log.d(TAG, "init: lineVerticalGravity=$lineVerticalGravity")
    ta.recycle()
}
companion object {
    private const val TAG = "FlowLayout"
    const val LINE_VERTICAL_GRAVITY_TOP = 0
    const val LINE_VERTICAL_GRAVITY_CENTER_VERTICAL = 1
    const val LINE_VERTICAL_GRAVITY_BOTTOM = 2
}
在xml布局中使用自定义属性:
<com.example.lib.FlowLayout
    android:id="@+id/flowlayout"
    android:background="#44ff0000"
    android:padding="8dp"
    app:flowlayout_line_vertical_gravity="top"
    android:layout_width="wrap_content"
    android:layout_height="wrap_content" >
运行程序,查看是否可以正常获取到属性值,打印如下:
D/FlowLayout: init: lineVerticalGravity=0可以正常获取属性值。在Activity中,我们还添加一些代码里动态设置lineVerticalGravity的menu项:
R.id.action_line_vertical_gravity_top -> {
    binding.flowlayout.lineVerticalGravity = FlowLayout.LINE_VERTICAL_GRAVITY_TOP
    true
}
R.id.action_line_vertical_gravity_center_vertical -> {
    binding.flowlayout.lineVerticalGravity = FlowLayout.LINE_VERTICAL_GRAVITY_CENTER_VERTICAL
    true
}
R.id.action_line_vertical_gravity_bottom -> {
    binding.flowlayout.lineVerticalGravity = FlowLayout.LINE_VERTICAL_GRAVITY_BOTTOM
    true
}
自定义属性的定义,解析,设置工作都完成了,接着看如何使用自定义属性吧。在FlowLayout中定义getOffsetTop方法,用于获取子元素顶部的偏移量:
private fun getOffsetTop(lineHeight: Int, child: View): Int {
    val lp = child.layoutParams as MarginLayoutParams
    val childMeasuredHeight = child.getMeasuredHeight()
    val childMeasuredHeightWithMargin = childMeasuredHeight + lp.topMargin + lp.bottomMargin
    return when (lineVerticalGravity) {
        LINE_VERTICAL_GRAVITY_TOP -> 0
        LINE_VERTICAL_GRAVITY_CENTER_VERTICAL -> (lineHeight - childMeasuredHeightWithMargin) / 2
        LINE_VERTICAL_GRAVITY_BOTTOM -> lineHeight - childMeasuredHeightWithMargin
        else -> {
            throw IllegalArgumentException("unknown lineVerticalGravity value: $lineVerticalGravity")
        }
    }
}
在onLayout方法的内层for循环里使用getOffsetTop:
val offsetTop = getOffsetTop(lineHeight, child)
// 确定子元素的位置
child.layout(childLeft, childTop + lp.topMargin + offsetTop, childLeft + childMeasuredWidth,
    childTop + lp.topMargin + offsetTop+ childMeasuredHeight)
运行程序,效果如下:

自定义流式布局的自定义属性之限制行数
在attrs.xml文件中添加自定义属性:
<declare-styleable name="FlowLayout">
    ...
    <attr name="android:maxLines"/>
</declare-styleable>
可以看到,这里添加的是Android系统已经有的自定义属性,这时候要写上android的命名空间。在FlowLayout里面,解析定义的自定义属性,并设置代码动态设置行数的方法:
var maxLines: Int = Int.MAX_VALUE
    set(value) {
        field = value
        requestLayout()
    }
init {
    // 默认值为 Int.MAX_VALUE,表示不限制行数
    maxLines = ta.getInt(R.styleable.FlowLayout_android_maxLines, Int.MAX_VALUE)
    Log.d(TAG, "init: maxLines=$maxLines")
}
属性的定义和获取工作已经完成了,下面开始去使用它吧。
我们的思路是:
在onMeasure方法中,在新增一行之前去判断当前行数是否等于最大行数,如果等于就结束遍历子元素。
在onLayout方法中,需要做修改吗?不需要,因为在onMeasure方法里我们已经控制了行数,在onLayout方法里自然不会再多布局元素了。
在onMeasure方法中,有两处新增行:
第一处:
if (lineWidth + actualItemHorizontalSpacing + actualChildWidth <= maxWidth - getPaddingLeft() - getPaddingRight()) {
    ...
} else {
    // 如果当前行数等于最大行数,就结束遍历子元素
    if (lineCount == maxLines) {
        break
    }
    maxLineWidth = max(lineWidth, maxLineWidth)
    lineCount++
    ...
}
第二处:
if (i == childCount - 1) {
    // 如果当前行数等于最大行数,就结束遍历子元素
    if (lineCount == maxLines) {
        break
    }
    maxLineWidth = max(lineWidth, maxLineWidth)
    lineCount++
    totalHeight += lineHeight + if (lineCount == 1) 0 else itemVerticalSpacing
    lineHeights.add(lineHeight)
    allLineViews.add(lineViews)
}
在页面里添加测试代码:
R.id.action_maxlines_1 -> {
    binding.flowlayout.maxLines = 1
    true
}
R.id.action_maxlines_3 -> {
    binding.flowlayout.maxLines = 3
    true
}
R.id.action_maxlines_maxCount_no_limit -> {
    binding.flowlayout.maxLines = Int.MAX_VALUE
    true
}
运行程序,效果如下:
查看日志,可以看到在onMeasure方法和onLayout方法打印的行数是一致的:
D/FlowLayout: onMeasure: lineCount=1
D/FlowLayout: onLayout: lineCount=1
D/FlowLayout: onMeasure: lineCount=3
D/FlowLayout: onLayout: lineCount=3
D/FlowLayout: onMeasure: lineCount=6
D/FlowLayout: onLayout: lineCount=6
自定义流式布局的自定义属性之限制个数
在attrs.xml中添加自定义属性:
<declare-styleable name="FlowLayout">
    ...
    <attr name="maxCount" format="integer"/>
</declare-styleable>
在FlowLayout中解析自定义属性并设置代码中动态设置的方法:
var maxCount: Int = Int.MAX_VALUE
    set(value) {
        field = value
        requestLayout()
    }
init {
    maxCount = ta.getInt(R.styleable.FlowLayout_maxCount, Int.MAX_VALUE)
}
使用个数限制的思路是:当个数达到个数限制时,就结束遍历子元素。
具体来说,在onMeasure方法中,定义一个局部变量:
var measuredChildCount = 0用于记录参与测量的元素个数。
在统计到元素参与测量时,就自增measuredChildCount :
if (child.visibility != View.GONE) {
    ...
    measuredChildCount++
}
在元素个数达到个数限制时,就结束子元素遍历:
if (i == childCount - 1 || (measuredChildCount == maxCount)) {
    if (lineCount == maxLines) {
        break
    }
    maxLineWidth = max(lineWidth, maxLineWidth)
    lineCount++
    totalHeight += lineHeight + if (lineCount == 1) 0 else itemVerticalSpacing
    lineHeights.add(lineHeight)
    allLineViews.add(lineViews)
    if (measuredChildCount == maxCount) {
        break
    }
}
在onLayout方法没有做修改。运行程序,查看效果:
可以看到,限制最多3个时,屏幕上显示的是3个;但是,当限制最多6个时,屏幕上显示的是7个。这肯定是不对的。在onLayout方法添加打印日志的代码:
val itemCount = allLineViews.sumOf { it.size }
Log.d(TAG, "onLayout: itemCount=$itemCount,childCount=$childCount")
查看日志:
D/FlowLayout: onMeasure: lineCount=1
D/FlowLayout: onLayout: lineCount=1
D/FlowLayout: onLayout: itemCount=3,childCount=14
D/FlowLayout: onMeasure: lineCount=2
D/FlowLayout: onLayout: lineCount=2
D/FlowLayout: onLayout: itemCount=6,childCount=14
当限制两行时,打印出的itemCount确实是6个,childCount是14个。
为什么childCount是14个呢?
这是因为FlowLayout这个ViewGroup里有14个子元素,在限制个数时,并没有更改子元素的个数,所以流式布局的子元素个数是没有变化的。那么,为什么限制最多显示6个,而实际上却显示了7个?
当屏幕上的元素个数没有限制时,显示为14个。当限制最多显示6个时,计算出需要的行数为2行,元素个数为6个,这时在onLayout方法里,只会对前6个元素进行重新布局,而第7个元素正好位于第2行,没有经过重新布局,所以它的显示不受任何影响。
解决办法是:对在限制个数以外的子元素进行重新布局,布局在(0, 0, 0, 0)的位置。
在onLayout中定义:
var nextChildIndex = 0在内层for循环里添加:
nextChildIndex = indexOfChild(child)在外层for循环结束后添加:
val childCount = getChildCount()
for (i in nextChildIndex + 1 until childCount) {
    val child = getChildAt(i)
    if (child.visibility == View.GONE) {
        continue
    }
    child.layout(0,0,0,0)
}
重新运行程序,效果如下:

看效果是正常了。
解决限制行数与限制个数设置冲突的问题
因为maxLines和maxCount都是在onMeasure方法中使用的,我们希望设置限制行数时,限制个数的设置不要使用;设置限制个数时,限制行数的设置不要使用。定义模式常量来区分:
const val MODE_LIMIT_MAX_LINE = 0
const val MODE_LIMIT_MAX_COUNT = 1
在onMeasure方法中,需要使用限制行数或限制个数的地方添加mode判断:
for (i in 0 until childCount) {
    val child = getChildAt(i)
    if (child.visibility != View.GONE) {
        // 测量子 View
        val lp = child.layoutParams as MarginLayoutParams
        val childWidthMeasureSpec = getChildMeasureSpec(widthMeasureSpec,
            getPaddingLeft() + getPaddingRight(), lp.width)
        val childHeightMeasureSpec = getChildMeasureSpec(heightMeasureSpec,
            getPaddingTop() + getPaddingBottom(), lp.height)
        child.measure(childWidthMeasureSpec, childHeightMeasureSpec)
        // 获取子 View 的测量宽/高
        val childMeasuredWidth = child.getMeasuredWidth()
        val childMeasuredHeight = child.getMeasuredHeight()
        val actualChildWidth = childMeasuredWidth + lp.leftMargin + lp.rightMargin
        val actualChildHeight = childMeasuredHeight + lp.topMargin + lp.bottomMargin
        val actualItemHorizontalSpacing = if (lineWidth == 0) 0 else itemHorizontalSpacing
        if (lineWidth + actualItemHorizontalSpacing + actualChildWidth <= maxWidth - getPaddingLeft() - getPaddingRight()) {
            // 在本行还可以放置一个子 View
            lineWidth += actualItemHorizontalSpacing + actualChildWidth
            // 行高为一行中所有子 View 最高的那一个
            lineHeight = max(lineHeight, actualChildHeight)
            lineViews.add(child)
        } else {
            // 在本行不可以放置一个子 View,需要换行
            if (lineCount == maxLines && mode == MODE_LIMIT_MAX_LINE) {
                break
            }
            maxLineWidth = max(lineWidth, maxLineWidth)
            lineCount++
            totalHeight += lineHeight + if (lineCount == 1) 0 else itemVerticalSpacing
            lineHeights.add(lineHeight)
            allLineViews.add(lineViews)
            lineWidth = actualChildWidth
            lineHeight = actualChildHeight
            lineViews = ArrayList<View>()
            lineViews.add(child)
        }
        measuredChildCount++
    }
    if (i == childCount - 1 || (measuredChildCount == maxCount && mode == MODE_LIMIT_MAX_COUNT)) {
        if (lineCount == maxLines && mode == MODE_LIMIT_MAX_LINE) {
            break
        }
        maxLineWidth = max(lineWidth, maxLineWidth)
        lineCount++
        totalHeight += lineHeight + if (lineCount == 1) 0 else itemVerticalSpacing
        lineHeights.add(lineHeight)
        allLineViews.add(lineViews)
        if (measuredChildCount == maxCount && mode == MODE_LIMIT_MAX_COUNT) {
            break
        }
    }
}
解决流式布局宽度方向上没有限制时仍会换行的问题
修改使用FlowLayout的布局的父节点为HorizontalScrollView:
<?xml version="1.0" encoding="utf-8"?>
<HorizontalScrollView xmlns:android="http://schemas.android.com/apk/res/android"
    xmlns:app="http://schemas.android.com/apk/res-auto"
    xmlns:tools="http://schemas.android.com/tools"
    android:layout_width="match_parent"
    android:layout_height="wrap_content"
    tools:context=".MainActivity">

    <com.example.lib.FlowLayout
        android:id="@+id/flowlayout"
        android:background="#44ff0000"
        android:padding="8dp"
        app:itemHorizontalSpacing="20px"
        app:itemVerticalSpacing="20px"
        app:flowlayout_line_vertical_gravity="top"
        android:layout_width="wrap_content"
        android:layout_height="wrap_content" >

        <TextView
            android:text="Android"
            style="@style/ItemStyle" />

        <TextView
            android:text="Kotlin"
            style="@style/ItemStyle" />

        <TextView
            android:layout_margin="16dp"
            android:text="Java"
            style="@style/ItemStyle" />

        <TextView
            android:text="Custom View"
            style="@style/ItemStyle" />
    </com.example.lib.FlowLayout>

</HorizontalScrollView>
运行程序,查看效果:
FlowLayout的父节点是HorizonalScrollView,那么在宽度方向上,父节点给FlowLayout的测量模式就是UNSPECIED,意思就是对流式布局在宽度方向上没有任何限制,想多大就多大,想多小就多小。这样来看,流式布局不应该换行才对啊。
查看代码,判断换行的依据是maxWidth:
val widthSize = MeasureSpec.getSize(widthMeasureSpec)
val widthMode = MeasureSpec.getMode(widthMeasureSpec)
val heightSize = MeasureSpec.getSize(heightMeasureSpec)
val heightMode = MeasureSpec.getMode(heightMeasureSpec)
Log.d(TAG, "onMeasure: widthMeasureSpec=${MeasureSpec.toString(widthMeasureSpec)}, heightMeasureSpec=${MeasureSpec.toString(heightMeasureSpec)}")
// 获取流式布局允许的最大宽度
val maxWidth = widthSize
查看日志widSize目前为 1080:
D/FlowLayout: onMeasure: widthMeasureSpec=MeasureSpec: UNSPECIFIED 1080, heightMeasureSpec=MeasureSpec: AT_MOST 2025同时看到日志里面,此时流式布局在宽度方向上的测量模式确实是UNSPECIFIED,需要说明的是1080只是一个参考值,这里我们希望的是宽度非常大,越大越好。所以调整获取流式布局允许的最大宽度的代码为:
val maxWidth = if (widthMode != MeasureSpec.UNSPECIFIED) widthSize else Int.MAX_VALUE重新运行程序,效果如下:
解决流式布局高度会大于父布局高度的问题
修改布局如下:
<?xml version="1.0" encoding="utf-8"?>
<LinearLayout xmlns:android="http://schemas.android.com/apk/res/android"
    xmlns:app="http://schemas.android.com/apk/res-auto"
    xmlns:tools="http://schemas.android.com/tools"
    android:layout_width="match_parent"
    android:layout_height="100px"
    tools:context=".MainActivity">

    <com.example.lib.FlowLayout
        android:id="@+id/flowlayout"
        android:background="#44ff0000"
        android:padding="8dp"
        app:itemHorizontalSpacing="20px"
        app:itemVerticalSpacing="20px"
        app:flowlayout_line_vertical_gravity="top"
        android:layout_width="wrap_content"
        android:layout_height="wrap_content" >

        <TextView
            android:text="Android"
            style="@style/ItemStyle" />

        <TextView
            android:text="Kotlin"
            style="@style/ItemStyle" />

        <TextView
            android:layout_margin="16dp"
            android:text="Java"
            style="@style/ItemStyle" />

        <TextView
            android:text="Custom View"
            style="@style/ItemStyle" />
    </com.example.lib.FlowLayout>

</LinearLayout>
给LinearLayout指定了固定的高度为100px,运行程序查看流式布局的测量宽高:
D/FlowLayout: onMeasure: measuredWidth=934, measuredHeight=264可以看到,流式布局的高度竟然比父布局的高度还大,这是有问题的。看一下,计算流式布局测量高度的代码:
val measuredHeight = if (heightMode == MeasureSpec.EXACTLY) heightSize else totalHeight当heightMode不为EXACTLY时,就直接把计算出的高度作为测量高度了。但是,计算出的高度会超出父布局给的最大允许高度,这点是欠考虑的。修改代码如下:
val measuredHeight = when(heightMode) {
    MeasureSpec.EXACTLY -> heightSize
    MeasureSpec.AT_MOST -> Math.min(heightSize, totalHeight)
    else -> totalHeight
}
重新允许程序,查看日志:
D/FlowLayout: onMeasure: measuredWidth=934, measuredHeight=100Okay.
流式布局的状态保存与恢复
这里以maxCount值的状态保存与恢复为例子来说明。先看下问题:

在翻转屏幕之前,设置了个数限制为3个,在翻转屏幕之后,个数限制就失效了。我们希望在屏幕翻转后,个数限制的值依然是3。这就需要用到状态恢复与保存了。在FlowLayout中添加代码如下:
override fun onSaveInstanceState(): Parcelable {
    val superState =  super.onSaveInstanceState()
    val ss = SavedState(superState)
    ss.maxCount = maxCount
    Log.d(TAG, "onSaveInstanceState: maxCount=$maxCount")
    return ss
}
override fun onRestoreInstanceState(state: Parcelable?) {
    val ss = state as SavedState
    super.onRestoreInstanceState(ss.superState)
    maxCount = ss.maxCount
    Log.d(TAG, "onRestoreInstanceState: maxCount=$maxCount")
}
class SavedState : BaseSavedState {
    var maxCount = Int.MAX_VALUE
    constructor(superState: Parcelable?): super(superState)
    constructor(parcel: Parcel) : super(parcel) {
        maxCount = parcel.readInt()
    }
    override fun writeToParcel(parcel: Parcel, flags: Int) {
        super.writeToParcel(parcel, flags)
        parcel.writeInt(maxCount)
    }
    override fun describeContents(): Int {
        return 0
    }
    companion object CREATOR : Parcelable.Creator<SavedState> {
        override fun createFromParcel(parcel: Parcel): SavedState {
            return SavedState(parcel)
        }
        override fun newArray(size: Int): Array<SavedState?> {
            return arrayOfNulls(size)
        }
    }
}
再次测试程序,效果如下:

日志如下:
D/FlowLayout: onSaveInstanceState: maxCount=3
D/FlowLayout: onRestoreInstanceState: maxCount=3
可以看到,问题已经解决了。
优化 onMeasure 方法中分配对象的问题
每次换行都会分配一个集合:
var lineViews = ArrayList<View>()As已经警告了:
Avoid object allocations during draw/layout operations (preallocate and reuse instead)目前来看,这样做是必须的,因为lineViews是用来存放每一行的子元素的集合。如果要避免分配太多对象,复用对象和提前创建对象都是不可行的。
其实,我们即便不存储每一行的元素,在onLayout方法中也可以把它们布局好:因为我们已经知道了流式布局的测量宽高,每个子元素的测量宽高,它们的间距,margin等等。删除allLineViews这个成员变量,以及在onMeasure方法中的使用。在onLayout方法修改代码如下:
override fun onLayout(changed: Boolean, l: Int, t: Int, r: Int, b: Int) {
    // 子元素的左上角横坐标
    var childLeft = getPaddingLeft()
    // 子元素的左上角纵坐标
    var childTop = getPaddingTop()
    val childCount = getChildCount()
    // 行数索引
    var lineIndex = 0
    var layoutChildCount = 0
    for (i in 0 until childCount) {
        val child = getChildAt(i)
        if (child.visibility != View.GONE) {
            val lp = child.layoutParams as MarginLayoutParams
            childLeft += lp.leftMargin
            val childMeasuredWidth = child.getMeasuredWidth()
            val childMeasuredHeight = child.getMeasuredHeight()
            if (childLeft + childMeasuredWidth > getMeasuredWidth()) {
                // 需要换行了
                // 更新 childTop,作为下一行子元素的左上角纵坐标
                childTop += lineHeights[lineIndex] + itemVerticalSpacing
                // 更新 childLeft,作为下一行子元素的左上角横坐标
                childLeft = getPaddingLeft()
                lineIndex++
            }
            if (lineIndex + 1 > maxLines && mode == MODE_LIMIT_MAX_LINE) {
                child.layout(0,0,0,0)
            } else if (layoutChildCount >= maxCount && mode == MODE_LIMIT_MAX_COUNT) {
                child.layout(0,0,0,0)
            } else {
                val offsetTop = getOffsetTop(lineHeights[lineIndex], child)
                // 确定子元素的位置
                child.layout(
                    childLeft, childTop + lp.topMargin + offsetTop, childLeft + childMeasuredWidth,
                    childTop + lp.topMargin + offsetTop + childMeasuredHeight
                )
                layoutChildCount++
                // 更新 childLeft,作为该行下一个子元素的左上角横坐标
                childLeft += childMeasuredWidth + lp.rightMargin + itemHorizontalSpacing
            }
        }
    }
}
总结
本文一步一步地使用自定义ViewGroup实现了流式布局,比较全面地考虑了自定义ViewGroup的注意事项。希望能够帮助到大家。
进一步地学习,可以查看参考里的文章或者视频。
代码地址:
https://github.com/jhwsx/BlogCodes/tree/master/FlowLayout
博客地址:
https://blog.csdn.net/willway_wang
关注我获取更多知识或者投稿


 2573
2573


 被折叠的 条评论
为什么被折叠?
被折叠的 条评论
为什么被折叠?
 到【灌水乐园】发言


