


 介绍了VS2005 Web应用项目的更新内容,包括新增功能、快速上手指南及项目属性定制等,强调了其对于大型VS2003 Web项目的升级便利性。
May 8th Update: The final release of the VS 2005 Web Application Project is now live. You can learn more about it here.
Today we published the Release Candidate of the VS 2005 Web Application Project on the web. You can download it now from here.
Over the next few days we’ll be updating the in-depth tutorials on how to use it on http://webproject.scottgu.com. We have also posted a whitepaper that describes the project option more (and when to use it versus a VS 2005 Web Site Project) here. You can also read more about the original motivation for adding the VS 2005 Web Application Project option here.
There is also a new forum on http://forums.asp.net that is dedicated to VS 2005 Web Application Project questions. You can access it here.
What is new with today’s release?
Today’s release is a major refresh that provides a ton of new functionality and rounds out the feature-set. Some of the major new features added since the February preview:
-
Event handler generation and wire-up from the WYSIWYG designer
-
F7/Shift-F7 Navigation Support (switch between page views)
-
Add New Item Wizard to add pages based on Master Pages (easily pick master)
-
Richer Publishing Support
-
Connection String and Settings Support in Web.Config
-
Resources and .Resx Resource Editor Support
-
Support for building multi-project applications and sub-web projects
-
.ASPX files no longer locked when debugging
-
Support for root-path based image and stylesheets (/images/foo.jpg)
-
Control Registrations within Web.Config files
-
Web Service Cross-Project Reference Support
-
Section 508 and WCAG Accessibility Checker Support
-
Ability to create an IIS Vroot/Application setting within Project Dialog
-
SQL DataSource Control Support
-
ASP.NET Custom Folder Templates
-
Component Designer Support
-
Support to Drag/Drop User Controls, StyleSheets, Images from Solution Explorer to designer
-
New Web Service Project Template
-
SQL Express Support

Also included in this build is support to automatically migrate a VS 2003 Web Application to be a VS 2005 Web Application Project. With the VS 2005 Web Application Project installed, you can now simply do a File->Open File within VS 2005 and select a VS 2003 .sln or project file to kick off a migration wizard that will convert the project to be VS 2005 Web Application Project (no need to open or modify any project file settings manually anymore).
This will provide a straight-forward way to migrate a VS 2003 Web Application to VS 2005 without having to-do much work (because this new project type uses the same compile and project semantics as VS 2003 you shouldn’t need to make code changes to get a VS 2003 app building and running in VS 2005 – we’ll be posting a detailed step-by-step tutorial on how to-do this shortly).
We also have added automated migration support to help take a VS 2005 Web Site Project and migrate it to the VS 2005 Web Application Project option you can do that too (we’ll also be publishing tutorials on this as well).
If you have installed and used the previous two preview releases of the VS 2005 Web Application Project, you can simply uninstall the previous installs and install this new one. The project file format and code is the same, so your apps will keep working (but now with more features to use).
Quick Step-By-Step Walkthrough
To get a quick sense of how VS 2005 Web Application Projects work, you can install it and try out the simple “hello world” walkthrough below:
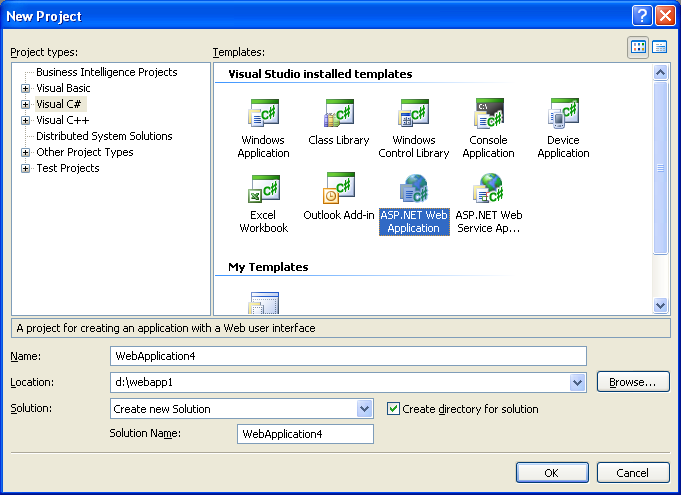
Step 1: Create a New VS 2005 Web Application Project
Choose the File->New Project menu item and select the “ASP.NET Web Application” project template (note below that we also now have an ASP.NET Web Service project template if you are building a web service project).
This will create a project that contains a default.aspx page (along with associated code-behind file, and a .designer.cs/.vb file where control field declarations and tool-generated code is persisted):
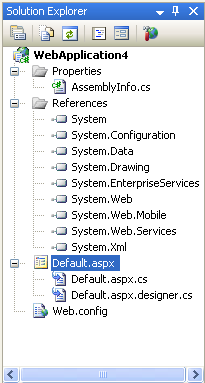
Note that I didn’t have to associate this project with an IIS application. Unlike VS 2003, I don’t need to have IIS on the machine – instead developers can use the built-in VS web-server if they want to instead. Alternatively, they can open up the project properties to map (or create) an IIS application to handle the project (see step 5 below on how to-do this).
Step 2: Open and Edit the Default.aspx Page
Double click on the default.aspx page node in the solution explorer to open and edit it (note: you can now use F7 and Shift-F7 to toggle between the designer, .aspx source, and code-behind views of the page). Add a button and label to the page:
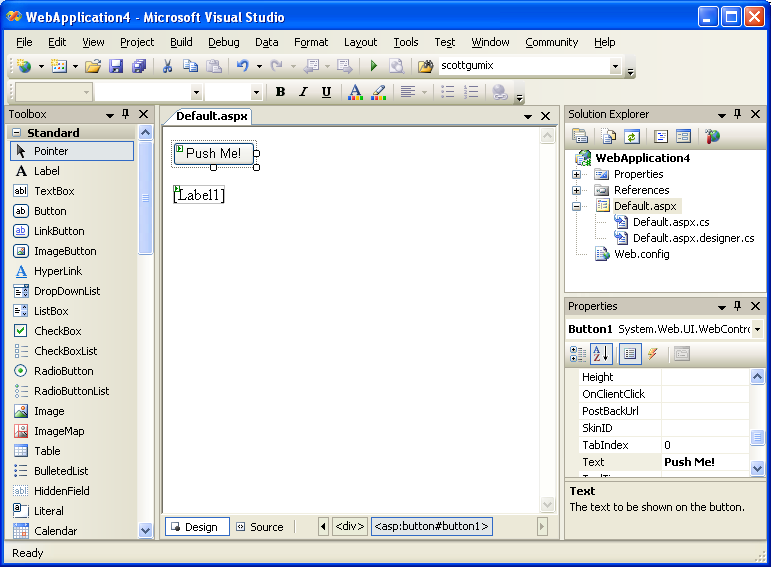
This generates .aspx markup source like so:
<%@ Page Language="C#" AutoEventWireup="true" CodeBehind="Default.aspx.cs" Inherits="WebApplication4._Default" %>
<!DOCTYPE html PUBLIC "-//W3C//DTD XHTML 1.0 Transitional//EN" "http://www.w3.org/TR/xhtml1/DTD/xhtml1-transitional.dtd">
<html xmlns="http://www.w3.org/1999/xhtml" >
<head runat="server">
<title>Untitled Page</title>
</head>
<body>
<form id="form1" runat="server">
<div>
<asp:Button ID="Button1" runat="server" Text="Push Me!" />
<br />
<br />
<asp:Label ID="Label1" runat="server"></asp:Label>
</div>
</form>
</body>
</html>
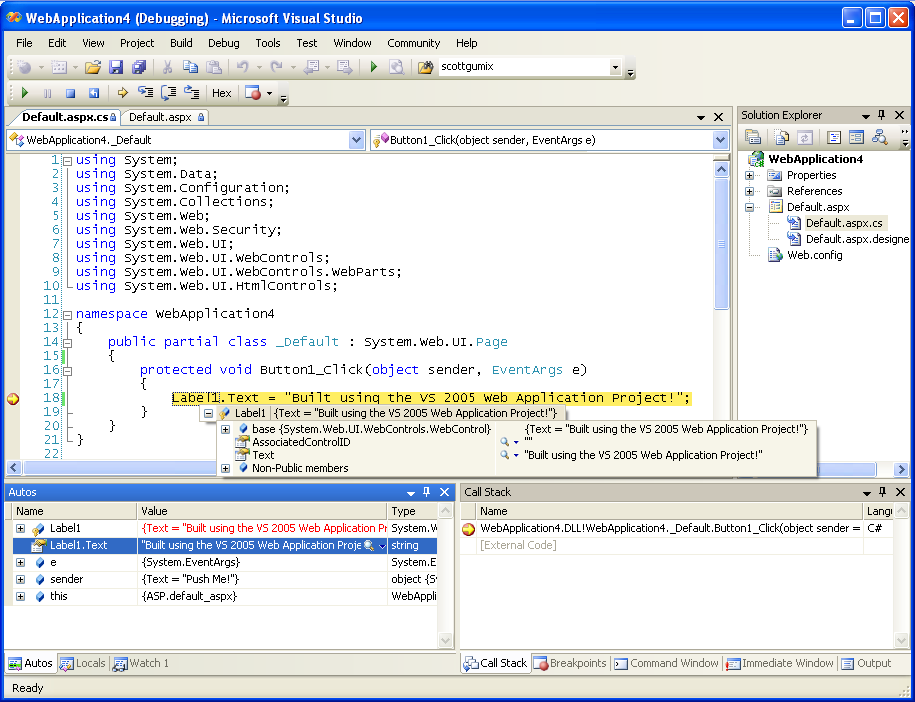
Within the WYSIWYG designer, double click on the button control to generate a “Click” event handler. This will automatically generate the appropriate event-handler in your code-behind and wire it up to the control. Within your code-behind file you can then write your code to work against the controls on the page:
using System;
using System.Data;
using System.Configuration;
using System.Collections;
using System.Web;
using System.Web.Security;
using System.Web.UI;
using System.Web.UI.WebControls;
using System.Web.UI.WebControls.WebParts;
using System.Web.UI.HtmlControls;
namespace WebApplication4
{
public partial class _Default : System.Web.UI.Page
{
protected void Button1_Click(object sender, EventArgs e)
{
Label1.Text = "Built using the VS 2005 Web Application Project!";
}
}
}
The code above is actually the exact same code-behind code that you would write with a VS 2005 Web Site Project based application. The difference is that with a VS 2005 Web Site Project the control declarations are dynamically generated by the project at compile time (rather than persisted in the project) within a partial class that is compiled together with the code-behind file. With VS 2005 Web Application Projects each page instead has a .designer.cs file (or with VB projects .designer.vb file) that contains the persisted control declarations within a partial class. This is updated by VS anytime you modify the .aspx page. For example, the Default.aspx.designer.cs file for our above sample would look like this:
namespace WebApplication4 {
public partial class _Default {
protected System.Web.UI.HtmlControls.HtmlForm form1;
protected System.Web.UI.WebControls.Button Button1;
protected System.Web.UI.WebControls.Label Label1;
}
}
Persisting these declarations within .designer.cs files within the project allows very fast compile times (in general people in the beta program have found VS 2005 Web Applications compile 10-15% faster than VS 2003 Web Projects, and much, much faster than VS 2005 Web Site Projects when a full build/re-build scenario occurs). It also allows any class within the project (or a separate project that references your web project) to directly reference and use a page and its controls if you want to. It also makes code refactoring very fast even for very large projects.
If you want, you can also optionally declare your controls manually within your code-behind file (for example: if you wanted to add a custom attribute to them or define a custom type to use). If VS detects that a control declaration has already been made in the code-behind file by you, then it will automatically omit duplicating it from the .designer.cs/.vb file (which is a nice, useful feature).
Step 3: Build the Project
When you build the web-site, all code and pages within the project will be compiled into a single project assembly (like VS 2003 did). This assembly will be persisted in the /bin directory of the web project. You can see this by doing a build, and then clicking the “Show All Files” solution explorer icon to see files on disk that are not part of the project:
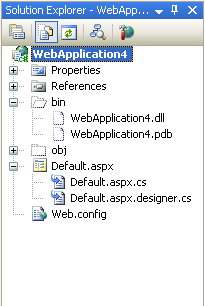
Note that only files and directories specifically added to a VS 2005 Web Application Project file get added to the application and project view. This makes it easy to have files on disk underneath a web project root and not have them show up in the solution explorer or be included in a build or publish step.
Step 4: Run the Project
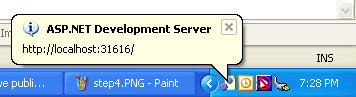
Set a breakpoint on the button click event handler, and then hit F5 to run the application. Because we haven’t yet associated this project with an IIS application, it will by default launch the built-in VS web-server to run it:
I can then obviously hit breakpoints and debug the application:
Step 5: Customize Project Properties
Double-click on the “Properties” node in the Solution Explorer to bring up the project properties window. This provides the same options as standard VS 2005 class libraries and Windows Forms projects (for example: assembly name, versioning, code signing, code analysis, resources, etc). It also then adds an additional “Web” property tab for web-specific settings:
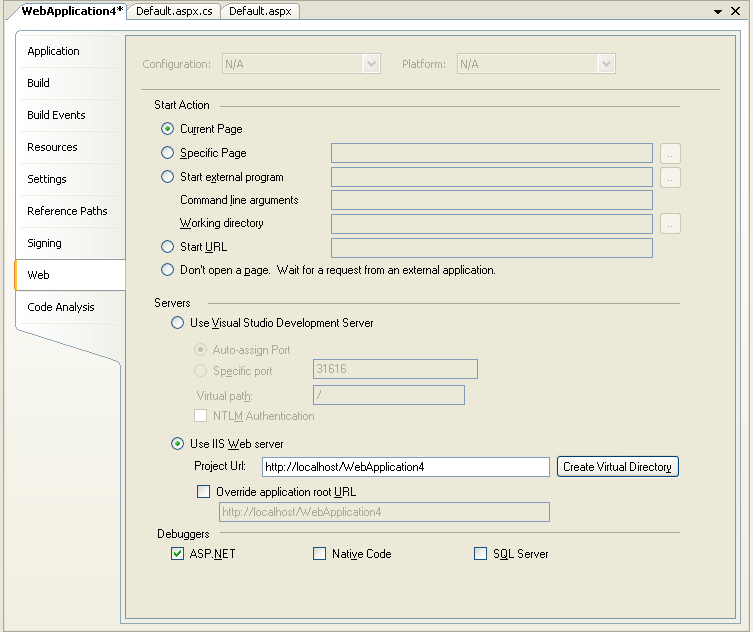
Within this tab you can customize a bunch of launch options for the project, as well as control whether it uses the built-in VS web-server or IIS to run the application (note: all settings are persisted in the project’s .csproj or .vbproj file).
To map the application to use IIS instead, you can either use the IIS admin tool to create your application to point to your directory, or with this new VS 2005 Web Application Release simply specify a new virtual directory/application to create and click the “Create virtual directory” button within the “web” property tab. This will create and associate it for you automatically with IIS.
For example, in the above properties dialog I chose to map the application to a new http://localhost/WebApplication4/ IIS application. I clicked the “Create virtual directory” button to setup this mapping to my new project. And now when I next run the application it will use IIS:

Step 6: Publishing the Project
To publish a VS 2005 Web Application to a remote server (or just another directory on your local system), select the Build->Publish menu item. This brings up a publish dialog that provides support for many new publishing options:
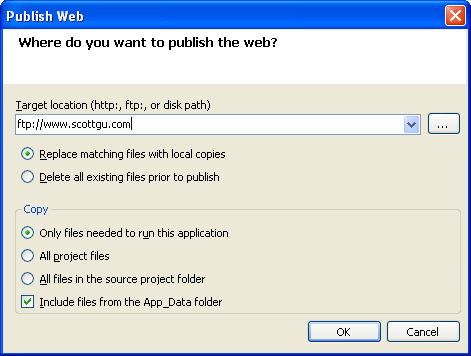
If you click on the “…” button in the publish dialog you can configure the publish location path you want to use. VS 2005 Web Application Projects support several options:
File System – Deploy the application to a local or remote UNC share
IIS – Deploy the application to a local IIS web application
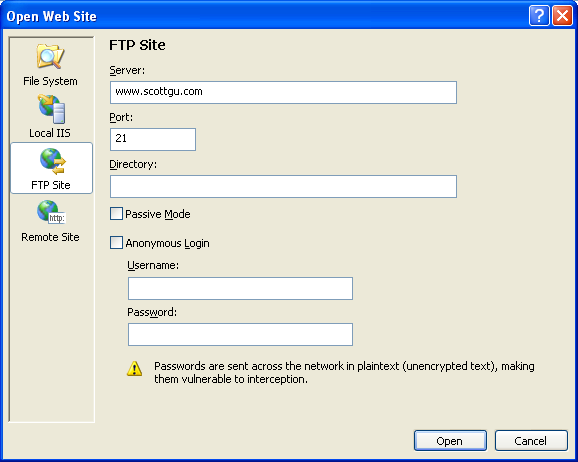
FTP – Deploy the application to a FTP based location
Remote Site – Deploy using FrontPage Server Extensions over HTTP to a local or remote server (also includes the ability to create a new remote site using FPSE)
VS 2005 Web Applications also support multiple file deploy modes – including both clean replacement (where the target directory is deleted and then recreated) as well as incremental copies (where only modified files are copied over). The incremental approach is ideal for cases where you only make a change to 1 or more pages, and simply want to copy the changed .aspx files and single .dll assembly.
For more advanced deployment options, you can also optionally associate a VS 2005 Web Deployment Project with a VS 2005 Web Application Project (VS 2005 Web Deployment Projects work with both Web Site and Web Application Projects). We will be shipping the final released build of the VS 2005 Web Deployment Project download in a few days.
Next Steps
We’ve had about 150 private beta testers who have been testing out VS 2005 Web Application Project builds the last few months, and have provided great feedback on features to add and bugs to fix. Their feedback has been invaluable and has really helped shape the feature-set and direction of the project.
We are calling this week’s download a “Release Candidate” because we expect to see a few last minute feature requests and bug reports once thousands more people start using it. Our plan is to spend the rest of this month responding to these, and then publish the final build on the web. We are then working to also add VS 2005 Web Application Support directly into VS 2005 SP1 (but we wanted to make it available as a web download now before then).
I’ve received a few questions from people about our web project model plans going forward. To quickly summarize a few of the common answers:
-- We will be fully supporting both the VS 2005 Web Site and VS 2005 Web Application Project Model going forward. Both will be fully supported in the next release of Visual Studio. So both are “safe” bets to use going forward to build new projects.
-- Deciding which project model option to use really depends on your particular preference in terms of development style, your team dynamics, and the size and requirements of the project. There is no “right” or “wrong” project option to use (just like language preferences, while people might be passionate about a particular choice, it really depends on you and your background as to which is better for your scenario). We have published an initial whitepaper here that provides guidance on the scenarios and the pros/cons of each model to help you decide.
-- This new project option isn’t just about making upgrades of large VS 2003 Web Projects easier. It is also ideal for a lot of new projects that have rich enterprise scenarios/requirements.
Hope this helps,


 被折叠的 条评论
为什么被折叠?
被折叠的 条评论
为什么被折叠?
 到【灌水乐园】发言


