


A good SCM should be closely integrated into your working environment. No one really likes having to go to the command line to add files to the repository. Eclipse has had excellent CVS integration for a long time, but until recently Subversion users have been left out in the cold. Now the new Subclipse plug-in provides a smooth integration of Subversion in Eclipse.
Installing the Subclipse Plug-in
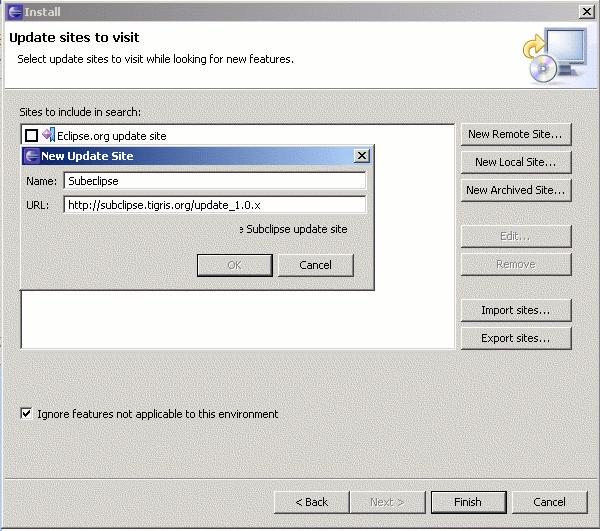
You install Subclipse from the update site in the usual way:
- Open the Find and Install window (Help > Software Updates > Find and Install).
- Select the "Search for new features to install" option and click Next.
- Click New Remote Site and create a remote site with the name Subclipse and the URL http://subclipse.tigris.org/update_1.0.x (see Figure 1).
- In the resulting Install window, check Subeclipse in the Features to Install list, and step through the wizard to install the plug-in.
- When you’re done, restart Eclipse. Now you’re ready to go!
Figure 1 Installing the Subclipse plug-in.
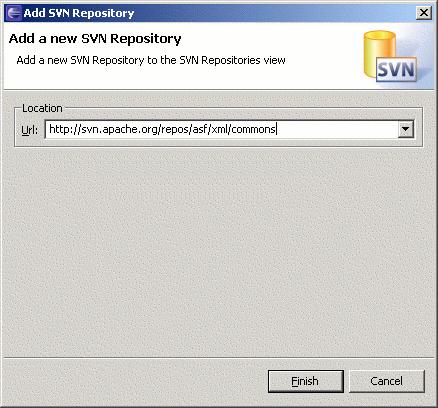
Setting Up Repository Definitions
Now that you have the plug-in installed, you need to tell it where your project repositories are. You do this in the SVN Repository view. Open this view (Windows > Show View > Other > SVN Repository) and select New > Repository Location in the contextual menu to display the dialog box shown in Figure 2. Enter the appropriate URL and click Finish.
Figure 2 Adding a repository definition.
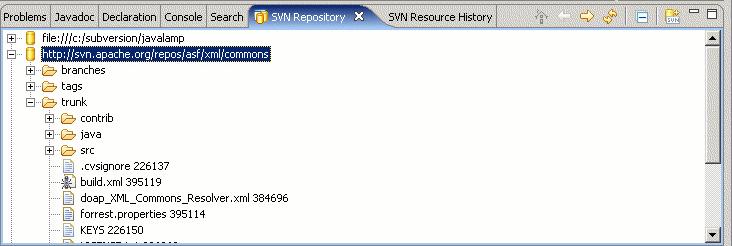
Checking Out a Project
Once the repository is set up, you can browse through its contents in the SVN Repository view (see Figure 3). As we’ll see later, this view is a handy way to interact with Subversion.
Now let’s check out a project into your Eclipse workspace. Just select the Subversion repository you need (typically it will be trunk), open the contextual menu, and select Checkout. This will open a wizard with two options:
- Check out as a project configured using the New Project Wizard. This option opens the New Project Wizard, which lets you configure the project using one of the built-in Eclipse project types. This option is generally the best, as it lets you use the same project templates and configuration screens that you use when creating a conventional project.
- Check out as a project in the workspace. This option simply creates a vanilla Eclipse project in your workspace containing the checked-out source code.
In both cases, you still need to update the project build path, because Eclipse can’t work out where the Java source code is before checking out the project source code.
Importing a New Project into the Repository
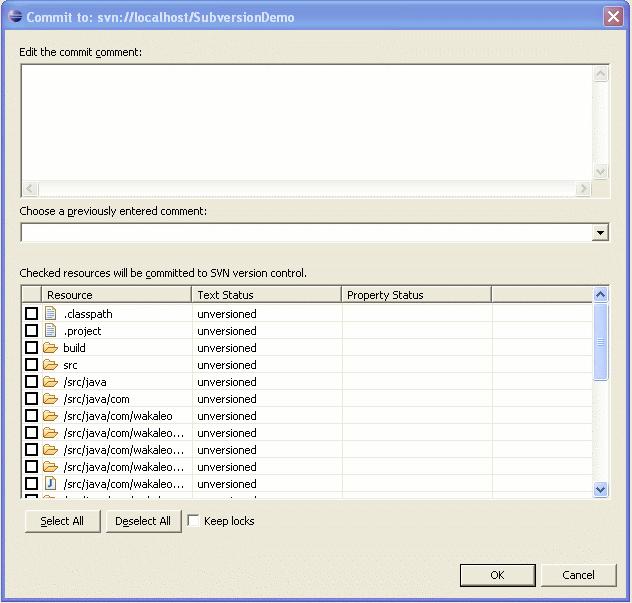
If you’ve just started a new project, you need to import it into the Subversion repository. Subclipse provides a convenient way to do this directly from within your IDE. Select your project in the Package Explorer view and select Team > Share Project in the contextual menu. You can use one of the existing repositories, or create a new repository definition. After you’ve specified the repository and the project name, you can specify the files and directories you want to place in the repository and provide an initial comment (see Figure 4). This approach is particularly useful because it lets you selectively import only the files that should be managed with Subversion, even if the project contains other files such as generated classes, temporary files, or other unnecessary artifacts.


 126
126

 被折叠的 条评论
为什么被折叠?
被折叠的 条评论
为什么被折叠?
 到【灌水乐园】发言


