


首先本文我是参照鸿洋大师的博客http://blog.csdn.net/lmj623565791/article/details/39257409 来学习,在自己根据
他的介绍实现了qq侧滑功能,这里我简单的做一下介绍并且巩固一下自己的知识。只有自己去敲了才能发现问题。
首先说下思路,这里我主要是通过自定义HorizontalScrollView来实现一个侧滑效果。一般自定义view的话都是在
onMeasure()、onLayout()、ondraw()、onTouchEvent()还有事件分发机制方法里面做文章。这里我们主要
是通过onMeasure()方法里面测量我们添加滑动view的大小,在onLayout()方法里面设置menu view的位置。最后
在touch事件里面处理up时滑动view的位置,可能你会问为什么不在move事件里面处理呢?嘿嘿,这就是我们使
用HorizontalScrollView的优势了,move事件它已经给我们处理好了。最后实现侧滑的重点就是滑动的逻辑问题了,还
有就是实现抽屉式侧滑的属性动画。具体我们就看我一一介绍:
1.我们先来看下布局文件
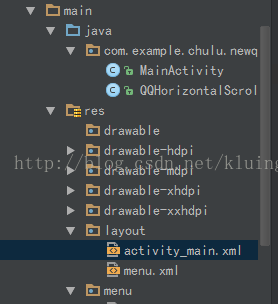
首先是menu.xml
- <?xml version="1.0" encoding="utf-8"?>
- <RelativeLayout xmlns:android="http://schemas.android.com/apk/res/android"
- android:layout_width="match_parent"
- android:layout_height="match_parent"
- android:orientation="vertical"
- android:background="#0000"
- >
- <LinearLayout
- android:layout_width="match_parent"
- android:layout_height="wrap_content"
- android:layout_centerInParent="true"
- android:orientation="vertical" >
- <RelativeLayout
- android:layout_width="fill_parent"
- android:layout_height="wrap_content" >
- <ImageView
- android:id="@+id/id_img1"
- android:layout_width="50dp"
- android:layout_height="50dp"
- android:layout_centerVertical="true"
- android:layout_marginLeft="20dp"
- android:layout_marginTop="20dp"
- android:src="@drawable/img_1" />
- <TextView
- android:layout_width="wrap_content"
- android:layout_height="wrap_content"
- android:layout_centerVertical="true"
- android:layout_marginLeft="20dp"
- android:layout_toRightOf="@id/id_img1"
- android:text="第一个Item"
- android:textColor="#ffffff"
- android:textSize="20sp" />
- </RelativeLayout>
- <RelativeLayout
- android:layout_width="fill_parent"
- android:layout_height="wrap_content" >
- <ImageView
- android:id="@+id/id_img2"
- android:layout_width="50dp"
- android:layout_height="50dp"
- android:layout_centerVertical="true"
- android:layout_marginLeft="20dp"
- android:layout_marginTop="20dp"
- android:src="@drawable/img_2" />
- <TextView
- android:layout_width="wrap_content"
- android:layout_height="wrap_content"
- android:layout_centerVertical="true"
- android:layout_marginLeft="20dp"
- android:layout_toRightOf="@id/id_img2"
- android:text="第二个Item"
- android:textColor="#ffffff"
- android:textSize="20sp" />
- </RelativeLayout>
- <RelativeLayout
- android:layout_width="fill_parent"
- android:layout_height="wrap_content" >
- <ImageView
- android:id="@+id/id_img3"
- android:layout_width="50dp"
- android:layout_height="50dp"
- android:layout_centerVertical="true"
- android:layout_marginLeft="20dp"
- android:layout_marginTop="20dp"
- android:src="@drawable/img_3" />
- <TextView
- android:layout_width="wrap_content"
- android:layout_height="wrap_content"
- android:layout_centerVertical="true"
- android:layout_marginLeft="20dp"
- android:layout_toRightOf="@id/id_img3"
- android:text="第三个Item"
- android:textColor="#ffffff"
- android:textSize="20sp" />
- </RelativeLayout>
- <RelativeLayout
- android:layout_width="fill_parent"
- android:layout_height="wrap_content" >
- <ImageView
- android:id="@+id/id_img4"
- android:layout_width="50dp"
- android:layout_height="50dp"
- android:layout_centerVertical="true"
- android:layout_marginLeft="20dp"
- android:layout_marginTop="20dp"
- android:src="@drawable/img_4" />
- <TextView
- android:layout_width="wrap_content"
- android:layout_height="wrap_content"
- android:layout_centerVertical="true"
- android:layout_marginLeft="20dp"
- android:layout_toRightOf="@id/id_img4"
- android:text="第四个Item"
- android:textColor="#ffffff"
- android:textSize="20sp" />
- </RelativeLayout>
- <RelativeLayout
- android:layout_width="fill_parent"
- android:layout_height="wrap_content" >
- <ImageView
- android:id="@+id/id_img5"
- android:layout_width="50dp"
- android:layout_height="50dp"
- android:layout_centerVertical="true"
- android:layout_marginLeft="20dp"
- android:layout_marginTop="20dp"
- android:src="@drawable/img_5" />
- <TextView
- android:layout_width="wrap_content"
- android:layout_height="wrap_content"
- android:layout_centerVertical="true"
- android:layout_marginLeft="20dp"
- android:layout_toRightOf="@id/id_img5"
- android:text="第五个Item"
- android:textColor="#ffffff"
- android:textSize="20sp" />
- </RelativeLayout>
- <RelativeLayout
- android:layout_width="fill_parent"
- android:layout_height="wrap_content" >
- <ImageView
- android:id="@+id/id_img6"
- android:layout_width="50dp"
- android:layout_height="50dp"
- android:layout_centerVertical="true"
- android:layout_marginLeft="20dp"
- android:layout_marginTop="20dp"
- android:src="@drawable/img_1" />
- <TextView
- android:layout_width="wrap_content"
- android:layout_height="wrap_content"
- android:layout_centerVertical="true"
- android:layout_marginLeft="20dp"
- android:layout_toRightOf="@id/id_img6"
- android:text="第一个Item"
- android:textColor="#ffffff"
- android:textSize="20sp" />
- </RelativeLayout>
- </LinearLayout>
- </RelativeLayout>
接下来就是主布局:
- <RelativeLayout xmlns:android="http://schemas.android.com/apk/res/android"
- android:layout_width="match_parent"
- android:layout_height="match_parent" >
- <com.example.chulu.newqqmodel.QQHorizontalScrollView
- android:id="@+id/id_menu"
- android:layout_width="match_parent"
- android:layout_height="match_parent"
- android:background="@drawable/img_frame_background" >
- <LinearLayout
- android:layout_width="match_parent"
- android:layout_height="match_parent"
- android:orientation="horizontal" >
- <include layout="@layout/menu" />
- <LinearLayout
- android:layout_width="match_parent"
- android:layout_height="match_parent"
- android:background="@drawable/qq" >
- <Button
- android:onClick="toggleMenu"
- android:layout_width="wrap_content"
- android:layout_height="wrap_content"
- android:text="切换菜单"
- />
- </LinearLayout>
- </LinearLayout>
- </com.example.chulu.newqqmodel.QQHorizontalScrollView>
- </RelativeLayout>
2.下面我们就来介绍一下自定义HorizontalScrollView
- import android.content.Context;
- import android.util.AttributeSet;
- import android.util.DisplayMetrics;
- import android.util.TypedValue;
- import android.view.MotionEvent;
- import android.view.ViewGroup;
- import android.view.WindowManager;
- import android.widget.HorizontalScrollView;
- import android.widget.LinearLayout;
- import com.nineoldandroids.view.ViewHelper;
- /**
- * Created by chulu on 2015/2/28.
- */
- public class QQHorizontalScrollView extends HorizontalScrollView {
- /**
- * 横向滚动条里面会有一个linearLayout
- */
- private LinearLayout mLinearMatch;
- /**
- * 屏幕宽度
- */
- private int mWindowWidth;
- private float mMenuViewLeftPadding;
- private ViewGroup mMenuView;
- private ViewGroup mContentView;
- /**
- * menu的宽度
- */
- private int mMenuWidth;
- /**
- * 防止测量多次长度
- */
- private boolean mFirst;
- /**
- * 判断是否处于menu状态
- */
- private boolean mIsOpen=false;
- public QQHorizontalScrollView(Context context, AttributeSet attrs) {
- super(context, attrs);
- /**
- * 得到界面宽度
- */
- WindowManager manager= (WindowManager) context.getSystemService(Context.WINDOW_SERVICE);
- DisplayMetrics metrics = new DisplayMetrics();
- manager.getDefaultDisplay().getMetrics(metrics);
- mWindowWidth = metrics.widthPixels;
- /**
- * 将dp转化为px像素
- */
- mMenuViewLeftPadding = TypedValue.applyDimension(TypedValue.COMPLEX_UNIT_DIP, 100, context.getResources().getDisplayMetrics());
- }
- /**
- *测量子view的长宽与父view的长宽
- */
- @Override
- protected void onMeasure(int widthMeasureSpec, int heightMeasureSpec) {
- /**
- * 具体ViewGroup里面子View顺序我们添加的时候就知道了
- */
- if(!mFirst){
- mLinearMatch = (LinearLayout) getChildAt(0);
- mMenuView = (ViewGroup) mLinearMatch.getChildAt(0);
- mMenuWidth=mMenuView.getLayoutParams().width = (int) (mWindowWidth - mMenuViewLeftPadding);
- mContentView = (ViewGroup) mLinearMatch.getChildAt(1);
- mContentView.getLayoutParams().width = mWindowWidth;
- mFirst = true;
- }
- super.onMeasure(widthMeasureSpec, heightMeasureSpec);
- }
- @Override
- protected void onLayout(boolean changed, int l, int t, int r, int b) {
- super.onLayout(changed, l, t, r, b);
- if(changed){
- scrollTo(mMenuWidth,0);
- }
- }
- /**
- * 因为是scrollerView所以这里我们只要判断up状态就行了
- */
- @Override
- public boolean onTouchEvent(MotionEvent ev) {
- switch (ev.getAction()) {
- case MotionEvent.ACTION_UP:
- if(getScrollX()<mMenuWidth/2){
- smoothScrollTo(0,0);//平滑移动
- mIsOpen = true;
- }else {
- smoothScrollTo( mMenuWidth,0);
- mIsOpen = false;
- }
- return true;
- }
- return super.onTouchEvent(ev);
- }
- /**
- * button touch的时候调用这个方法,点击的时候让menu view移动
- */
- public void openMenu(){
- if(mIsOpen){
- smoothScrollTo(mMenuWidth,0);
- mIsOpen = false;
- }else {
- smoothScrollTo(0,0);
- mIsOpen = true;
- }
- }
- /**
- * 实现抽屉动画
- */
- @Override
- protected void onScrollChanged(int l, int t, int oldl, int oldt) {
- super.onScrollChanged(l, t, oldl, oldt);
- float scale = l * 1.0f / mMenuWidth; // 1 ~ 0
- float rightScale = 0.7f + 0.3f * scale;
- float leftScale = 1.0f - scale * 0.3f;
- float leftAlpha = 0.6f + 0.4f * (1 - scale);
- /**
- * 这里主要是考虑兼容问题(属性动画3.0引入),顾这里我直接调用架包实现content view的缩放动画、menu view的透明度渐变动画、menu view的缩放动画
- * 如果不考虑向下兼容问题,我们可以使用Objectanimator对象来实现动画
- */
- // 调用属性动画,设置TranslationX
- ViewHelper.setTranslationX(mMenuView, mMenuWidth * scale * 0.8f);
- ViewHelper.setScaleX(mMenuView, leftScale);
- ViewHelper.setScaleY(mMenuView, leftScale);
- ViewHelper.setAlpha(mMenuView, leftAlpha);
- // 设置content的缩放的中心点
- ViewHelper.setPivotX(mContentView, 0);
- ViewHelper.setPivotY(mContentView, mContentView.getHeight() / 2);
- ViewHelper.setScaleX(mContentView, rightScale);
- ViewHelper.setScaleY(mContentView, rightScale);
- }
- }
2.1、首先是内容区域的缩放比例计算:
我们准备让在菜单出现的过程中,让内容区域从1.0~0.8进行变化~~
那么怎么把1.0~0.0转化为1.0~0.8呢,其实很简单了:
float rightScale = 0.8f + scale * 0.2f; (scale 从1到0 )
接下来还有3个动画:
2.2、菜单的缩放比例计算
仔细观察了下QQ,菜单大概缩放变化是0.7~1.0
float leftScale = 1 - 0.3f * scale;
2.3、菜单的透明度比例:
我们设置为0.6~1.0;即:0.6f + 0.4f * (1 - scale)
2.4、菜单的x方向偏移量:
看一下QQ,并非完全从被内容区域覆盖,还是有一点拖出的感觉,所以我们的偏移量这么设置:
tranlateX = mMenuWidth * scale * 0.6f ;
3.最后就是我们的收尾ManActivity了,里面也很简单就是添加了一个点击事件
- <span style="font-size:18px;">import android.app.Activity;
- import android.support.v7.app.ActionBarActivity;
- import android.os.Bundle;
- import android.view.Menu;
- import android.view.MenuItem;
- import android.view.View;
- import android.view.Window;
- import android.widget.Button;
- import android.widget.ImageButton;
- public class MainActivity extends Activity {
- private QQHorizontalScrollView mScrollView;
- @Override
- protected void onCreate(Bundle savedInstanceState) {
- super.onCreate(savedInstanceState);
- requestWindowFeature(Window.FEATURE_NO_TITLE);
- setContentView(R.layout.activity_main);
- mScrollView = (QQHorizontalScrollView) findViewById(R.id.id_menu);
- }
- public void toggleMenu(View view ){
- mScrollView.openMenu();
- }
- }
- </span>
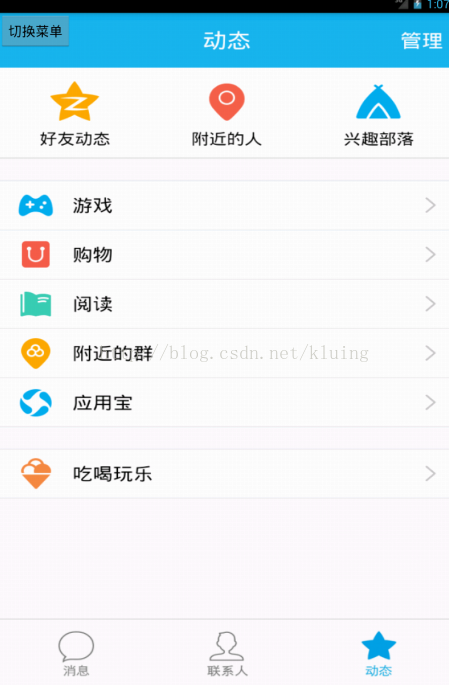
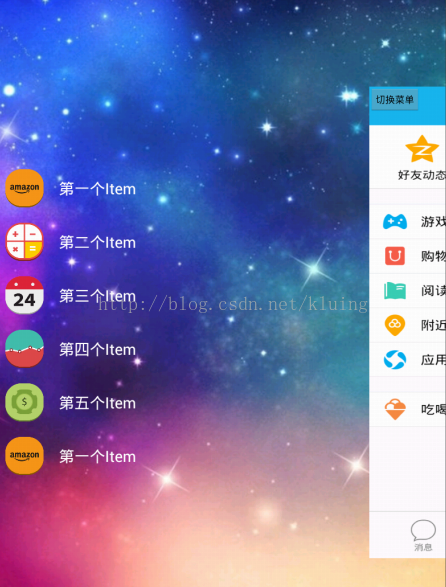
最后我发一下效果图,动态图还没baidu~还不会~先发下截图吧ovo


 5844
5844


 被折叠的 条评论
为什么被折叠?
被折叠的 条评论
为什么被折叠?
 到【灌水乐园】发言


