


1. 工程创建
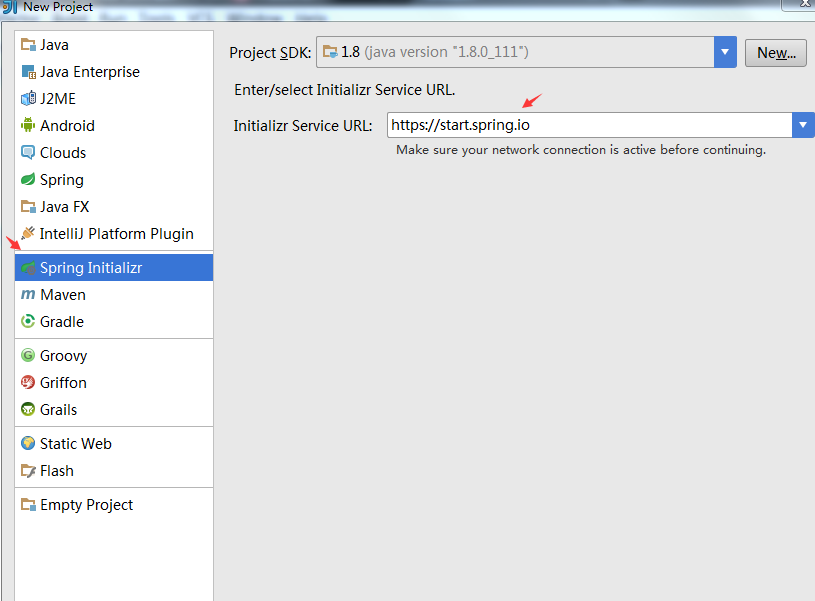
工程新建,从官网下载demo
工程名称,工程构建细节定义
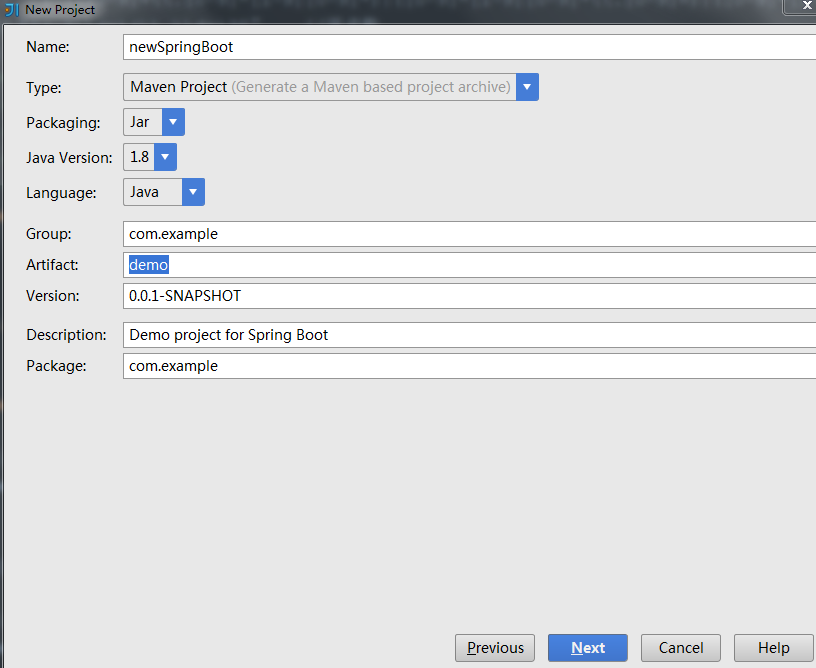
项目初始内容添加:
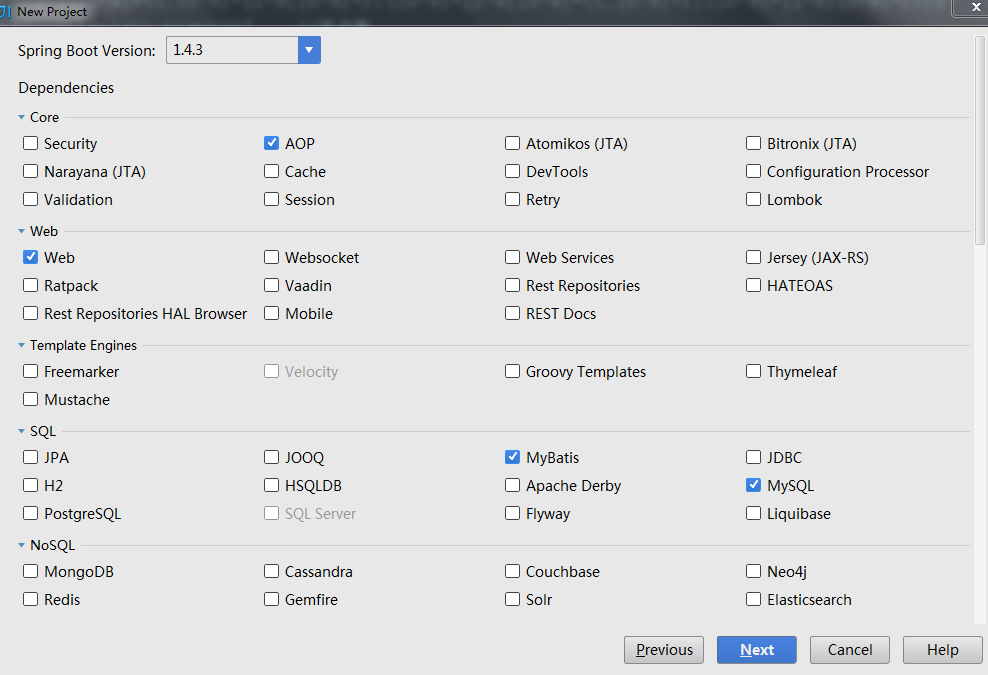
接着改下工程名称和路径选择,等待下载完成即可
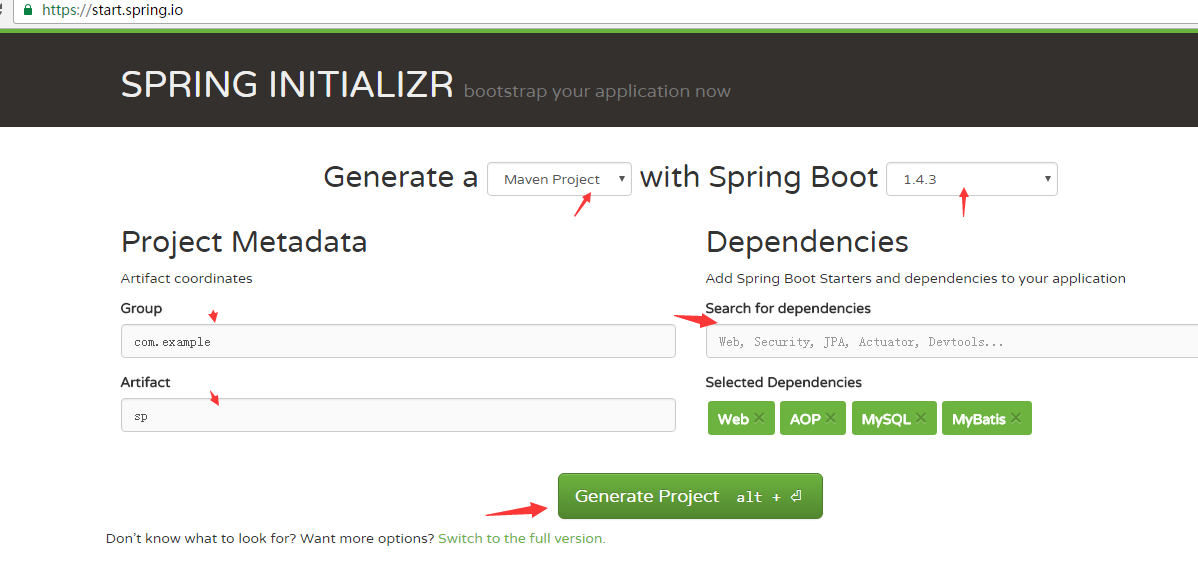
---- 直接进https://start.spring.io 网站进行创建工程也可以
2. 工程环境修改
maven配置:
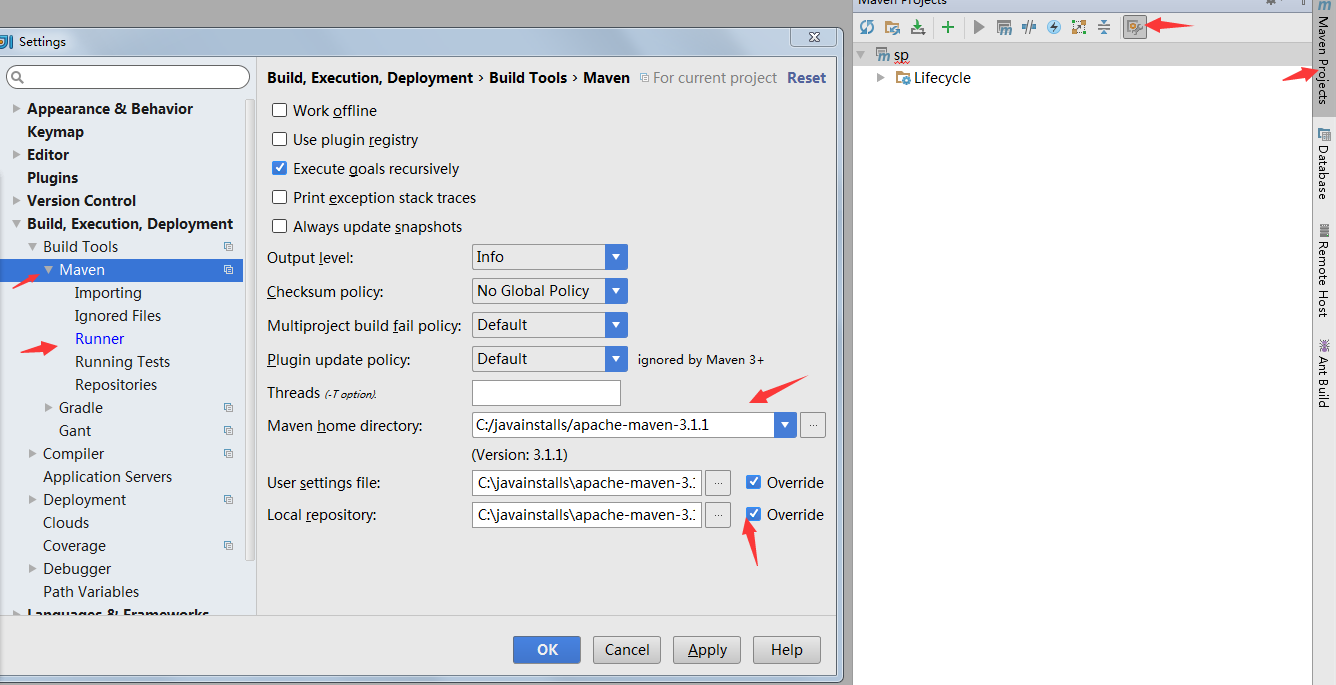
pom文件加入依赖下载的仓库地址:
<repositories>
<repository>
<id>nexus-aliyun</id>
<name>Nexus aliyun</name>
<layout>default</layout>
<url>http://maven.aliyun.com/nexus/content/groups/public</url>
</repository>
<!-- 中央仓库 -->
<repository>
<id>central</id>
<name> Maven Repository Switchboard</name>
<!--<layout> default</layout>-->
<url>http://repo1.maven.org/maven2</url>
<snapshots>
<enabled>false</enabled>
</snapshots>
</repository>
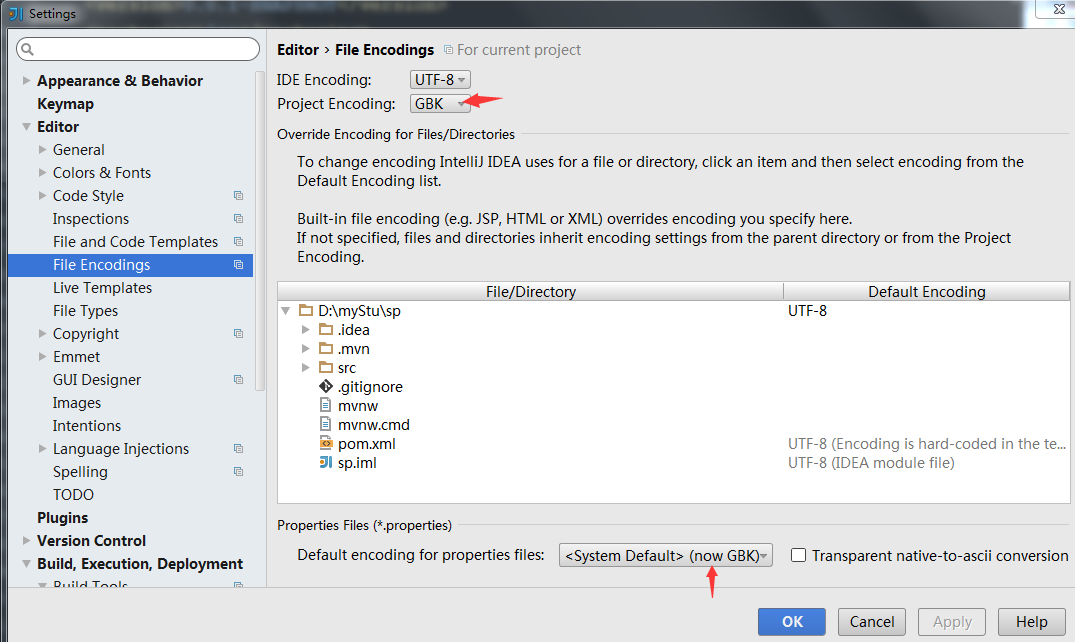
</repositories>修改工程编码:改为UTF-8
3. 项目运行配置:
添加依赖-数据库连接池:
<!-- HikariCP 链接池-->
		<dependency>
			<groupId>com.zaxxer</groupId>
			<artifactId>HikariCP</artifactId>
			<!-- 版本号可以不用指定,Spring Boot会选用合适的版本 -->
		</dependency>
application.properties中加入数据库连接参数:
#server params
server.port=8088
server.context-path=/

#datasource params
spring.datasource.url=jdbc:mysql://localhost:3306/springboot
spring.datasource.username=root
spring.datasource.password=root
spring.datasource.driver-class-name=com.mysql.jdbc.Driver

#database connection pool type:HikariCP
spring.datasource.type=com.zaxxer.hikari.HikariDataSource

spring.datasource.maximum-pool-size=80
spring.datasource.max-idle=15
spring.datasource.max-active=150
spring.datasource.max-wait=10000
spring.datasource.min-idle=5
spring.datasource.initial-size=5
spring.datasource.validation-query=SELECT 1
spring.datasource.test-on-borrow=false
spring.datasource.test-while-idle=true
spring.datasource.time-between-eviction-runs-millis=18800
项目启动action配置:
@RestController
public class HelloController {
    @RequestMapping(value = "/")
    public Object hello(){
        return "hello";
    }
}
项目启动项配置: 配置running configurations
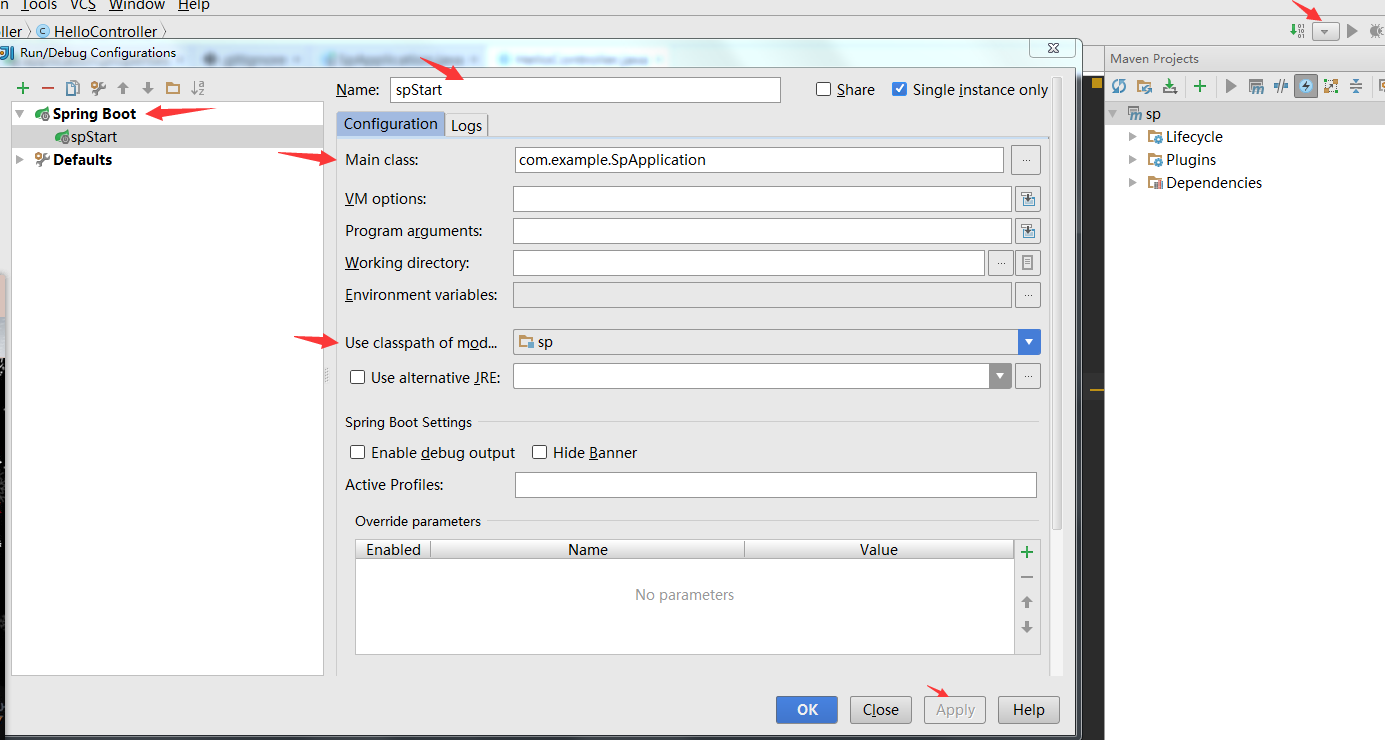
启动项目:
run start类的main方法 ,或者run 启动配置项spStart
Connected to the target VM, address: '127.0.0.1:53172', transport: 'socket'

  .   ____          _            __ _ _
 /\\ / ___'_ __ _ _(_)_ __  __ _ \ \ \ \
( ( )\___ | '_ | '_| | '_ \/ _` | \ \ \ \
 \\/  ___)| |_)| | | | | || (_| |  ) ) ) )
  '  |____| .__|_| |_|_| |_\__, | / / / /
 =========|_|==============|___/=/_/_/_/
 :: Spring Boot ::        (v1.4.3.RELEASE)
.........
.........
2016-12-23 16:20:07.442  INFO 9804 --- [           main] s.b.c.e.t.TomcatEmbeddedServletContainer : Tomcat started on port(s): 8088 (http)
2016-12-23 16:20:07.446  INFO 9804 --- [           main] com.example.SpApplication                : Started SpApplication in 5.509 seconds (JVM running for 6.122)
2016-12-23 16:20:33.846  INFO 9804 --- [nio-8088-exec-1] o.a.c.c.C.[Tomcat].[localhost].[/]       : Initializing Spring FrameworkServlet 'dispatcherServlet'
2016-12-23 16:20:33.846  INFO 9804 --- [nio-8088-exec-1] o.s.web.servlet.DispatcherServlet        : FrameworkServlet 'dispatcherServlet': initialization started
2016-12-23 16:20:33.882  INFO 9804 --- [nio-8088-exec-1] o.s.web.servlet.DispatcherServlet        : FrameworkServlet 'dispatcherServlet': initialization completed in 36 ms
浏览器访问项目:
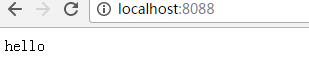
完成。
我的学习实践代码:https://github.com/zfgod/SpringBootDemo,期待和大家共同学习分享。


 176
176

 被折叠的 条评论
为什么被折叠?
被折叠的 条评论
为什么被折叠?
 到【灌水乐园】发言


