


Tomcat版本:Tomca8
如果对此章节不了解,可以查阅https://my.oschina.net/u/3155476/blog/3070575(Keepalived + Nginx实现高可用Web负载均衡)。
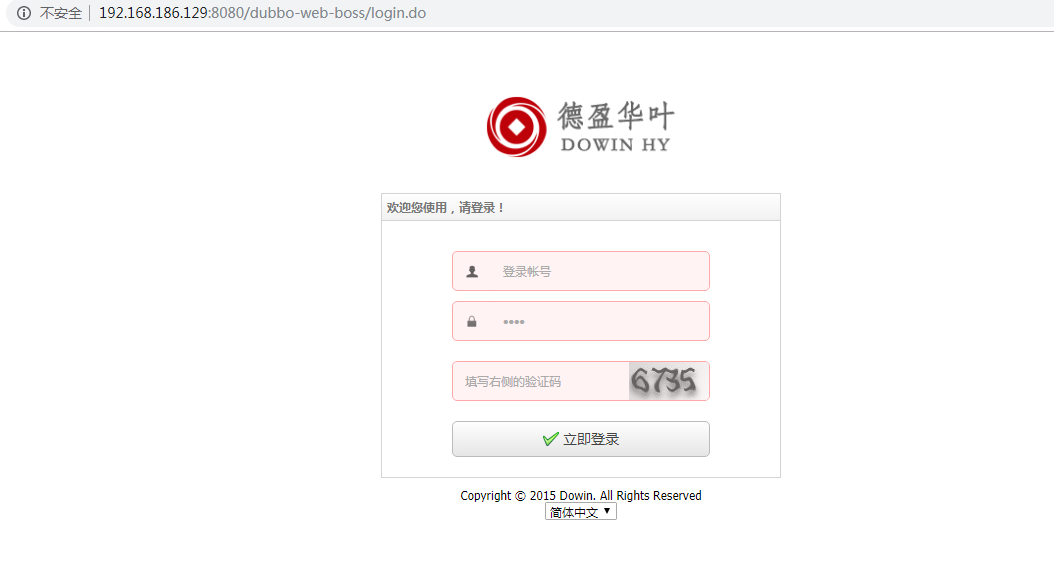
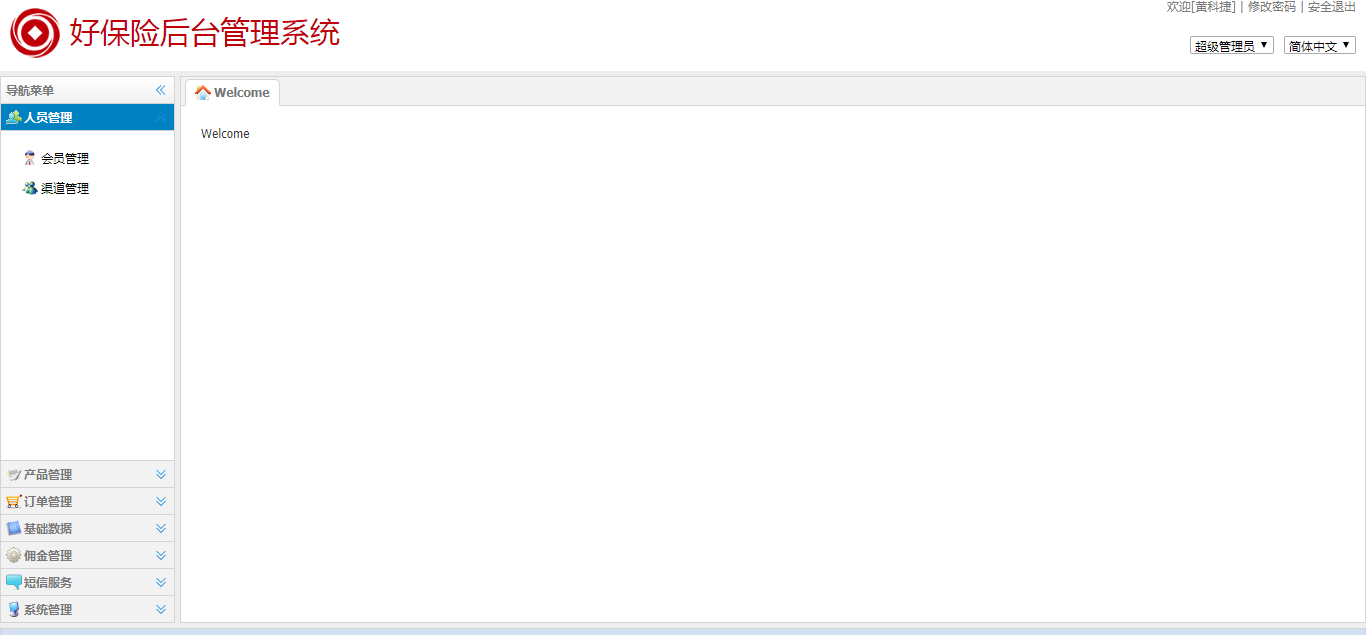
1、单节点访问 http://192.168.186.129:8080/dubbo-web-boss/login.do :
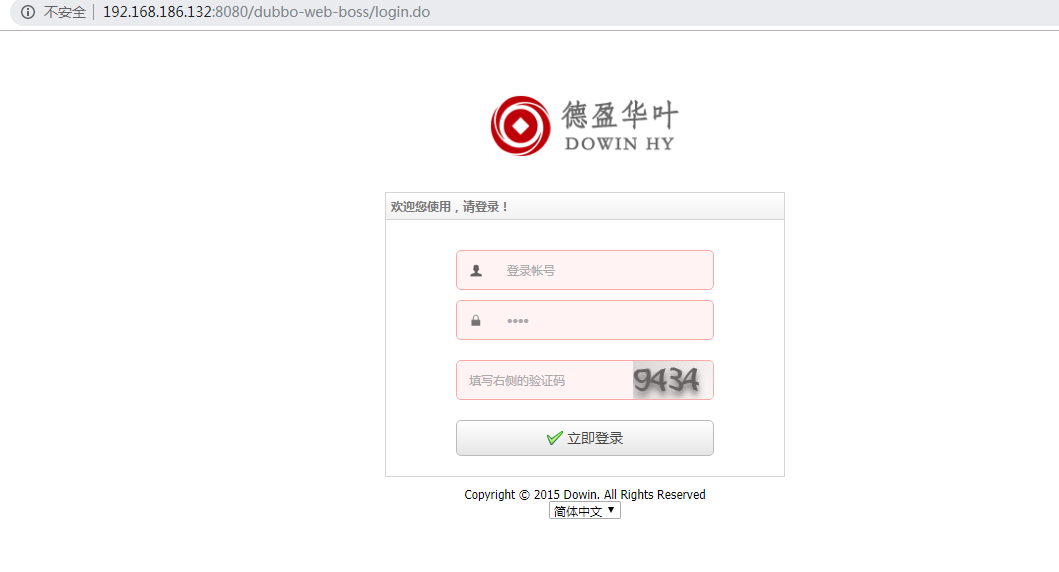
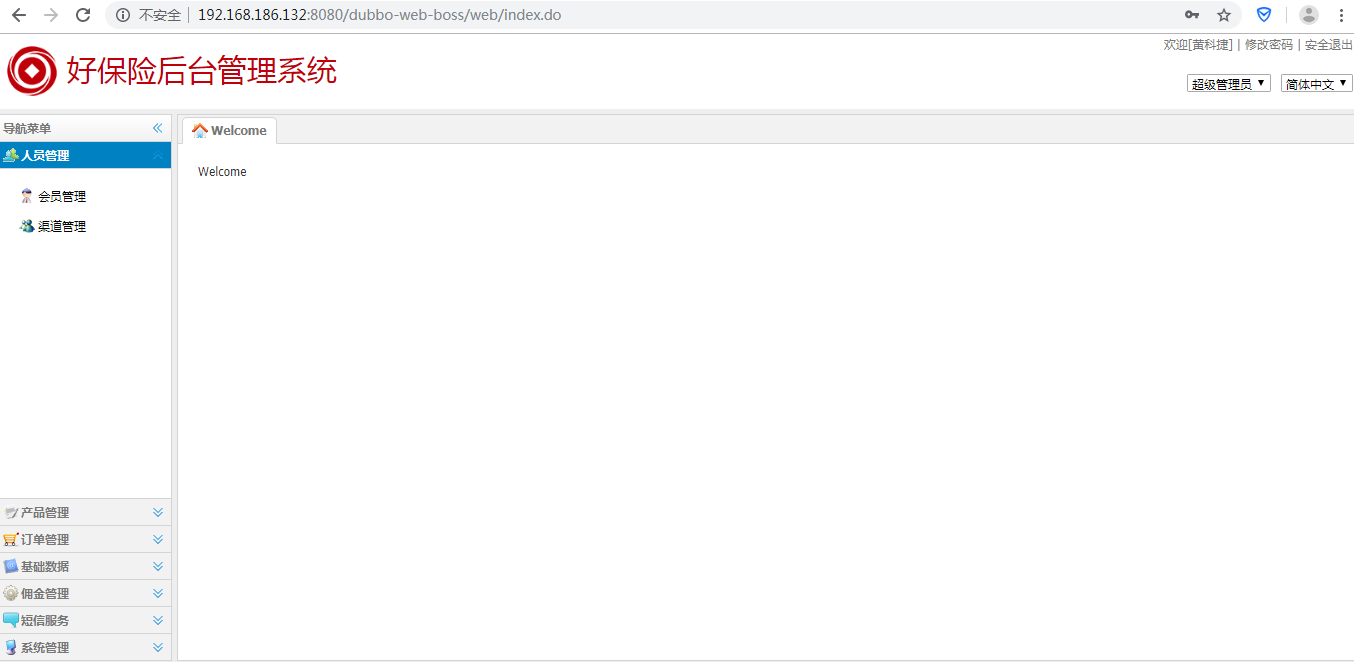
2、增加多一个消费者节点:192.168.186.129,以同样的方式部署dubbo-web-boss工程。(另外一个消费节点同样的原理,在此不再多次描述)
先验证新增节点也可正常访问 http://192.168.186.129:8080/dubbo-web-boss/login.do
3、在Keepalived+Nginx组成的反向代理集群中的三个节点同步增加如下两处配置:
user root;
worker_processes 1;
#error_log logs/error.log;
#error_log logs/error.log notice;
#error_log logs/error.log info;
#pid logs/nginx.pid;
events {
worker_connections 1024;
}
http {
include mime.types;
default_type application/octet-stream;
#log_format main '$remote_addr - $remote_user [$time_local] "$request" '
# '$status $body_bytes_sent "$http_referer" '
# '"$http_user_agent" "$http_x_forwarded_for"';
#access_log logs/access.log main;
sendfile on;
#tcp_nopush on;
#keepalive_timeout 0;
keepalive_timeout 65;
#gzip on;
## web-boss
upstream web_boss {
server 192.168.186.129:8080 weight=1 max_fails=2 fail_timeout=30s;
server 192.168.186.132:8080 weight=1 max_fails=2 fail_timeout=30s;
server 192.168.186.133:8080 weight=1 max_fails=2 fail_timeout=30s;
}
server {
listen 88;
server_name localhost;
#charset koi8-r;
#access_log logs/host.access.log main;
location / {
root html;
index index.html index.htm;
}
#error_page 404 /404.html;
# redirect server error pages to the static page /50x.html
error_page 500 502 503 504 /50x.html;
location = /50x.html {
root html;
}
## web-boss Cluster
location /dubbo-web-boss{
root html;
index index.html index.htm;
proxy_pass http://web_boss/dubbo-web-boss;
proxy_set_header Host $http_host;
proxy_set_header Cookie $http_cookie;
proxy_set_header X-Real-IP $remote_addr;
proxy_set_header X-Forwarded-For $proxy_add_x_forwarded_for;
proxy_set_header X-Forwarded-Proto $scheme;
client_max_body_size 100m;
}
}
}
4、重启Nginx
# /usr/local/nginx/sbin/nginx -s reload
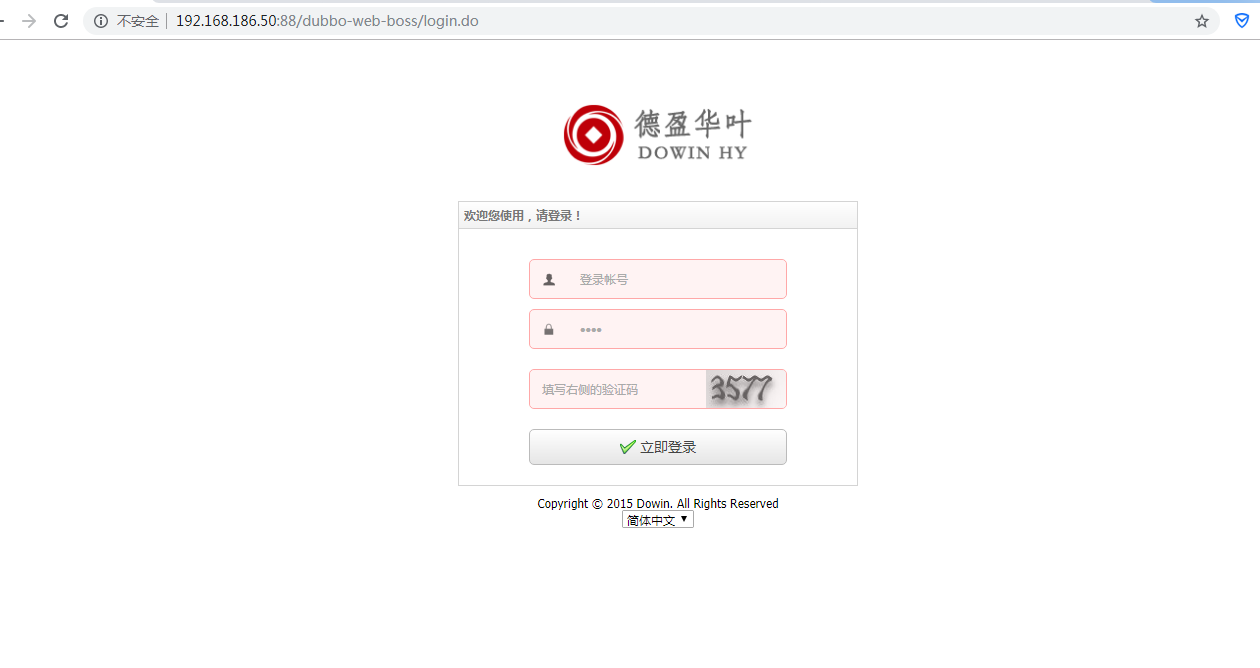
5、通过反向代理集群的VIP访问dubbo-web-boss时,有时可以登录成功,但有时又会提示验证码错误,原因就是Session没有同步。
http://192.168.186.50:88/dubbo-web-boss/login.do
接下来就是要解决Tomcat的Session共享问题,使用开源项目:
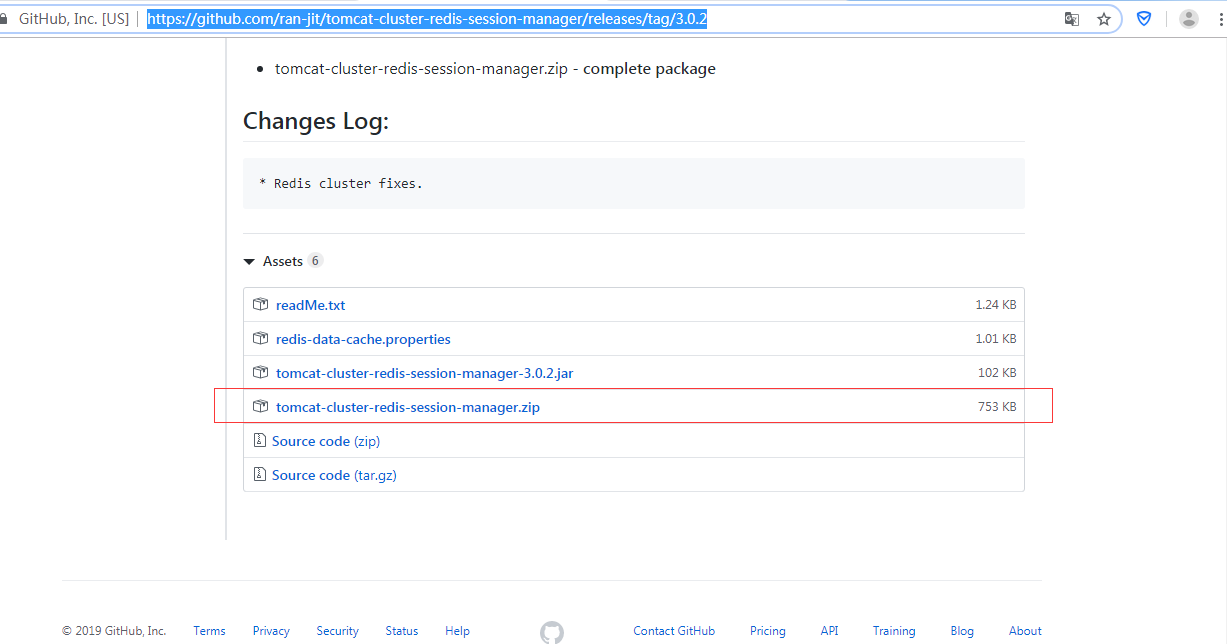
https://github.com/ran-jit/tomcat-cluster-redis-session-manager/releases/tag/3.0.2
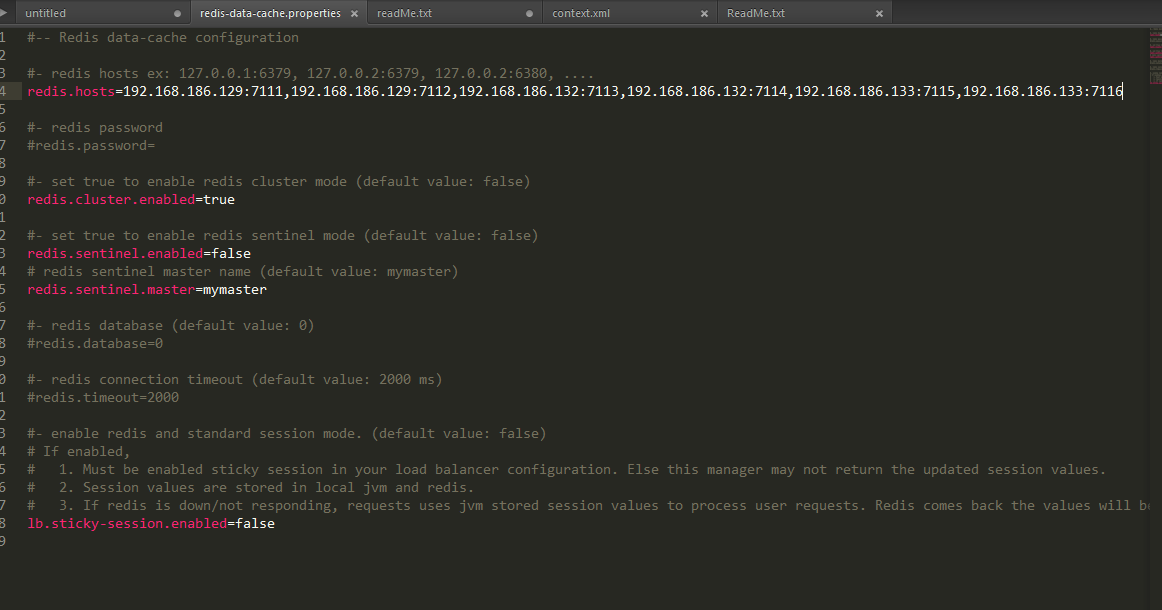
注意,因为我们使用的是Redis3.0集群,相应的插件一定要支持Redis3.0集群。
192.168.186.129:7111
192.168.186.129:7112
192.168.186.132:7113
192.168.186.132:7114
192.168.186.133:7115
192.168.186.133:7116
6、点击红色框下载最新版本tomcat-cluster-redis-session-manager
解压,找到lib目录中的依赖的jar包
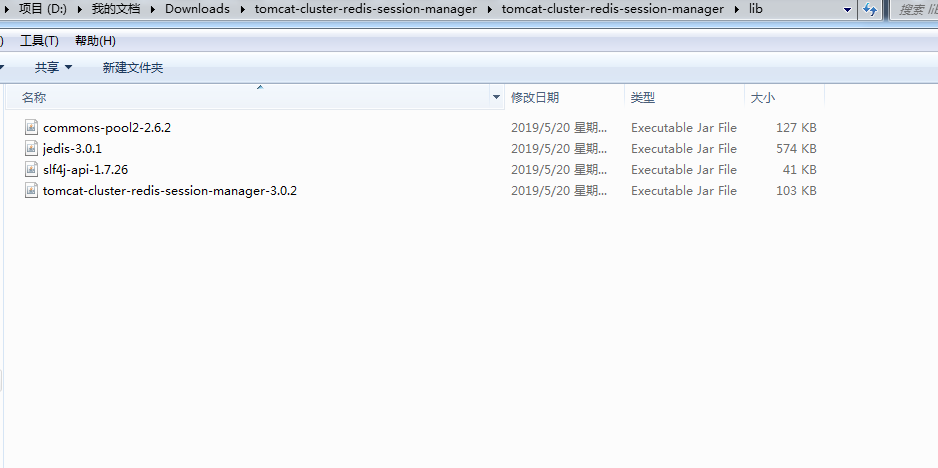
并将这些jar包上传到Tomcat8中的 lib 目录
找到conf目录下的properties

编辑文件如下,按需调整
8、添加Tomcat的环境变量 (可选)
catalina.base="/home/huangkejie/dubbo/web/tomcat8.5.40/"
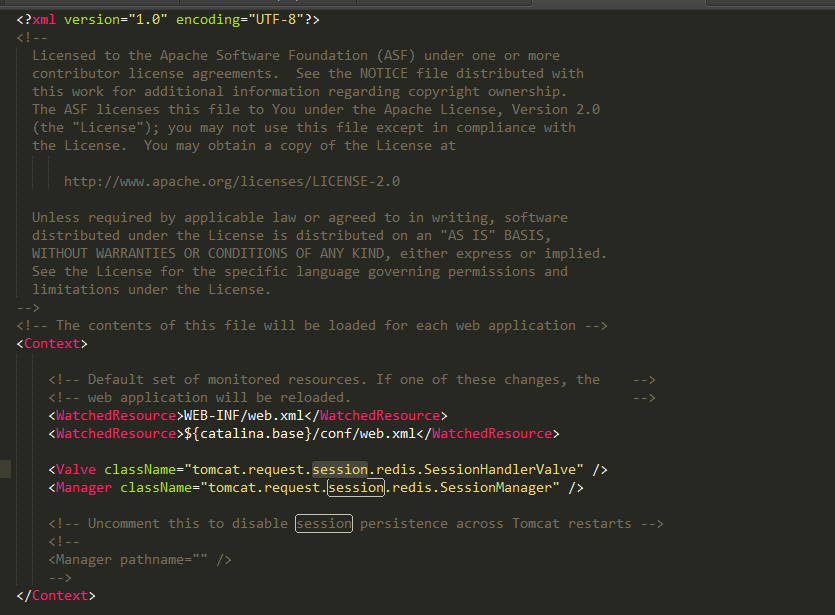
9、在Tomcat8中的 conf/context.xml 中增加如下两行配置:
<Valve className="tomcat.request.session.redis.SessionHandlerValve" />
<Manager className="tomcat.request.session.redis.SessionManager" />
11、在Tomcat的conf/web.xml中核对确认Tomcat的Session超时时间,默认为30分钟。
<!-- ==================== Default Session Configuration ================= -->
<!-- You can set the default session timeout (in minutes) for all newly -->
<!-- created sessions by modifying the value below. -->
<session-config>
<session-timeout>30</session-timeout>
</session-config>
可按需修改。
最后附上作者的readme说明内容
/**
 * Tomcat clustering with Redis data-cache implementation.
 *
 * author: Ranjith Manickam
 */

Supports:
   - Apache Tomcat 7
   - Apache Tomcat 8
   - Apache Tomcat 9

Pre-requisite:
	1. jedis.jar
	2. commons-pool2.jar
	3. slf4j-api.jar

more details.. https://github.com/ran-jit/tomcat-cluster-redis-session-manager/wiki

Steps to be done,
	1. Move the downloaded jars to tomcat/lib directory
		- tomcat/lib/

	2. Add tomcat system property "catalina.base"
		- catalina.base="/home/huangkejie/dubbo/web/tomcat8.5.40/"

	3. Extract downloaded package (tomcat-cluster-redis-session-manager.zip) to configure Redis credentials in redis-data-cache.properties file and move the file to tomcat/conf directory
		- tomcat/conf/redis-data-cache.properties

	4. Add the below two lines in tomcat/conf/context.xml
		<Valve className="tomcat.request.session.redis.SessionHandlerValve" />
		<Manager className="tomcat.request.session.redis.SessionManager" />

	5. Verify the session expiration time (minutes) in tomcat/conf/web.xml
		<session-config>
			<session-timeout>60<session-timeout>
		<session-config>

Note:
  - All your session attribute values must implement java.io.Serializable.
  - Supports redis default, sentinel and cluster based on the redis-data-cache.properties configuration.


 2439
2439


 被折叠的 条评论
为什么被折叠?
被折叠的 条评论
为什么被折叠?
 到【灌水乐园】发言


