iOS学习:自定义tableViewCell

效果如下图:可触发按钮事件

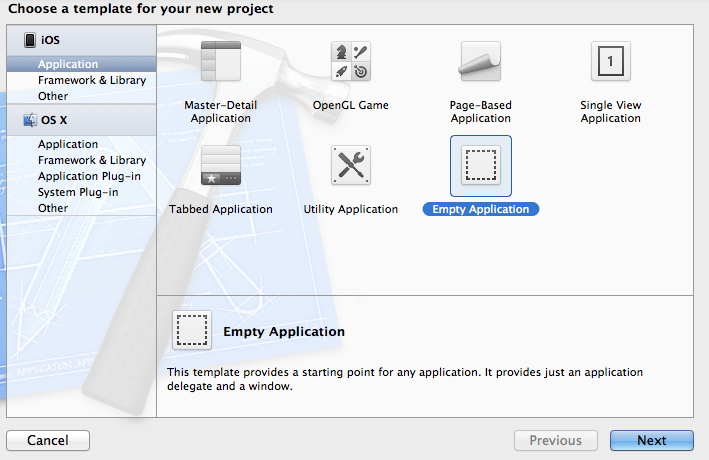
1、创建一个Empty Application
2、新建一个TableViewController,命名为MyTable

2.1在AppDelegate.h中添加@class 和property

#import <UIKit/UIKit.h>

@class MyTable;

@interface AppDelegate : UIResponder <UIApplicationDelegate>

@property (strong, nonatomic) UIWindow *window;

//声明
@property (strong, nonatomic) MyTable *MyTableView;

@end
2.2在AppDelegate.m的 didFinishLaunchingWithOptions方法中

- (BOOL)application:(UIApplication *)application didFinishLaunchingWithOptions:(NSDictionary *)launchOptions
{
    self.window = [[UIWindow alloc] initWithFrame:[[UIScreen mainScreen] bounds]];
    
    self.window.backgroundColor = [UIColor whiteColor];
    
    _MyTableView = [[MyTable alloc] initWithNibName:@"MyTable" bundle:nil];
    
    //创建一个navigationController,也可不创建,直接将window的rootViewController设定为MyTableView,此处创建是为了让程序有NavigationController的属性,方便Push视图
    UINavigationController *nv = [[UINavigationController alloc] initWithRootViewController:self.MyTableView];
    
    self.window.rootViewController = nv;
    
    [self.window makeKeyAndVisible];
    return YES;
}

2.3、在MyTable的viewWillAppear方法中

-(void)viewWillAppear:(BOOL)animated
{
    [super viewWillAppear:animated];
    self.title = @"自定义Table";
}

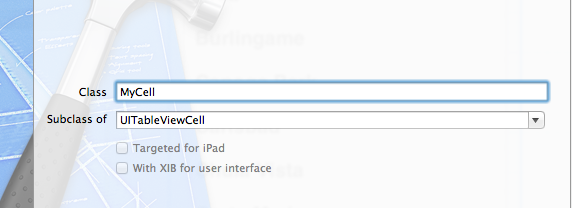
3、新建一个UITableViewCell类,命名为MyCell

4、新建一个View,命名与上面的相同(也可不同,只是命名相同更加方便)

4.1、将此View中的View删除,拖一个TableViewCell进来,将此tableViewCell的Custom Class改成3中新建的类MyCell

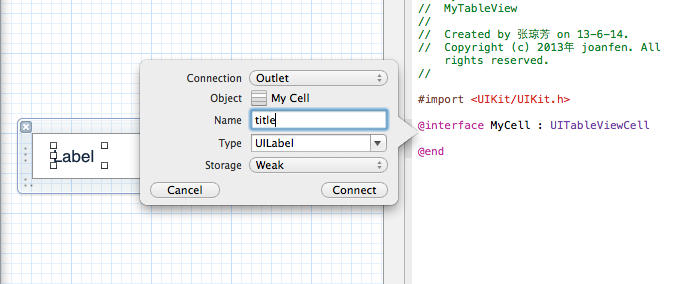
4.2.1、在cell中添加一个Label,创建映射
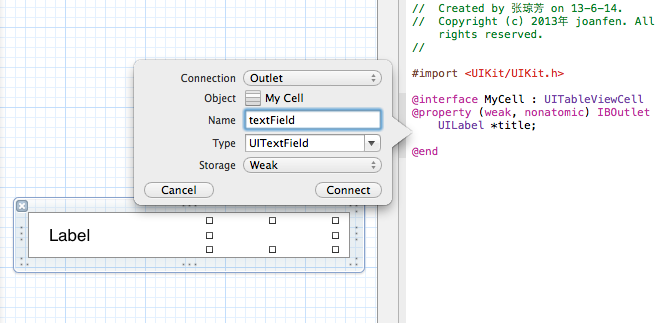
4.2.2、在Cell中添加一个TextField,创建映射
4.3.3、在Cell中添加一个Switch,创建映射
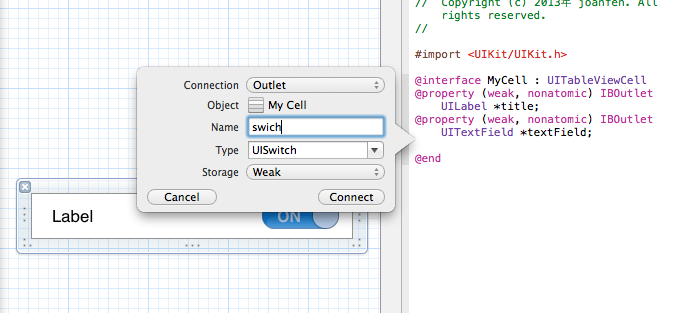
4.3.4、在Cell中添加一个segment,创建映射
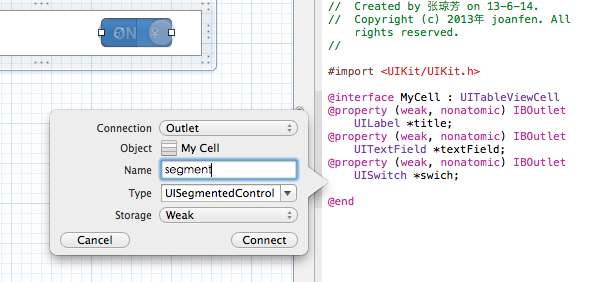
5、在MyTable.m中,补充tableViewDataSource方法

- (NSInteger)numberOfSectionsInTableView:(UITableView *)tableView
{

    // Return the number of sections.
    return 1;
}

- (NSInteger)tableView:(UITableView *)tableView numberOfRowsInSection:(NSInteger)section
{

    // Return the number of rows in the section.
    return 4;
}
补充CellForRow方法
- (UITableViewCell *)tableView:(UITableView *)tableView cellForRowAtIndexPath:(NSIndexPath *)indexPath
{
    static NSString *CellIdentifier = @"MyCell";
    //自定义cell
    MyCell *cell = (MyCell *)[tableView dequeueReusableCellWithIdentifier:CellIdentifier];
    if (cell ==nil) {
        //加载MyCell.xib文件,此处loadNibNamed后面的参数CellIdentifier必须与MyCell.xib文件名相同,否则会无法加载,报错崩溃
        NSArray *nibArray = [[NSBundle mainBundle] loadNibNamed:CellIdentifier owner:self options:nil];
        cell = (MyCell *)[nibArray objectAtIndex:0];
        
    }
    cell.accessoryType = UITableViewCellAccessoryDisclosureIndicator;
    
    NSArray *array = [NSArray arrayWithObjects:@"姓名",@"性别",@"学历",@"保险", nil];
    
    cell.title.text = [array objectAtIndex:indexPath.row];
    
    //根据行数来确定每行内容
    if (indexPath.row == 0||indexPath.row==2) {
        cell.textField.hidden = NO;
        cell.swich.hidden = YES;
        cell.segment.hidden = YES;
    }
    else if(indexPath.row == 1){
        cell.textField.hidden = YES;
        cell.segment.hidden = NO;
        cell.swich.hidden = YES;
    }
    else if(indexPath.row == 3)
    {
        cell.textField.hidden = YES;
        cell.swich.hidden = NO;
        cell.segment.hidden = YES;
    }
    //设置TextField代理
    cell.textField.delegate = self;
    return cell;
}


转载于:https://my.oschina.net/joanfen/blog/137601

  • 0
    点赞
  • 0
    收藏
    觉得还不错? 一键收藏
  • 0
    评论
YOLO高分设计资源源码,详情请查看资源内容中使用说明 YOLO高分设计资源源码,详情请查看资源内容中使用说明 YOLO高分设计资源源码,详情请查看资源内容中使用说明 YOLO高分设计资源源码,详情请查看资源内容中使用说明YOLO高分设计资源源码,详情请查看资源内容中使用说明YOLO高分设计资源源码,详情请查看资源内容中使用说明YOLO高分设计资源源码,详情请查看资源内容中使用说明YOLO高分设计资源源码,详情请查看资源内容中使用说明YOLO高分设计资源源码,详情请查看资源内容中使用说明YOLO高分设计资源源码,详情请查看资源内容中使用说明YOLO高分设计资源源码,详情请查看资源内容中使用说明YOLO高分设计资源源码,详情请查看资源内容中使用说明YOLO高分设计资源源码,详情请查看资源内容中使用说明YOLO高分设计资源源码,详情请查看资源内容中使用说明YOLO高分设计资源源码,详情请查看资源内容中使用说明YOLO高分设计资源源码,详情请查看资源内容中使用说明YOLO高分设计资源源码,详情请查看资源内容中使用说明YOLO高分设计资源源码,详情请查看资源内容中使用说明YOLO高分设计资源源码,详情请查看资源内容中使用说明YOLO高分设计资源源码,详情请查看资源内容中使用说明YOLO高分设计资源源码,详情请查看资源内容中使用说明YOLO高分设计资源源码,详情请查看资源内容中使用说明YOLO高分设计资源源码,详情请查看资源内容中使用说明YOLO高分设计资源源码,详情请查看资源内容中使用说明YOLO高分设计资源源码,详情请查看资源内容中使用说明YOLO高分设计资源源码,详情请查看资源内容中使用说明
可以在弹窗的视图控制器 `CreateOutboundDeletePopupView` 中定义一个协议,然后让 `CreateOutboundViewController` 实现该协议,以便在删除操作完成后更新数据。 首先,在 `CreateOutboundDeletePopupView` 中定义一个协议,例如: ``` @protocol CreateOutboundDeletePopupViewDelegate <NSObject> - (void)didDeleteOutbound; @end ``` 然后在 `CreateOutboundDeletePopupView` 中定义一个属性,用来保存委托对象: ``` @property (nonatomic, weak) id<CreateOutboundDeletePopupViewDelegate> delegate; ``` 在弹窗的确认删除按钮点击事件中,调用代理方法来通知委托对象删除操作已完成: ``` - (IBAction)deleteButtonClicked:(id)sender { // 向后台请求数据,删除出库记录 [self deleteOutboundRecord]; if ([self.delegate respondsToSelector:@selector(didDeleteOutbound)]) { [self.delegate didDeleteOutbound]; } [self dismissViewControllerAnimated:YES completion:nil]; } ``` 接下来,在 `CreateOutboundViewController` 中实现 `CreateOutboundDeletePopupViewDelegate` 协议,重写 `didDeleteOutbound` 方法,在该方法中更新数据源,并且刷新表格: ``` - (void)didDeleteOutbound { // 更新数据源 [self.dataArray removeObjectAtIndex:self.selectedIndex]; // 刷新表格 [self.tableView reloadData]; } ``` 当确认删除按钮点击后,会先执行 `deleteOutboundRecord` 方法向后台请求删除数据,然后执行代理方法 `didDeleteOutbound`,在该方法中更新数据源,刷新表格。 至于如何让该行的按钮显示,需要在 `cellForRowAtIndexPath` 方法中根据数据源中的数据来设置该行按钮的状态。具体的代码如下: ``` - (UITableViewCell *)tableView:(UITableView *)tableView cellForRowAtIndexPath:(NSIndexPath *)indexPath { static NSString *CellIdentifier = @"OutboundCell"; OutboundCell *cell = [tableView dequeueReusableCellWithIdentifier:CellIdentifier forIndexPath:indexPath]; // 配置cell OutboundModel *model = [self.dataArray objectAtIndex:indexPath.row]; cell.titleLabel.text = model.title; cell.timeLabel.text = model.time; cell.statusLabel.text = model.status; // 设置按钮状态 if (model.isDeleted) { [cell.deleteButton setTitle:@"已删除" forState:UIControlStateNormal]; cell.deleteButton.enabled = NO; } else { [cell.deleteButton setTitle:@"删除" forState:UIControlStateNormal]; cell.deleteButton.enabled = YES; } // ... } ``` 在 `OutboundModel` 中添加一个布尔类型的属性 `isDeleted`,当删除操作完成后,通过设置该属性为 `YES` 来让该行按钮显示为已删除状态。

“相关推荐”对你有帮助么?

  • 非常没帮助
  • 没帮助
  • 一般
  • 有帮助
  • 非常有帮助
提交
评论
添加红包

请填写红包祝福语或标题

红包个数最小为10个

红包金额最低5元

当前余额3.43前往充值 >
需支付:10.00
成就一亿技术人!
领取后你会自动成为博主和红包主的粉丝 规则
hope_wisdom
发出的红包
实付
使用余额支付
点击重新获取
扫码支付
钱包余额 0

抵扣说明:

1.余额是钱包充值的虚拟货币,按照1:1的比例进行支付金额的抵扣。
2.余额无法直接购买下载,可以购买VIP、付费专栏及课程。

余额充值