


12.6 Nginx安装
去官网下载最新的稳定版的包。
[root@localhost: ~]# cd /usr/local/src/
[root@localhost: src]# rz

[root@localhost: src]# ls nginx-1.14.0.tar.gz
nginx-1.14.0.tar.gz
解压到src目录,进行源码安装,只需指定安装位置即可。
[root@localhost: nginx-1.14.0]# ./configure --prefix=/usr/local/nginx1.14/
这里我们没有使用特殊的配置,后续我们会根据课程的需求来重新安装nginx,暂且这样使用。
[root@localhost: nginx-1.14.0]# make && make install
conf/下是配置文件,html/是默认的网页样例,logs/存放日志,sbin/下放置核心服务。
[root@localhost: nginx-1.14.0]# cd /usr/local/nginx1.14/
[root@localhost: nginx1.14]# ls
conf  html  logs  sbin
[root@localhost: nginx1.14]# ls conf/
fastcgi.conf            koi-utf             nginx.conf           uwsgi_params
fastcgi.conf.default    koi-win             nginx.conf.default   uwsgi_params.default
fastcgi_params          mime.types          scgi_params          win-utf
fastcgi_params.default  mime.types.default  scgi_params.default
[root@localhost: nginx1.14]# ls html/
50x.html  index.html
[root@localhost: nginx1.14]# ls logs/
[root@localhost: nginx1.14]# ls sbin/
nginx
-t选项依然是检测conf文件的语法。
[root@localhost: nginx1.14]# sbin/nginx -t
nginx: the configuration file /usr/local/nginx1.14//conf/nginx.conf syntax is ok
nginx: configuration file /usr/local/nginx1.14//conf/nginx.conf test is successful编辑配置文件
[root@localhost: nginx1.14]# vim /etc/init.d/nginx

#!/bin/bash
# chkconfig: - 30 21
# description: http service.
# Source Function Library
. /etc/init.d/functions
# Nginx Settings

NGINX_SBIN="/usr/local/nginx1.14/sbin/nginx"
NGINX_CONF="/usr/local/nginx1.14/conf/nginx.conf"
NGINX_PID="/usr/local/nginx1.14/logs/nginx.pid"
RETVAL=0
prog="Nginx"

start()
{
    echo -n $"Starting $prog: "
    mkdir -p /dev/shm/nginx_temp
    daemon $NGINX_SBIN -c $NGINX_CONF
    RETVAL=$?
    echo
    return $RETVAL
}

stop()
{
    echo -n $"Stopping $prog: "
    killproc -p $NGINX_PID $NGINX_SBIN -TERM
    rm -rf /dev/shm/nginx_temp
    RETVAL=$?
    echo
    return $RETVAL
}

reload()
{
    echo -n $"Reloading $prog: "
    killproc -p $NGINX_PID $NGINX_SBIN -HUP
    RETVAL=$?
    echo
    return $RETVAL
}

restart()
{
    stop
    start
}

configtest()
{
    $NGINX_SBIN -c $NGINX_CONF -t
    return 0
}

case "$1" in
  start)
        start
        ;;
  stop)
        stop
        ;;
  reload)
        reload
        ;;
  restart)
        restart
        ;;
  configtest)
        configtest
        ;;
  *)
        echo $"Usage: $0 {start|stop|reload|restart|configtest}"
        RETVAL=1
esac

exit $RETVAL


[root@localhost: nginx1.14]# vim /etc/init.d/nginx
[root@localhost: nginx1.14]# chmod 755 /etc/init.d/nginx
[root@localhost: nginx1.14]# chkconfig --add nginx
[root@localhost: nginx1.14]# chkconfig nginx on
注意修改目录到你的安装目录。
nginx的配置文件在conf目录下,默认安装完是有模板的,我们暂时不用,用书上的。
[root@localhost: nginx1.14]# ls conf/nginx.conf
conf/nginx.conf
[root@localhost: nginx1.14]# mv conf/nginx.conf conf/nginx.conf.bak
[root@localhost: nginx1.14]# vim conf/nginx.conf
[root@localhost: nginx1.14]# sbin/nginx -t
nginx: the configuration file /usr/local/nginx1.14//conf/nginx.conf syntax is ok
nginx: [emerg] open() "/usr/local/nginx/logs/nginx.pid" failed (2: No such file or directory)
nginx: configuration file /usr/local/nginx1.14//conf/nginx.conf test failed


配置文件如下。
user nobody nobody;
worker_processes 2;
error_log /usr/local/nginx/logs/nginx_error.log crit;
pid /usr/local/nginx/logs/nginx.pid;
worker_rlimit_nofile 51200;

events
{
    use epoll;
    worker_connections 6000;
}

http
{
    include mime.types;
    default_type application/octet-stream;
    server_names_hash_bucket_size 3526;
    server_names_hash_max_size 4096;
    log_format combined_realip '$remote_addr $http_x_forwarded_for [$time_local]'
    ' $host "$request_uri" $status'
    ' "$http_referer" "$http_user_agent"';
    sendfile on;
    tcp_nopush on;
    keepalive_timeout 30;
    client_header_timeout 3m;
    client_body_timeout 3m;
    send_timeout 3m;
    connection_pool_size 256;
    client_header_buffer_size 1k;
    large_client_header_buffers 8 4k;
    request_pool_size 4k;
    output_buffers 4 32k;
    postpone_output 1460;
    client_max_body_size 10m;
    client_body_buffer_size 256k;
    client_body_temp_path /usr/local/nginx/client_body_temp;
    proxy_temp_path /usr/local/nginx/proxy_temp;
    fastcgi_temp_path /usr/local/nginx/fastcgi_temp;
    fastcgi_intercept_errors on;
    tcp_nodelay on;
    gzip on;
    gzip_min_length 1k;
    gzip_buffers 4 8k;
    gzip_comp_level 5;
    gzip_http_version 1.1;
    gzip_types text/plain application/x-javascript text/css text/htm
    application/xml;

    server
    {
        listen 80;
        server_name localhost;
        index index.html index.htm index.php;
        root /usr/local/nginx/html;

        location ~ \.php$
        {
            include fastcgi_params;
            fastcgi_pass unix:/tmp/php-fcgi.sock;
            fastcgi_index index.php;
            fastcgi_param SCRIPT_FILENAME /usr/local/nginx/html$fastcgi_script_name;
        }
    }
}
语法检查报错是目录错误,需要把配置文件中的路径改为你的路径。
[root@localhost: nginx1.14]# sbin/nginx -t
nginx: the configuration file /usr/local/nginx1.14//conf/nginx.conf syntax is ok
nginx: configuration file /usr/local/nginx1.14//conf/nginx.conf test is successful
user nobody nobody; php代码写入文件的属主和属组就是进程的用户
worker_processes 2; 子进程的数量
error_log /usr/local/nginx/logs/nginx_error.log crit; 错误日志
pid /usr/local/nginx/logs/nginx.pid; pid
worker_rlimit_nofile 51200; nginx最多可以打开的文件数
events
{
use epoll; 使用epoll模式
worker_connections 6000; 进程的最大连接数
}详情见扩展。
server部分就对应apache的virtual host。
启动脚本
[root@localhost: nginx1.14]# /etc/init.d/nginx start
Starting nginx (via systemctl):                            [  OK  ]
[root@localhost: nginx1.14]# ps aux | grep nginx
root       4350  0.0  0.0  20548   620 ?        Ss   00:19   0:00 nginx: master process /usr/local/nginx1.14/sbin/nginx -c /usr/local/nginx1.14/conf/nginx.conf
nobody     4351  0.0  0.3  25076  3516 ?        S    00:19   0:00 nginx: worker process
nobody     4352  0.0  0.3  25076  3260 ?        S    00:19   0:00 nginx: worker process
root       4359  0.0  0.0 112704   972 pts/0    S+   00:20   0:00 grep --color=auto nginx
可以看到两个子进程。
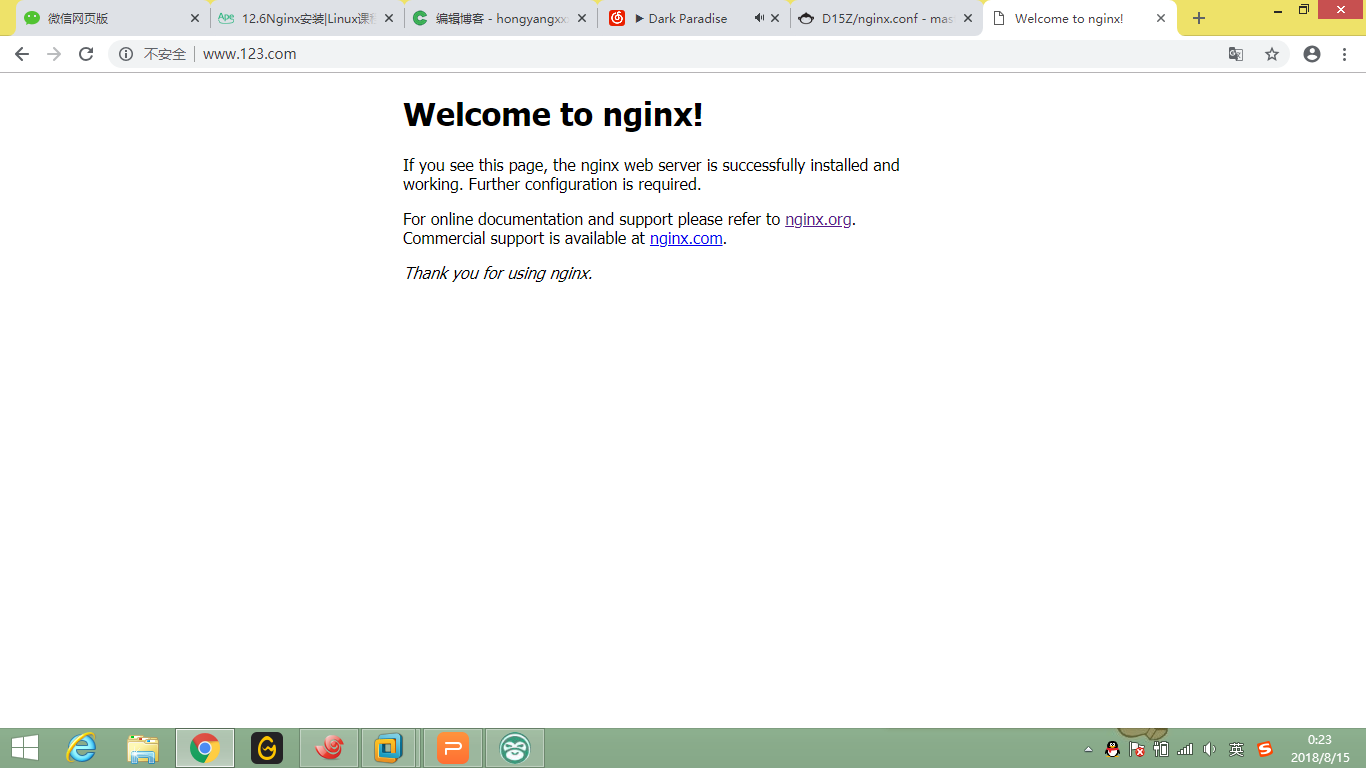
这时候就可以访问了。
[root@localhost: nginx1.14]# curl localhost
<!DOCTYPE html>
<html>
<head>
<title>Welcome to nginx!</title>
<style>
    body {
        width: 35em;
        margin: 0 auto;
        font-family: Tahoma, Verdana, Arial, sans-serif;
    }
</style>
</head>
<body>
<h1>Welcome to nginx!</h1>
<p>If you see this page, the nginx web server is successfully installed and
working. Further configuration is required.</p>

<p>For online documentation and support please refer to
<a href="http://nginx.org/">nginx.org</a>.<br/>
Commercial support is available at
<a href="http://nginx.com/">nginx.com</a>.</p>

<p><em>Thank you for using nginx.</em></p>
</body>
</html>
[root@localhost: nginx1.14]# cat html/index.html
<!DOCTYPE html>
<html>
<head>
<title>Welcome to nginx!</title>
<style>
    body {
        width: 35em;
        margin: 0 auto;
        font-family: Tahoma, Verdana, Arial, sans-serif;
    }
</style>
</head>
<body>
<h1>Welcome to nginx!</h1>
<p>If you see this page, the nginx web server is successfully installed and
working. Further configuration is required.</p>

<p>For online documentation and support please refer to
<a href="http://nginx.org/">nginx.org</a>.<br/>
Commercial support is available at
<a href="http://nginx.com/">nginx.com</a>.</p>

<p><em>Thank you for using nginx.</em></p>
</body>
</html>
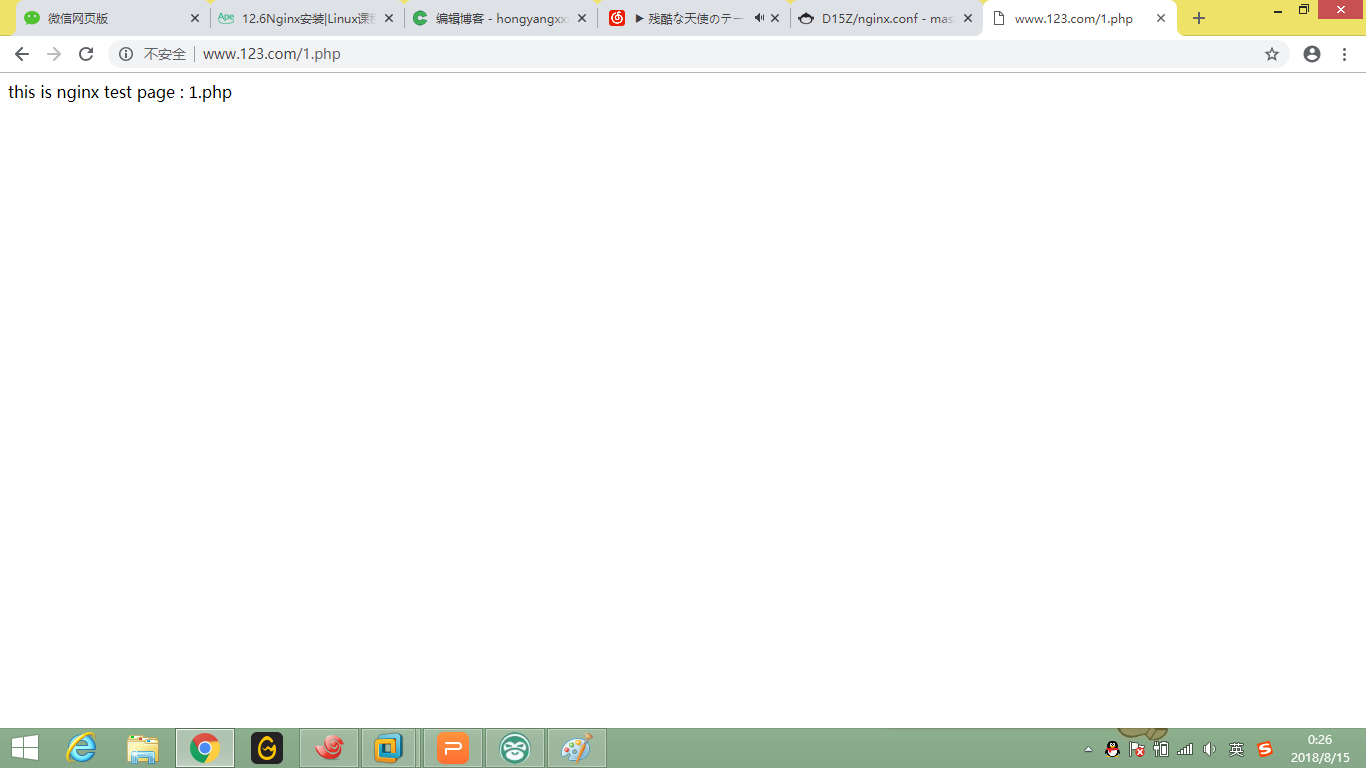
配置文件中也可以解析php
[root@localhost: nginx1.14]# curl localhost/1.php
this is nginx test page : 1.php
[root@localhost: nginx1.14]#
12.7 默认虚拟主机
我们上一小节定义的server其实就是默认的虚拟主机,默认的虚拟主机也可以写在单独的一个配置文件里。
下面我们把配置文件中的server段注释掉,添加一行include
    include vhost/*.conf;
 #   server
 #   {
 #       listen 80;
 #       server_name localhost;
 #       index index.html index.htm index.php;
 #       root /usr/local/nginx1.14/html;

 #       location ~ \.php$
 #       {
 #           include fastcgi_params;
 #           fastcgi_pass unix:/tmp/php-fcgi.sock;
 #           #fastcgi_pass 127.0.0.1:9000;
 #           fastcgi_index index.php;
 #           fastcgi_param SCRIPT_FILENAME /usr/local/nginx1.14/html$fastcgi_script_name;
 #       }
 #   }
这个vhost目录需要手动创建在conf目录下。
server
{
    listen 80 default_server;  // 有这个标记的就是默认虚拟主机
    server_name aaa.com;
    index index.html index.htm index.php;
    root /data/wwwroot/default;
}
root要指定成你网站的目录。
[root@localhost: nginx1.14]# ls /usr/local/nginx1.14/html/
1.php  50x.html  index.html
[root@localhost: nginx1.14]# vim html/index.html
[root@localhost: nginx1.14]#
检查完语法之后测试一下是否可行。
[root@localhost: nginx1.14]# sbin/nginx -s reload不重启服务,重新加载配置文件,
[root@localhost: nginx1.14]# curl localhost
Nginx1.14 default site
[root@localhost: nginx1.14]# curl 127.0.0.1:80 aaa.com
Nginx1.14 default site
^C
[root@localhost: nginx1.14]# curl 127.0.0.1:80 bbb.com
Nginx1.14 default site
^C
[root@localhost: nginx1.14]#
这就是默认的虚拟主机。
include *.conf中第一个就是默认的虚拟主机(如果没有标识的话),这里需要注意。
12.8 Nginx用户认证
首先我们先创立一个虚拟主机。
[root@localhost: nginx1.14]# vim conf/vhost/test.com.conf


server
{
    listen 80;
    server_name test.com;
    index index.html index.htm index.php;
    root  /usr/local/nginx1.14/html/test.com;

    location  /
    {
        auth_basic              "Auth";
        auth_basic_user_file   /usr/local/nginx1.14/conf/htpasswd;
    }
}
auth_basic就是用户认证的名字。
生成密码文件我们使用htpasswd服务。
[root@localhost: nginx1.14]# /usr/local/apache2.4/bin/htpasswd -c conf/htpasswd lhy
New password:
Re-type new password:
Adding password for user lhy
如果再次创建就不要-c选项了 否则会被覆盖。
[root@localhost: nginx1.14]# /usr/local/apache2.4/bin/htpasswd conf/htpasswd lhybak
New password:
Re-type new password:
Adding password for user lhybak
[root@localhost: nginx1.14]# cat conf/htpasswd
lhy:$apr1$7GpmTvLX$eizxWrgedEJA5I9ufBnr70
lhybak:$apr1$zHqdyztI$BeG7zIzu8Tos9hVMamfBD0
实验一下
[root@localhost: nginx1.14]# sbin/nginx -t
nginx: the configuration file /usr/local/nginx1.14//conf/nginx.conf syntax is ok
nginx: configuration file /usr/local/nginx1.14//conf/nginx.conf test is successful
[root@localhost: nginx1.14]# sbin/nginx -s reload
[root@localhost: nginx1.14]# curl -x 127.0.0.1:80 test.com
<html>
<head><title>401 Authorization Required</title></head>
<body bgcolor="white">
<center><h1>401 Authorization Required</h1></center>
<hr><center>nginx/1.14.0</center>
</body>
</html>
[root@localhost: nginx1.14]# curl -x 127.0.0.1:80 -ulhy:123 test.com
<html>
<head><title>404 Not Found</title></head>
<body bgcolor="white">
<center><h1>404 Not Found</h1></center>
<hr><center>nginx/1.14.0</center>
</body>
</html>
[root@localhost: nginx1.14]#
-s reload的好处就是即使你的配置文件错了,那么你的服务也不会停掉。
[root@localhost: nginx1.14]# mkdir html/test.com
[root@localhost: nginx1.14]# cd !$
cd html/test.com
[root@localhost: test.com]# echo "test.com" > index.html
[root@localhost: test.com]# curl -x 127.0.0.1:80 -ulhy:123 test.com
test.com
当然这个是整个站点都需要认证,我们还是把location改为admin认证最好
    location  /admin/
    {
        auth_basic              "Auth";
        auth_basic_user_file   /usr/local/nginx1.14/conf/htpasswd;
    }
[root@localhost: test.com]# mkdir admin
[root@localhost: test.com]# echo "admin test.com" > admin/admin.html
[root@localhost: test.com]# curl -x 127.0.0.1:80 test.com
test.com
[root@localhost: test.com]# curl -x 127.0.0.1:80 test.com/admin/admin.html
<html>
<head><title>401 Authorization Required</title></head>
<body bgcolor="white">
<center><h1>401 Authorization Required</h1></center>
<hr><center>nginx/1.14.0</center>
</body>
</html>
[root@localhost: test.com]# curl -x 127.0.0.1:80 -ulhy:123 test.com/admin/admin.html
admin test.com
[root@localhost: test.com]# curl -x 127.0.0.1:80 test.com/1/2/3/admin/admin.html
<html>
<head><title>404 Not Found</title></head>
<body bgcolor="white">
<center><h1>404 Not Found</h1></center>
<hr><center>nginx/1.14.0</center>
</body>
</html>
如果想改为所有的admin都要认证,就用正则匹配。
    location ~ /admin/
    {
        auth_basic              "Auth";
        auth_basic_user_file   /usr/local/nginx1.14/conf/htpasswd;
    }
[root@localhost: test.com]#
[root@localhost: test.com]# vim /usr/local/nginx1.14/conf/vhost/test.com.conf
[root@localhost: test.com]# /usr/local/nginx1.14/sbin/nginx -t
nginx: the configuration file /usr/local/nginx1.14//conf/nginx.conf syntax is ok
nginx: configuration file /usr/local/nginx1.14//conf/nginx.conf test is successful
[root@localhost: test.com]# /usr/local/nginx1.14/sbin/nginx -s reload
[root@localhost: test.com]# curl -x 127.0.0.1:80 test.com/1/2/3/admin/admin.html
<html>
<head><title>401 Authorization Required</title></head>
<body bgcolor="white">
<center><h1>401 Authorization Required</h1></center>
<hr><center>nginx/1.14.0</center>
</body>
</html>
12.9 Nginx域名重定向
域名重定向的需求在之前apache已经讲过了。
nginx的servername可以有多个,我们为了提高网站的权重,就需要把其他域名跳转到主域名。
server
{
    listen 80;
    server_name test.com test1.com test2.com;
    index index.html index.htm index.php;
    root /usr/local/nginx1.14/html/test.com;
    if ($host != 'test.com' )
    {
        rewrite  ^/(.*)$  http://test.com/$1  permanent;
    }

    location ~  /admin/
    {
        auth_basic              "Auth";
        auth_basic_user_file   /usr/local/nginx1.14/conf/htpasswd;
    }
}
这里和apache语法是类似的,也支持正则。
我们新建一个test1,测试一下。这里permanent跳转就是301,redirect就是302。
[root@localhost: test.com]# curl -x 127.0.0.1:80  test2.com/ -I
HTTP/1.1 301 Moved Permanently
Server: nginx/1.14.0
Date: Thu, 16 Aug 2018 05:24:05 GMT
Content-Type: text/html
Content-Length: 185
Connection: keep-alive
Location: http://test.com/

[root@localhost: test.com]# curl -x 127.0.0.1:80  test2.com/asdgags -I
HTTP/1.1 301 Moved Permanently
Server: nginx/1.14.0
Date: Thu, 16 Aug 2018 05:24:17 GMT
Content-Type: text/html
Content-Length: 185
Connection: keep-alive
Location: http://test.com/asdgags
扩展
nginx.conf 配置详解
http://my.oschina.net/duxuefeng/blog/34880
nginx rewrite四种flag
http://www.netingcn.com/nginx-rewrite-flag.html
http://unixman.blog.51cto.com/10163040/1711943
12.10 Nginx访问日志
nginx也有一个在主配置文件里的log的格式。
[root@localhost: test.com]# cat ../../conf/nginx.conf | grep log_format -A2
    log_format combined_realip '$remote_addr $http_x_forwarded_for [$time_local]'
    ' $host "$request_uri" $status'
    ' "$http_referer" "$http_user_agent"';
nginx的配置文件以分号分割。
这里log_format指定log的格式,combined_realip是自定义的这一段配置的别名,可以改为你想要的名字。
| $remote_addr | 客户端IP(公网IP) 这里是出口ip |
| $http_x_forwarded_for | 代理服务器的IP |
| $time_local | 服务器本地时间 |
| $host | 访问主机名(域名) |
| $request_uri | 访问的url地址 |
| $status | 状态码 |
| $http_referer | referer |
| $http_user_agent | user_agent |
之后我们在虚拟主机里添加一行指定log的路径和格式。
access_log /tmp/test.com.log combined_realip;
如果不写格式的话,会指定为默认的一个简单的格式。
然后curl访问几次,查看一下日志。
[root@localhost: nginx1.14]# cat /tmp/test.com.log
127.0.0.1 - [16/Aug/2018:14:20:37 +0800] test2.com "/asdgags" 301 "-" "curl/7.29.0"
127.0.0.1 - [16/Aug/2018:14:20:48 +0800] test1.com "/asdgags" 301 "-" "curl/7.29.0"
127.0.0.1 - [16/Aug/2018:14:20:52 +0800] test.com "/asdgags" 404 "-" "curl/7.29.0"
12.11 Nginx日志切割
既然有了日志,那必然就涉及到日志切割,按照日期切割,方便查询。
这里我们用自己的日志切割脚本。
#! /bin/bash
## 假设nginx的日志存放路径为/data/logs/
d=`date -d "-1 day" +%Y%m%d`
logdir="/data/logs"
nginx_pid="/usr/local/nginx1.14/logs/nginx.pid"
cd $logdir
for log in `ls *.log`  #通配所有的日志,要求被分割的日志以.log结尾
do
    mv $log $log-$d
done
/bin/kill -HUP `cat $nginx_pid`


[root@localhost: nginx1.14]# vim /usr/local/sbin/nginx_logrotate.sh
[root@localhost: nginx1.14]# mkdir -p /data/logs
写脚本的时候可以在bash里测试。
[root@localhost: nginx1.14]# sh -x /usr/local/sbin/nginx_logrotate.sh
++ date -d '-1 day' +%Y%m%d
+ d=20180815
+ logdir=/data/logs
+ nginx_pid=/usr/local/nginx1.14/logs/nginx.pid
+ cd /data/logs
++ ls '*.log'
ls: cannot access *.log: No such file or directory
++ cat /usr/local/nginx1.14/logs/nginx.pid
+ /bin/kill -HUP 924
-x选项可以显示你的sh文件执行到哪一步了。
过期的日志也需要删除。
每天的凌晨也需要切割。
这一些都可以加入到crontab -e的任务计划中。
12.12 静态文件不记录日志和过期时间
直接在虚拟主机配置文件中添加配置,
server
{
    listen 80;
    server_name test.com test1.com test2.com;
    index index.html index.htm index.php;
    root /usr/local/nginx1.14/html/test.com;
    if ( $host != 'test.com' )
    {
        rewrite  ^/(.*)$  http://test.com/$1  permanent;
    }

    location ~  /admin/
    {
        auth_basic              "Auth";
        auth_basic_user_file   /usr/local/nginx1.14/conf/htpasswd;
    }

    location ~ .*\.(gif|jpg|jpeg|png|bmp|swf)$
    {
          expires      7d;
          access_log off;
    }

    location ~ .*\.(js|css)$
    {
          expires      12h;
          access_log off;
    }
    access_log /data/logs/test.com.log combined_realip;
}
注意匹配的写法。
[root@localhost: nginx1.14]# /usr/local/nginx1.14/sbin/nginx -t
nginx: the configuration file /usr/local/nginx1.14//conf/nginx.conf syntax is ok
nginx: configuration file /usr/local/nginx1.14//conf/nginx.conf test is successful
[root@localhost: nginx1.14]# /usr/local/nginx1.14/sbin/nginx -s reload
[root@localhost: nginx1.14]# echo "123" > html/test.com/1.gif
[root@localhost: nginx1.14]# echo "123" > html/test.com/2.js
[root@localhost: nginx1.14]# curl -x127.0.0.1:80 test.com/1.gif
123
[root@localhost: nginx1.14]# curl -x127.0.0.1:80 test.com/2.js
123
[root@localhost: nginx1.14]# curl -x127.0.0.1:80 test.com/index.htm
<html>
<head><title>404 Not Found</title></head>
<body bgcolor="white">
<center><h1>404 Not Found</h1></center>
<hr><center>nginx/1.14.0</center>
</body>
</html>
[root@localhost: nginx1.14]# curl -x127.0.0.1:80 test.com/index.html
test.com
[root@localhost: nginx1.14]# cat /data/logs/test.com.log
127.0.0.1 - [16/Aug/2018:14:46:06 +0800] test.com "/index.htm" 404 "-" "curl/7.29.0"
127.0.0.1 - [16/Aug/2018:14:46:09 +0800] test.com "/index.html" 200 "-" "curl/7.29.0"
测试是成功的。
[root@localhost: nginx1.14]# curl -x127.0.0.1:80 test.com/index.html -I
HTTP/1.1 200 OK
Server: nginx/1.14.0
Date: Thu, 16 Aug 2018 06:47:55 GMT
Content-Type: text/html
Content-Length: 9
Last-Modified: Thu, 16 Aug 2018 04:45:51 GMT
Connection: keep-alive
ETag: "5b75017f-9"
Accept-Ranges: bytes

[root@localhost: nginx1.14]# curl -x127.0.0.1:80 test.com/2.js -I
HTTP/1.1 200 OK
Server: nginx/1.14.0
Date: Thu, 16 Aug 2018 06:48:05 GMT
Content-Type: application/javascript
Content-Length: 4
Last-Modified: Thu, 16 Aug 2018 06:45:16 GMT
Connection: keep-alive
ETag: "5b751d7c-4"
Expires: Thu, 16 Aug 2018 18:48:05 GMT
Cache-Control: max-age=43200
Accept-Ranges: bytes
可以看到已经出现了过期时间Expires标识。
12.13 Nginx防盗链
    location ~* ^.+\.(gif|jpg|png|swf|flv|rar|zip|doc|pdf|gz|bz2|jpeg|bmp|xls)$
    {
        expires 10d;
        valid_referers none blocked server_names  *.test.com ;
        if ($invalid_referer) {
            return 403;
        }
        access_log off;
    }
这个配置可以和之前的结合。location后面的~*表示不区分大小写。
要注意的话,如果有多个匹配,更精准的匹配会被实现,注意过期时间,下面是测试结果,详见扩展。
[root@localhost: nginx1.14]# echo "123" > html/test.com/4.gif
[root@localhost: nginx1.14]# curl -x127.0.0.1:80 test.com/4.gif -I
HTTP/1.1 200 OK
Server: nginx/1.14.0
Date: Thu, 16 Aug 2018 07:41:33 GMT
Content-Type: image/gif
Content-Length: 4
Last-Modified: Thu, 16 Aug 2018 07:41:27 GMT
Connection: keep-alive
ETag: "5b752aa7-4"
Expires: Thu, 23 Aug 2018 07:41:33 GMT
Cache-Control: max-age=604800
Accept-Ranges: bytes

[root@localhost: nginx1.14]# fg
vim conf/vhost/test.com.conf

[1]+  Stopped                 vim conf/vhost/test.com.conf
[root@localhost: nginx1.14]# echo "123" > html/test.com/5.Gif
[root@localhost: nginx1.14]# curl -x127.0.0.1:80 test.com/5.Gif -I
HTTP/1.1 200 OK
Server: nginx/1.14.0
Date: Thu, 16 Aug 2018 07:43:30 GMT
Content-Type: image/gif
Content-Length: 4
Last-Modified: Thu, 16 Aug 2018 07:43:21 GMT
Connection: keep-alive
ETag: "5b752b19-4"
Expires: Sun, 26 Aug 2018 07:43:30 GMT
Cache-Control: max-age=864000
Accept-Ranges: bytes
[root@localhost: nginx1.14]# curl -e "http://www.baidu.com" -x127.0.0.1:80 test.com/5.Gif -I
HTTP/1.1 403 Forbidden
Server: nginx/1.14.0
Date: Thu, 16 Aug 2018 07:48:06 GMT
Content-Type: text/html
Content-Length: 169
Connection: keep-alive

[root@localhost: nginx1.14]# curl -e "http://www.test.com" -x127.0.0.1:80 test.com/5.Gif -I
HTTP/1.1 200 OK
Server: nginx/1.14.0
Date: Thu, 16 Aug 2018 07:48:14 GMT
Content-Type: image/gif
Content-Length: 4
Last-Modified: Thu, 16 Aug 2018 07:43:21 GMT
Connection: keep-alive
ETag: "5b752b19-4"
Expires: Sun, 26 Aug 2018 07:48:14 GMT
Cache-Control: max-age=864000
Accept-Ranges: bytes

[root@localhost: nginx1.14]# curl -e "http://www.baidu.com" -x127.0.0.1:80 test.com/4.gif -I
HTTP/1.1 200 OK
Server: nginx/1.14.0
Date: Thu, 16 Aug 2018 07:48:32 GMT
Content-Type: image/gif
Content-Length: 4
Last-Modified: Thu, 16 Aug 2018 07:41:27 GMT
Connection: keep-alive
ETag: "5b752aa7-4"
Expires: Thu, 23 Aug 2018 07:48:32 GMT
Cache-Control: max-age=604800
Accept-Ranges: bytes
return 403;也可以写成deny all;
参数说明:
- none “Referer” 为空
- blocked “Referer”不为空,但是里面的值被代理或者防火墙删除了,这些值都不以http://或者https://开头,而是“Referer: XXXXXXX”这种形式
- server_names “Referer”来源头部包含当前的server_names(当前域名)
- arbitrary string 任意字符串,定义服务器名或者可选的URI前缀.主机名可以使用*开头或者结尾,在检测来源头部这个过程中,来源域名中的主机端口将会被忽略掉
- regular expression 正则表达式,~表示排除https://或http://开头的字符串.
注意
通过Referer实现防盗链比较基础,仅可以简单实现方式资源被盗用。构造Referer的请求很容易实现。
12.14 Nginx访问控制
需求:访问/admin/目录的请求,只允许某几个IP访问,配置如下:
    location ~  /admin/
    {
        auth_basic              "Auth";
        auth_basic_user_file   /usr/local/nginx1.14/conf/htpasswd;
    #    allow 192.168.244.128;
        allow 127.0.0.1;
        deny all;
    }
因为127.0.0.0整段都是本机,所以都可以访问,但是192.168.244.128就访问不了了。
[root@localhost: nginx1.14]# /usr/local/nginx1.14/sbin/nginx -s reload
[root@localhost: nginx1.14]# curl -x127.0.0.1:80 test.com/admin/admin.html -I
HTTP/1.1 401 Unauthorized
Server: nginx/1.14.0
Date: Thu, 16 Aug 2018 08:33:31 GMT
Content-Type: text/html
Content-Length: 195
Connection: keep-alive
WWW-Authenticate: Basic realm="Auth"

[root@localhost: nginx1.14]# curl -ulhy:123 -x127.0.0.1:80 test.com/admin/admin.html -I
HTTP/1.1 200 OK
Server: nginx/1.14.0
Date: Thu, 16 Aug 2018 08:33:40 GMT
Content-Type: text/html
Content-Length: 15
Last-Modified: Thu, 16 Aug 2018 04:49:21 GMT
Connection: keep-alive
ETag: "5b750251-f"
Accept-Ranges: bytes

[root@localhost: nginx1.14]# curl -ulhy:123 -x127.0.0.2:80 test.com/admin/admin.html -I
HTTP/1.1 200 OK
Server: nginx/1.14.0
Date: Thu, 16 Aug 2018 08:33:46 GMT
Content-Type: text/html
Content-Length: 15
Last-Modified: Thu, 16 Aug 2018 04:49:21 GMT
Connection: keep-alive
ETag: "5b750251-f"
Accept-Ranges: bytes

[root@localhost: nginx1.14]# curl -ulhy:123 -x192.168.244.128:80 test.com/admin/admin.html -I
HTTP/1.1 200 OK
Server: nginx/1.14.0
Date: Thu, 16 Aug 2018 08:33:59 GMT
Content-Type: text/html
Content-Length: 15
Last-Modified: Thu, 16 Aug 2018 04:49:21 GMT
Connection: keep-alive
ETag: "5b750251-f"
Accept-Ranges: bytes

[root@localhost: nginx1.14]# fg
vim conf/vhost/test.com.conf

[1]+  Stopped                 vim conf/vhost/test.com.conf
[root@localhost: nginx1.14]# /usr/local/nginx1.14/sbin/nginx -s reload
[root@localhost: nginx1.14]# curl -ulhy:123 -x192.168.244.128:80 test.com/admin/admin.html -I
HTTP/1.1 403 Forbidden
Server: nginx/1.14.0
Date: Thu, 16 Aug 2018 08:34:22 GMT
Content-Type: text/html
Content-Length: 169
Connection: keep-alive
新开一个网卡,重新测试一下,更改ip为192.168.16.100,开放192.168.244.128 。最后说明我们的结果是没有问题的。
[root@localhost: ~]# ifconfig
ens33: flags=4163<UP,BROADCAST,RUNNING,MULTICAST>  mtu 1500
        inet 192.168.244.128  netmask 255.255.255.0  broadcast 192.168.244.255
        inet6 fe80::8672:7640:d3da:4d8b  prefixlen 64  scopeid 0x20<link>
        ether 00:0c:29:7a:e1:b0  txqueuelen 1000  (Ethernet)
        RX packets 20156  bytes 1696173 (1.6 MiB)
        RX errors 0  dropped 0  overruns 0  frame 0
        TX packets 8738  bytes 1260816 (1.2 MiB)
        TX errors 0  dropped 0 overruns 0  carrier 0  collisions 0

ens37: flags=4163<UP,BROADCAST,RUNNING,MULTICAST>  mtu 1500
        inet 192.168.96.128  netmask 255.255.255.0  broadcast 192.168.96.255
        inet6 fe80::4aab:12c8:1809:8a24  prefixlen 64  scopeid 0x20<link>
        ether 00:0c:29:7a:e1:ba  txqueuelen 1000  (Ethernet)
        RX packets 9  bytes 1780 (1.7 KiB)
        RX errors 0  dropped 0  overruns 0  frame 0
        TX packets 18  bytes 2406 (2.3 KiB)
        TX errors 0  dropped 0 overruns 0  carrier 0  collisions 0

lo: flags=73<UP,LOOPBACK,RUNNING>  mtu 65536
        inet 127.0.0.1  netmask 255.0.0.0
        inet6 ::1  prefixlen 128  scopeid 0x10<host>
        loop  txqueuelen 1000  (Local Loopback)
        RX packets 702  bytes 64716 (63.1 KiB)
        RX errors 0  dropped 0  overruns 0  frame 0
        TX packets 702  bytes 64716 (63.1 KiB)
        TX errors 0  dropped 0 overruns 0  carrier 0  collisions 0

[root@localhost: ~]# ifup ens37
/usr/sbin/ifup: configuration for ens37 not found.
Usage: ifup <configuration>
[root@localhost: ~]# echo $?
1
[root@localhost: ~]# ifconfig ens37 192.168.16.100/24
[root@localhost: ~]# ifconfig
ens33: flags=4163<UP,BROADCAST,RUNNING,MULTICAST>  mtu 1500
        inet 192.168.244.128  netmask 255.255.255.0  broadcast 192.168.244.255
        inet6 fe80::8672:7640:d3da:4d8b  prefixlen 64  scopeid 0x20<link>
        ether 00:0c:29:7a:e1:b0  txqueuelen 1000  (Ethernet)
        RX packets 20308  bytes 1708127 (1.6 MiB)
        RX errors 0  dropped 0  overruns 0  frame 0
        TX packets 8812  bytes 1270158 (1.2 MiB)
        TX errors 0  dropped 0 overruns 0  carrier 0  collisions 0

ens37: flags=4163<UP,BROADCAST,RUNNING,MULTICAST>  mtu 1500
        inet 192.168.16.100  netmask 255.255.255.0  broadcast 192.168.16.255
        inet6 fe80::4aab:12c8:1809:8a24  prefixlen 64  scopeid 0x20<link>
        ether 00:0c:29:7a:e1:ba  txqueuelen 1000  (Ethernet)
        RX packets 9  bytes 1780 (1.7 KiB)
        RX errors 0  dropped 0  overruns 0  frame 0
        TX packets 18  bytes 2406 (2.3 KiB)
        TX errors 0  dropped 0 overruns 0  carrier 0  collisions 0

lo: flags=73<UP,LOOPBACK,RUNNING>  mtu 65536
        inet 127.0.0.1  netmask 255.0.0.0
        inet6 ::1  prefixlen 128  scopeid 0x10<host>
        loop  txqueuelen 1000  (Local Loopback)
        RX packets 702  bytes 64716 (63.1 KiB)
        RX errors 0  dropped 0  overruns 0  frame 0
        TX packets 702  bytes 64716 (63.1 KiB)
        TX errors 0  dropped 0 overruns 0  carrier 0  collisions 0

[root@localhost: ~]# curl -x127.0.0.1:80 www.baidu.com
Nginx1.14 default site
[root@localhost: ~]# curl -x192.168.244.128:80 www.baidu.com
Nginx1.14 default site
[root@localhost: ~]# curl -x192.168.16.100:80 www.baidu.com
Nginx1.14 default site
[root@localhost: ~]# curl -ulhy:123 -x192.168.16.100:80 test.com/admin/admin.html -I
HTTP/1.1 403 Forbidden
Server: nginx/1.14.0
Date: Thu, 16 Aug 2018 08:46:38 GMT
Content-Type: text/html
Content-Length: 169
Connection: keep-alive

[root@localhost: ~]# fg
-bash: fg: current: no such job
[root@localhost: ~]# vim /usr/local/nginx1.14/conf/vhost/test.com.conf

[1]+  Stopped                 vim /usr/local/nginx1.14/conf/vhost/test.com.conf
[root@localhost: ~]# /usr/local/nginx1.14/sbin/nginx -s reload
[root@localhost: ~]# curl -ulhy:123 -x192.168.16.100:80 test.com/admin/admin.html -I
HTTP/1.1 403 Forbidden
Server: nginx/1.14.0
Date: Thu, 16 Aug 2018 08:47:16 GMT
Content-Type: text/html
Content-Length: 169
Connection: keep-alive

[root@localhost: ~]# curl -ulhy:123 -x192.168.244.128:80 test.com/admin/admin.html -I
HTTP/1.1 200 OK
Server: nginx/1.14.0
Date: Thu, 16 Aug 2018 08:47:28 GMT
Content-Type: text/html
Content-Length: 15
Last-Modified: Thu, 16 Aug 2018 04:49:21 GMT
Connection: keep-alive
ETag: "5b750251-f"
Accept-Ranges: bytes
可以看一下访问日志
192.168.244.128 - [16/Aug/2018:16:33:59 +0800] test.com "/admin/admin.html" 200 "-" "curl/7.29.0"
192.168.244.128 - [16/Aug/2018:16:34:22 +0800] test.com "/admin/admin.html" 403 "-" "curl/7.29.0"
192.168.16.100 - [16/Aug/2018:16:46:38 +0800] test.com "/admin/admin.html" 403 "-" "curl/7.29.0"
192.168.16.100 - [16/Aug/2018:16:47:16 +0800] test.com "/admin/admin.html" 403 "-" "curl/7.29.0"
192.168.244.128 - [16/Aug/2018:16:47:28 +0800] test.com "/admin/admin.html" 200 "-" "curl/7.29.0"
同样,也可以针对目录设置。
 可以匹配正则
location ~ .*(abc|image)/.*\.php$
{
        deny all;
}

根据user_agent限制
if ($http_user_agent ~ 'Spider/3.0|YoudaoBot|Tomato')
{
      return 403;
}
这里deny和403的效果是一样的。
12.15 Nginx解析php相关配置
配置文件如下
    location ~ \.php$
    {
        include fastcgi_params;
        fastcgi_pass unix:/tmp/php-fcgi.sock;
        fastcgi_index index.php;
        fastcgi_param SCRIPT_FILENAME /usr/local/nginx1.14/html/test.com$fastcgi_script_name;
    }
如果没有这个,php是不能解析的。
[root@localhost: ~]# vim /usr/local/nginx1.14/html/test.com/3.php
[root@localhost: ~]# cat !$
cat /usr/local/nginx1.14/html/test.com/3.php
<?php
    phpinfo();
?>


[root@localhost: ~]# curl -x127.0.0.1:80 test.com/3.php | head
  % Total    % Received % Xferd  Average Speed   Time    Time     Time  Current
                                 Dload  Upload   Total   Spent    Left  Speed
  0     0    0     0    0     0      0      0 --:--:-- --:--:-- --:--:--     0<!DOCTYPE html PUBLIC "-//W3C//DTD XHTML 1.0 Transitional//EN" "DTD/xhtml1-transitional.dtd">
<html xmlns="http://www.w3.org/1999/xhtml"><head>
<style type="text/css">
body {background-color: #fff; color: #222; font-family: sans-serif;}
pre {margin: 0; font-family: monospace;}
1a:link {color: #009; text-decoration: none; background-color: #fff;}
0a:hover {text-decoration: underline;}
0table {border-collapse: collapse; border: 0; width: 934px; box-shadow: 1px 2px 3px #ccc;}
 .center {text-align: center;}
6.center table {margin: 1em auto; text-align: left;}
8563    0 68563    0     0   179k      0 --:--:-- --:--:-- --:--:-- 1030k
(23) Failed writing body
如果不能解析php的话,就会显示php的源码。
如果socket路径错了,会显示502错误。
[root@localhost: ~]# /usr/local/nginx1.14/sbin/nginx -s reload
[root@localhost: ~]# curl -x127.0.0.1:80 test.com/3.php
<html>
<head><title>502 Bad Gateway</title></head>
<body bgcolor="white">
<center><h1>502 Bad Gateway</h1></center>
<hr><center>nginx/1.14.0</center>
</body>
</html>
[root@localhost: ~]# tail -5 /data/logs/test.com.log
127.0.0.1 - [16/Aug/2018:18:44:56 +0800] test.com "/3.php" 200 "-" "curl/7.29.0"
127.0.0.1 - [16/Aug/2018:18:45:19 +0800] test.com "/3.php" 200 "-" "curl/7.29.0"
127.0.0.1 - [16/Aug/2018:18:45:57 +0800] test.com "/3.php" 200 "-" "curl/7.29.0"
127.0.0.1 - [16/Aug/2018:18:46:16 +0800] test.com "/3.php" 200 "-" "curl/7.29.0"
127.0.0.1 - [16/Aug/2018:18:48:08 +0800] test.com "/3.php" 502 "-" "curl/7.29.0"
错误日志
[root@localhost: ~]# tail -5 /usr/local/nginx1.14/logs/nginx_error.log
2018/08/16 18:48:08 [crit] 4373#0: *111 connect() to unix:/tmp/php-cgi.sock failed (2: No such file or directory) while connecting to upstream, client: 127.0.0.1, server: test.com, request: "GET HTTP://test.com/3.php HTTP/1.1", upstream: "fastcgi://unix:/tmp/php-cgi.sock:", host: "test.com"
这里想要更多的信息要把nginx的错误日志级别从
error_log /usr/local/nginx1.14/logs/nginx_error.log crit;改为
error_log /usr/local/nginx1.14/logs/nginx_error.log debug;然后重启服务
[root@localhost: ~]# /etc/init.d/nginx restart
Restarting nginx (via systemctl):                          [  OK  ]
如果php-fpm监听的是9000端口而不是socket文件
[root@localhost: ~]# vim /usr/local/php-fpm/etc/php-fpm.conf

[www]
listen = 127.0.0.1:9000


[root@localhost: ~]# vim /usr/local/php-fpm/etc/php-fpm.conf
[root@localhost: ~]# /etc/init.d/php-fpm restart
Gracefully shutting down php-fpm warning, no pid file found - php-fpm is not running ?
Starting php-fpm  done
[root@localhost: ~]# netstat -lntp | grep php
tcp 0 0 127.0.0.1:9000 0.0.0.0:* LISTEN 5214/ph-fpm: maste此时访问3.php依然是502
[root@localhost: ~]# curl -x127.0.0.1:80 test.com/3.php
<html>
<head><title>502 Bad Gateway</title></head>
<body bgcolor="white">
<center><h1>502 Bad Gateway</h1></center>
<hr><center>nginx/1.14.0</center>
</body>
</html>
这是因为nginx在监听socket文件
2018/08/16 20:14:49 [crit] 4589#0: *9 connect() to unix:/tmp/php-fcgi.sock failed (2: No such file or directory) while connecting to upstream, client: 127.0.0.1, server: test.com, request: "GET HTTP://test.com/3.php HTTP/1.1", upstream: "fastcgi://unix:/tmp/php-fcgi.sock:", host: "test.com"
2018/08/16 20:14:49 [info] 4589#0: *9 client 127.0.0.1 closed keepalive connection
此时配置文件应该更改为
fastcgi_pass 127.0.0.1:9000;[root@localhost: ~]# curl -x127.0.0.1:80 test.com/3.php -I
HTTP/1.1 200 OK
Server: nginx/1.14.0
Date: Thu, 16 Aug 2018 12:17:29 GMT
Content-Type: text/html; charset=UTF-8
Connection: keep-alive
所以LNMP框架里,nginx和php-fpm必须协调好。
还有SCRIPT_FILENAME和root必须对应起来。
502还有一种情况。
在php5.4以及以后的版本中都有一个特点,你的socket文件要设置mode=666;
其他用户的读写权限一定要有,否则就是440权限,还是不能通信。
如果nobody没有读写权限,也是会报502错误,sock文件permission denied
所以有了错误之后,服务日志和程序日志都要查看。
12.16 Nginx代理

如果用户不能直接访问web端,或者我们的用户基数很大,直接访问web服务器会给服务器造成过量的压力,或者直连的话网速慢,都可以通过Nginx搭载代理服务器来解决。
server
{
    listen 80;
    server_name ask.apelearn.com;

    location /
    {
        proxy_pass      http://223.94.95.10/;
        proxy_set_header Host   $host;
        proxy_set_header X-Real-IP      $remote_addr;
        proxy_set_header X-Forwarded-For $proxy_add_x_forwarded_for;
    }
}
配置如上,我们访问猿课论坛的时候会通过我们本机,跳转到121.201.9.155。
如果我们未配置代理服务器,这个是通过网络直连的。
[root@localhost: nginx1.14]# curl ask.apelearn.com/robots.txt
#
# robots.txt for MiWen
#

User-agent: *

Disallow: /?/admin/
Disallow: /?/people/
Disallow: /?/question/
Disallow: /account/
Disallow: /app/
Disallow: /cache/
Disallow: /install/
Disallow: /models/
Disallow: /crond/run/
Disallow: /search/
Disallow: /static/
Disallow: /setting/
Disallow: /system/
Disallow: /tmp/
Disallow: /themes/
Disallow: /uploads/
Disallow: /url-*
Disallow: /views/
Disallow: /*/ajax/[root@localhost: nginx1.14]#
然后用本机代理访问
[root@localhost: nginx1.14]# curl -x127.0.0.1:80 ask.apelearn.com/robots.txt
#
# robots.txt for MiWen
#

User-agent: *

Disallow: /?/admin/
Disallow: /?/people/
Disallow: /?/question/
Disallow: /account/
Disallow: /app/
Disallow: /cache/
Disallow: /install/
Disallow: /models/
Disallow: /crond/run/
Disallow: /search/
Disallow: /static/
Disallow: /setting/
Disallow: /system/
Disallow: /tmp/
Disallow: /themes/
Disallow: /uploads/
Disallow: /url-*
Disallow: /views/12.17 Nginx负载均衡
代理一台机器就是代理,代理多台机器就是负载均衡。
我们用qq.com演示如何做负载均衡。
可以使用dig命令查询qq.com的响应ip
[root@localhost: nginx1.14]# dig qq.com

; <<>> DiG 9.9.4-RedHat-9.9.4-61.el7 <<>> qq.com
;; global options: +cmd
;; Got answer:
;; ->>HEADER<<- opcode: QUERY, status: NOERROR, id: 50837
;; flags: qr rd ra; QUERY: 1, ANSWER: 2, AUTHORITY: 4, ADDITIONAL: 12

;; OPT PSEUDOSECTION:
; EDNS: version: 0, flags:; MBZ: 0005 , udp: 4096
;; QUESTION SECTION:
;qq.com.				IN	A

;; ANSWER SECTION:
qq.com.			5	IN	A	111.161.64.40
qq.com.			5	IN	A	111.161.64.48

;; AUTHORITY SECTION:
qq.com.			5	IN	NS	ns3.qq.com.
qq.com.			5	IN	NS	ns4.qq.com.
qq.com.			5	IN	NS	ns2.qq.com.
qq.com.			5	IN	NS	ns1.qq.com.

;; ADDITIONAL SECTION:
ns1.qq.com.		5	IN	A	59.36.132.142
ns1.qq.com.		5	IN	A	101.89.19.165
ns2.qq.com.		5	IN	A	157.255.246.101
ns2.qq.com.		5	IN	A	183.192.201.116
ns3.qq.com.		5	IN	A	121.51.142.230
ns3.qq.com.		5	IN	A	182.140.167.157
ns3.qq.com.		5	IN	A	58.144.154.100
ns4.qq.com.		5	IN	A	184.105.206.124
ns4.qq.com.		5	IN	A	203.205.144.156
ns4.qq.com.		5	IN	A	123.151.66.78
ns4.qq.com.		5	IN	A	125.39.46.125

;; Query time: 3 msec
;; SERVER: 192.168.244.2#53(192.168.244.2)
;; WHEN: Fri Aug 17 00:20:49 CST 2018
;; MSG SIZE  rcvd: 315
配置文件如下
[root@localhost: nginx1.14]# vim conf/vhost/load.conf

upstream qq_com
{
    ip_hash;
    server 182.254.34.74:80;
    server 182.254.18.159:80;
    server 182.254.74.167:80;
    server 111.161.64.40:80;
    server 111.161.64.48:80;
}
server
{
    listen 80;
    server_name qq.com;
    location /
    {
        proxy_pass      http://qq_com;
        proxy_set_header Host   $host;
        proxy_set_header X-Real-IP      $remote_addr;
        proxy_set_header X-Forwarded-For $proxy_add_x_forwarded_for;
    }
}
upstream可以定义多个web服务端ip,后面的名字可以随便取。
ip_hash的目的是始终让一个客户端访问同一个服务端。(原因是如果不这样你的请求可能会随机访问,如果你在A上登录而又把请求发送到了B上,动态请求就出现问题了)。
80端口可以省略。
[root@localhost: nginx1.14]# curl -x127.0.0.1:80 qq.com
Nginx1.14 default site
[root@localhost: nginx1.14]# /usr/local/nginx1.14/sbin/nginx -s reload

更改前默认你是访问虚拟主机的
更改后
[root@localhost: nginx1.14]# curl -x127.0.0.1:80 qq.com
<html>
<head><title>302 Found</title></head>
<body bgcolor="white">
<center><h1>302 Found</h1></center>
<hr><center>nginx/1.6.0</center>
</body>
</html>
这个就是负载均衡,nginx会合理分配用户去多个web服务器的。
但是nginx不能代理https(443端口)。
只能是nginx去访问监听服务器的80端口。
12.18 ssl原理
下面我们就要介绍一下https的相关原理,
首先https的通信是加密的,如果不加密的话,可能会被别人抓包抓走,你的信息就会被泄露。
如果你使用的是https,即使你的信息被抓走了,对方破解你的信息需要解码,这就增加了安全性。
下面就是流程
浏览器发送一个https的请求给服务器;
服务器要有一套数字证书,可以自己制作(后面的操作就是阿铭自己制作的证书),也可以向组织申请,区别就是自己颁发的证书需要客户端验证通过,才可以继续访问,而使用受信任的公司申请的证书则不会弹出>提示页面,这套证书其实就是一对公钥和私钥;
服务器会把公钥传输给客户端; 客户端(浏览器)收到公钥后,会验证其是否合法有效,无效会有警告提醒,有效则会生成一串随机数,并用收到的公钥加密;
客户端把加密后的随机字符串传输给服务器;
服务器收到加密随机字符串后,先用私钥解密(公钥加密,私钥解密),获取到这一串随机数后,再用这串随机字符串加密传输的数据(该加密为对称加密,所谓对称加密,就是将数据和私钥也就是这个随机字符串>通过某种算法混合在一起,这样除非知道私钥,否则无法获取数据内容);
服务器把加密后的数据传输给客户端;
客户端收到数据后,再用自己的私钥也就是那个随机字符串解密;
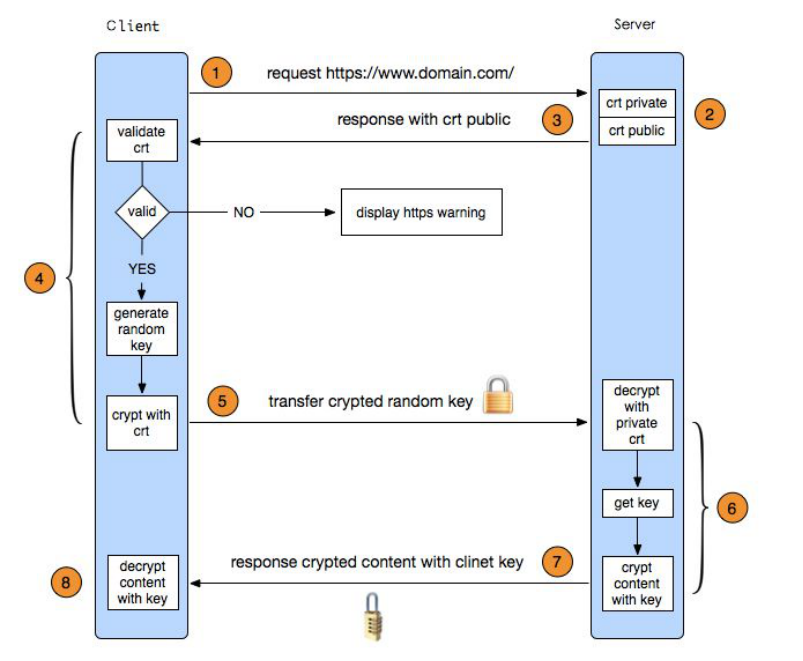
生成的随机字符串,只用一次,也保障了安全。
12.19 生成ssl密钥对
ssl的密钥对就是信任证书。
[root@localhost: nginx1.14]# openssl genrsa -des3 -out tmp.key 2048
Generating RSA private key, 2048 bit long modulus
.....................................+++
....................................................................................+++
e is 65537 (0x10001)
Enter pass phrase for tmp.key:
140534401337232:error:28069065:lib(40):UI_set_result:result too small:ui_lib.c:831:You must type in 4 to 1023 characters
Enter pass phrase for tmp.key:
Verifying - Enter pass phrase for tmp.key:
[root@localhost: nginx1.14]# ls tmp.key
tmp.key
这里必须要输入密码,但是我们nginx也不能用脚本输入密码,那下一步必须再把密码取消掉。这里的密码要足够长,且不能使用退格。
[root@localhost: nginx1.14]# openssl rsa -in tmp.key -out lhy.key
Enter pass phrase for tmp.key:
writing RSA key
解码之后生成的key
[root@localhost: nginx1.14]# ls lhy.key
lhy.key
[root@localhost: nginx1.14]# cat lhy.key
-----BEGIN RSA PRIVATE KEY-----
MIIEowIBAAKCAQEAtiEuZMFt38fJJenHHoVl7SmzmPEcyxTYM6ElKw84t2md755c
TneVcB1Vh3qctZbUIQfVLnmr3oD0RUO9lOC24bAXyyTbhZmMxlzyWspus6ft3kfs
e95Vtb+ToB+2/+hhcLDWD7BdKca/pIYPgCOu5TlEvL/ssgLI/WVYaO8eyV2r/dWJ
bC3RDYhuWnYHtZc7h4J0Swl1/gJLEnb9YAGEAA45Wg5NK7JsO+rAbP/Cc+XwtIL1
kZcyneWvh7XhNllBY1m/mtyKySuHnJYGZYEMHCv4fNhdzIu9R0l1r/WH4fQX5PTv
lxqbgoZ0dQx0goA5SNeoblvqmTEs1L+mZczeyQIDAQABAoIBAC9ipKpsNQUC+s+V
akwDkwhIUETbfo1LyBBuvbfdRvlZTlEYl5WGwWehCi6sdPc93cUWP53O5CuIy4T1
4e5JJOvFH/unhEHXOGwnpJqAjprJdzbc6ac0qoIV7Pe9KKSeNjPWnmsIjMSgxB2v
D3tcTVWwN7UQDiomVVqwMndit1TWTFSp32kfYnTEwnx2MIYET30RONgvQHT4OI0w
zkYZKvL6d4VFC3LenSG3GdnOI+CV+WQqgwO92qX11o09SuYhJPrrcMZ//cl5kHVd
4k912/i10JsBVpBmIzjuun4OQ+Ooyjjco0/Q3LJsAJrD4vD4BeU9ofYfPL09jCis
eMrJwR0CgYEA7e8zP+oYhmlJi9r9W3/iNPhZCj1csGSGfCmeXcrr/pTH2o7F9DR6
D0YFz19v5RPStv9VJ6GLPRwEQoOSh7sjaVI/QyzKF+CSTOAy+btao+7ujZHJao/p
mHRL/LW5mM/KlaNs1ze89yL93KV0xD0ULcX4Dvpf4recr6/fmb743ycCgYEAw/VJ
oTBOYVrqQ2TAcFTsW9yjIeBFkpB67fteKfsYmSjz6Dgb6TRTSGbW6QWihEHx1cn1
nsK1AiMATS+PboJfCkl1eWIQhdV+6UmC5gdtmIcOOX7a29ltQYeL7pVrkswgrreO
m8veJwD7NTQxSLF6DgtqdXf9fTyastR7YAEZCI8CgYEAjhHx7Av/sOJVQ+jytxvZ
Gf/gSrjxC3I6yxCeuypbV5vG6b2ufW6II26QMY6u5X28qAA1/H/8//QmpwChEeKv
9kdh9t5bnX4+XSDRz0QLjy8vyeBu/+4GcT2f0blApPoN4OPALZHeh0KhiopQ+ovt
7Jb00xy0/E7ehBjjzo21VKkCgYBvvmRqYp2PrsSAAegrJoJSMBNmsfl6hqFTLFCa
J/HzBQNxnO1tosULOHm9D9WJDgHWJADIs8d8nHEDkud74SRJPXKb8WvypbhlV+Ip
Qnsgy4M1Dj3HuMkw4RbOyq45W+YXO906wprAKzMVN9oS1gIAGEpxCienTvP4nmps
aLPZyQKBgANmzxlKFWO0git+DHQDXND7AU1mWPXFQhnJ5bliuUXAQakejVwDEVAM
Xlbtq8E43zWegsPmw+c6ZJNIdnzSMzD5jpNFFw+Kz/KjC8aKVEjnQdXpHiZtg+wz
1UbK/Slk9GodgiM1qkwuJDo/FDjQM8kOvz0G1Eo+cNFwFAfHsObO
-----END RSA PRIVATE KEY-----
此时,tmp.key可以删掉了。
之后我们再生成请求的文件。这个文件和私钥就可以生成一个公钥。
[root@localhost: nginx1.14]# openssl req -new -key lhy.key -out lhy.csr
You are about to be asked to enter information that will be incorporated
into your certificate request.
What you are about to enter is what is called a Distinguished Name or a DN.
There are quite a few fields but you can leave some blank
For some fields there will be a default value,
If you enter '.', the field will be left blank.
-----
Country Name (2 letter code) [XX]:86
State or Province Name (full name) []:Beijing
Locality Name (eg, city) [Default City]:Beijing
Organization Name (eg, company) [Default Company Ltd]:PKU
Organizational Unit Name (eg, section) []:Physics Academy
Common Name (eg, your name or your server's hostname) []:lhy
Email Address []:hongyang92@hotmail.com

Please enter the following 'extra' attributes
to be sent with your certificate request
A challenge password []:qweasdzxc1234
An optional company name []:
授信证书需要填很多信息,既然是自己生成的 也可以留空。
[root@localhost: nginx1.14]# openssl x509 -req -days 365 -in lhy.csr -signkey lhy.key -out lhy.crt
Signature ok
subject=/C=86/ST=Beijing/L=Beijing/O=PKU/OU=Physics Academy/CN=lhy/emailAddress=hongyang92@hotmail.com
Getting Private key
[root@localhost: nginx1.14]# ls lhy*
lhy.crt  lhy.csr  lhy.key
这三个分别是公钥,证书,私钥。
12.20 Nginx配置ssl
[root@localhost: nginx1.14]# ls lhy*
lhy.crt  lhy.csr  lhy.key
[root@localhost: nginx1.14]# mv lhy.* conf/
[root@localhost: nginx1.14]# cd conf/
[root@localhost: conf]# cd vhost/
[root@localhost: vhost]# vim ssl.conf

server
{
    listen 443;
    server_name aaa.com;
    index index.html index.php;
    root /usr/local/nginx1.14/html/aaa.com/;
    ssl on;
    ssl_certificate lhy.crt;
    ssl_certificate_key lhy.key;
    ssl_protocols TLSv1 TLSv1.1 TLSv1.2;
}
我们新配置一个配置文件,监听443端口。
[root@localhost: vhost]# /usr/local/nginx1.14/sbin/nginx -t
nginx: [emerg] unknown directive "ssl" in /usr/local/nginx1.14//conf/vhost/ssl.conf:7
nginx: configuration file /usr/local/nginx1.14//conf/nginx.conf test failed
这里报错是因为他不知道ssl是什么,我们的nginx一开始没有编译ssl。
重新编译一次
[root@localhost: nginx-1.14.0]# ./configure --prefix=/usr/local/nginx1.14 --with-http_ssl_module
编译完成之后,
make[1]: Leaving directory `/usr/local/src/nginx-1.14.0'
[root@localhost: nginx-1.14.0]# cd -
/usr/local/nginx1.14/conf/vhost
[root@localhost: vhost]# /usr/local/nginx1.14/sbin/nginx -t
nginx: the configuration file /usr/local/nginx1.14/conf/nginx.conf syntax is ok
nginx: configuration file /usr/local/nginx1.14/conf/nginx.conf test is successful
重启服务,加载配置文件是没用的。
[root@localhost: vhost]# /etc/init.d/nginx restart
Restarting nginx (via systemctl):                          [  OK  ]
[root@localhost: vhost]# netstat -lntp
Active Internet connections (only servers)
Proto Recv-Q Send-Q Local Address           Foreign Address         State       PID/Program name
tcp        0      0 0.0.0.0:443             0.0.0.0:*               LISTEN      6226/nginx: master
tcp        0      0 0.0.0.0:3306            0.0.0.0:*               LISTEN      1191/mysqld
tcp        0      0 0.0.0.0:111             0.0.0.0:*               LISTEN      597/rpcbind
tcp        0      0 0.0.0.0:80              0.0.0.0:*               LISTEN      6226/nginx: master
tcp        0      0 0.0.0.0:22              0.0.0.0:*               LISTEN      898/sshd
tcp6       0      0 :::111                  :::*                    LISTEN      597/rpcbind
tcp6       0      0 :::22                   :::*                    LISTEN      898/sshd
此时curl直接访问时会报400错误
[root@localhost: nginx1.14]# mkdir html/aaa.com
[root@localhost: nginx1.14]# curl -127.0.0.1:443 aaa.com
curl: option -127.0.0.1:443: is unknown
curl: try 'curl --help' or 'curl --manual' for more information
[root@localhost: nginx1.14]# curl -x127.0.0.1:443 aaa.com
<html>
<head><title>400 The plain HTTP request was sent to HTTPS port</title></head>
<body bgcolor="white">
<center><h1>400 Bad Request</h1></center>
<center>The plain HTTP request was sent to HTTPS port</center>
<hr><center>nginx/1.14.0</center>
</body>
</html>
[root@localhost: nginx1.14]# curl -x127.0.0.1:443 https://aaa.com
curl: (56) Received HTTP code 400 from proxy after CONNECT
我们通过修改hosts的方法来访问。
[root@localhost: nginx1.14]# vim /etc/hosts
[root@localhost: nginx1.14]# curl https://aaa.com
curl: (60) Peer's certificate issuer has been marked as not trusted by the user.
More details here: http://curl.haxx.se/docs/sslcerts.html

curl performs SSL certificate verification by default, using a "bundle"
 of Certificate Authority (CA) public keys (CA certs). If the default
 bundle file isn't adequate, you can specify an alternate file
 using the --cacert option.
If this HTTPS server uses a certificate signed by a CA represented in
 the bundle, the certificate verification probably failed due to a
 problem with the certificate (it might be expired, or the name might
 not match the domain name in the URL).
If you'd like to turn off curl's verification of the certificate, use
 the -k (or --insecure) option.
[root@localhost: nginx1.14]# echo $?
60
这里的错误是你的证书被标记为不可信了。实际上已经配置成功了。
不妨通过windows上的浏览器访问一下。
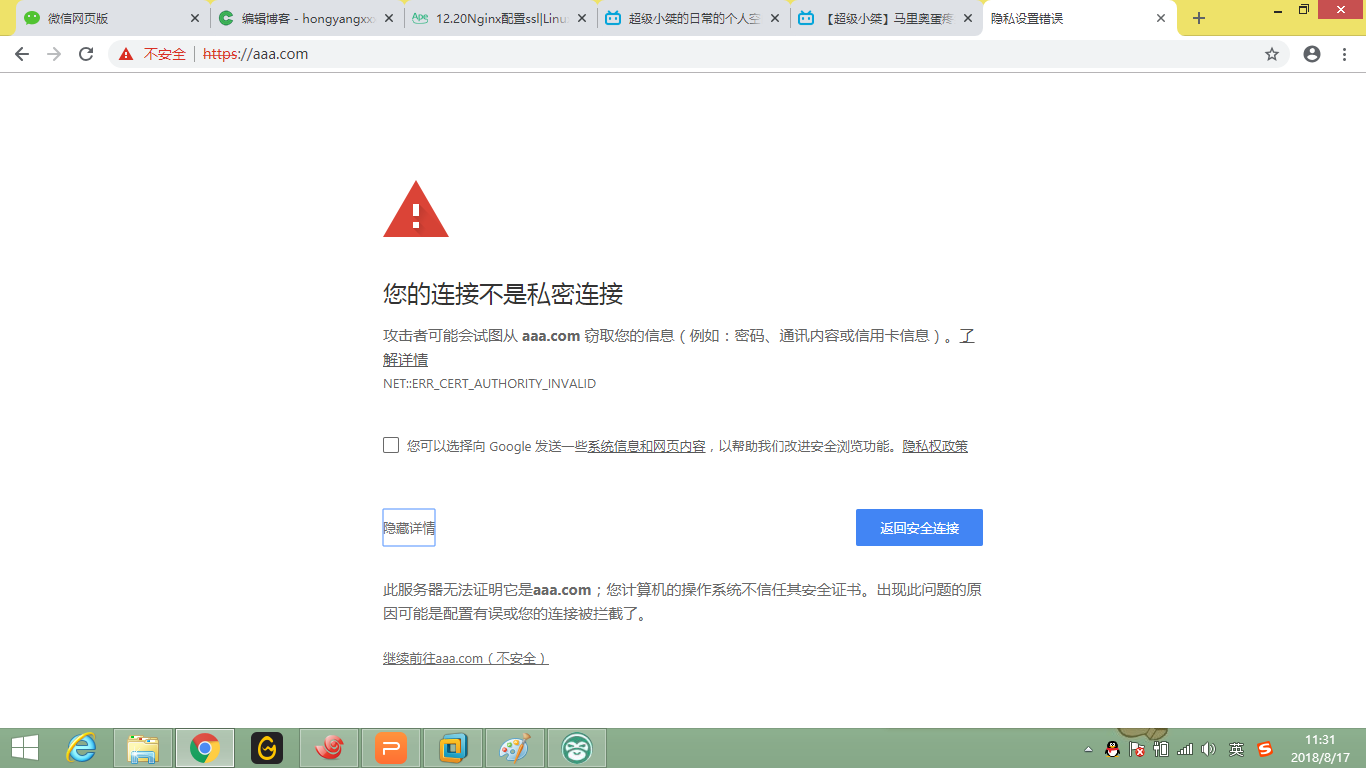
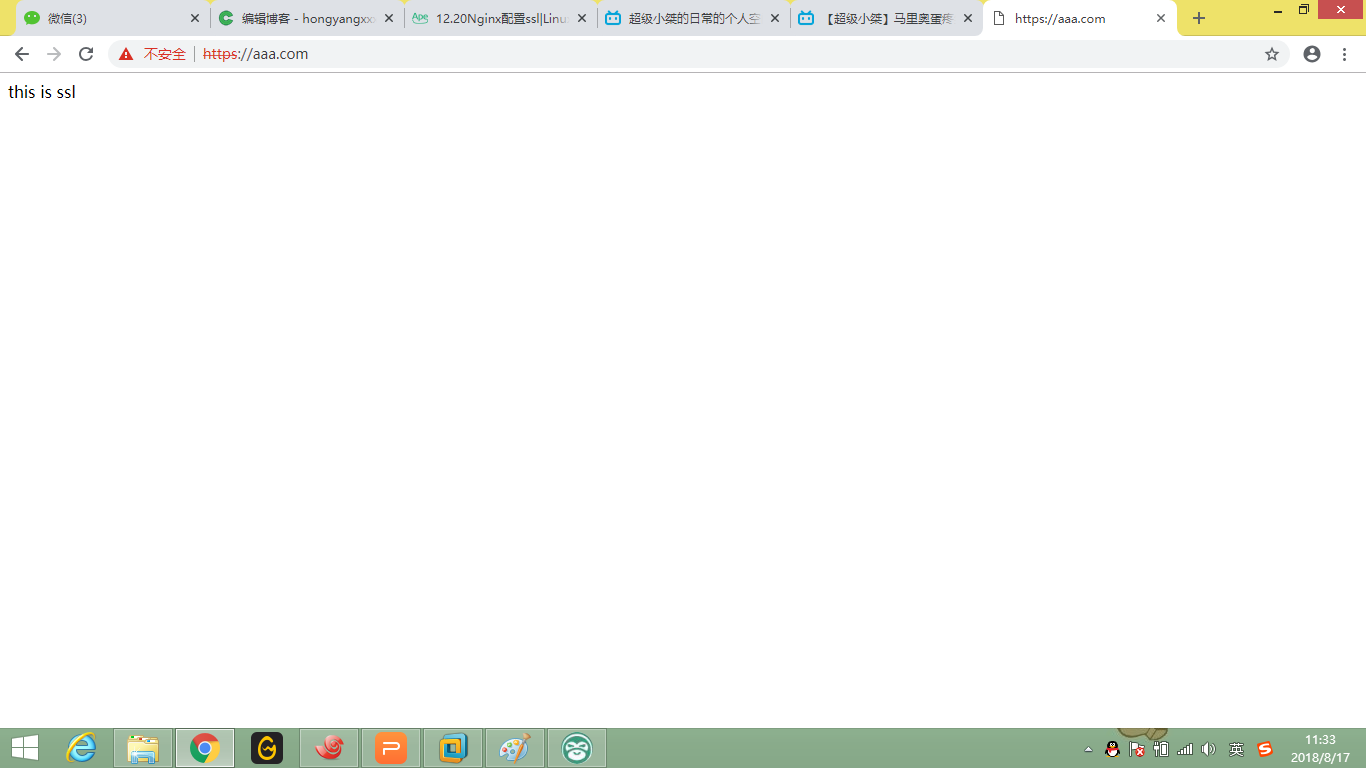
显示站点不受信任,继续访问被认为是不安全的。
但是12306的网站,也是使用的自己的证书。lol
扩展
针对请求的uri来代理
根据访问的目录来区分后端的web
nginx长连接
nginx算法分析
12.21 php-fpm的pool
之后我们再介绍php-fpm的配置。
php-fpm中有个概念是pool,可以看看
[root@localhost: php-fpm]# cat etc/php-fpm.conf
[global]
pid = /usr/local/php-fpm/var/run/php-fpm.pid
error_log = /usr/local/php-fpm/var/log/php-fpm.log
[www]
listen = /tmp/php-fcgi.sock
listen.mode = 666
user = php-fpm
group = php-fpm
pm = dynamic
pm.max_children = 50
pm.start_servers = 20
pm.min_spare_servers = 5
pm.max_spare_servers = 35
pm.max_requests = 500
rlimit_files = 1024
进程中也可以看到
[root@localhost: php-fpm]# ps aux | grep php
root       6368  2.2  0.6 300968  6148 ?        Ss   11:45   0:00 php-fpm: master process (/usr/local/php-fpm/etc/php-fpm.conf)
php-fpm    6369  0.6  0.6 303184  6284 ?        S    11:45   0:00 php-fpm: pool www
php-fpm    6370  0.0  0.6 303184  6284 ?        S    11:45   0:00 php-fpm: pool www
php-fpm    6371  0.2  0.6 303184  6284 ?        S    11:45   0:00 php-fpm: pool www
php-fpm    6372  0.0  0.6 303184  6284 ?        S    11:45   0:00 php-fpm: pool www
php-fpm    6373  0.5  0.6 303184  6288 ?        S    11:45   0:00 php-fpm: pool www
php-fpm    6374  0.4  0.6 303184  6288 ?        S    11:45   0:00 php-fpm: pool www
php-fpm    6375  0.5  0.6 303184  6284 ?        S    11:45   0:00 php-fpm: pool www
php-fpm    6376  0.5  0.6 303184  6284 ?        S    11:45   0:00 php-fpm: pool www
php-fpm    6377  0.4  0.6 303184  6284 ?        S    11:45   0:00 php-fpm: pool www
php-fpm    6378  0.6  0.6 303184  6284 ?        S    11:45   0:00 php-fpm: pool www
php-fpm    6379  0.5  0.6 303184  6284 ?        S    11:45   0:00 php-fpm: pool www
php-fpm    6380  0.5  0.6 303184  6284 ?        S    11:45   0:00 php-fpm: pool www
php-fpm    6381  0.4  0.6 303184  6284 ?        S    11:45   0:00 php-fpm: pool www
php-fpm    6382  0.4  0.6 303184  6288 ?        S    11:45   0:00 php-fpm: pool www
php-fpm    6383  0.5  0.6 303184  6288 ?        S    11:45   0:00 php-fpm: pool www
php-fpm    6384  0.5  0.6 303052  6288 ?        S    11:45   0:00 php-fpm: pool www
php-fpm    6385  0.4  0.6 303184  6288 ?        S    11:45   0:00 php-fpm: pool www
php-fpm    6386  0.3  0.6 303184  6288 ?        S    11:45   0:00 php-fpm: pool www
php-fpm    6387  0.5  0.6 303184  6288 ?        S    11:45   0:00 php-fpm: pool www
php-fpm    6388  0.5  0.6 303184  6288 ?        S    11:45   0:00 php-fpm: pool www
配置文件中只定义了一个pool,我们可以为每一个站点配置一个pool。
如果所有的站点配置一个pool,如果一个站点把资源耗尽,所有的站点都会502 。
cat etc/php-fpm.conf
[global]
pid = /usr/local/php-fpm/var/run/php-fpm.pid
error_log = /usr/local/php-fpm/var/log/php-fpm.log
[www]
listen = /tmp/php-fcgi.sock
listen.mode = 666
user = php-fpm
group = php-fpm
pm = dynamic
pm.max_children = 50
pm.start_servers = 20
pm.min_spare_servers = 5
pm.max_spare_servers = 35
pm.max_requests = 500
rlimit_files = 1024
[aaabbb.com]
listen = /tmp/aaabbb.sock
listen.mode = 666
user = php-fpm
group = php-fpm
pm = dynamic
pm.max_children = 50
pm.start_servers = 20
pm.min_spare_servers = 5
pm.max_spare_servers = 35
pm.max_requests = 500
rlimit_files = 1024
然后去配置aaa.com的配置文件
cat /usr/local/nginx1.14/conf/vhost/aaabbb.com.conf
server
{
    listen 80;
    server_name aaabbb.com;
    index index.html index.htm index.php;
    root /usr/local/nginx1.14/html/aaa.com;

    location ~ \.php$
    {
        include fastcgi_params;
        fastcgi_pass unix:/tmp/aaabbb.sock;
      #  fastcgi_pass 127.0.0.1:9000;
        fastcgi_index index.php;
        fastcgi_param SCRIPT_FILENAME /usr/local/nginx1.14/html/aaabbb.com$fastcgi_script_name;
    }

    access_log /data/logs/aaabbb.com.log combined_realip;
}
一切妥当,
[root@localhost: php-fpm]# ps aux | grep php
root       6671  2.7  0.6 301028  6180 ?        Ss   12:02   0:00 php-fpm: master process (/usr/local/php-fpm/etc/php-fpm.conf)
php-fpm    6672  0.0  0.6 303184  6268 ?        S    12:02   0:00 php-fpm: pool www
php-fpm    6673  0.0  0.6 303184  6248 ?        S    12:02   0:00 php-fpm: pool www
php-fpm    6674  0.0  0.6 303184  6280 ?        S    12:02   0:00 php-fpm: pool www
php-fpm    6675  0.0  0.6 303184  6276 ?        S    12:02   0:00 php-fpm: pool www
php-fpm    6676  0.0  0.6 303184  6280 ?        S    12:02   0:00 php-fpm: pool www
php-fpm    6677  0.0  0.6 303184  6280 ?        S    12:02   0:00 php-fpm: pool www
php-fpm    6678  0.0  0.6 303184  6280 ?        S    12:02   0:00 php-fpm: pool www
php-fpm    6679  0.0  0.6 303184  6280 ?        S    12:02   0:00 php-fpm: pool www
php-fpm    6680  0.0  0.6 303184  6280 ?        S    12:02   0:00 php-fpm: pool www
php-fpm    6681  0.1  0.6 303184  6280 ?        S    12:02   0:00 php-fpm: pool www
php-fpm    6682  0.0  0.6 303184  6284 ?        S    12:02   0:00 php-fpm: pool www
php-fpm    6683  0.0  0.6 303184  6284 ?        S    12:02   0:00 php-fpm: pool www
php-fpm    6684  0.0  0.6 303184  6284 ?        S    12:02   0:00 php-fpm: pool www
php-fpm    6685  0.0  0.6 303188  6284 ?        S    12:02   0:00 php-fpm: pool www
php-fpm    6686  0.0  0.6 303184  6284 ?        S    12:02   0:00 php-fpm: pool www
php-fpm    6687  0.0  0.6 303184  6284 ?        S    12:02   0:00 php-fpm: pool www
php-fpm    6688  0.0  0.6 303184  6284 ?        S    12:02   0:00 php-fpm: pool www
php-fpm    6689  0.0  0.6 303184  6284 ?        S    12:02   0:00 php-fpm: pool www
php-fpm    6690  0.0  0.6 303184  6284 ?        S    12:02   0:00 php-fpm: pool www
php-fpm    6691  0.7  0.6 303184  6284 ?        S    12:02   0:00 php-fpm: pool www
php-fpm    6692  0.1  0.6 303184  6280 ?        S    12:02   0:00 php-fpm: pool aaabbb.com
php-fpm    6693  0.0  0.6 303184  6280 ?        S    12:02   0:00 php-fpm: pool aaabbb.com
php-fpm    6694  0.7  0.6 303184  6280 ?        S    12:02   0:00 php-fpm: pool aaabbb.com
php-fpm    6695  0.6  0.6 303184  6280 ?        S    12:02   0:00 php-fpm: pool aaabbb.com
php-fpm    6696  0.6  0.6 303184  6284 ?        S    12:02   0:00 php-fpm: pool aaabbb.com
php-fpm    6697  0.5  0.6 303184  6284 ?        S    12:02   0:00 php-fpm: pool aaabbb.com
php-fpm    6698  0.5  0.6 303184  6288 ?        S    12:02   0:00 php-fpm: pool aaabbb.com
php-fpm    6699  0.6  0.6 303184  6288 ?        S    12:02   0:00 php-fpm: pool aaabbb.com
php-fpm    6700  0.5  0.6 303184  6288 ?        S    12:02   0:00 php-fpm: pool aaabbb.com
php-fpm    6701  0.4  0.6 303184  6288 ?        S    12:02   0:00 php-fpm: pool aaabbb.com
php-fpm    6702  0.5  0.6 303184  6288 ?        S    12:02   0:00 php-fpm: pool aaabbb.com
php-fpm    6703  0.5  0.6 303184  6288 ?        S    12:02   0:00 php-fpm: pool aaabbb.com
php-fpm    6704  0.6  0.6 303184  6288 ?        S    12:02   0:00 php-fpm: pool aaabbb.com
php-fpm    6705  0.4  0.6 303184  6284 ?        S    12:02   0:00 php-fpm: pool aaabbb.com
php-fpm    6706  0.6  0.6 303184  6288 ?        S    12:02   0:00 php-fpm: pool aaabbb.com
php-fpm    6707  0.5  0.6 303184  6288 ?        S    12:02   0:00 php-fpm: pool aaabbb.com
php-fpm    6708  0.6  0.6 303184  6288 ?        S    12:02   0:00 php-fpm: pool aaabbb.com
php-fpm    6709  0.5  0.6 303184  6288 ?        S    12:02   0:00 php-fpm: pool aaabbb.com
php-fpm    6710  0.5  0.6 303184  6288 ?        S    12:02   0:00 php-fpm: pool aaabbb.com
php-fpm    6711  0.3  0.6 303184  6288 ?        S    12:02   0:00 php-fpm: pool aaabbb.com
这样就给两个站点分配了两个pool。
同样,php-fpm配置文件 也支持include
[root@localhost: php-fpm]# sbin/php-fpm -t
[17-Aug-2018 12:09:26] NOTICE: configuration file /usr/local/php-fpm/etc/php-fpm.conf test is successful

[root@localhost: php-fpm]# cat etc/php-fpm.conf
[global]
pid = /usr/local/php-fpm/var/run/php-fpm.pid
error_log = /usr/local/php-fpm/var/log/php-fpm.log
include = /usr/local/php-fpm/etc/php-fpm.d/*.conf
[root@localhost: php-fpm]# cat etc/php-fpm.d/aaabbb.conf
[aaabbb.com]
listen = /tmp/aaabbb.sock
listen.mode = 666
user = php-fpm
group = php-fpm
pm = dynamic
pm.max_children = 50
pm.start_servers = 20
pm.min_spare_servers = 5
pm.max_spare_servers = 35
pm.max_requests = 500
rlimit_files = 1024
[root@localhost: php-fpm]# cat etc/php-fpm.d/www.conf
[www]
listen = /tmp/php-fcgi.sock
listen.mode = 666
user = php-fpm
group = php-fpm
pm = dynamic
pm.max_children = 50
pm.start_servers = 20
pm.min_spare_servers = 5
pm.max_spare_servers = 35
pm.max_requests = 500
rlimit_files = 1024
这样写起来就干净多了。
12.22 php-fpm慢执行日志
非常有用的一个知识点。
如果做php网站,我推荐做lnmp就是因为php-fpm可以分析慢执行日志。
比如我们针对www这个pool修改一下配置
request_slowlog_timeout = 1
slowlog = /usr/local/php-fpm/var/log/www-slow.log
就是说如果网页timeout超过1s我就记录日志,日志保存在下方位置,
[root@localhost: php-fpm]# /etc/init.d/php-fpm reload
Reload service php-fpm  done
[root@localhost: php-fpm]# ls /usr/local/php-fpm/var/log/
php-fpm.log  www-slow.log
[root@localhost: php-fpm]# cat /usr/local/php-fpm/var/log/www-slow.log
此时日志是空的。
我们来模拟一个慢执行的php。
我们www是配置的test.com,我们的的php应该写在这个配置的目录下
fastcgi_param SCRIPT_FILENAME /usr/local/nginx1.14/html/test.com$fastcgi_script_name;
<?php
        echo "test slow log";
        sleep(2);
        echo "done";
?>

[root@localhost: php-fpm]# vim /usr/local/nginx1.14/html/test.com/slow.php
[root@localhost: php-fpm]#
我们执行一下。
[root@localhost: php-fpm]# curl -x127.0.0.1:80 test.com/slow.php
<html>
<head><title>502 Bad Gateway</title></head>
<body bgcolor="white">
<center><h1>502 Bad Gateway</h1></center>
<hr><center>nginx/1.14.0</center>
</body>
</html>
这里检查了一下,应该是修改了配置文件位置没有重启服务。
正常结果是这样的,
[root@localhost: php-fpm]# curl -x127.0.0.1:80 test.com/slow.php
test slow logdone
但是可以自己试验,显示会延长两秒。
日志生成了这段
[root@localhost: php-fpm]# cat var/log/www-slow.log

[17-Aug-2018 12:40:37]  [pool www] pid 7343
script_filename = /usr/local/nginx1.14/html/test.com/slow.php
[0x00007f3d0f215090] sleep() /usr/local/nginx1.14/html/test.com/slow.php:3
它会告诉你哪个脚本超过了1s的时间。
这里设置2s比较合适。1s中很有可能是因为硬件问题,毕竟我们线上的服务一般不会故意写sleep这类的需求。
12.23 open_basedir
我们可以通过不同的pool定义不同的open_basedir
[root@localhost: php-fpm]# vim etc/php-fpm.d/www.conf
php_admin_value[open_basedir]=/usr/local/nginx1.14/html/test.com:/tmp/
如果我们定义了一个错误的目录,比如说
php_admin_value[open_basedir]=/usr/local/nginx1.14/html/aaa.com:/tmp/我们在php.ini中打开日志,E_ALL记录全部。
display_errors = Off
error_reporting = E_ALL
error_log = /usr/local/php-fpm/var/log/php_errors.log
此时访问就会被拒绝掉了。
[root@localhost: php-fpm]# curl -x127.0.0.1:80 test.com/slow.php
Access denied.
[root@localhost: php-fpm]# curl -x127.0.0.1:80 test.com/slow.php -I
HTTP/1.1 403 Forbidden
Server: nginx/1.14.0
Date: Fri, 17 Aug 2018 05:26:52 GMT
Content-Type: text/html; charset=UTF-8
Connection: keep-alive
X
手动生成日志,
[root@localhost: php-fpm]# touch /usr/local/php-fpm/var/log/php_errors.log
[root@localhost: php-fpm]# chmod 777 !$
chmod 777 /usr/local/php-fpm/var/log/php_errors.log
[root@localhost: php-fpm]# curl -x127.0.0.1:80 test.com/slow.php
No input file specified.
[root@localhost: php-fpm]# curl -x127.0.0.1:80 test.com/slow.php -I
HTTP/1.1 404 Not Found
Server: nginx/1.14.0
Date: Fri, 17 Aug 2018 05:31:19 GMT
Content-Type: text/html; charset=UTF-8
Connection: keep-alive
X-Powered-By: PHP/7.1.6
[root@localhost: php-fpm]# cat /usr/local/php-fpm/var/log/php_errors.log
[17-Aug-2018 05:29:57 UTC] PHP Warning:  Unknown: open_basedir restriction in effect. File(/usr/local/nginx1.14/html/test.com/slow.php) is not within the allowed path(s): (/usr/local/nginx1.14/html/aaa.com:/tmp/) in Unknown on line 0
[17-Aug-2018 05:29:57 UTC] PHP Warning:  Unknown: failed to open stream: Operation not permitted in Unknown on line 0
[17-Aug-2018 05:30:07 UTC] PHP Warning:  Unknown: open_basedir restriction in effect. File(/usr/local/nginx1.14/html/test.com/slow.php) is not within the allowed path(s): (/usr/local/nginx1.14/html/aaa.com:/tmp/) in Unknown on line 0
[17-Aug-2018 05:30:07 UTC] PHP Warning:  Unknown: failed to open stream: Operation not permitted in Unknown on line 0
这时候访问变为404 。
[root@localhost: php-fpm]# vim etc/php-fpm.d/www.conf
[root@localhost: php-fpm]# /etc/init.d/php-fpm restart
Gracefully shutting down php-fpm . done
Starting php-fpm  done
[root@localhost: php-fpm]# curl -x127.0.0.1:80 test.com/slow.php
test slow logdone
这说明我们的设置是有效的。
12.24 php-fpm进程管理
www的pool配置中有一段是这样的,之前没有讲。
pm = dynamic //动态进程管理,也可以是static
pm.max_children = 50 //最大子进程数,ps aux可以查看
pm.start_servers = 20 //启动服务时会启动的进程数
pm.min_spare_servers = 5 //定义在空闲时段,子进程数的最少数量,如果达到这个数值时,php-fpm服务会自动派生新的子进程。
pm.max_spare_servers = 35 //定义在空闲时段,子进程数的最大值,如果高于这个数值就开始清理空闲的子进程。
pm.max_requests = 500 //定义一个子进程最多处理的请求数,也就是说在一个php-fpm的子进程最多可以处理这么多请求,当达到这个数值时,它会自动退出。
如果不想动态生成就可以写
pm = static
pm.max_children = 50 启动就有50个
这一块配置就是php-fpm的进程管理。


 21万+
21万+

 被折叠的 条评论
为什么被折叠?
被折叠的 条评论
为什么被折叠?
 到【灌水乐园】发言


