


一、AOP概念
1.AOP(Aspect Oriented Programming):面向切面编程,是面向对象编程的补充和完善
面向切面是面向对象的一种方式而已。在代码执行过程中,动态嵌入其他代码,叫做面向切面编程。常见的使用场景:日志、事务、数据库操作。。。
2.AOP几个核心概念
| 概念 | 说明 |
|---|---|
| IOC/DI | 本质是就是Java反射+XML解析 |
| AOP | 本质上Java动态代理 |
| 切点 | 要添加代码的地方称作切点 |
| 切面 | 切点+通知 |
| 通知(增强) | 向切点插入的代码称为通知Advice |
| 连接点 | 切点的定义 |
二、AOP术语
1.介绍 面向切面编程,就是将交叉业务逻辑封装成切面,利用AOP的功能将切面植入到主业务逻辑中。所谓交叉业务逻辑是值,通用的、与主业务逻辑无关的代码,如安全检查、事务、日志等。若不使用AOP,则会出现代码纠缠,即交叉业务逻辑与主业务逻辑混合在一起。这样,会使主业务逻辑变的混杂不清
三、AOP的实现方式
(一)基于Schema-based方式实现
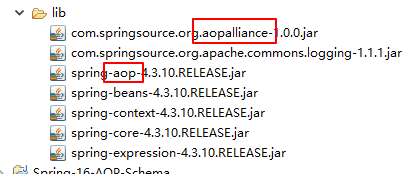
1.创建项目,导入jar包、
2.创建接口和实现类
public interface SomeService {
	public String doSome();
	public String say();
}
public class SomeServiceImpl implements SomeService {

	@Override
	public String doSome() {
		System.out.println("do some...");
		return "doSome()";
	}

	@Override
	public String say() {
		System.out.println("say...");
		return "saysay";
	}

}
3.前置通知类
public class MyMethodBeforeAdvice implements MethodBeforeAdvice {

	@Override
	public void before(Method arg0, Object[] arg1, Object arg2) throws Throwable {
		System.out.println("前置通知执行了。。。");
	}

}
4.后置通知类
public class MyAfterReturningAdvice implements AfterReturningAdvice {

	@Override
	public void afterReturning(Object arg0, Method arg1, Object[] arg2, Object arg3) throws Throwable {
		System.out.println("后置通知执行了。。。");
	}

}
5.环绕通知
public class MyMethodInterceptor implements MethodInterceptor {

	@Override
	public Object invoke(MethodInvocation arg0) throws Throwable {
		System.out.println("环绕通知。1。。");
		Object res = arg0.proceed();
		if(res!=null){
			res = res.toString().toUpperCase();
		}
		System.out.println("环绕通知。2。。");
		return res;
	}

}
6.异常通知类
public class MyThrowsAdvice implements ThrowsAdvice {

	//一定要写这种固定的方法名,否则会出错
	public void afterThrowing(Exception ex){
		System.out.println("异常发生了。。。");
	}

}
7.applicationContext.xml配置文件
<?xml version="1.0" encoding="UTF-8"?>
<beans xmlns="http://www.springframework.org/schema/beans"
	xmlns:xsi="http://www.w3.org/2001/XMLSchema-instance"
	xmlns:context="http://www.springframework.org/schema/context"
	xsi:schemaLocation="http://www.springframework.org/schema/beans http://www.springframework.org/schema/beans/spring-beans.xsd
		http://www.springframework.org/schema/context http://www.springframework.org/schema/context/spring-context-4.3.xsd">

 	<!-- 配置目标对象 -->
 	<bean class="com.luo.service.impl.SomeServiceImpl" id="someService"></bean>

 	<!-- 配置通知类 -->
 	<!-- 前置通知 -->
 	<bean class="com.luo.advice.MyMethodBeforeAdvice" id="myMethodBeforeAdvice"></bean>
 	<!-- 后置通知 -->
 	<bean class="com.luo.advice.MyAfterReturningAdvice" id="myAfterReturningAdvice"></bean>
 	<!-- 环绕通知 -->
 	<bean class="com.luo.advice.MyMethodInterceptor" id="myMethodInterceptor"></bean>
 	<!-- 异常通知 -->
 	<bean class="com.luo.advice.MyThrowsAdvice" id="myThrowsAdvice"></bean>

 	<!-- 配置代理类 -->
 	<bean class="org.springframework.aop.framework.ProxyFactoryBean" id="proxyFactoryBean">
 		<!-- 类似于动态代理类的参数:目标类的类加载器,目标类的所有接口,目标类的处理器其中的拦截方法 -->
 		<!-- 目标类 -->
 		<property name="target" ref="someService"></property>
 		<!-- 目标类实现的接口 -->
 		<property name="interfaces" value="com.luo.service.SomeService"></property>
 		<!-- 目标类的拦截方法,值是上面配置的通知类的id -->
 		<property name="interceptorNames">
 			<list>
 				<!-- <value>myMethodBeforeAdvice</value> -->
 				<!-- <value>myAfterReturningAdvice</value> -->
 				<!-- <value>myMethodInterceptor</value> -->
 				<value>myThrowsAdvice</value>
 			</list>
 		</property>
 	</bean>
 </beans>
8.测试类
public class Test {
	public static void main(String[] args) {
		ApplicationContext ac = new ClassPathXmlApplicationContext("applicationContext.xml");
		SomeService some = ac.getBean("proxyFactoryBean", SomeService.class);
		System.out.println(some.doSome());
		System.out.println("---------------------------------");
		System.out.println(some.say());
	}
}
(二)AspectJ方式注解实现
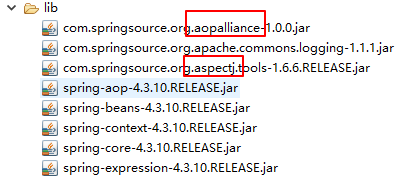
1.创建项目,导入jar包
2.创建接口和实现类(同Schema-based)
3.通知类配置文件
@Aspect
@Component
public class MyAdvice {

	/**
	 * 前置通知
	 */
	@Before(value="execution(* com.luo.service.impl.*.*(..))")
	public void before(){
		//System.out.println("前置通知执行了...");
	}

	/**
	 * 后置通知
	 */
	@AfterReturning(value="execution(* com.luo.service.impl.*.*(..))",returning="msg")
	public void afterReturning(Object msg){
		//System.out.println("后置通知"+msg);
	}

	/**
	 * 环绕通知
	 * @throws Throwable
	 */
	@Around(value="execution(* com.luo.service.impl.*.*(..))")
	public Object around(ProceedingJoinPoint pjp) throws Throwable{
		System.out.println("环绕前");
		Object res = pjp.proceed();
		if(res != null){
			res = res.toString().toUpperCase();
		}
		System.out.println("环绕后");

		return res;
	}

	/**
	 * 异常通知
	 */
	@AfterThrowing(value="execution(* com.luo.service.impl.*.*(..))",throwing="ex")
	public void afterThrowing(Exception ex){
		System.out.println("异常通知:"+ex.getMessage());
	}

	/**
	 * 最终通知
	 */
	@After(value="execution(* com.luo.service.impl.*.*(..))")
	public void after(){
		System.out.println("最终通知");
	}
}
4.applicationContext.xml配置文件
<?xml version="1.0" encoding="UTF-8"?>
<beans xmlns="http://www.springframework.org/schema/beans"
	xmlns:xsi="http://www.w3.org/2001/XMLSchema-instance"
	xmlns:context="http://www.springframework.org/schema/context"
	xmlns:aop="http://www.springframework.org/schema/aop"
	xsi:schemaLocation="http://www.springframework.org/schema/beans http://www.springframework.org/schema/beans/spring-beans.xsd
		http://www.springframework.org/schema/context http://www.springframework.org/schema/context/spring-context-4.3.xsd
		http://www.springframework.org/schema/aop http://www.springframework.org/schema/aop/spring-aop-4.3.xsd">

	<!-- 组件扫描 -->
	<context:component-scan base-package="com.luo.*"></context:component-scan>

	<!-- AspectJ的自动代理 -->
	<aop:aspectj-autoproxy/>
 </beans>
5.测试类
public class Test {
	public static void main(String[] args) {
		ApplicationContext ac = new ClassPathXmlApplicationContext("applicationContext.xml");

		UserService bean = ac.getBean(UserService.class);

		System.out.println(bean.doSome());
		System.out.println("-----------------");
		System.out.println(bean.say());
	}
}
(三)AspectJ方式XML实现
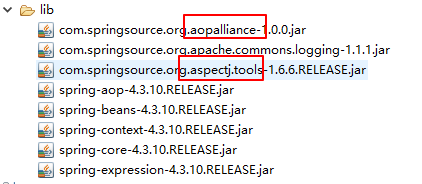
1.创建项目,导入jar包
2.创建接口和实现类(同Schema-based)
3.配置类
@Component
public class MyAspect {

	/**
	 * 	配置前置通知
	 */
	public void before(){
		System.out.println("前置通知。。。");
	}

	public void afterReturning(Object msg){
		System.out.println("后置通知。。。"+msg);
	}

	public Object round(ProceedingJoinPoint pjp) throws Throwable{
		System.out.println("环绕通知前。。。");
		Object rej = pjp.proceed();
		System.out.println("环绕通知后。。。");
		rej = rej.toString().toUpperCase();
		return rej;
	}

	public void toThrowing(Exception ex){
		System.out.println("异常通知");
	}

	public void after(){
		System.out.println("最后通知。。。");
	}

}
4.applicationContext.xml配置文件
<?xml version="1.0" encoding="UTF-8"?>
<beans xmlns="http://www.springframework.org/schema/beans"
	xmlns:xsi="http://www.w3.org/2001/XMLSchema-instance"
	xmlns:context="http://www.springframework.org/schema/context"
	xmlns:aop="http://www.springframework.org/schema/aop"
	xsi:schemaLocation="http://www.springframework.org/schema/beans http://www.springframework.org/schema/beans/spring-beans.xsd
		http://www.springframework.org/schema/context http://www.springframework.org/schema/context/spring-context-4.3.xsd
		http://www.springframework.org/schema/aop http://www.springframework.org/schema/aop/spring-aop-4.3.xsd">

	<!-- 组件扫描 -->
	<context:component-scan base-package="com.luo.*"></context:component-scan>

	<!-- AspectJ的自动代理 -->
	<aop:config>
		<!-- 配置切点 -->
		<aop:pointcut expression="execution(* com.luo.service.*.*(..))" id="pointcut"/>
		<!-- 配置切面 -->
		<aop:aspect ref="myAspect">
			<!--  <aop:before method="before" pointcut-ref="pointcut"/> -->
			<!-- <aop:after-returning method="afterReturning" pointcut-ref="pointcut" returning="msg"/> -->
			<aop:around method="round" pointcut-ref="pointcut"/>
			<aop:after-throwing method="toThrowing" pointcut-ref="pointcut" throwing="ex"/>
			<aop:after method="after" pointcut-ref="pointcut"/>
		</aop:aspect>
	</aop:config>
 </beans>
5.测试类
public class Test {
	public static void main(String[] args) {
		ApplicationContext ac = new ClassPathXmlApplicationContext("applicationContext.xml");

		UserService bean = ac.getBean(UserService.class);

		System.out.println(bean.doSome());
		System.out.println("-----------------");
		System.out.println(bean.say());
	}
}


 52万+
52万+


 被折叠的 条评论
为什么被折叠?
被折叠的 条评论
为什么被折叠?
 到【灌水乐园】发言


