


这2天在研究unity调用android原生的java代码,由于对android开发不熟悉,一切都是从头开始学。最开始连通过搜索引擎要用什么关键字都不知该如何概括 (现在知道了,即:android plugin for unity)。。。我使用的android开发工具是android studio,但是在网上搜的一大把文章都是用eclipse作为开发工具,它和android studio的一些配置方面差别还是挺大,因此有了这篇文章,记录下我这个小白的研究过程,也供新手参考。
如果是eclipse开发环境的话,可以参考http://www.xuanyusong.com/archives/667
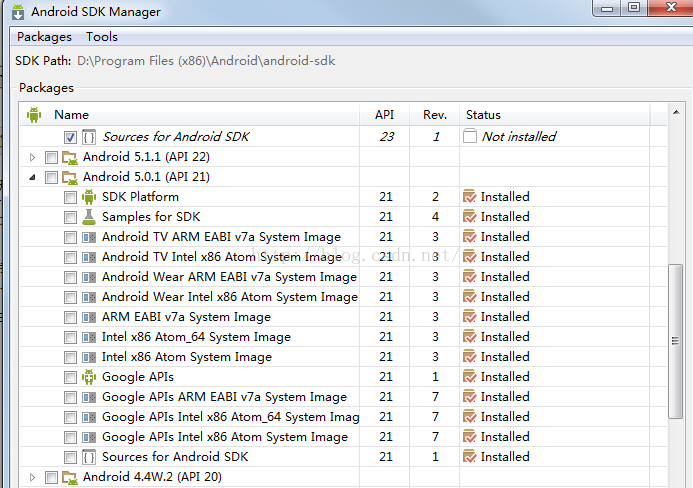
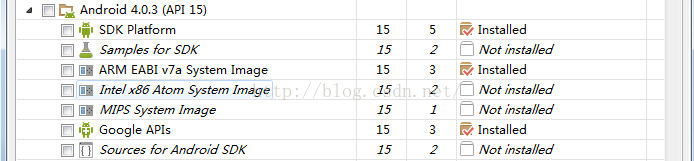
系统环境
先介绍下我的一些系统环境。
OS:win7 64位
android SDK:最小SDK 4.0.3,API版本14;最大SDK5.0.1,API版本21。
创建一个andriod studio工程
step1:
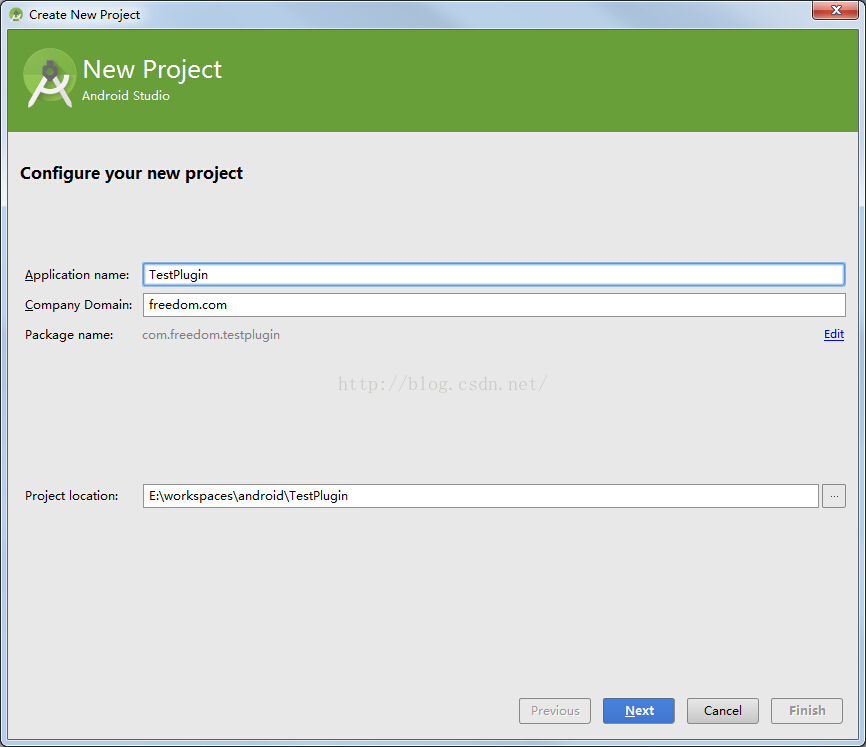
step2:

step3:
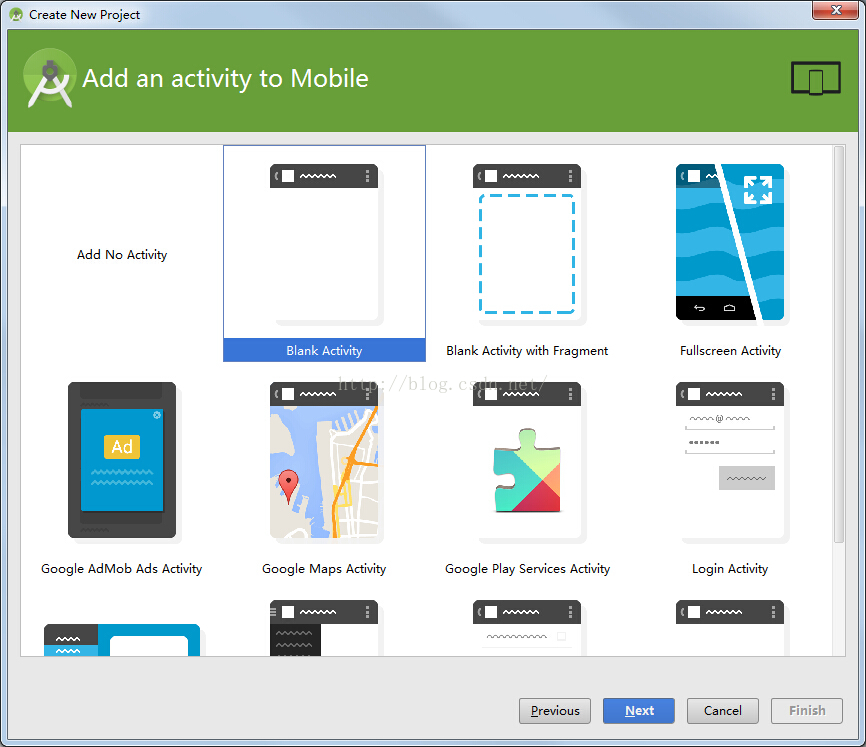
step4:
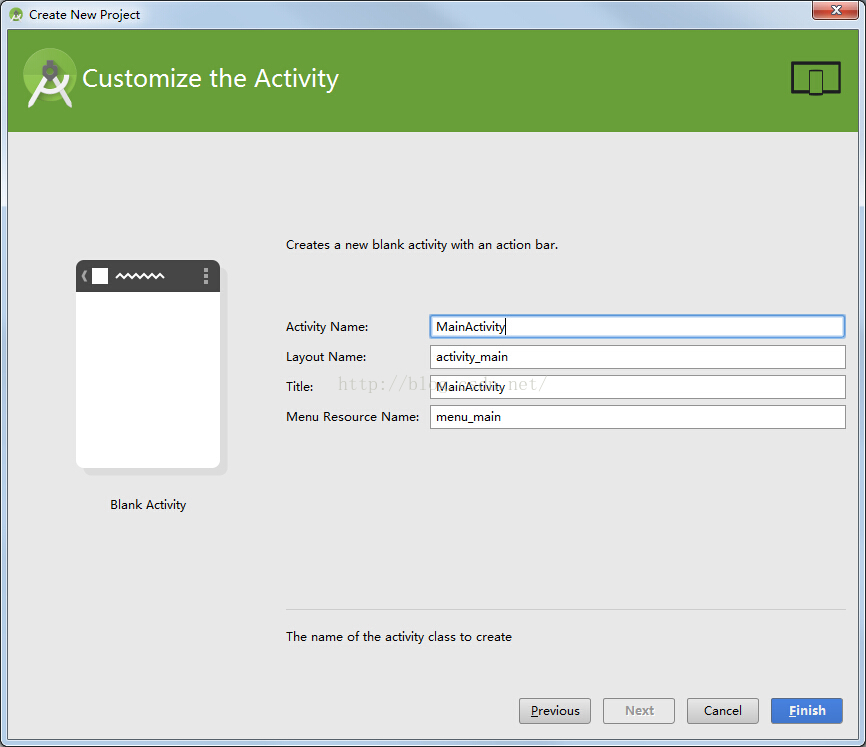
经过上面4个步骤,就可以创建一个新的android studio工程。
而我的环境报错,如下图所示:
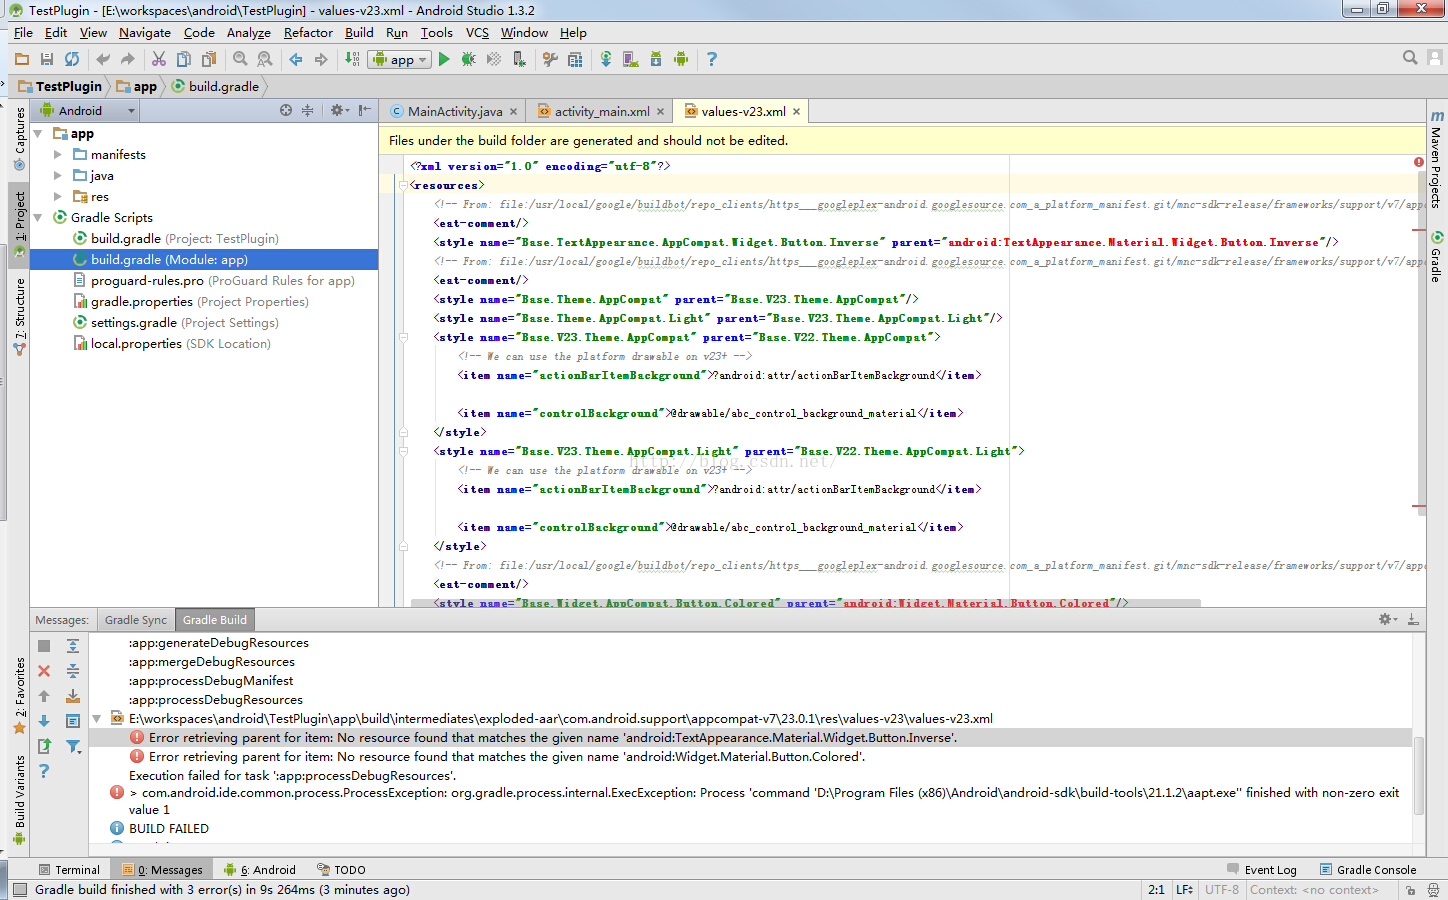
可以修改Gradle Scripts下的build.gradle文件,将dependencies域下的compile 'com.android.support:appcompat-v7:23.0.1'修改为compile 'com.android.support:appcompat-v7:21.0.3',并且resync一下。具体原因可以百度。
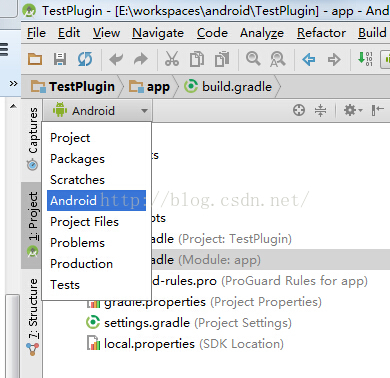
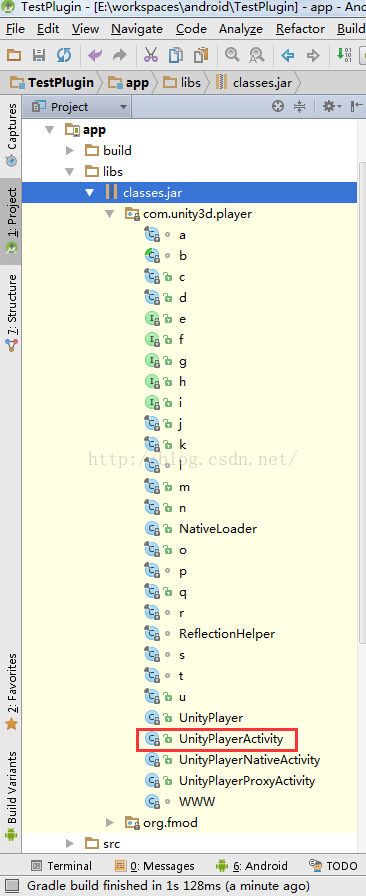
切换下android studio中project的显示视图,由Android切换到Project,如下图:
将unity的jar作为库加入到android studio
定位到你的unity安装目录下的C:\Program Files (x86)\Unity\Editor\Data\PlaybackEngines\androidplayer\release\bin,里面又一个Classes.jar文件,复制它,把把粘贴到TestPlugin/app/libs文件夹下,然后右击Classes.jar,点击 Add as Library,如下图所示。
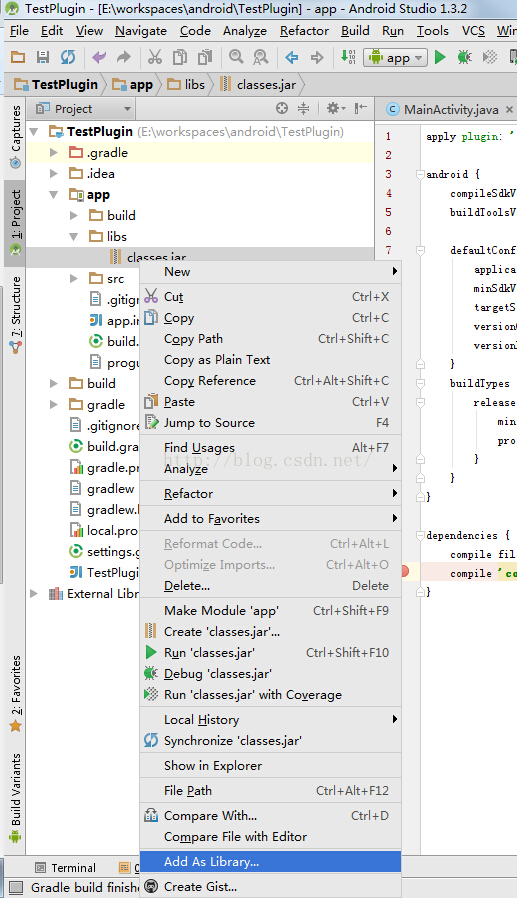
这样我们就可以在android studio中使用com.unity3d.player中的内容,比如com.unity3d.player.UnityPlayerActivity了。
如果按照上面的步骤执行的话,这时候你的TestPlugin/app/build.gradle应该如下:
apply plugin: 'com.android.application'

android {
    compileSdkVersion 21
    buildToolsVersion "21.1.2"

    defaultConfig {
        applicationId "com.freedom.testplugin"
        minSdkVersion 15
        targetSdkVersion 21
        versionCode 1
        versionName "1.0"
    }
    buildTypes {
        release {
            minifyEnabled false
            proguardFiles getDefaultProguardFile('proguard-android.txt'), 'proguard-rules.pro'
        }
    }
}

dependencies {
    compile fileTree(dir: 'libs', include: ['*.jar'])
    compile 'com.android.support:appcompat-v7:21.0.3'
    compile files('libs/classes.jar')
}
编写android原生接口
修改MainActivity.java文件的内容为:
package com.freedom.testplugin;

import android.content.Intent;
import com.unity3d.player.UnityPlayerActivity;

public class MainActivity extends UnityPlayerActivity {

    public void shareText(String subject, String body) {
        Intent sharingIntent = new Intent(android.content.Intent.ACTION_SEND);
        sharingIntent.setType("text/plain");
        sharingIntent.putExtra(android.content.Intent.EXTRA_SUBJECT, subject);
        sharingIntent.putExtra(android.content.Intent.EXTRA_TEXT, body);
        startActivity(Intent.createChooser(sharingIntent, "Share via"));
    }

}
shareText就是接口函数了,到时候可以在unity中的C#脚本中直接调用它。
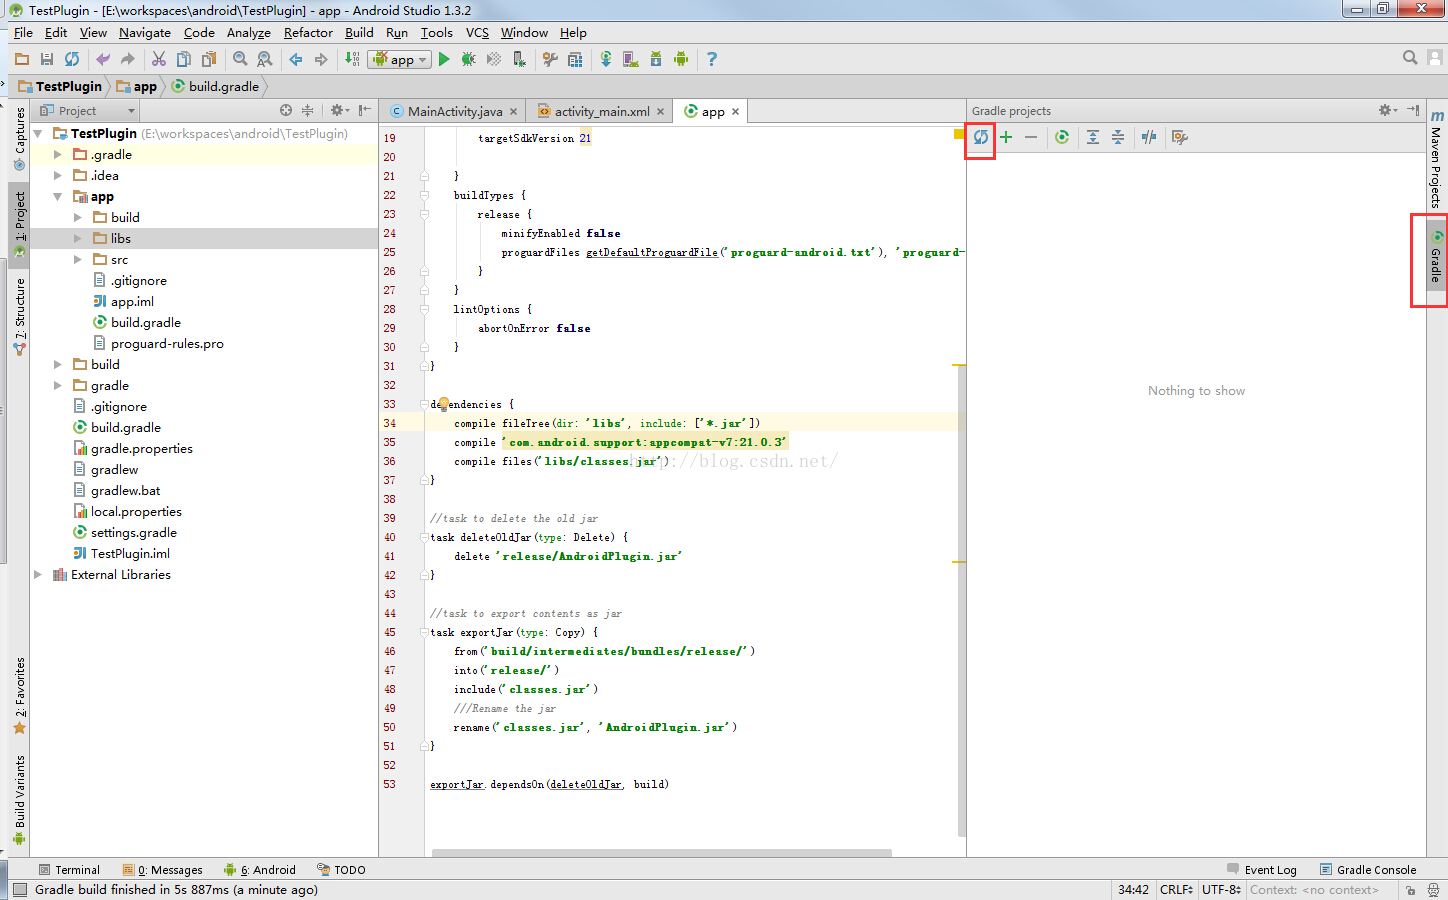
使用build.gradle导出jar作为unity的plugin
修改TestPlugin/app/build.gradle文件为:
//indicates that this is a library
apply plugin: 'com.android.library'

android {
    compileSdkVersion 21
    buildToolsVersion "21.1.2"
    sourceSets {
        main {
            //Path to your source code
            java {
                srcDir 'src/main/java'
            }
        }
    }

    defaultConfig {

        minSdkVersion 15
        targetSdkVersion 21

    }
    buildTypes {
        release {
            minifyEnabled false
            proguardFiles getDefaultProguardFile('proguard-android.txt'), 'proguard-rules.txt'
        }
    }
    lintOptions {
        abortOnError false
    }
}

dependencies {
    compile fileTree(dir: 'libs', include: ['*.jar'])
    compile 'com.android.support:appcompat-v7:21.0.3'
    compile files('libs/classes.jar')
}

//task to delete the old jar
task deleteOldJar(type: Delete) {
    delete 'release/AndroidPlugin.jar'
}

//task to export contents as jar
task exportJar(type: Copy) {
    from('build/intermediates/bundles/release/')
    into('release/')
    include('classes.jar')
    ///Rename the jar
    rename('classes.jar', 'AndroidPlugin.jar')
}

exportJar.dependsOn(deleteOldJar, build)
sync一下。
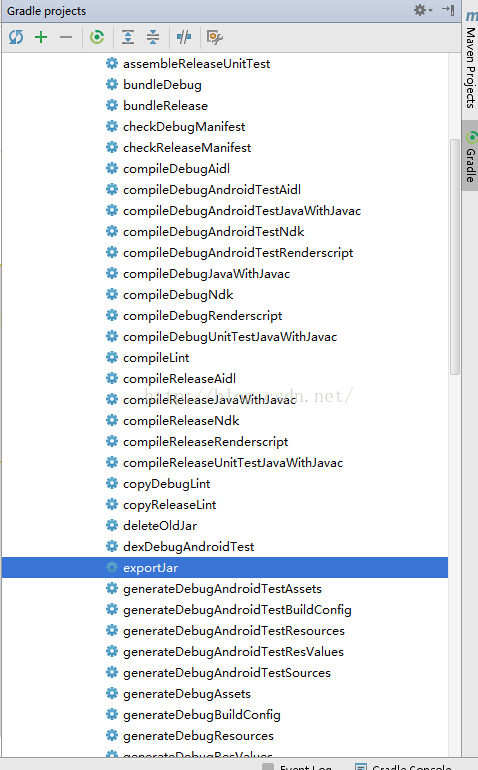
这时候打开android studio右边的Gradle控制台,并refresh all gradle projects。
这时候在TestPlugin/TestPlugin/other下会有一个exportJar。
双击它,在run窗口下你会看到BUILD SUCCESSFUL提示,则表示生成jar成功。
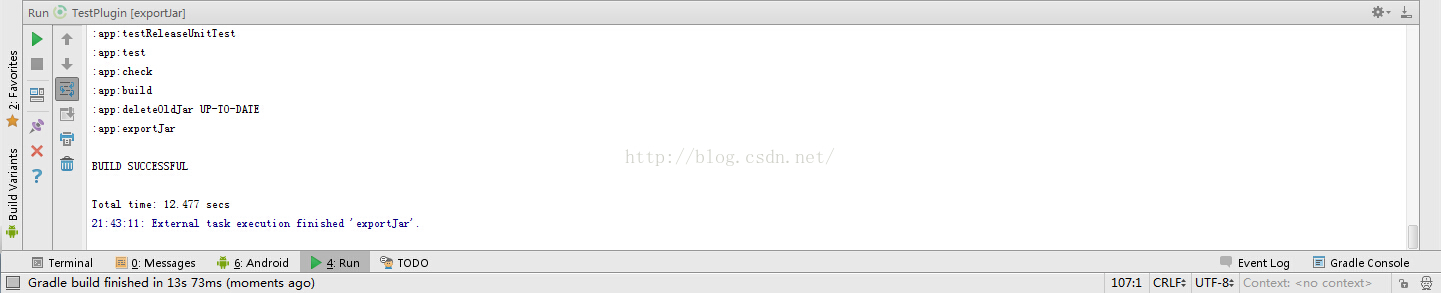
在project视图下,你会看到TestPlugin/app/release/下生成了一个AndroidPlugin.jar文件。
这个AndroidPlugin.jar文件就是我们要导入unity中的android原生接口文件。
在unity中调用jar的接口函数
新建一个名为TestAndroidPlugin的unity工程。在Assets文件夹下建立Plugins文件夹,再在Plugins文件夹下建立Android文件夹,然后将上面的AndroidPlugin.jar文件复制到Assets/Plugins/Android文件夹下。并且把android studio工程下的TestPlugin/app/src/main/AndroidManifest.xml复制到Assets/Plugins/Android文件夹下,并修改该xml文件。
如果不修改文件的话,在unity工程build成apk的时候会报错,提示:Failed to re-package resources.,即打包资源有错。
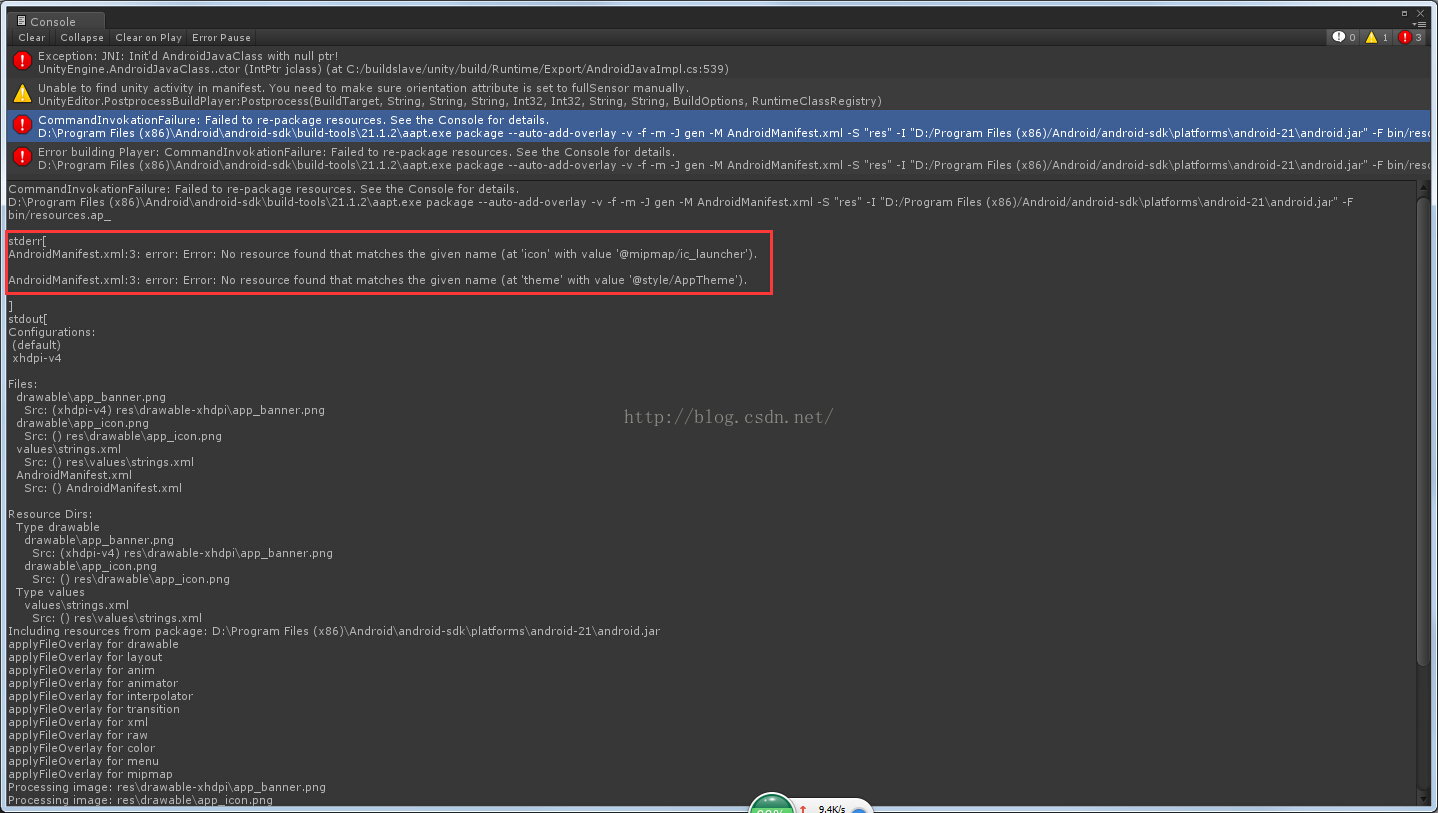
根据错误提示我们知道,是icon@mipmap/ic_launcher图标和theme@style/AppTheme主题找不到资源,因此我们把unity工程中的Assets/Plugins/Android/AndroidManifest.xml文件中的android:icon和android:theme两个域去掉,则xml文件变为如下:
<?xml version="1.0" encoding="utf-8"?>
<manifest xmlns:android="http://schemas.android.com/apk/res/android"
    package="com.freedom.testplugin" >

    <application
        android:allowBackup="true"
        android:label="@string/app_name">
        <activity
            android:name=".MainActivity"
            android:label="@string/app_name" >
            <intent-filter>
                <action android:name="android.intent.action.MAIN" />

                <category android:name="android.intent.category.LAUNCHER" />
            </intent-filter>
        </activity>
    </application>

</manifest>
在unity工程创建C#文件test.cs文件,如下:
using UnityEngine;
using System.Collections;

public class test : MonoBehaviour {
    string subject = "TEST";
    string body = "TEST ANDROID PLUGIN FOR UNITY";

    void OnGUI()
    {
        if (GUILayout.Button("OPEN Activity", GUILayout.Height(100)))
        {
            callAndroidApi();
        }
    }

    public void callAndroidApi()
    {
        AndroidJavaClass unity = new AndroidJavaClass("com.unity3d.player.UnityPlayer");
        AndroidJavaObject currentActivity = unity.GetStatic<AndroidJavaObject>("currentActivity");
        currentActivity.Call("shareText", subject, body);
    }
}
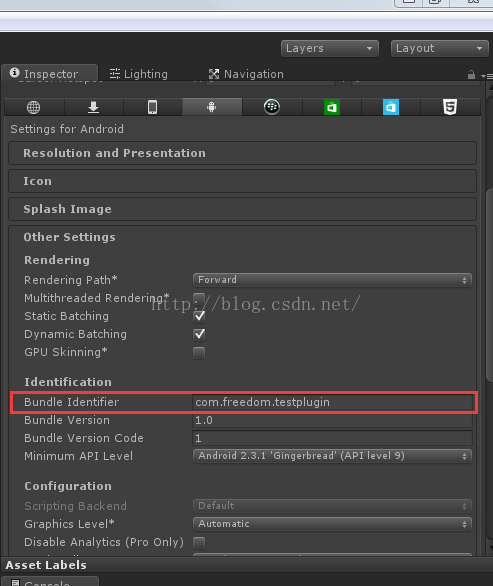
最后一步,修改一下Build Settings中的Android的Player Settings中的Bundle Identifier为Android studio的包名,com.freedom.testplugin。
测试
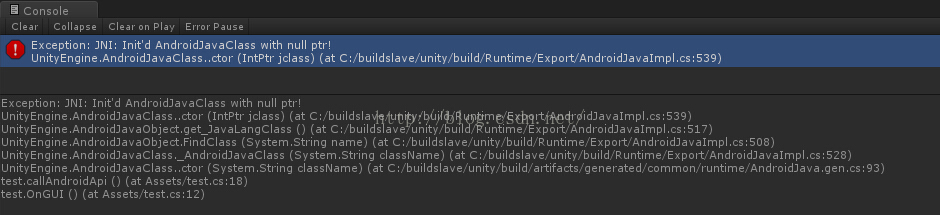
测试必须是真机测试,在unity editor player是不能测试的,会报错Exception: JNI: Init'd AndroidJavaClass with null ptr!。
将生成的apk包安装到测试机上,就可以在unity应用中调用Android原生的接口了,done!
参考文章:http://www.thegamecontriver.com/2015/04/android-plugin-unity-android-studio.html


 3192
3192


 被折叠的 条评论
为什么被折叠?
被折叠的 条评论
为什么被折叠?
 到【灌水乐园】发言


