


前四节,我们讲了通讯基础,从这节起,我们回归到项目中来,要将前面的WCF通讯知识应用进来。
之前的项目大伙没丢把,重新发下载地址:之前第3阶段代码:点此下载
我们为Chess项目的解决方案里,再添加WCF应用服务程序
由于Silverlight+WCF 新手实例 象棋 WCF通讯跨域(十五)已截图,所以这里不截图了。
步骤:
1。对着解决方案-》右键-》添加新建项目-》选择WCF应用服务程序-》输入:GameService
2。删除默认的IService1.cs和IService1.svc
3。新建WCF服务,起名为IService
4。把跨域文件clientaccesspolicy.xml复制到项目中去.
5。设置GameService项目属性的特定启动端口为:8686
6。添加引用PollingDuplex.dll
7。修改配置文件,参考十五小节
上面步骤完成了后
我们接下来要添加几个新文件:
1.新添加一个回调接口:ICallBack
对着GameService项目右键-》添加-》新建项->选择接口->输入:ICallBack.cs
2.添加文件夹,用于存放通讯实体[契约数据]
对着GameService项目右键-》添加-》新建文件夹-》输入:DataContract
3.在通讯实体文件夹下,我们添加一个玩家Player实体用于通讯传递。
对着DataContract文件夹右键-》添加-》类-》输入:Player.cs
目前的项目结构图如下:

我们去掉Player的名称空间[.DataContract],其实就是去掉文件夹的名称:
namespace GameService
{
/// <summary>
/// 游戏玩家 by 路过秋天
/// </summary>
[DataContract]
public class Player
{
}
}
接着,我们为Player增加基本属性[以后随着应用会增加]:
ID:用户标识
NickName:昵称
CallBack:玩家的回调,我们把回调放到玩家里。
RoomID:玩家所在房间,没有的话默认为0;
下面我们实现属性代码:


{
/// <summary>
/// 游戏玩家 by 路过秋天
/// </summary>
[DataContract]
public class Player
{
/// <summary>
/// 玩家ID
/// </summary>
[DataMember]
public Guid ID
{
get ;
set ;
}
/// <summary>
/// 玩家昵称
/// </summary>
[DataMember]
public string NickName
{
get ;
set ;
}
/// <summary>
/// 玩家的回调
/// </summary>
[DataMember]
internal ICallBack CallBack
{
get ;
set ;
}
/// 玩家所在房间号
/// </summary>
[DataMember]
public int RoomID
{
get;
set;
}
}
用于传递的player完成了,现在我们写一下WCF通讯方法,我们为IService接口添加登陆和退出事件:
{
[ServiceContract(CallbackContract = typeof (ICallBack))] // 头顶上这里写明了回调是ICallBack
public interface IService
{
[OperationContract(IsOneWay = true )]
void Login(Player player); // 登陆
[OperationContract(IsOneWay = true )]
void Logout(Player player); // 退出
}
}
就是说,客户端直接传递一个Player实体过来了,我们接着实现这个接口:
{
public class Service : IService
{
/// <summary>
/// 玩家集合
/// </summary>
static Dictionary < int , Dictionary < Guid, Player >> playerList = new Dictionary < int , Dictionary < Guid, Player >> ();
#region IService 成员
public void Login(Player player)
{
// 待实现
}
public void Logout(Player player)
{
// 待实现
}
#endregion
}
}
我这在里用了一个静态的全局变量,来保存所有的用户,简单解释一下这个双重的泛型字典集合
Dictionary<int, Dictionary<Guid, Player>> 翻译一下就变成----》Dictionary<房间号, 玩家列表>
看到翻译明白了吧,所有的玩家都被分到房间里去了。然后所有的房间的玩家才构成一个大集合。
看明白了,现在来实现Login登陆了。
根据以前我们注册一样,先判断用户在不在,在就删除,然后再添加用户。
{
// 待实现
Player oldPlayer = FindPlayer(player.ID);
if (oldPlayer != null ) // 用户已存在了
{
RemovePlayer(player); // 删除用户
}
AddPlayer(player, ); // 添加用户
}
所以这里我们还要补上三个方法:
FindPlayer:从全局里找用户
RemovePlayer:从全局里移除用户
AddPlayer:从全局里添加一个用户
{
foreach (KeyValuePair < int , Dictionary < Guid, Player >> item in playerList)
{
if (item.Value.ContainsKey(playerID))
{
return item.Value[playerID];
}
}
return null ;
}
static void RemovePlayer(Player player)
{
playerList[player.RoomID].Remove(player.ID);
}
static void AddPlayer(Player player, int roomID)
{
player.RoomID = roomID;
// 注册回调
player.CallBack = OperationContext.Current.GetCallbackChannel < ICallBack > ();
Dictionary < Guid, Player > players;
if (playerList.ContainsKey(roomID)) // 房间已存在
{
players = playerList[roomID]; // 房间所有用户
if ( ! players.ContainsKey(player.ID))
{
players.Add(player.ID, player);
}
}
else
{
players = new Dictionary < Guid, Player > ();
players.Add(player.ID, player);
playerList.Add(roomID, players);
}
}
全面两个函数都短一点,后面添加就长一点了。
要判断房间是否存在,然后还要判断房间里是不是已有用户了,最后才添加。
用户登陆就到此了,那退出呢?
退出就一行代码搞完了:
{
// 待实现
RemovePlayer(player); // 删除用户
}
OK,WCF的服务端就写完了,写完就要编绎下服务端代码,确保是正常通过的。
接着是客户端要调用开始了,这里先:
1。当然是添加服务引用了,并起名为GameService。

接着我们回到App.xaml.cs里,我们把GameService做成一个全局变量,在应用程序开始时实例化一次,以后调用就不用到New了:
public static GameService.ServiceClient client; // 回调的客户端
public static GameService.Player player; // 当前玩家
public App()
{
this .Startup += this .Application_Startup;
this .Exit += this .Application_Exit;
this .UnhandledException += this .Application_UnhandledException;
InitializeComponent();
InitiallizeGlobalVar();
}
private void InitiallizeGlobalVar()
{
PollingDuplexHttpBinding binding = new PollingDuplexHttpBinding()
{
InactivityTimeout = TimeSpan.FromMinutes( 20 )
};
EndpointAddress endPoint = new EndpointAddress( " http://localhost:8686/Service.svc " );
client = new GameService.ServiceClient(binding, endPoint);
player = new GameService.Player();
}
这里有一点提一下:
本人机子装了VS2005+VS2010
新建的项目Silverlight是2.0的库,WCF服务应用程序是4.0的库。所以在引用DLL方面,有点小插曲。
这不,WCF引用的轮询是4.0的,到Silverlight里,就只能引用2.0的。好在也能用着。
顺便提一下,之所以不用wsDualHttpBinding双工通讯方式,就是因为Silverlight是2.0的,
因此引用不了4.0的wsDualHttpBinding库,所以没用它了。
现回到Login页面,简单修改下以前的代码:
{
nickName = txtNickName.Text.Trim();
if (nickName == "" )
{
MessageBox.Show( " 请输入昵称! " );
return ;
}
if (nickName.Contains( " , " ))
{
MessageBox.Show( " 昵称不能包含非法字符! " );
return ;
}
btnLogin.IsEnabled = false ;
// 下面这几句代码变了一下:
App.player.ID = userID;
App.player.NickName = nickName;
App.client.LoginCompleted += new EventHandler < System.ComponentModel.AsyncCompletedEventArgs > (client_LoginCompleted);
App.client.LoginAsync(App.player);
}
void client_LoginCompleted( object sender, System.ComponentModel.AsyncCompletedEventArgs e)
{ // 设置Cookie
System.Windows.Browser.HtmlPage.Document.Cookies = userID + " , " + nickName;
((App)(Application.Current)).RedirectTo( new Room());
}
好了按F5运行,
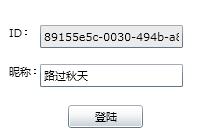
点击登陆,正常转向房间

原文链接: http://www.cnblogs.com/cyq1162/archive/2010/07/14/1777307.html


 6675
6675

 被折叠的 条评论
为什么被折叠?
被折叠的 条评论
为什么被折叠?
 到【灌水乐园】发言


