


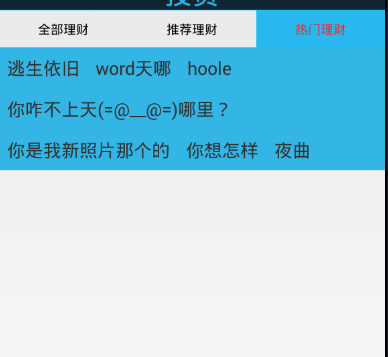
第一步:获取布局的大小(下图蓝色区域的图就是根据下面方法首先获取到的大小)
1.流式布局特点描述:
在布局内,随意摆放任意个view,每行所摆放的view个数,根据实时计算出来的宽度,一旦当前要摆放的view宽度和之前摆放的所有view宽度加在一起,超过了布局的宽度,那么就把该view换行摆放。
2.应用场景:
一般,像这种流式布局会应用在一些热门标签,热门推荐之类的应用上
3.测量模式:
> MeasureSpec.EXACTLY:精确模式, eg:100dp,match_parent.
> MeasureSpec.AT_MOST: 至多模式, view最多可以获得的宽高值,它需要计算所有包含的子view的宽高,最后计算出来的宽高总和值,eg:wrap_content.
> UNSPECIFIED:未指定模式,想设置多宽多高,就给你多宽多高,一般的控件不会指定这种模式,但也存在,eg:scrollview的宽高测量,就是使用的此种模式
在我们的流式布局内,应该怎么设置布局的宽高呢? onMeasure()
1:如果布局指定的宽是match_parent或者精确的宽度值,那么直接就可以从父控件传入的测量规格中直接获取布局宽度,高度同理.
2:如果布局指定的宽高不是EXACTLY,而是AT_MOST,那么这时候,就需要计算每一个子view的宽高,来决定布局的宽高了。
宽度:摆放的所有子view占据宽度最多的一行,作为布局宽度。
高度:摆放的所有子view总共占据几行的高度总和。
4.子View的布局方式: onLayout()
> 使用onLayout():设置ViewGroup内包含的所有子view的位置;
> 获取到每一行的每一个子view,计算出它的left,top,right,bottom,调用layout方法设置其在流式布局当中的位置。
宽度=子view占据宽度最多的那行的宽度=那一行每一个子view的宽度+leftMargin+rightMargin;
高度=所有行的高度 = 每一行的高度+topMargin+bottomMargin;
setMeasureDimension()--->设置流式布局的宽高。
//调用如下方法,才允许获取子视图的测量宽高
measureChild(child, widthMeasureSpec, heightMeasureSpec);
******************
//FlowLayout中有了如下的方法,在onMeasure()中可通过child就可以getLayoutParams(),返回MarginLayoutParams类对象,进而计算margin的值
@Override
public ViewGroup.LayoutParams generateLayoutParams(AttributeSet attrs) {
MarginLayoutParams mp = new MarginLayoutParams(getContext(), attrs);
return mp;
}
关键api方法:
setColor(rgb);  //填充颜色
setGradientType(GradientDrawable.RECTANGLE); //shape矩形
setCornerRadius(radius);  //四周圆角半径
setStroke(1,strokenColor); //边框厚度与颜色
1.设置selector:
tv.setBackground( DrawableUtil.getSelector(DrawableUtil.getDrawable(Color.rgb(r, g, b), UIUtils.dp2px(5)),
DrawableUtil.getDrawable(Color.WHITE, UIUtils.dp2px(5))));
2.设置TextView的内边距:
int padding = UIUtils.dp2px(5);
tv.setPadding(padding, padding, padding, padding);
3.设置监听:
tv.setOnClickListener(new View.OnClickListener() {
@Override
public void onClick(View v) {
Toast.makeText(HotProductFragment.this.getActivity(), tv.getText(), Toast.LENGTH_SHORT).show();
}
});
创建一个FlowLayout类
package p2ppinves.com.p2p.ui;

import android.content.Context;
import android.util.AttributeSet;
import android.util.Log;
import android.view.View;
import android.view.ViewGroup;

import java.util.ArrayList;
import java.util.List;

/**
 * Created by 联想 on 2017/5/18.
 * //自定义流式布局
 */

public class FlowLayout extends ViewGroup {
    public FlowLayout(Context context) {
        this(context,null);
    }

    public FlowLayout(Context context, AttributeSet attrs) {
        this(context, attrs,0);
    }

    public FlowLayout(Context context, AttributeSet attrs, int defStyleAttr) {
        super(context, attrs, defStyleAttr);

    }

    //能够设置当布局前测量的宽高
    @Override
    protected void onMeasure(int widthMeasureSpec, int heightMeasureSpec) {
        //     super.onMeasure(widthMeasureSpec, heightMeasureSpec);
        //获取设置的宽高的模式或者值
        int widthMode = MeasureSpec.getMode(widthMeasureSpec);
        int heigthMode = MeasureSpec.getMode(heightMeasureSpec);
        int widthsize = MeasureSpec.getSize(widthMeasureSpec);
        int heigthsize = MeasureSpec.getSize(heightMeasureSpec);
        //ruguo用户使用的是至多模式,那么使用如下两个变量计算真是的宽高
        int width=0;
        int heigth=0;

        //每一行的宽度
        int lineWidth=0;
        int lineHeigth=0;
        //获取子视图算宽高
        int childCount = getChildCount();
        for (int i=0;i<childCount;i++){
            View childView = getChildAt(i);

            //只有调用了如下方法,方可计算子视图的宽高
            measureChild(childView,widthMeasureSpec,heightMeasureSpec);

            //获取子视图的一个宽高
            int childwidth = childView.getMeasuredWidth();
            int childHeigth = childView.getMeasuredHeight();
            //要想保证获取子视图的边距参数对象,必须调用generateLayoutParams()方法
            MarginLayoutParams layoutParams = (MarginLayoutParams) childView.getLayoutParams();
        //已经有的视图加上一个新的视图+一个边距的距离
            if(lineWidth +childwidth+layoutParams.leftMargin+layoutParams.rightMargin<=widthsize){//不换行
                lineWidth += childwidth+layoutParams.leftMargin+layoutParams.rightMargin;
                lineHeigth=Math.max(lineHeigth,childHeigth+layoutParams.topMargin+layoutParams.bottomMargin);

            }else {//换行
                width=Math.max(width,lineWidth);
                heigth +=lineHeigth;
                //重置
                lineWidth=childwidth+layoutParams.leftMargin+layoutParams.rightMargin;
                lineHeigth=childHeigth+layoutParams.topMargin+layoutParams.bottomMargin;

            }
            //最后一个元素
            if(i==childCount-1){
                width=Math.max(width,lineWidth);
                heigth +=lineHeigth;
            }
        }
        Log.e("TAG",widthsize+"---"+heigthsize);
        Log.e("TAG",width+"---"+heigth);
        //设置当前流式布局的宽高:如果是精确模式就用精确值否则就在自己计算
        setMeasuredDimension((widthMode==MeasureSpec.EXACTLY ) ?widthsize :width,(heigthMode==MeasureSpec.EXACTLY) ?heigthsize :heigth);
    }
//重写目的:给每一个子视图指定显示的位置:childView。layout(l,t,r,b);
    private List<List<View>> allViews=new ArrayList<>();//每一行的子视图的集合构成的集合
    private List<Integer> allHeigths=new ArrayList<>();//每一行高度的集合

    @Override
    protected void onLayout(boolean b, int i, int i1, int i2, int i3) {
        //一,给两个集合添加元素。


        //每一行的宽高
        int lineWidth=0;
        int lineHeigth=0;


        //提供一个集合保存一行childView
        List<View> lineList =new ArrayList<>();


//获取布局的宽度
        int width = this.getMeasuredWidth();


        int childCount = getChildCount();
        for(int s=0;s<childCount;s++){
            View childView=getChildAt(s);
            //获取视图的测量宽高,边距
            int childwidth = childView.getMeasuredWidth();
            int childHeigth=childView.getMeasuredHeight();
            MarginLayoutParams layoutParams = (MarginLayoutParams) childView.getLayoutParams();

if(lineWidth+childwidth+layoutParams.leftMargin+layoutParams.rightMargin<=width){//不换行
    lineList.add(childView);
lineWidth+=childwidth+layoutParams.leftMargin+layoutParams.rightMargin;
    lineHeigth=Math.max(lineHeigth,childHeigth+layoutParams.topMargin+layoutParams.bottomMargin);

}else{//换行
    allViews.add(lineList);
    allHeigths.add(lineHeigth);
lineWidth=childwidth+layoutParams.leftMargin+layoutParams.rightMargin;
    lineHeigth=childHeigth+layoutParams.topMargin+layoutParams.bottomMargin;
    lineList=new ArrayList<>();
    lineList.add(childView);
}
if (s==childCount-1){//如果是最后一个元素
    allViews.add(lineList);
    allHeigths.add(lineHeigth);
}
        }
Log.e("TAG","allviews.size"+allViews.size()+"allheigts.size="+allHeigths.size());

        //二,给每一个子视图指定显示的位置
        int x=0;
        int y=0;
        for(int f=0;f<allViews.size();f++){//每遍历一次对应一行元素
            List<View> lineViews = allViews.get(f);//取出当前构成的集合
            for(int j=0;j<lineViews.size();j++){
                View childView = lineViews.get(j);
                MarginLayoutParams layoutParams = (MarginLayoutParams) childView.getLayoutParams();
                int left=x+layoutParams.leftMargin;
                int top =y+ layoutParams.topMargin;
                int right=left+childView.getMeasuredWidth();
                int bottom=top+childView.getMeasuredHeight();

                childView.layout(left,top,right,bottom);
                x+=childView.getMeasuredWidth()+layoutParams.leftMargin+layoutParams.rightMargin;

            }
            y+=allHeigths.get(f);
x=0;

        }
    }

    @Override
    public LayoutParams generateLayoutParams(AttributeSet attrs) {
        MarginLayoutParams marginLayoutParams = new MarginLayoutParams(getContext(), attrs);
        return marginLayoutParams;
    }
}
创建一个xml类
<p2ppinves.com.p2p.ui.FlowLayout
    android:id="@+id/flow_hot"
    android:background="@android:color/holo_blue_light"
    android:layout_width="match_parent"
    android:layout_height="wrap_content">
    <TextView
        android:layout_width="wrap_content"
        android:layout_height="wrap_content"
        android:text="逃生依旧"
        android:textSize="20sp"
        android:layout_margin="10dp"
        />
    <TextView
        android:layout_width="wrap_content"
        android:layout_height="wrap_content"
        android:text="word天哪"
        android:textSize="20sp"
        android:layout_margin="10dp"
        />
    <TextView
        android:layout_width="wrap_content"
        android:layout_height="wrap_content"
        android:text="hoole"
        android:textSize="20sp"
        android:layout_margin="10dp"
        />
    <TextView
        android:layout_width="wrap_content"
        android:layout_height="wrap_content"
        android:text="你咋不上天(=@__@=)哪里?"
        android:textSize="20sp"
        android:layout_margin="10dp"
        />
    <TextView
        android:layout_width="wrap_content"
        android:layout_height="wrap_content"
        android:text="你是我新照片那个的"
        android:layout_margin="10dp"
        android:textSize="20sp"
        />
    <TextView
        android:layout_width="wrap_content"
        android:layout_height="wrap_content"
        android:layout_margin="10dp"
        android:text="你想怎样"
        android:textSize="20sp"
        />
    <TextView
        android:layout_width="wrap_content"
        android:layout_height="wrap_content"
        android:text="夜曲"
        android:layout_margin="10dp"
        android:textSize="20sp"
        />

</p2ppinves.com.p2p.ui.FlowLayout>
如果想添加背景和点击事件
把上面的xml中的TextView注释(只留下)如下
<LinearLayout xmlns:android="http://schemas.android.com/apk/res/android"
    android:orientation="vertical" android:layout_width="match_parent"
    android:layout_height="match_parent">
 <p2ppinves.com.p2p.ui.FlowLayout
     android:id="@+id/flow_hot"
     android:background="@android:color/holo_blue_light"
     android:layout_width="match_parent"
     android:layout_height="wrap_content">
     <!--<TextView-->
         <!--android:layout_width="wrap_content"-->
         <!--android:layout_height="wrap_content"-->
         <!--android:text="逃生依旧"-->
         <!--android:textSize="20sp"-->
         <!--android:layout_margin="10dp"-->
         <!--/>-->
     <!--<TextView-->
         <!--android:layout_width="wrap_content"-->
         <!--android:layout_height="wrap_content"-->
         <!--android:text="word天哪"-->
         <!--android:textSize="20sp"-->
         <!--android:layout_margin="10dp"-->
         <!--/>-->
     <!--<TextView-->
         <!--android:layout_width="wrap_content"-->
         <!--android:layout_height="wrap_content"-->
         <!--android:text="hoole"-->
         <!--android:textSize="20sp"-->
         <!--android:layout_margin="10dp"-->
         <!--/>-->
     <!--<TextView-->
         <!--android:layout_width="wrap_content"-->
         <!--android:layout_height="wrap_content"-->
         <!--android:text="你咋不上天(=@__@=)哪里?"-->
         <!--android:textSize="20sp"-->
         <!--android:layout_margin="10dp"-->
         <!--/>-->
     <!--<TextView-->
         <!--android:layout_width="wrap_content"-->
         <!--android:layout_height="wrap_content"-->
         <!--android:text="你是我新照片那个的"-->
         <!--android:layout_margin="10dp"-->
         <!--android:textSize="20sp"-->
         <!--/>-->
     <!--<TextView-->
         <!--android:layout_width="wrap_content"-->
         <!--android:layout_height="wrap_content"-->
         <!--android:layout_margin="10dp"-->
         <!--android:text="你想怎样"-->
         <!--android:textSize="20sp"-->
         <!--/>-->
     <!--<TextView-->
         <!--android:layout_width="wrap_content"-->
         <!--android:layout_height="wrap_content"-->
         <!--android:text="夜曲"-->
         <!--android:layout_margin="10dp"-->
         <!--android:textSize="20sp"-->
         <!--/>-->

 </p2ppinves.com.p2p.ui.FlowLayout>
</LinearLayout>
写一个类继承BaseFragment
package p2ppinves.com.p2p.fragment.InvestBottomFragment;

import android.graphics.Color;
import android.os.Bundle;
import android.view.LayoutInflater;
import android.view.View;
import android.view.ViewGroup;
import android.widget.TextView;

import com.loopj.android.http.RequestParams;

import java.util.Random;

import butterknife.Bind;
import butterknife.ButterKnife;
import p2ppinves.com.p2p.R;
import p2ppinves.com.p2p.common.BaseFragment;
import p2ppinves.com.p2p.ui.FlowLayout;
import p2ppinves.com.p2p.util.DrawUtils;
import p2ppinves.com.p2p.util.UIUtils;

/**
 * Created by 联想 on 2017/5/16.
 */

public class ProductHotFragment extends BaseFragment {
    @Bind(R.id.flow_hot)
    FlowLayout flowHot;
    private String[] datas = new String[]{"超级新手计划", "乐享活系列90天计划", "钱包计划", "30天理财计划(加息2%)", "90天理财计划(加息5%)", "180天理财计划(加息10%)",
            "林业局投资商业经营", "中学老师购买车辆", "屌丝下海经商计划", "新西游影视拍摄投资", "Java培训老师自己周转", "养猪场扩大经营",
            "旅游公司扩大规模", "阿里巴巴洗钱计划", "铁路局回款计划", "高级白领赢取白富美投资计划"
    };
    @Override
    protected RequestParams getParams() {
        return null;
    }

    @Override
    protected String getUrl() {
        return null;
    }

    @Override
    protected void initdata(String content) {
for(int i=0;i<datas.length;i++){
    final TextView textView=new TextView(getContext());

    //
    textView.setText(datas[i]);
    ViewGroup.MarginLayoutParams mp=new ViewGroup.MarginLayoutParams(ViewGroup.LayoutParams.WRAP_CONTENT,ViewGroup.LayoutParams.WRAP_CONTENT);
    //设置属性
    textView.setText(datas[i]);
    mp.leftMargin= UIUtils.dp2px(5);
    mp.rightMargin= UIUtils.dp2px(5);
    mp.topMargin= UIUtils.dp2px(5);
    mp.bottomMargin= UIUtils.dp2px(5);
    textView.setLayoutParams(mp);//设置边距
    int padding=UIUtils.dp2px(5);
    textView.setPadding(padding,padding,padding,padding);


    textView.setTextSize(UIUtils.dp2px(15));
    Random random=new Random();
int red=random.nextInt(211);
    int green=random.nextInt(211);
    int blue=random.nextInt(211);
    //设置单一背景用的DrawUtils的getDrawable方法
   // textView.setBackground(DrawUtils.getDrawable(Color.rgb(red,green,blue),UIUtils.dp2px(5)));
    //设置具有选着器的背景
    textView.setBackground(DrawUtils.getSelector(DrawUtils.getDrawable(Color.rgb(red,green,blue),UIUtils.dp2px(5)),DrawUtils.getDrawable(Color.WHITE,UIUtils.dp2px(5))));
 //设置Textview是可点击的状态,或者如果设置了点击事件默认是可以点击的,就不用设置setClickable方法
 //   textView.setClickable(true);
    textView.setOnClickListener(new View.OnClickListener() {
        @Override
        public void onClick(View view) {
            UIUtils.toast(textView.getText().toString());
        }
    });
    flowHot.addView(textView);


}
    }

    @Override
    protected void inittitle() {

    }

    @Override
    public int getLayoutId() {
        return R.layout.fragment_producthot;
    }


}
BaseFragment类
package p2ppinves.com.p2p.common;

import android.content.Context;
import android.os.Bundle;
import android.support.annotation.Nullable;
import android.support.v4.app.Fragment;
import android.view.LayoutInflater;
import android.view.View;
import android.view.ViewGroup;

import com.loopj.android.http.RequestParams;

import butterknife.ButterKnife;
import p2ppinves.com.p2p.R;
import p2ppinves.com.p2p.ui.LoadingPage;
import p2ppinves.com.p2p.util.UIUtils;

/**
 * Created by 联想 on 2017/5/15.
 */

public abstract class BaseFragment extends Fragment {


    private LoadingPage l;

    @Nullable
    @Override
    public View onCreateView(LayoutInflater inflater, @Nullable ViewGroup container, @Nullable Bundle savedInstanceState) {
        //  View view = View.inflate(getActivity(), R.layout.fragment_home, null);
//        View view = UIUtils.getView(getLayoutId());
//        ButterKnife.bind(this, view);
//        //初始化title
//        inittitle();
初始化对象
//        initdata();
        l = new LoadingPage(container.getContext()) {
            @Override
            public int layouId() {
                return getLayoutId();
            }

            @Override
            protected RequestParams params() {
                return getParams();
            }

            @Override
            public String ursl() {
                return getUrl();
            }

            @Override
            protected void OnSuccss(ResultState resultState, View view_success) {
                ButterKnife.bind(BaseFragment.this, view_success);
                inittitle();
                initdata(resultState.getContent());
            }
        };
        return l;
    }
//为了保证loadingpage中部位null在这个地方调
    @Override
    public void onActivityCreated(@Nullable Bundle savedInstanceState) {
        super.onActivityCreated(savedInstanceState);
        show();
    }

    protected abstract RequestParams getParams();

    protected abstract String getUrl();

    //数据的初始化
    protected abstract void initdata(String content);
//初始化title
    protected abstract void inittitle();


    //提供布局
    public abstract int getLayoutId();
    @Override
    public void onDestroyView() {
        super.onDestroyView();
        ButterKnife.unbind(this);
    }
    public  void show(){
        l.show();
    }
}
在写一个工具类
实现背景DrawUtils
package p2ppinves.com.p2p.util;

import android.graphics.drawable.Drawable;
import android.graphics.drawable.GradientDrawable;
import android.graphics.drawable.StateListDrawable;

/**
 * Created by 联想 on 2017/5/19.
 */

public class DrawUtils  {
    public static Drawable getDrawable(int rgb, float radius) {
        GradientDrawable gradientDrawable = new GradientDrawable();
        gradientDrawable.setColor(rgb);//填充颜色

     //   gradientDrawable.setGradientType(GradientDrawable.RECTANGLE);//不用设置也行  shape矩形

        gradientDrawable.setCornerRadius(radius);//四周圆角半径
        gradientDrawable.setStroke(UIUtils.dp2px(1), rgb);//边框厚度与颜色
        return gradientDrawable;
    }
    //相对比上面的方法好按下之后颜色改变
    public static StateListDrawable getSelector(Drawable normalDrawable, Drawable pressDrawable) {
        StateListDrawable stateListDrawable = new StateListDrawable();
//给当前的颜色选择器添加选中图片指向状态,未选中图片指向状态
        stateListDrawable.addState(new int[]{android.R.attr.state_enabled, android.R.attr.state_pressed}, pressDrawable);
        stateListDrawable.addState(new int[]{android.R.attr.state_enabled}, normalDrawable);
//设置默认状态
        stateListDrawable.addState(new int[]{}, normalDrawable);
        return stateListDrawable;
    }


}


 889
889

 被折叠的 条评论
为什么被折叠?
被折叠的 条评论
为什么被折叠?
 到【灌水乐园】发言


