


由于cxf的web项目已经集成了Spring所以,cxf的服务类都是在spring的配置文件中完成的。以下是步骤:
第一步:建立一个web项目。
第二步:准备所有jar包。将cxf_home\lib项目下的所有jar包全部copy到新项目的lib目录下,里面已经包含了spring3.0的jar包。
第三步:在web.xml中配置cxf的核心servlet,CXFServlet。
第四步:创建(最好是Copy)cxf-servlet.xml文件。这是一个spring的配置文件。
发布一个不带接口的和一个带接口的webservice

<?xml version="1.0" encoding="UTF-8"?>
<beans xmlns="http://www.springframework.org/schema/beans"
	xmlns:xsi="http://www.w3.org/2001/XMLSchema-instance" xmlns:jaxws="http://cxf.apache.org/jaxws"
	xmlns:jaxrs="http://cxf.apache.org/jaxrs" xmlns:cxf="http://cxf.apache.org/core"
	xsi:schemaLocation="http://www.springframework.org/schema/beans
          http://www.springframework.org/schema/beans/spring-beans-3.0.xsd
            http://cxf.apache.org/jaxrs http://cxf.apache.org/schemas/jaxrs.xsd
            http://cxf.apache.org/jaxws http://cxf.apache.org/schemas/jaxws.xsd
            http://cxf.apache.org/core http://cxf.apache.org/schemas/core.xsd">
		<!-- 引入CXF Bean定义如下,早期的版本中使用 -->
		<import resource="classpath:META-INF/cxf/cxf.xml" />
		<import resource="classpath:META-INF/cxf/cxf-extension-soap.xml" />
		<import resource="classpath:META-INF/cxf/cxf-servlet.xml" />


		<!-- 通过配置文件的方式发布一个不带接口的webservice -->
		<!-- 1,id,2,服务对外的访问地址,3,提供服务的实现类..  -->
		<jaxws:endpoint id="helloService" address="/helloService" implementor="cn.itcast.cxf.spring.HelloService"></jaxws:endpoint>
		<!-- 通过此配置发布一个带接口的webservice  -->
		<!--
			1,id
			2,服务对外的访问地址
			3,接口的类型

		 -->
		<jaxws:server id="makeCallService" address="/makeCallService" serviceClass="cn.itcast.cxf.spring.call.CallService">
			<jaxws:serviceBean>
			<!-- 接口的实现类... -->
				<bean class="cn.itcast.cxf.spring.call.CallServiceImpl"></bean>
			</jaxws:serviceBean>
			<!-- 通过配置文件的方式添加拦截器。。。 -->
			<!-- 添加请求的消息拦截器 -->
			<jaxws:inInterceptors>
				<bean class="org.apache.cxf.interceptor.LoggingInInterceptor"></bean>
			</jaxws:inInterceptors>

			<!-- 添加响应的消息拦截器.. -->
			<jaxws:outInterceptors>
				 <bean class="org.apache.cxf.interceptor.LoggingOutInterceptor"></bean>
			</jaxws:outInterceptors>

		</jaxws:server>


</beans>
客户端访问。。

路径里面有个ws是因为在web.xml配置文件中自己添加上去的。
<?xml version="1.0" encoding="UTF-8"?>
<beans xmlns="http://www.springframework.org/schema/beans"
	xmlns:xsi="http://www.w3.org/2001/XMLSchema-instance" xmlns:jaxws="http://cxf.apache.org/jaxws"
	xmlns:jaxrs="http://cxf.apache.org/jaxrs" xmlns:cxf="http://cxf.apache.org/core"
	xsi:schemaLocation="http://www.springframework.org/schema/beans
          http://www.springframework.org/schema/beans/spring-beans-3.0.xsd
            http://cxf.apache.org/jaxrs http://cxf.apache.org/schemas/jaxrs.xsd
            http://cxf.apache.org/jaxws http://cxf.apache.org/schemas/jaxws.xsd
            http://cxf.apache.org/core http://cxf.apache.org/schemas/core.xsd">
		<!-- 引入CXF Bean定义如下,早期的版本中使用 -->
		<import resource="classpath:META-INF/cxf/cxf.xml" />
		<import resource="classpath:META-INF/cxf/cxf-extension-soap.xml" />
		<import resource="classpath:META-INF/cxf/cxf-servlet.xml" />
		<!--
			1,id,通过id 获取到bean
		2,访问webservice 的服务的地址   location
		3,需要依赖接口类型	wsimport得到的
		 -->
		<jaxws:client id="itcast" address="http://localhost:8080/cxfspringweb/ws/makeCallService" serviceClass="cn.itcast.cxf.spring.call.CallService"></jaxws:client>

</beans>
package cn.itcast.spring.client;

import org.springframework.context.ApplicationContext;
import org.springframework.context.support.ClassPathXmlApplicationContext;

import cn.itcast.cxf.spring.call.CallService;


/**
 *
 * 通过配置文件的方式调用webservice,
 * 同时也需要依赖一个接口....
 *
 * @ 作者 zhuwu@itcast.cn
 *
 */
public class SpringClientInvoke {

	/**
	 * @param args
	 */
	public static void main(String[] args) {
		//解析spring配置文件
		ApplicationContext context=new ClassPathXmlApplicationContext("bean.xml");
		//通过getBean 拿到接口 的实例对象...
		CallService callService=
		(CallService) context.getBean("itcast");
		boolean flag=callService.makeCaller("itcast");
		System.out.println(flag);


	}

}
ajax请求webService服务。。
data变量里面的数据是通过拦截器打印出来的。完全照着copy即可

<%@ page language="java" import="java.util.*" pageEncoding="UTF-8"%>
<!DOCTYPE HTML PUBLIC "-//W3C//DTD HTML 4.01 Transitional//EN">
<html>
<head>
<title>My JSP 'index.jsp' starting page</title>
<meta http-equiv="pragma" content="no-cache">
<meta http-equiv="cache-control" content="no-cache">
<meta http-equiv="expires" content="0">
<meta http-equiv="keywords" content="keyword1,keyword2,keyword3">
<meta http-equiv="description" content="This is my page">
<script type="text/javascript" src="js/jquery-1.6.2.js"></script>
<script type="text/javascript">
/**
ajax 的xmlHttpRequest 对象可以发送一个http 请求
我们可以把服务端需要的xml 格式的数据传送到服务端。
模拟soap 请求。
**/
var itcast;
itcast={
sendMessage:function(){
var data='<soapenv:Envelope xmlns:soapenv="http://schemas.xmlsoap.org/soap/envelope/" xmlns:q0="http://call.spring.cxf.itcast.cn/" xmlns:xsd="http://www.w3.org/2001/XMLSchema" xmlns:xsi="http://www.w3.org/2001/XMLSchema-instance">';
data+='<soapenv:Body><q0:makeCaller><arg0>itcast</arg0></q0:makeCaller></soapenv:Body></soapenv:Envelope>';
$.ajax({
url: "ws/makeCallService",
data:data,
contentType:'text/xml;charset=utf-8',
type:"POST",
dataType:"xml",
success: function(data, textStatus, jqXHR){
var text=$(data).find("return").text();
$(".message").html(text);
// $(".message").show(3000);
$(".message").slideDown(3000);
}
});
},
hide:function(){
$(".message").slideUp(3000);
}
}
</script>
</head>
<body>
<input type="button" value="显示" onclick="itcast.sendMessage()"/>
<input type="button" value="隐藏" onclick="itcast.hide()"/>
<div class="message" style="border-width: 4xp;border-style: solid;border-color: red;width: 400px;height: 400px;display: none;">
</div>
</body>
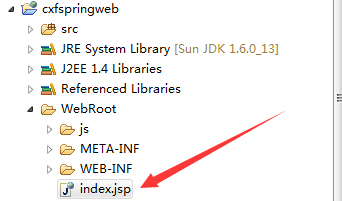
</html>访问的是默认的index文件


 2640
2640


 被折叠的 条评论
为什么被折叠?
被折叠的 条评论
为什么被折叠?
 到【灌水乐园】发言


