


SpringMVC预览上传图片
基于SSM(spring,springmvc,mybatis)开发项目已经成为一种趋势, 其中图片以及文件的上传又是在项目中必不可缺的功能,下面我们着重研究基于Spring MVC 自己提供的MultipartResolver功能实现图片的上传。
项目结构: 
- 编写jsp 页面
<%@ page language="java" contentType="text/html; charset=UTF-8" pageEncoding="UTF-8"%>
<!DOCTYPE html PUBLIC "-//W3C//DTD HTML 4.01 Transitional//EN" "http://www.w3.org/TR/html4/loose.dtd">
<html>
<head>
<meta http-equiv="Content-Type" content="text/html; charset=UTF-8">
<title>添加</title>
<script type="text/javascript" src="resource/back/js/upload.js"></script>
</head>
<body>
    <div align="center">
        <form action="addItems.action" method="post" enctype="multipart/form-data">
    姓名:<input type="text" id="name " name="name"> <br>
    价格:<input type="text" id="price " name="price"><br>
    详情:<input type="text" id="detail " name="detail"><br>  添加日期:<input type="text" id="date " name="date"><br>
    图片:<input type="file" id="pic " name="file" onchange="previewImage(this,'imgPreviewId')"><br>
    <img alt="" src="" id="imgPreviewId" width="150px;" height="150px;"><br>
    <input type="submit">
        </form>
    </div>
</body>
</html>
依然引入upload.js实现图片上传时的预览,因为项目基于SSM编写,所以所有的添加页面位于WEB-INF下,而此目录下的内容又是受保护的,所以直接在此目录下新建js文件夹添加upload.js是有问题的,问题在于你在jsp页面如何找到此路径,故而,在WebContext目录下建立resource将upload.js置于此目录下,如下图: 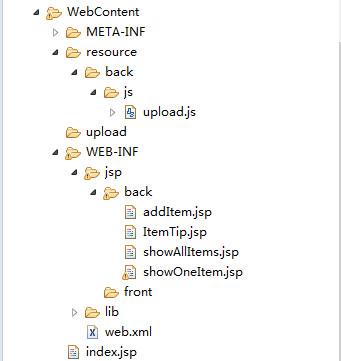
这样在jsp页面使用一下语句就可以引用到此js,从而实现预览功能:
<script type="text/javascript" src="resource/back/js/upload.js"></script>
切记一定要将form表单的enctype设置为”multipart/form-data”类型,此处虽没有什么技术含量,但是往往有人忘记设置导致出现许多不必要的麻烦。
2.. 定义id为multipartResolver 的bean,在springmvc.xml文件中:
<?xml version="1.0" encoding="UTF-8"?>
<beans xmlns="http://www.springframework.org/schema/beans" xmlns:xsi="http://www.w3.org/2001/XMLSchema-instance" xmlns:context="http://www.springframework.org/schema/context" xmlns:mvc="http://www.springframework.org/schema/mvc" xsi:schemaLocation="http://www.springframework.org/schema/mvc http://www.springframework.org/schema/mvc/spring-mvc-4.3.xsd http://www.springframework.org/schema/beans http://www.springframework.org/schema/beans/spring-beans.xsd http://www.springframework.org/schema/context http://www.springframework.org/schema/context/spring-context-4.3.xsd">
    <!-- 自动扫描 -->
    <context:component-scan base-package="cn.com.mp"></context:component-scan>
    <!--配置适配器,映射器 -->
    <mvc:annotation-driven></mvc:annotation-driven>
    <!--配置视图解析器 -->
    <bean  class="org.springframework.web.servlet.view.InternalResourceViewResolver">
        <property name="prefix" value="/WEB-INF/jsp/"></property>
        <property name="suffix" value=".jsp"></property>
    </bean>

    <bean id="multipartResolver" class="org.springframework.web.multipart.commons.CommonsMultipartResolver">
        <!--此处可以添加的属性有 : defaultEncoding:设置默认编码 maxUploadSize:最大的上传文件大小 uploadTempDir:上传文件的临时路劲 等等 -->
        <property name="defaultEncoding" value="utf-8" />
    </bean>
</beans>
其中multipartResolver的属性可以根据开发需要添加不同功能的属性
3.. 编写controller类
@RequestMapping("addItems.action")
    public ModelAndView add(@RequestParam(value = "file", required = false) MultipartFile file, Items items) {
        ModelAndView modelAndView = new ModelAndView();
        if (!file.isEmpty()) {
            try {
                DateFormat format = new SimpleDateFormat("yyyyMMddHHmmss");
                String formatDate = format.format(new Date());
                int random = new Random().nextInt(10000);
                String originName = file.getOriginalFilename();
                String extension = originName.substring(originName.lastIndexOf("."));
                String newName = formatDate + random + extension;

                // 文件保存路径
                String filePath = request.getSession().getServletContext().getRealPath("/") + "image/" + formatDate
                        + random + newName;
                // 转存文件
                file.transferTo(new File(filePath));
                items.setPic(newName);
            } catch (Exception e) {
                e.printStackTrace();
            }
        }
        int result = service.add(items);
        if (result > 0) {
            modelAndView.addObject("addtip", "添加成功");
        } else {
            modelAndView.addObject("addtip", "添加失败");
        }

        modelAndView.setViewName("/back/ItemTip");

        return modelAndView;
}- 其中add方法中使用注解@RequestParam(value = “file”, required = false),并且建议写required = false,也可不写
- MultipartFile file的 参数变量需与form表单中 type=“file”的input的name保持一致,且一般就写为file
核心思想:若得到的file不为空,则证明上传了图片,此时需要得到原图片后缀,然后和其生成的扩展名称一起组成新的存储路径,最后上传图片,别忘了为model设置新的名称,这样图片将上传成功,同时以新的名称保存在数据库中
5..测试界面: 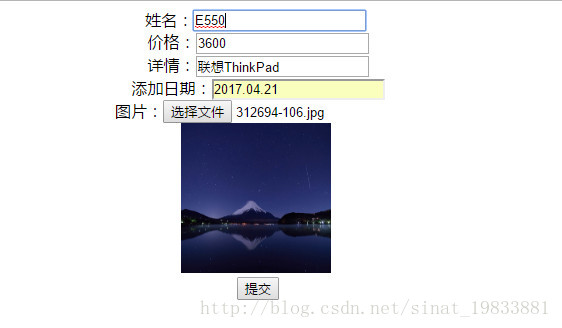
6.. 测试结果: 
即数据库中成功保存到名称为201705031624457316.jpg的图片,因此在upload目录下找该名称的图片: 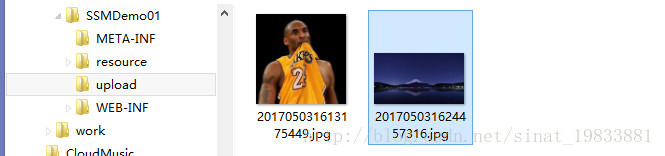
的确存在这样一张图片,由此说明我们图片上传功能已经完成。
总结
springmvc自带的MultipartResolver 功能,对与图片的上传着实让开发者方便了许多,同时其上传速度也较流上传文件的方式快好多好多,因此还是推荐大家使用springmvc的MultipartResolver 上传图片文件等。
更多springMVC MultipartResolver 的功能参见:springmvc MultipartResolver
完整项目下载:springmvc图片上传
期待您更多指教!


 576
576

 被折叠的 条评论
为什么被折叠?
被折叠的 条评论
为什么被折叠?
 到【灌水乐园】发言


