


11月1日任务
10.32/10.33 rsync通过服务同步
10.34 linux系统日志
10.35 screen工具
扩展
1. Linux日志文件总管logrotate http://linux.cn/article-4126-1.html
2. xargs用法详解 http://blog.csdn.net/zhangfn2011/article/details/6776925
10.32 rsync通过服务同步(上)
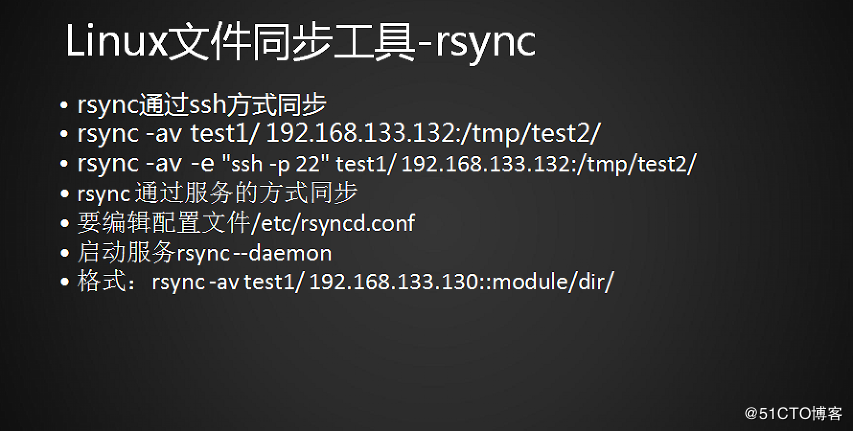
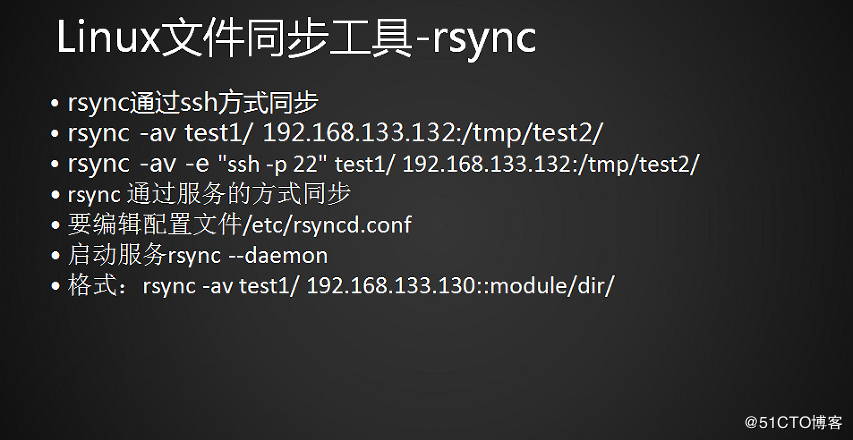
rsync 通过服务的方式同步
- 开启服务
- 客户端
- 服务端 启动rsync服务,关闭firewalld服务,配置rsyncd.conf文件信息
- 监听端口 默认端口873,端口可以 自定义 。开启端口后,客户端通过873与服务端进行通信,从而传输数据。
启动服务之前
要编辑配置文件/etc/rsyncd.conf
可以自定义路径,如果自定义路径后,需要加--config=路径
启动服务rsync --daemon
使用配置文件,执行#rsync --daemon 即可启动服务。
如果自定义路径的配置文件地址,需要#rsync --daemon--config=路径去执行启动
演示操作
在A上把相应参数添加进去rsyncd.conf
vi /etc/rsyncd.conf
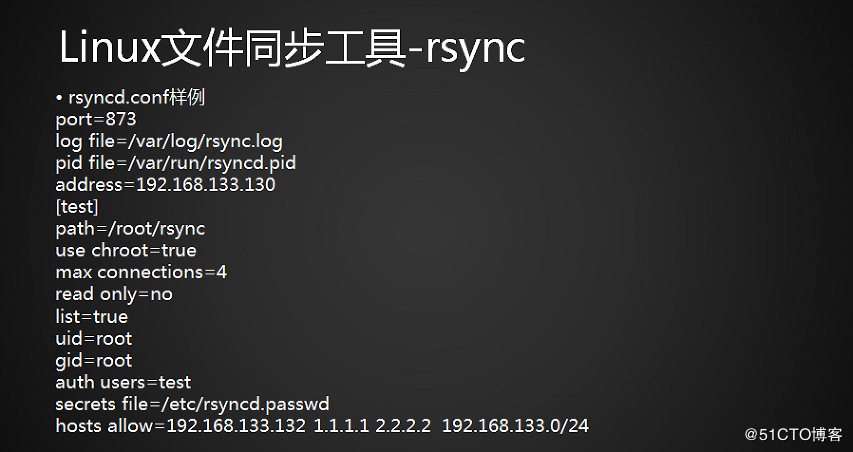
#rsyncd.conf样例 port=873
log file=/var/log/rsync.log
pid file=/var/run/rsyncd.pid
address=192.168.133.130
[test]
path=/root/rsync
use chroot=true
max connections=4
read only=no
list=true
uid=root
gid=root
auth users=test
secrets file=/etc/rsyncd.passwd
hosts allow=192.168.133.132 1.1.1.1 2.2.2.2 192.168.133.0/24
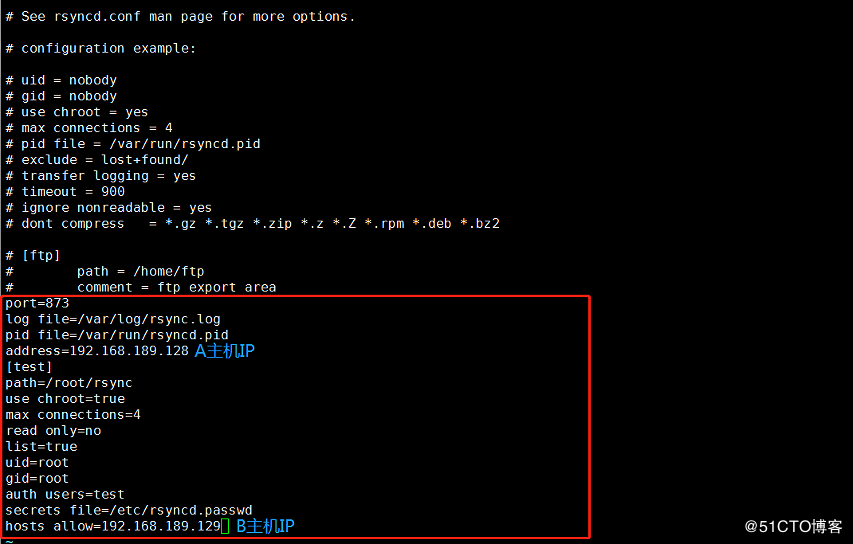
虽然上面已经有了数据,但是在vi里面#开头的数据相当于备注,不作为功能性参数使用。
所以直接添加数据即可。
启动服务
[root@centos7-01 ~]# rsync --daemon
[root@centos7-01 ~]# ps aux |grep rsync
root 1796 0.0 0.0 114652 528 ? Ss 16:10 0:00 rsync --daemon
root 1812 0.0 0.0 112676 980 pts/0 R+ 16:11 0:00 grep --color=auto rsync
[root@centos7-01 ~]# ps aux |grep rsync
root 1796 0.0 0.0 114652 528 ? Ss 16:10 0:00 rsync --daemon
root 1812 0.0 0.0 112676 980 pts/0 R+ 16:11 0:00 grep --color=auto rsync
查看监听的端口及ip状态,
如果不写监听IP,地址会绑定0.0.0.0
[root@Centos7-01 ~]# netstat -lntp
Active Internet connections (only servers)
Proto Recv-Q Send-Q Local Address Foreign Address State PID/Program name
tcp 0 0 0.0.0.0:22 0.0.0.0:* LISTEN 1108/sshd
tcp 0 0 127.0.0.1:25 0.0.0.0:* LISTEN 1197/master
tcp 0 0 192.168.189.128:873 0.0.0.0:* LISTEN 1796/rsync
tcp6 0 0 :::22 :::* LISTEN 1108/sshd
tcp6 0 0 ::1:25 :::* LISTEN 1197/master
服务端已经配置完毕,检查一下对应的路径。
此处把path=/root/rsync目录改成path=/tmp/rsync
然后做如下参数。
[root@centos7-01 tmp]# mkdir rsync
[root@centos7-01 tmp]# chmod 777 rsync
[root@centos7-01 tmp]# ls -ld rsync/
drwxrwxrwx 2 root root 6 3月 28 16:20 rsync/
[root@centos7-01 tmp]# chmod 777 rsync
[root@centos7-01 tmp]# ls -ld rsync/
drwxrwxrwx 2 root root 6 3月 28 16:20 rsync/
在B上同步文件
格式:
rsync -av test1/ 192.168.133.130::module/dir/
以::为中心,前面是服务端的IP,后面是模块的名称
[root@centos7-02 ~]# rsync -avP /tmp/aming.txt 192.168.189.128::test/aming-02.txt
rsync: failed to connect to 192.168.189.128 (192.168.189.128): No route to host (113)
rsync error: error in socket IO (code 10) at clientserver.c(122) [sender=3.0.9]
rsync: failed to connect to 192.168.189.128 (192.168.189.128): No route to host (113)
rsync error: error in socket IO (code 10) at clientserver.c(122) [sender=3.0.9]
遇到这种问题,首先需要检查网络连通性
1能ping通
2检查端口:
#telnet 192.168.189.128 873 (格式:telnet IP 端口)
[root@centos7-02 ~]# telnet 192.168.189.128 873
Trying 192.168.188.128...
telnet: connect to address 192.168.189.128: Connection refused
[root@centos7-02 ~]# telnet 192.168.189.128 873
Trying 192.168.188.128...
telnet: connect to address 192.168.189.128: Connection refused
端口不通,
检查iptables的规则(太多数据,不一一列出),确实有问题,所以要把firewalld停掉。
[root@centos7-02 ~]# systemctl stop firewalld
#同时把A上的firewalld停掉
[root@centos7-02 ~]# telnet 192.168.189.128 873
Trying 192.168.189.128...
Connected to 192.168.189.128.
Escape character is '^]'.
@RSYNCD: 30.0
q
@ERROR: protocol startup error
Connection closed by foreign host.
#同时把A上的firewalld停掉
[root@centos7-02 ~]# telnet 192.168.189.128 873
Trying 192.168.189.128...
Connected to 192.168.189.128.
Escape character is '^]'.
@RSYNCD: 30.0
q
@ERROR: protocol startup error
Connection closed by foreign host.
成功ping通,端口也通了(telnet退出,ctrl+u [键 退出)
[root@centos7-02 ~]# rsync -avP /tmp/aming.txt 192.168.189.128::test/aming-02.txt
Password:
#需要登录密码验证,如果取消密码验证,在A上修改rsyncd.conf验证参数即可。
#auth users=test
#secrets file=/etc/rsyncd.passwd
Password:
#需要登录密码验证,如果取消密码验证,在A上修改rsyncd.conf验证参数即可。
#auth users=test
#secrets file=/etc/rsyncd.passwd
在B上同步文件操作,成功。
[root@centos7-02 ~]# rsync -avP /tmp/aming.txt 192.168.189.128::test/aming-02.txt
sending incremental file list
aming.txt
1102 100% 0.00kB/s 0:00:00 (xfer#1, to-check=0/1)
sent 1175 bytes received 27 bytes 2404.00 bytes/sec
total size is 1102 speedup is 0.92
sending incremental file list
aming.txt
1102 100% 0.00kB/s 0:00:00 (xfer#1, to-check=0/1)
sent 1175 bytes received 27 bytes 2404.00 bytes/sec
total size is 1102 speedup is 0.92
在A上检查文件已被同步。
[root@centos7-01 tmp]# ls /tmp/rsync/
aming-02.txt
aming-02.txt
B上操作,远程到本地
[root@centos7-02 ~]# rsync -avP 192.168.189.128::test/aming-02.txt /tmp/123.txt
receiving incremental file list
aming-02.txt
1102 100% 1.05MB/s 0:00:00 (xfer#1, to-check=0/1)
sent 45 bytes received 1209 bytes 2508.00 bytes/sec
total size is 1102 speedup is 0.88
receiving incremental file list
aming-02.txt
1102 100% 1.05MB/s 0:00:00 (xfer#1, to-check=0/1)
sent 45 bytes received 1209 bytes 2508.00 bytes/sec
total size is 1102 speedup is 0.88
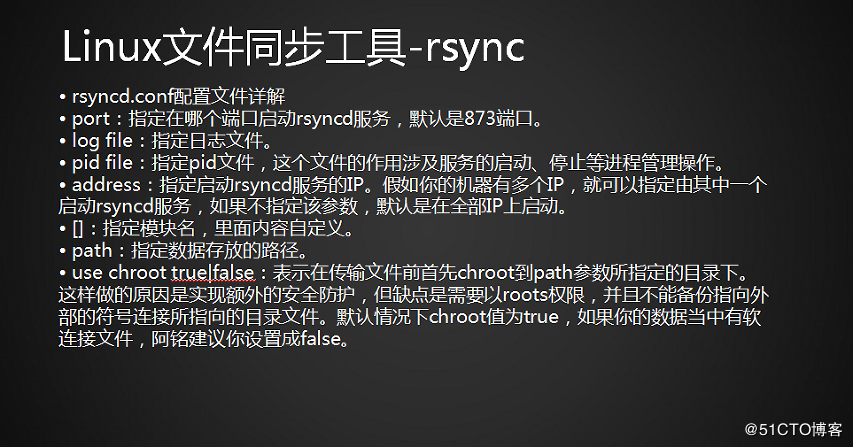
rsyncd.conf配置文件详解
- port:指定在哪个端口启动rsyncd服务,默认是873端口。
- log file:指定日志文件。
- pid file:指定pid文件,这个文件的作用涉及服务的启动、停止等进程管理操作。
- address:指定启动rsyncd服务的IP。假如你的机器有多个IP,就可以指定由其中一个启动rsyncd服务,如果不
指定该参数,默认是在全部IP上启动。
- []:指定模块名,里面内容自定义。
- path:指定数据存放的路径。
- use chroot true|false:表示在传输文件前首先chroot到path参数所指定的目录下。
这样做的原因是实现额外的安全防护,但缺点是需要以roots权限,并且不能备份指向外部的符号连接所指向的目录文件。
默认情况下chroot值为true,如果你的数据当中有软连接文件,一般建议设置成false。
假如把use chroot改成true 那么就会限制path指定的路径下。
如果同步文件的软链接,此时文件的软链接指向了path以外的路径,此时使用-L会把源文件同步过来,此时会有问题出错。
举例说明,
在A上操作
[root@centos7-01 rsync]# ln -s /etc/passwd ./12.txt
[root@centos7-01 rsync]# ls -l
总用量 4
lrwxrwxrwx 1 root root 11 3月 28 17:37 12.txt -> /etc/passwd
-rw-r--r-- 1 root root 1102 3月 20 21:12 aming-02.txt
[root@centos7-01 rsync]# ls -l
总用量 4
lrwxrwxrwx 1 root root 11 3月 28 17:37 12.txt -> /etc/passwd
-rw-r--r-- 1 root root 1102 3月 20 21:12 aming-02.txt
B上同步目录
[root@centos7-02 ~]# rsync -avLP 192.168.189.128::test/ /tmp/test/
receiving incremental file list
symlink has no referent: "/12.txt" (in test)
./
sent 29 bytes received 132 bytes 322.00 bytes/sec
total size is 1102 speedup is 6.84
rsync error: some files/attrs were not transferred (see previous errors) (code 23) at main.c(1518)
[generator=3.0.9]
receiving incremental file list
symlink has no referent: "/12.txt" (in test)
./
sent 29 bytes received 132 bytes 322.00 bytes/sec
total size is 1102 speedup is 6.84
rsync error: some files/attrs were not transferred (see previous errors) (code 23) at main.c(1518)
[generator=3.0.9]
出现报错信息。
查看日志
[root@centos7-01 rsync]# cat /var/log/rsync.log
2018/03/28 09:39:38 [2366] symlink has no referent: "/12.txt" (in test)
#在A上修改use chroot=false
sed -i 's/use chroot=true/use chroot=false/' /etc/rsyncd.conf
#在B上同步,OK
[root@centos7-02 ~]# rsync -avLP 192.168.189.128::test/ /tmp/test/
receiving incremental file list
12.txt
1102 100% 1.05MB/s 0:00:00 (xfer#1, to-check=1/3)
sent 45 bytes received 1234 bytes 2558.00 bytes/sec
total size is 2204 speedup is 1.72
10.33 rsync通过服务同步(下)
把端口修改为
8730
sed -i 's/port=873/port=8730/' /etc/rsyncd.conf
关闭防火墙(如果默认关闭就不需此操作),然后重启rsync服务
[root@centos7-01 ~]# systemctl stop firewalld
[root@centos7-01 ~]# rsync --daemon
[root@centos7-01 ~]# rsync --daemon
检查监听端口状态是否8730
[root@centos7-01 ~]# !net
netstat -lntp
Active Internet connections (only servers)
Proto Recv-Q Send-Q Local Address Foreign Address State PID/Program name
tcp 0 0 192.168.189.128:8730 0.0.0.0:* LISTEN 1294/rsync
netstat -lntp
Active Internet connections (only servers)
Proto Recv-Q Send-Q Local Address Foreign Address State PID/Program name
tcp 0 0 192.168.189.128:8730 0.0.0.0:* LISTEN 1294/rsync
在B上操作,done.
rsync -avLP --port 8730 129.168.133.130::test/ /tmp/test/
Linux文件同步工具-rsync
max connections:指定最大的连接数,默认是0,即没有限制。
read only ture|false:如果为true,则不能上传到该模块指定的路径下。
当服务端设置了true的时候,此时客户端把数据推到服务端上,是推不到的。
反之,false即可写。
list:表示当用户查询该服务器上的可用模块时,该模块是否被列出,设定为true则列出,false则隐藏。
相当于一个安全选项,
示例演示
#true状态
[root@centos7-02 ~]# rsync -avLP --port 8730 192.168.189.128::
test
#false状态,无提示
[root@centos7-02 ~]# rsync -avLP --port 8730 192.168.189.128::
[root@centos7-02 ~]# rsync -avLP --port 8730 192.168.189.128::
test
#false状态,无提示
[root@centos7-02 ~]# rsync -avLP --port 8730 192.168.189.128::
uid/gid:指定传输文件时以哪个用户/组的身份传输。
为显示更好效果,删除重新建立文件
[root@centos7-01 rsync]# rm -rf ./*
修改1机上面的uid gid为nobody(nobody是权限比较小的一个id)
[root@centos7-01 rsync]# sed -i 's#uid=root#uid=nobody#' /etc/rsyncd.conf
[root@centos7-01 rsync]# sed -i 's#gid=root#gid=nobody#' /etc/rsyncd.conf
[root@centos7-02 ~]# rsync -avLP /tmp/test/ --port=8730 192.168.189.128::test/
sending incremental file list
./
rsync: failed to set times on "." (in test): Operation not permitted (1)
12.txt
1102 100% 0.00kB/s 0:00:00 (xfer#1, to-check=1/3)
aming-02.txt
1102 100% 1.05MB/s 0:00:00 (xfer#2, to-check=0/3)
sent 2351 bytes received 49 bytes 4800.00 bytes/sec
total size is 2204 speedup is 0.92
rsync error: some files/attrs were not transferred (see previous errors) (code 23) at main.c(1052) [sender=3.0.9]
出现报错,Operation not permitted表示动作不允许,传输失败。
所以得把root改回来
[root@centos7-01 rsync]# sed -i 's#gid=nobody#gid=root#' /etc/rsyncd.conf
[root@centos7-01 rsync]# sed -i 's#uid=nobody#uid=root#' /etc/rsyncd.conf
[root@centos7-01 rsync]# sed -i 's#uid=nobody#uid=root#' /etc/rsyncd.conf
- auth users:指定传输时要使用的用户名。
- secrets file:指定密码文件,该参数连同上面的参数如果不指定,则不使用密码验证。注意该密码文件的权限一定要是600。格式:用户名:密码
在服务端操作
[root@centos7-01 rsync]# vim /etc/rsyncd.passwd 输入账号密码,格式 账号:密码
[root@centos7-01 rsync]# vim /etc/rsyncd.conf 把rsyncd.conf中auth users和secrets file的#去掉。
[root@centos7-01 rsync]# vim /etc/rsyncd.conf 把rsyncd.conf中auth users和secrets file的#去掉。
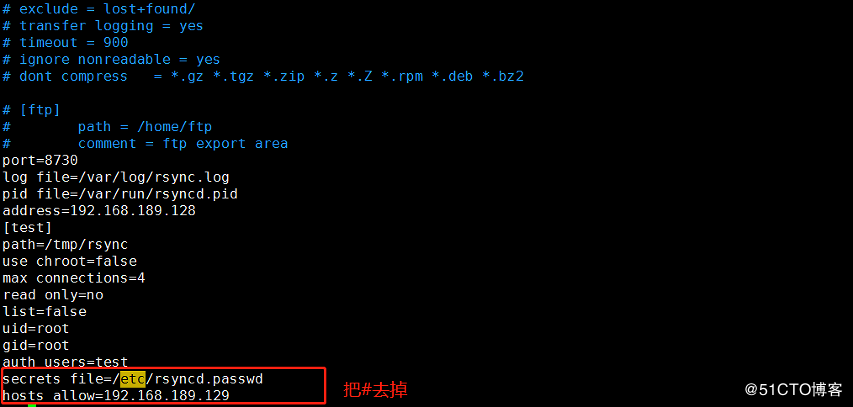
[root@centos7-01 rsync]# chmod 600 /etc/rsyncd.passwd
在2上操作同步数据,记住在IP前面输入用户,格式test@192.168.189.128.....
[root@centos7-02 ~]# rsync -avLP /tmp/test/ --port=8730 test@192.168.189.128::test/
Password:
@ERROR: auth failed on module test
rsync error: error starting client-server protocol (code 5) at main.c(1516) [sender=3.0.9]
[root@centos7-02 ~]# rsync -avLP /tmp/test/ --port=8730 test@192.168.189.128::test/
Password:
sending incremental file list
./
sent 67 bytes received 17 bytes 24.00 bytes/sec
total size is 2204 speedup is 26.24
Password:
@ERROR: auth failed on module test
rsync error: error starting client-server protocol (code 5) at main.c(1516) [sender=3.0.9]
[root@centos7-02 ~]# rsync -avLP /tmp/test/ --port=8730 test@192.168.189.128::test/
Password:
sending incremental file list
./
sent 67 bytes received 17 bytes 24.00 bytes/sec
total size is 2204 speedup is 26.24
hosts allow:表示被允许连接该模块的主机,可以是IP或者网段,如果是多个,中间用空格隔开。
客户端的IP或者IP,
当设置了auth users和secrets file后,客户端连服务端也需要用用户名密码了,若想在命令行中带上密码,可以设定一个密码文件
在2上操作
[root@centos7-02 ~]# vim /etc/rsync_pass.txt
aming
aming
内容只写密码,无需写账号,编辑完成后,修改密码文件权限为600
[root@centos7-02 ~]# chmod 600 /etc/rsync_pass.txt
同步数据操作,此处需要添加选项 --password-file 后面接=/etc/rsync_pass.txt
[root@centos7-02 ~]# rsync -avP /tmp/test/ --port=8730 --password-file=/etc/rsync_pass.txt test@192.168.189.128::test/
sending incremental file list
sent 58 bytes received 8 bytes 132.00 bytes/sec
total size is 2204 speedup is 33.39
sending incremental file list
sent 58 bytes received 8 bytes 132.00 bytes/sec
total size is 2204 speedup is 33.39
10.34 Linux系统日志
日志的主要功能是审计和检测,还可以实时地检测系统状态,检测和追踪侵入者等。
很多错误的信息,不会显示在屏幕上的,而是记录在日志里。
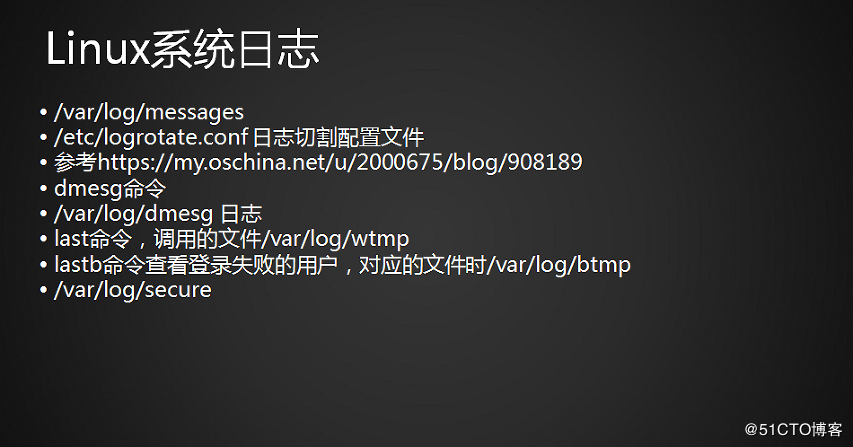
/var/log/messages
重要日志,核心系统日志文件,除了特定服务日志指定日志文件外,其余日志一般记录在此。
它包含了系统启动时的引导小溪,以及系统运行时的其他状态消息。网络,系统,内核等等状态或者错误的信息。
less /var/log/messages
查看/var/log/messages*
ls /var/log/messages*
/var/log/messages /var/log/messages-20180313 /var/log/messages-20180326
/var/log/messages-20180305 /var/log/messages-20180319
/var/log/messages /var/log/messages-20180313 /var/log/messages-20180326
/var/log/messages-20180305 /var/log/messages-20180319
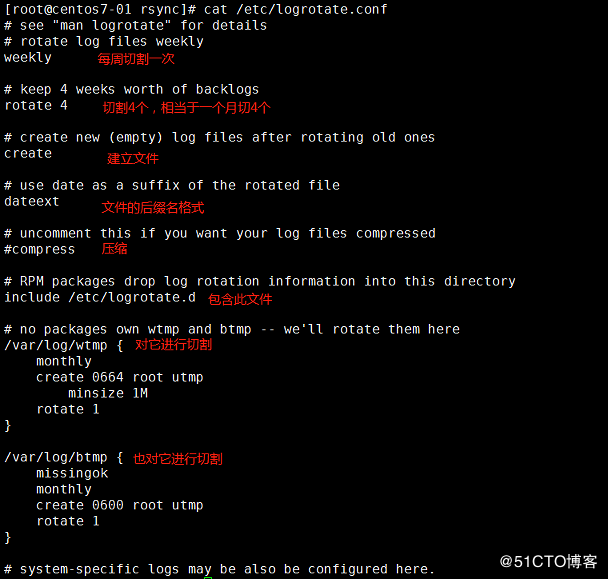
/etc/logrotate.conf 日志切割配置文件
cat /etc/logrotate.conf
切割详细信息
#cat /etc/logrotate.d/syslog
/var/log/cron
/var/log/maillog
/var/log/messages
/var/log/secure
/var/log/spooler
{
missingok
sharedscripts
postrotate
/bin/kill -HUP `cat /var/run/syslogd.pid 2> /dev/null` 2> /dev/null || true
endscript
}
/var/log/cron
/var/log/maillog
/var/log/messages
/var/log/secure
/var/log/spooler
{
missingok
sharedscripts
postrotate
/bin/kill -HUP `cat /var/run/syslogd.pid 2> /dev/null` 2> /dev/null || true
endscript
}
参考https://my.oschina.net/u/2000675/blog/908189
dmesg命令
此日志保存在内存中,并不是一个文件。
关注点:硬件故障记录。
#dmesg -c 临时清空日志
/var/log/dmesg 日志
和命令#dmesg没关联
这是一个系统启动日志。
# cat /var/log/dmesg 查看日志
last命令,调用的文件/var/log/wtmp
查看正确的登录历史,
#last 查看日志,
不能#cat /var/log/wtmp来查看日志,var/log/wtmp是一个二进制文件只是被调用。
lastb命令查看登录失败的用户,对应的文件时/var/log/btmp
#lastb查看日志,
同样地,不能#cat /var/log/btmp来查看日志,var/log/btmp是一个二进制文件只是被调用。
/var/log/secure
和登录信息相关的安全日志文件。该日志文件记录验证和授权等方面的信息,比如ssh登录系统成功或者失败时,相关的信息都会记录在这个日志里。
10.35 screen工具

为了不让一个任务意外中断
nohup command &
screen是一个虚拟终端
screen相当于一个虚拟终端,
能把想执行的命令,放到此终端上,然后可以在退出pts01 02远程终端之前,
先把screen调到后台去,达到随时调用的效果。
yum install -y screen
screen直接回车就进入了虚拟终端
支持同时打开多个screen
ctral a组合键再按d退出虚拟终端,但不是结束
把终端放到后台
screen -ls 查看虚拟终端列表
查看当前终端
[root@centos7-01 rsync]# screen -ls
There is a screen on:
2928.pts-0.centos7-01 (Attached)
1 Socket in /var/run/screen/S-root.
There is a screen on:
2928.pts-0.centos7-01 (Attached)
1 Socket in /var/run/screen/S-root.
screen -r id 进入指定的终端
[root@centos7-01 rsync]# screen -r 2928
退出screen
exit
screen -S aming
自定义screen的名称
screen -r aming


 325
325


 被折叠的 条评论
为什么被折叠?
被折叠的 条评论
为什么被折叠?
 到【灌水乐园】发言


