


缓存代码以前写了不少,不过一直没有整理,丢三落四总犯懒!
这次遇到这么个需求,要在页面上动态显示RSS条目。如果要在页面上获取RSS,就需要向远程服务器发送请求,同时需要解析,展示。如果这页面被多次访问,就会导致多次HTTP请求,很可能自己的网站没打开,反倒把RSS服务器搞宕机了!这时候,就需要通过缓存RSS信息,减少请求次数来提高响应效率了!
再者,通过标签简化JSP代码实现!
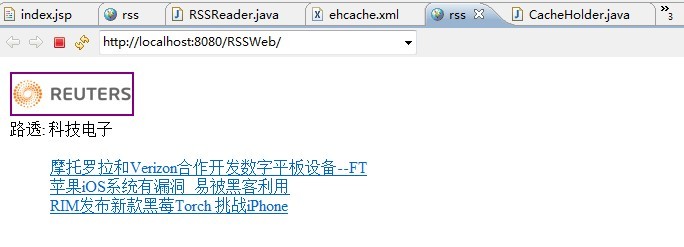
用 路透: 科技电子作为样例,最后搞一个这样的页面:
说说RSS的节点,这里先说image
RSS中给出如下结构
<image>
	<title>Reuters News</title>
	<width>120</width>
	<height>35</height>
	<link>http://cn.reuters.com</link>
	<url>http://cn.reuters.com/resources/images/reuters120.gif</url>
</image>
对应给出域对象Image
import java.io.Serializable;

/**
 * @author <a href="mailto:zlex.dongliang@gmail.com">梁栋</a>
 * @since 1.0
 */
public class Image implements Serializable {
	/**
	 *
	 */
	private static final long serialVersionUID = 3377367647893337410L;

	/**
	 * 高
	 */
	private String height;
	/**
	 * 宽
	 */
	private String width;
	/**
	 * 链接
	 */
	private String link;

	/**
	 * 标题
	 */
	private String title;
	/**
	 * 图片路径
	 */
	private String url;
}
import java.io.Serializable; Why?
考虑到这些域对象可能需要缓存,就需要涉及到将对象保存到文件中,也就是序列化操作。因此,当我们构建域对象时,最好实现序列化接口!
再看Item
RSS中给出如下结构
<item>
<title>摩托罗拉和Verizon合作开发数字平板设备--FT</title>
<description> 路透伦敦8月4日电---金融时报周三报导,美国移动电话生产商摩托罗拉正在与Verizon Wireless合作开发一款数字平板设备,用来与苹果的iPad竞争.</description>
<link>http://cn.reuters.com/article/CNTechNews/idCNCHINA-2770720100804?feedType=RSS&feedName=CNTechNews</link>
<guid isPermaLink="false">CNCHINA-2770720100804</guid>
<category>CNTechNews</category>
<pubDate>Wed, 04 Aug 2010 11:08:34 +0800</pubDate>
</item>给出对应绑定域对象
import java.io.Serializable;

/**
 * @author <a href="mailto:zlex.dongliang@gmail.com">梁栋</a>
 * @since 1.0
 *
 */
public class Item implements Serializable {
	/**
	 *
	 */
	private static final long serialVersionUID = -8860646418160016186L;

	/**
	 * 标题
	 */
	private String title;
	/**
	 * 描述
	 */
	private String description;
	/**
	 * 链接
	 */
	private String link;
	/**
	 * guid
	 */
	private String guid;
	/**
	 * 分类
	 */
	private String category;
	/**
	 * 发布日期
	 */
	private String pubDate;
}
最后是Channel
RSS中给出如下结构,也是一个完整的RSS。
<?xml version="1.0" encoding="UTF-8" ?>
<rss version="2.0" >
<channel>
<title>路透: 科技电子</title>
<link>http://cn.reuters.com</link>
<description>路透中文网提供实时新闻,财经资讯和投资信息。路透社是全球最大的新闻通讯社之一,为全球媒体,金融实体,商业组织和个人提供新闻报道,金融资讯和相关技术方案。</description>
<image>
<title>Reuters News</title>
<width>120</width>
<height>35</height>
<link>http://cn.reuters.com</link>
<url>http://cn.reuters.com/resources/images/reuters120.gif</url>
</image>
<language>en-us</language>
<lastBuildDate>Wed, 04 Aug 2010 14:03:25 +0800</lastBuildDate>
<copyright>All rights reserved. Users may download and print extracts of content from this website for their own personal and non-commercial use only. Republication or redistribution of Reuters content, including by framing or similar means, is expressly prohibited without the prior written consent of Reuters. Reuters and the Reuters sphere logo are registered trademarks or trademarks of the Reuters group of companies around the world. © Reuters 2010</copyright>
<item>
<title>摩托罗拉和Verizon合作开发数字平板设备--FT</title>
<description> 路透伦敦8月4日电---金融时报周三报导,美国移动电话生产商摩托罗拉正在与Verizon Wireless合作开发一款数字平板设备,用来与苹果的iPad竞争.</description>
<link>http://cn.reuters.com/article/CNTechNews/idCNCHINA-2770720100804?feedType=RSS&feedName=CNTechNews</link>
<guid isPermaLink="false">CNCHINA-2770720100804</guid>
<category>CNTechNews</category>
<pubDate>Wed, 04 Aug 2010 11:08:34 +0800</pubDate>
</item>
</channel>
</rss>image节点只有一个,但item节点就可能有多个!
对应的Channel域对象如下:
import java.io.Serializable;
import java.util.List;

/**
 * @author <a href="mailto:zlex.dongliang@gmail.com">梁栋</a>
 * @since 1.0
 *
 */
public class Channel implements Serializable {
	/**
	 *
	 */
	private static final long serialVersionUID = 549783894750767576L;

	/**
	 *标题
	 */
	private String title;
	/**
	 * 链接
	 */
	private String link;
	/**
	 * 描述
	 */
	private String description;
	/**
	 * 上次发布时间
	 */
	private String lastBuildDate;
	/**
	 * doc
	 */
	private String docs;
	/**
	 * 语言
	 */
	private String language;
	/**
	 * 版权
	 */
	private String copyright;
	/**
	 * 图片
	 */
	private Image image;

	/**
	 * 项列表
	 */
	private List<Item> itemList;
域对象准备好了,我们就需要对xml进行转换,通过Dom4J做相应实现!这部分内容,太基础了,详见附件吧!(查看RSSReader类)
今天的主角是CacheHolder,用来维护缓存调用!
import net.sf.ehcache.Cache;
import net.sf.ehcache.CacheException;
import net.sf.ehcache.CacheManager;
import net.sf.ehcache.Element;

import org.apache.log4j.Logger;

/**
 * 缓存控制器
 *
 * @author <a href="mailto:zlex.dongliang@gmail.com">梁栋</a>
 * @since 1.0
 *
 */
public class CacheHolder {

	/**
	 * Logger for this class
	 */
	private static final Logger logger = Logger.getLogger(CacheHolder.class);

	private static CacheHolder INSTANCE;

	/**
	 * 缓存管理器
	 */
	private CacheManager cm;

	/**
	 * 缓存
	 */
	private Cache cache;

	/**
	 * 获取缓存控制器
	 *
	 * @param cacheName
	 * @return
	 */
	public static synchronized CacheHolder getCacheHolder(String cacheName) {

		if (INSTANCE == null) {
			INSTANCE = new CacheHolder(cacheName);
		}
		return INSTANCE;
	}

	/**
	 * @param cacheName
	 */
	private CacheHolder(String cacheName) {
		try {

			cm = CacheManager.create();

		} catch (CacheException e) {
			logger.warn(e.getMessage());
		}

		cache = cm.getCache(cacheName);

		if (cache == null) {
			cache = new Cache("LRU", 500, false, false, 60 * 60 * 24,
					60 * 60 * 12);
			cm.addCache(cache);
		}
	}

	/**
	 * 添加缓存对象
	 *
	 * @param key
	 * @param value
	 */
	public void add(Object key, Object value) {
		Element e = new Element(key, value);
		cache.put(e);
		if (logger.isDebugEnabled()) {
			logger.debug("Cache:[" + key + "]");
		}
	}

	/**
	 * 获得缓存对象
	 *
	 * @param key
	 */
	public Object get(Object key) {
		Element e = cache.get(key);
		if (e != null) {
			if (logger.isDebugEnabled()) {
				logger.debug("Cache Hit:[" + key + "]");
			}
			return e.getObjectValue();
		}
		return null;
	}

	/**
	 * 删除指定缓存对象
	 *
	 * @param key
	 * @return {@link Object}
	 */
	public void remove(Object key) {
		cache.remove(key);
	}

	/**
	 * 删除所有缓存对象
	 *
	 */
	public void removeAll() {
		cache.removeAll();
	}

}
通常,我们需要通过单例模式进行调度:
private static CacheHolder INSTANCE;

	/**
	 * 缓存管理器
	 */
	private CacheManager cm;

	/**
	 * 获取缓存控制器
	 *
	 * @param cacheName
	 * @return
	 */
	public static synchronized CacheHolder getCacheHolder(String cacheName) {

		if (INSTANCE == null) {
			INSTANCE = new CacheHolder(cacheName);
		}
		return INSTANCE;
	}
在构建单例模式时,最重要的是使得构造方法为私有方法:
/**
	 * 缓存
	 */
	private Cache cache;
	/**
	 * @param cacheName
	 */
	private CacheHolder(String cacheName) {
		try {

			cm = CacheManager.create();

		} catch (CacheException e) {
			logger.warn(e.getMessage());
		}

		cache = cm.getCache(cacheName);

		if (cache == null) {
			cache = new Cache("LRU", 500, false, false, 60 * 60 * 24,
					60 * 60 * 12);
			cm.addCache(cache);
		}
	}
这里设定了默认的调用算法为“LRU”也就是最近最少访问的对象将被清理!
默认的timeToLiveSeconds为60 * 60 * 24=1day,也就是说缓存最多保留1天,时间一到自动清理。
默认的timeToIdleSeconds为60 * 60 * 12=0.5day,也就是说缓存空闲最多为半天,如果这个对象半天内不被访问将被清理。
如果想要灵活配置,就配置ehcache.xml文件好了:
<?xml version="1.0" encoding="UTF-8"?>
<ehcache
	xmlns:xsi="http://www.w3.org/2001/XMLSchema-instance"
	xsi:noNamespaceSchemaLocation="ehcache.xsd">
	<diskStore
		path="java.io.tmpdir" />
	<defaultCache
		maxElementsInMemory="10000"
		eternal="false"
		timeToIdleSeconds="120"
		timeToLiveSeconds="120"
		overflowToDisk="true"
		diskPersistent="false"
		diskSpoolBufferSizeMB="30"
		maxElementsOnDisk="10000000"
		diskExpiryThreadIntervalSeconds="120"
		memoryStoreEvictionPolicy="LRU" />
	<cache
		name="com.netqin.tag.rss.Channel"
		maxElementsInMemory="1"
		eternal="false"
		overflowToDisk="true"
		timeToIdleSeconds="3600"
		timeToLiveSeconds="3600"
		memoryStoreEvictionPolicy="LFU" />
</ehcache>
这里通过
<cache
		name="com.netqin.tag.rss.Channel"
		maxElementsInMemory="1"
		eternal="false"
		overflowToDisk="true"
		timeToIdleSeconds="3600"
		timeToLiveSeconds="3600"
memoryStoreEvictionPolicy="LFU" />How?
给出部分RSSReader类实现:
import org.apache.log4j.Logger;

import java.util.LinkedList;
import java.util.List;

import org.dom4j.Document;
import org.dom4j.Element;
import org.dom4j.io.SAXReader;

/**
 * RSSReader
 *
 * @author <a href="mailto:zlex.dongliang@gmail.com">梁栋</a>
 * @since 1.0
 *
 */
public abstract class RSSReader {
	/**
	 * Logger for this class
	 */
	private static final Logger logger = Logger.getLogger(RSSReader.class);

	private static final CacheHolder cacheHolder = CacheHolder
			.getCacheHolder("com.netqin.tag.rss");
	public static final String KEY = "com.netqin.tag.rss.Channel";

	/**
	 * 获得渠道
	 *
	 * @param doc
	 * @return
	 */
	public static Channel getChannel(String url) throws Exception {
		Channel channel = (Channel) cacheHolder.get(KEY);

		if (channel == null) {

			Document doc = getDocument(url);
			channel = toChannel(doc);

			cacheHolder.add(KEY, channel);
		}
		return channel;
	}
}
使用,就这么简单!
最后,用tag包装一下:
import org.apache.log4j.Logger;

import javax.servlet.jsp.JspException;
import javax.servlet.jsp.tagext.TagSupport;

/**
 * RSSTag标签
 *
 * @author <a href="mailto:zlex.dongliang@gmail.com">梁栋</a>
 * @since 1.0
 *
 */
public class RSSTag extends TagSupport {
	/**
	 * Logger for this class
	 */
	private static final Logger logger = Logger.getLogger(RSSTag.class);

	/**
	 *
	 */
	private static final long serialVersionUID = -8392115916509318259L;

	public static final String REQUEST_ATTRIBUTE_NAME = "rssChannel";

	/**
	 * 请求路径
	 */
	private String url;

	/**
	 * request的Attribute中的Channel名字
	 */
	private String channelName;

	/**
	 * @return the channelName
	 */
	public String getChannelName() {
		return channelName == null ? REQUEST_ATTRIBUTE_NAME : channelName;
	}

	/**
	 * @param channelName
	 *            the channelName to set
	 */
	public void setChannelName(String channelName) {
		this.channelName = channelName;
	}

	/**
	 * @param url
	 *            the url to set
	 */
	public void setUrl(String url) {
		this.url = url;
	}

	/*
	 * (non-Javadoc)
	 *
	 * @see javax.servlet.jsp.tagext.TagSupport#doStartTag()
	 */
	@Override
	public int doStartTag() throws JspException {
		try {
			Channel channel = RSSReader.getChannel(url);
			this.pageContext.getRequest().setAttribute(getChannelName(),
					channel);
		} catch (Exception e) {
			logger.warn(e.getMessage());
			throw new JspException(e);
		}
		return super.doStartTag();
	}

}
我们通过url设置请求的rss站点,通过设置channelName,指定Channel对象在Request的Attribute中的命名。
再构建一个TLD:
<?xml version="1.0" encoding="UTF-8"?>
<taglib
xmlns="http://java.sun.com/xml/ns/j2ee"
xmlns:xsi="http://www.w3.org/2001/XMLSchema-instance"
xsi:schemaLocation="http://java.sun.com/xml/ns/j2ee http://java.sun.com/xml/ns/j2ee/web-jsptaglibrary_2_0.xsd"
version="2.0">
<description>Restricts JSP pages to the RSS tag libraries</description>
<display-name>rssTaglibs</display-name>
<tlib-version>1.0</tlib-version>
<short-name>rss</short-name>
<uri>http://www.zlex.org/tag/rss</uri>
<!-- <rss:rss/> -->
<tag>
<description><rss:rss/></description>
<name>rss</name>
<tag-class>org.zlex.commons.web.tag.rss.RSSTag</tag-class>
<body-content>JSP</body-content>
<attribute>
<description>请求地址</description>
<name>url</name>
<required>true</required>
<rtexprvalue>true</rtexprvalue>
</attribute>
<attribute>
<description>Request的Attribute中的Channel名称</description>
<name>channelName</name>
<required>false</required>
<rtexprvalue>true</rtexprvalue>
</attribute>
</tag>
</taglib>这就够用了!
注意打包时,包含tld文件,注意要包含在META-INF目录中:

这样,我们就不需要在web.xml中配置了!
在页面中使用
<%@ taglib prefix="rss" uri="http://www.zlex.org/tag/rss"%>引入标签,然后在JSP中写入如下代码:
<rss:rss url="http://cn.reuters.com/rssFeed/CNTechNews/"
	channelName="channel" />
<a href="${channel.link}"><img
	src='<c:url value="${channel.image.url}"/>'
	alt="${channel.image.title}" /></a>
<dt><c:out value="${channel.title}" /></dt>
<dl>
	<c:forEach begin="0" end="2" items="${channel.itemList}" var="item">
		<dd><a href='<c:url value="${item.link}" />'><c:out
			value="${item.title}" /></a></dd>
	</c:forEach>
</dl>
就可以获得本文开篇的图样!
缓存有没有效果:

详细内容,看附件,下次需要缓存实现,我就不用到处翻了!呵呵!


 2万+
2万+

 被折叠的 条评论
为什么被折叠?
被折叠的 条评论
为什么被折叠?
 到【灌水乐园】发言


