1. 表单介绍
什么是表单?
表单是 HTML 页面中负责 数据采集 功能的部件。它往往由三个部分组成,即表单标签、表单域、表单按钮。我们可以通过表单,将用户输入的数据提交给服务端,并交由服务端进行处理。
表单标签
- 用于声明表单的范围,位于表单标签中的元素将被提交
- 语法:<form>...</form>
- 属性:Method, Enctype, action ......
表单域
- 表单域包含了文本框,密码框等多种类型
- 语法:<input ...... />
- 属性:type, name, value ......
表单按钮
- 文本框 <... type = "text">
- 密码框 <... type = "password">
- 文本区域 <... type = "textarea">
- 文件上传框 <... type = "file">
- 单选框 <... type = "radio">
- 复选框 <... type = "checkbox">
2. 表单的提交方式
1. GET 方式
GET 方式通过 URL 提交数据,数据在 URL 中可以看到。GET 方式的适用场合为:
- 单纯的数据请求,不进行其他操作
- 表单数据较短,不超过 1024 个字符
- 对安全性要求一般的场合
2. POST 方式
POST 方式,数据放置在 HTML header 中提交。POST 方式的适用场合为:
- 数据不仅仅用于请求,还需要将数据插入数据库内
- 表单数据过长时,比如是一篇博客内容
- 要传送的数据不是 ASCII 编码
实战
我们首先创建以下文件目录:
192:test ming$ tree
.
├── app.py
├── static
└── templates
    └── index.html

2 directories, 2 files
之后,我们首先来编写 index.html 中的表单代码,如下:
<!DOCTYPE html>
<html>
<head>
    <title> flask form </title>
</head>
<body>
    <div align="center">
    <h1> User Management </h1>
    <form method="post">
        <input type="text" name="username" placeholder="username" /> <br />
        <input type="password" name="password" placeholder="password" /> <br />
        <input type="submit" value="Submit" />
        <input type="reset" value="reset" />
    </form>
    </div>
</body>
</html>
然后,编写 app.py 中的代码,如下:
#!/usr/bin/env python
# -*- coding: utf-8 -*-

from flask import Flask
from flask import request, render_template, redirect

app = Flask(__name__)

@app.route('/user', methods = ['GET', 'POST'])
def hello_world():
    if request.method == 'POST':
        # request.form 表示我们获取表单中的数据
        username = request.form['username']
        password = request.form['password']
        if username == 'admin' and password == 'admin':
            return redirect("http://www.jianshu.com/notebooks/6873024/latest")
        else:
            return render_template('index.html')
    return render_template('index.html')

if __name__ == '__main__':
    app.run()
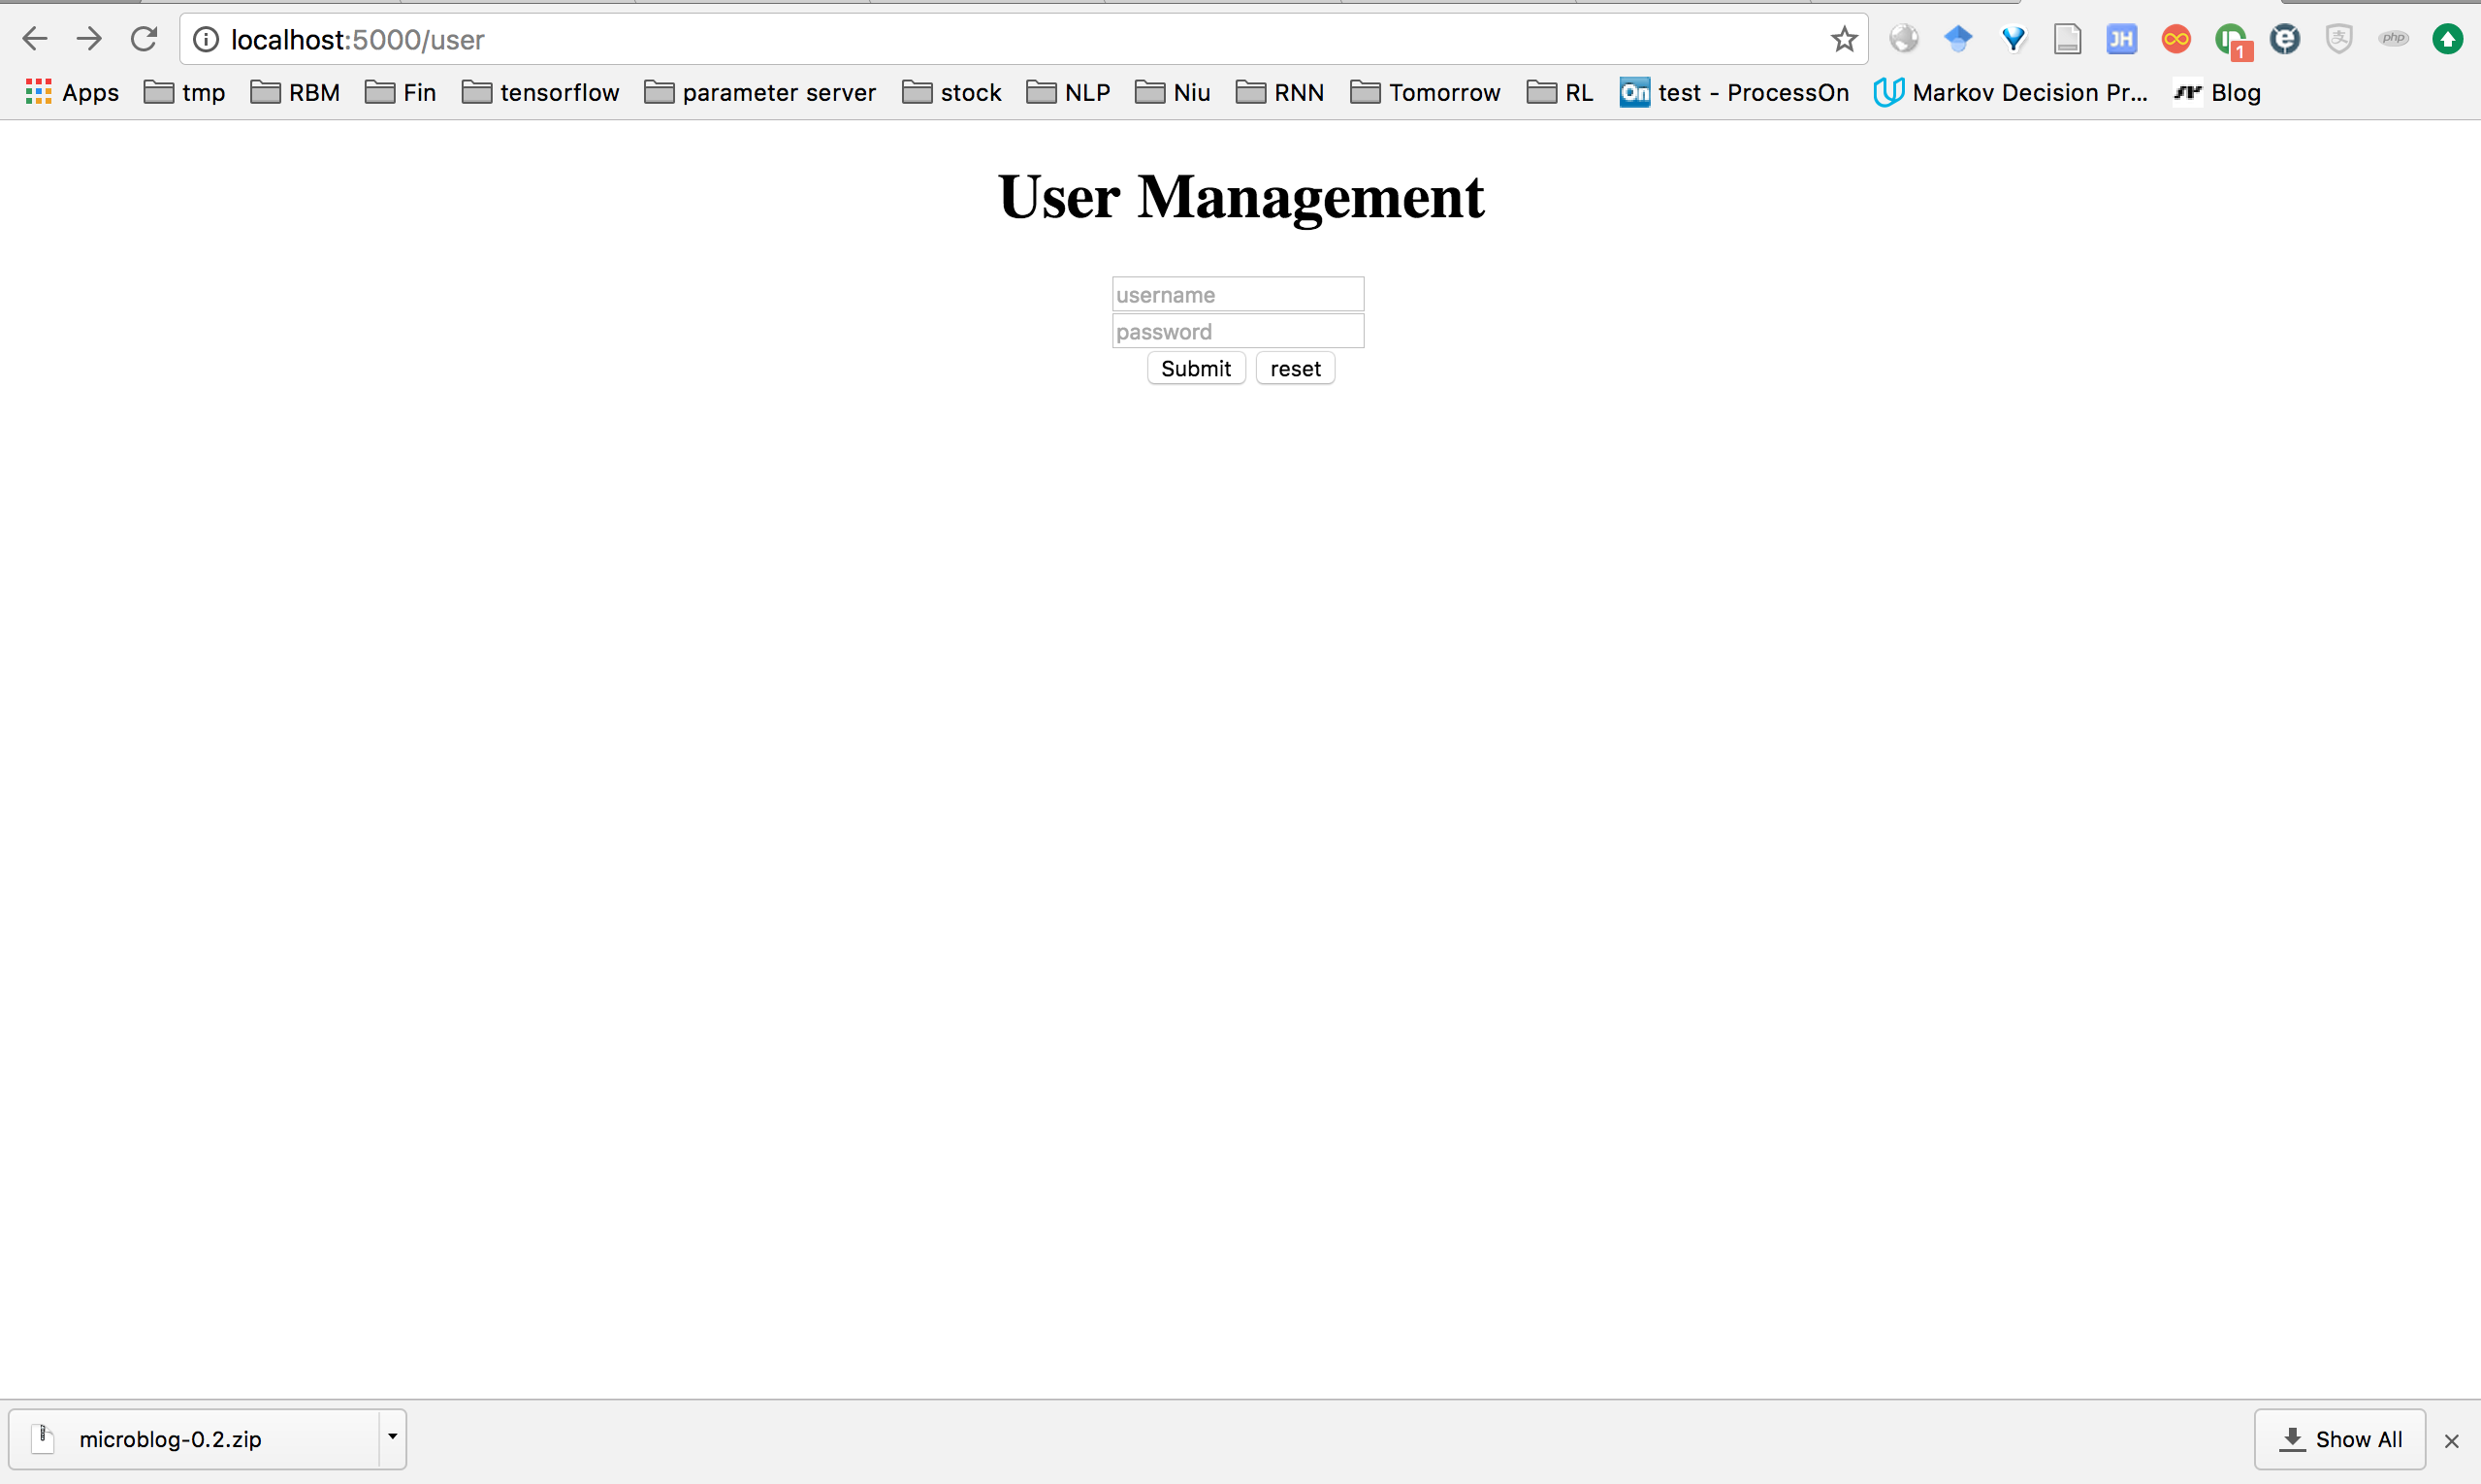
然后我们利用 python app.py 运行程序,得到如下界面:

之后,我们还可以向 index.html 中发送参数,具体可以看这个博客。接下来,我们修改 app.py 程序来向 index.html 文件发送参数,如下代码加入 message 参数:
#!/usr/bin/env python
# -*- coding: utf-8 -*-

from flask import Flask
from flask import request, render_template, redirect

app = Flask(__name__)

@app.route('/user', methods = ['GET', 'POST'])
def hello_world():
    if request.method == 'POST':
        # request.form 表示我们获取表单中的数据
        username = request.form['username']
        password = request.form['password']
        if username == 'admin' and password == 'admin':
            return redirect("http://www.jianshu.com/notebooks/6873024/latest")
        else:
            message = "Login Failed"
            return render_template('index.html', message = message)
    return render_template('index.html')

if __name__ == '__main__':
    app.run()
修改 index.html 文件如下:
<!DOCTYPE html>
<html>
<head>
    <title> flask form </title>
</head>
<body>
    <div align="center">
    <h1> User Management </h1>
    {% if message %}
        {{message}}
    {% endif %}
    <form method="post">
        <input type="text" name="username" placeholder="username" /> <br />
        <input type="password" name="password" placeholder="password" /> <br />
        <input type="submit" value="Submit" />
        <input type="reset" value="reset" />
    </form>
    </div>
</body>
</html>
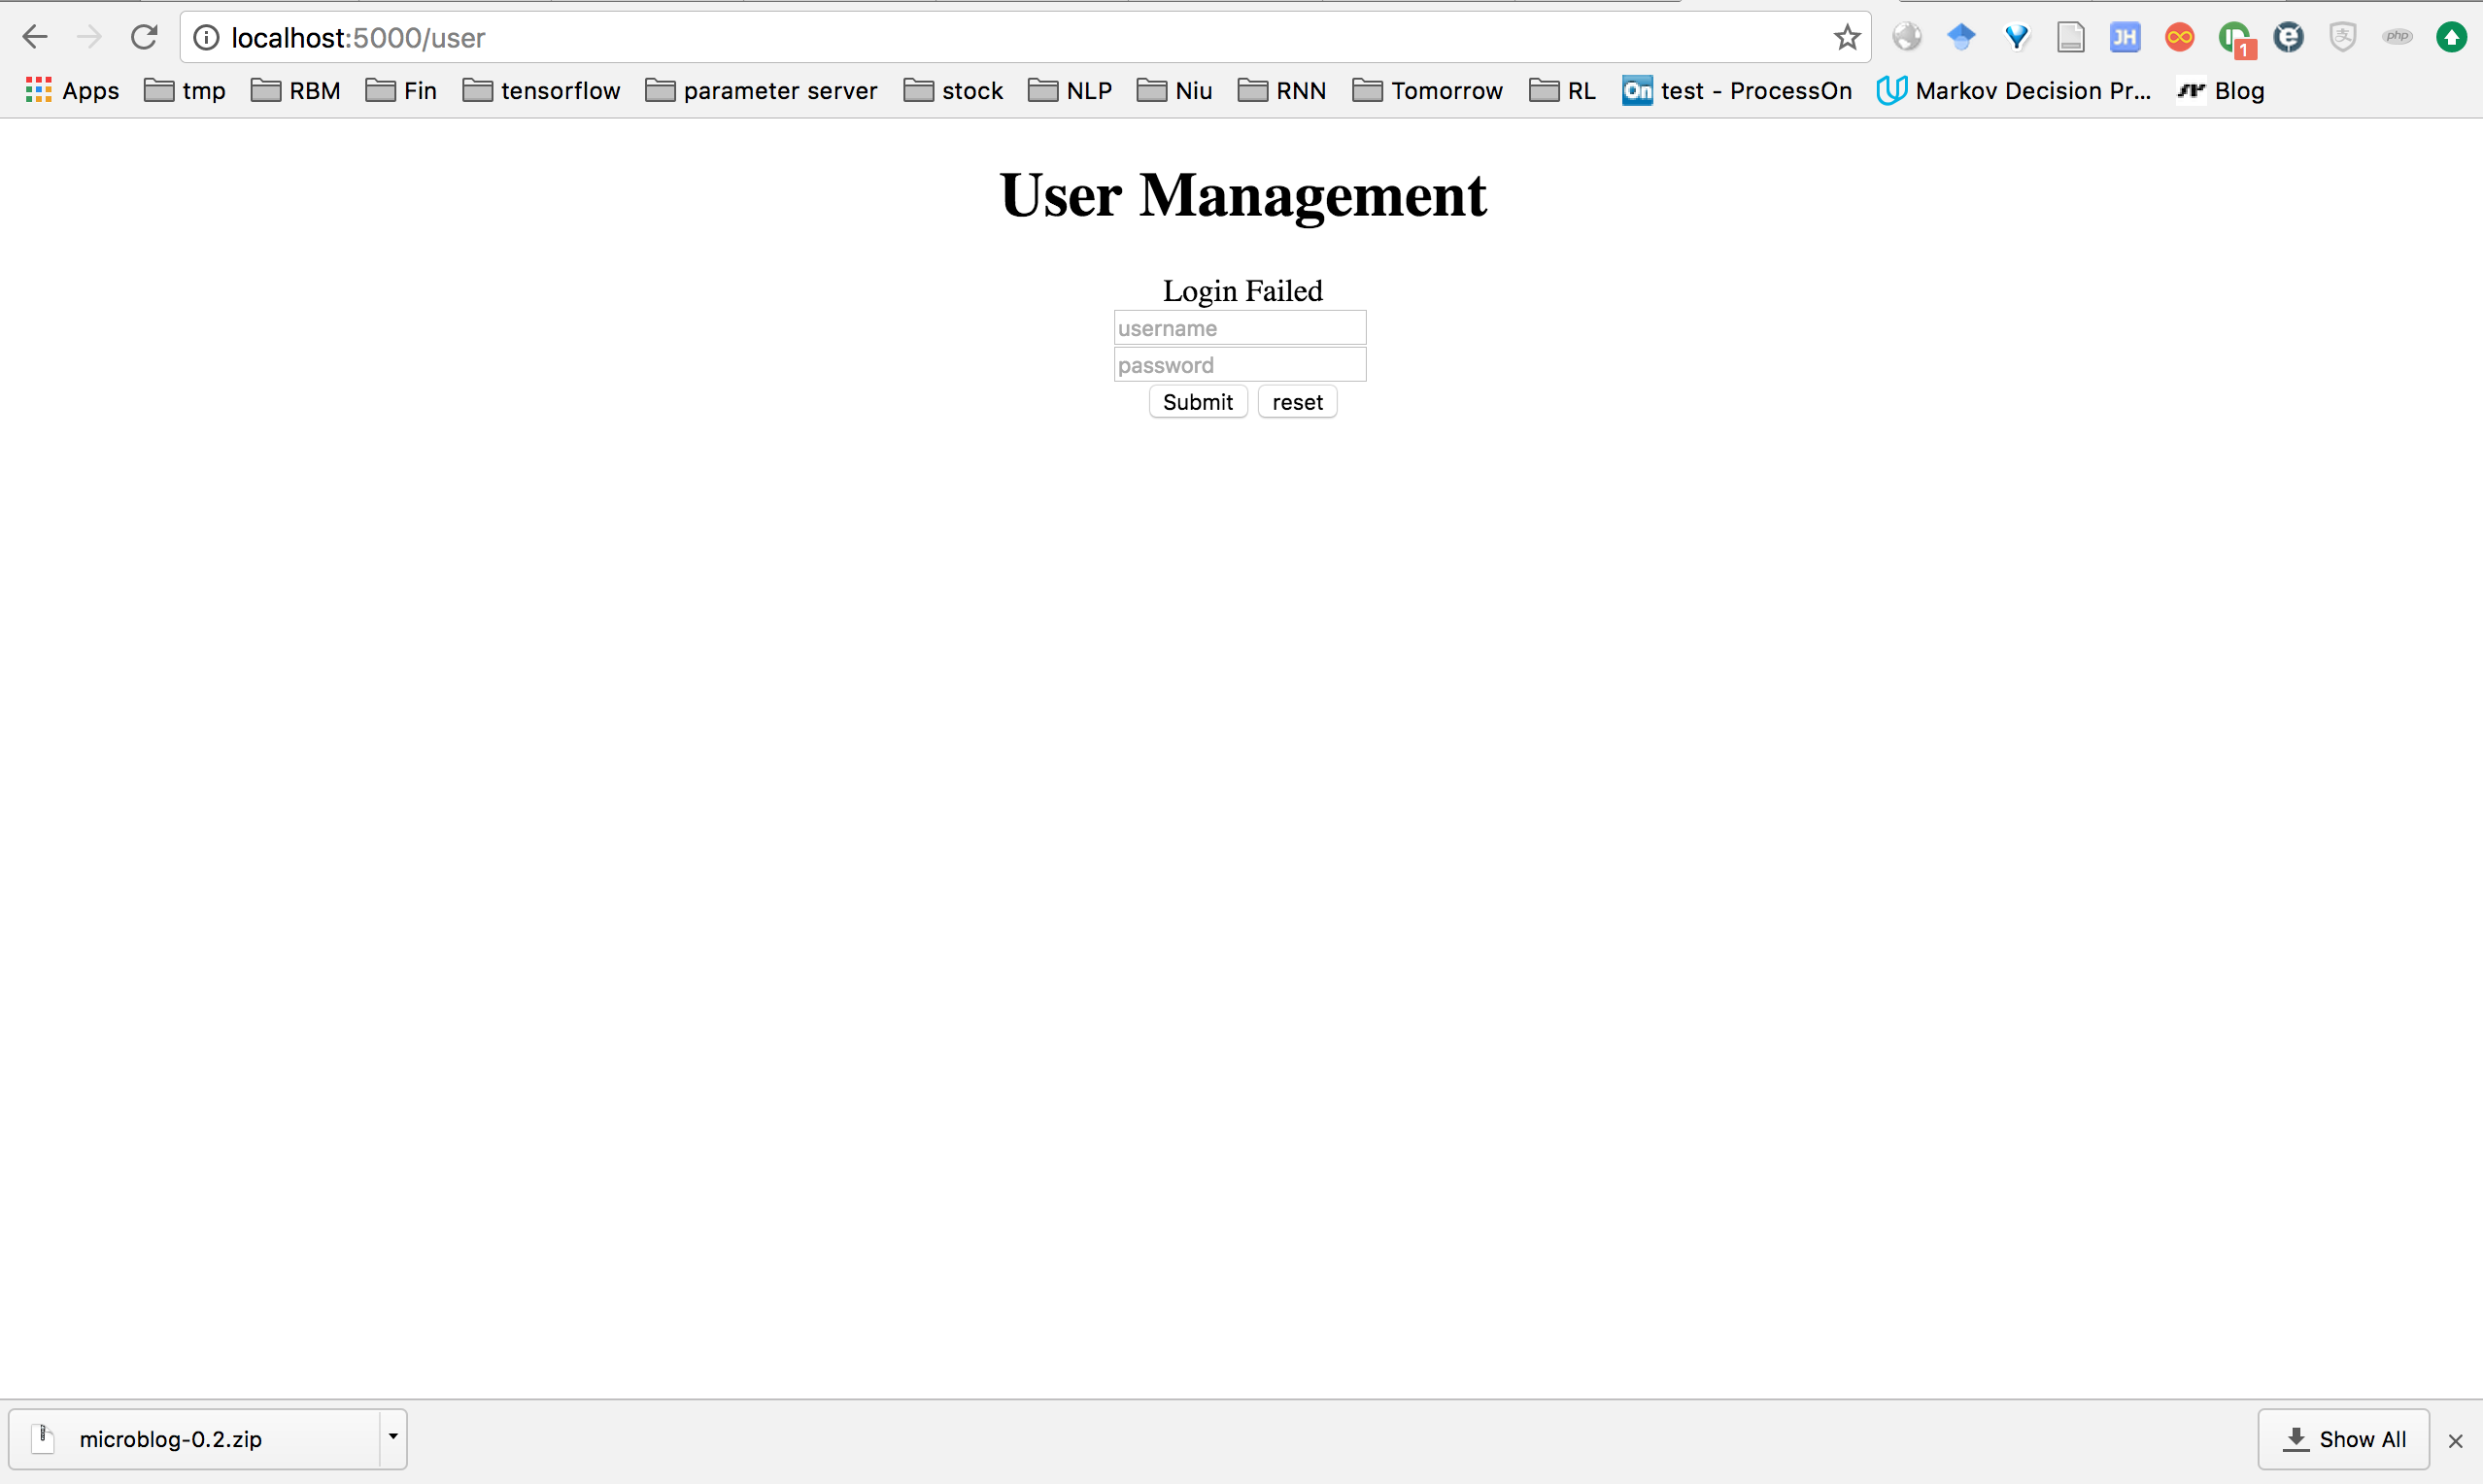
运行以上代码之后,我们点击 Submit 按钮之后,就会显示 message 传递的 Login Failed 参数,运行界面如下:

以上方法基本就能实现表单和 flask 框架之间的信息传递,但是当需要传递的信息很多时,上面这种方法就会显得非常臃肿和麻烦。那么,我们就可以利用 flask 的扩展来简化我们的代码。首先我们需要在终端中安装这个扩展,可以利用以下命令来安装:
sudo pip install Flask-wtf之后,我们可以利用这个扩展在表单中构建用户名和密码的输入框。首先我们需要引入表单类、文本框、密码框和验证器,如下:
# 引入表单类
from wtforms import Form
# 引入文本框
from wtforms import TextField
# 引入密码框
from wtforms import PasswordField
# 引入验证器,验证表单内容是否正确
from wtforms import validators
之后,修改 app.py 中的代码,如下:
#!/usr/bin/env python
# -*- coding: utf-8 -*-

from flask import Flask
from flask import request, render_template, redirect

app = Flask(__name__)

# 引入表单类
from wtforms import Form
# 引入文本框
from wtforms import TextField
# 引入密码框
from wtforms import PasswordField
# 引入验证器,验证表单内容是否正确
from wtforms import validators

class LoginForm(Form):
    # 表名 username 是一个必须填入的对象,用验证器来进行验证
    username = TextField("username", [validators.Required()])
    password = PasswordField("password", [validators.Required()])

@app.route('/user', methods = ['GET', 'POST'])
def hello_world():

    myForm = LoginForm(request.form)
    return render_template('index.html', form = myForm, message = False)

if __name__ == '__main__':
    app.run()
之后,我们修改 index.html 中的代码,如下:
<!DOCTYPE html>
<html>
<head>
    <title> flask form </title>
</head>
<body>
    <div align="center">
    <h1> User Management </h1>
    {% if message %}
        {{message}}
    {% endif %}
    <form method="post">
        Username: {{form.username}} <br />
        Password: {{form.password}} <br />
        <input type="submit" value="Submit" />
        <input type="reset" value="reset" />
    </form>
    </div>
</body>
</html>
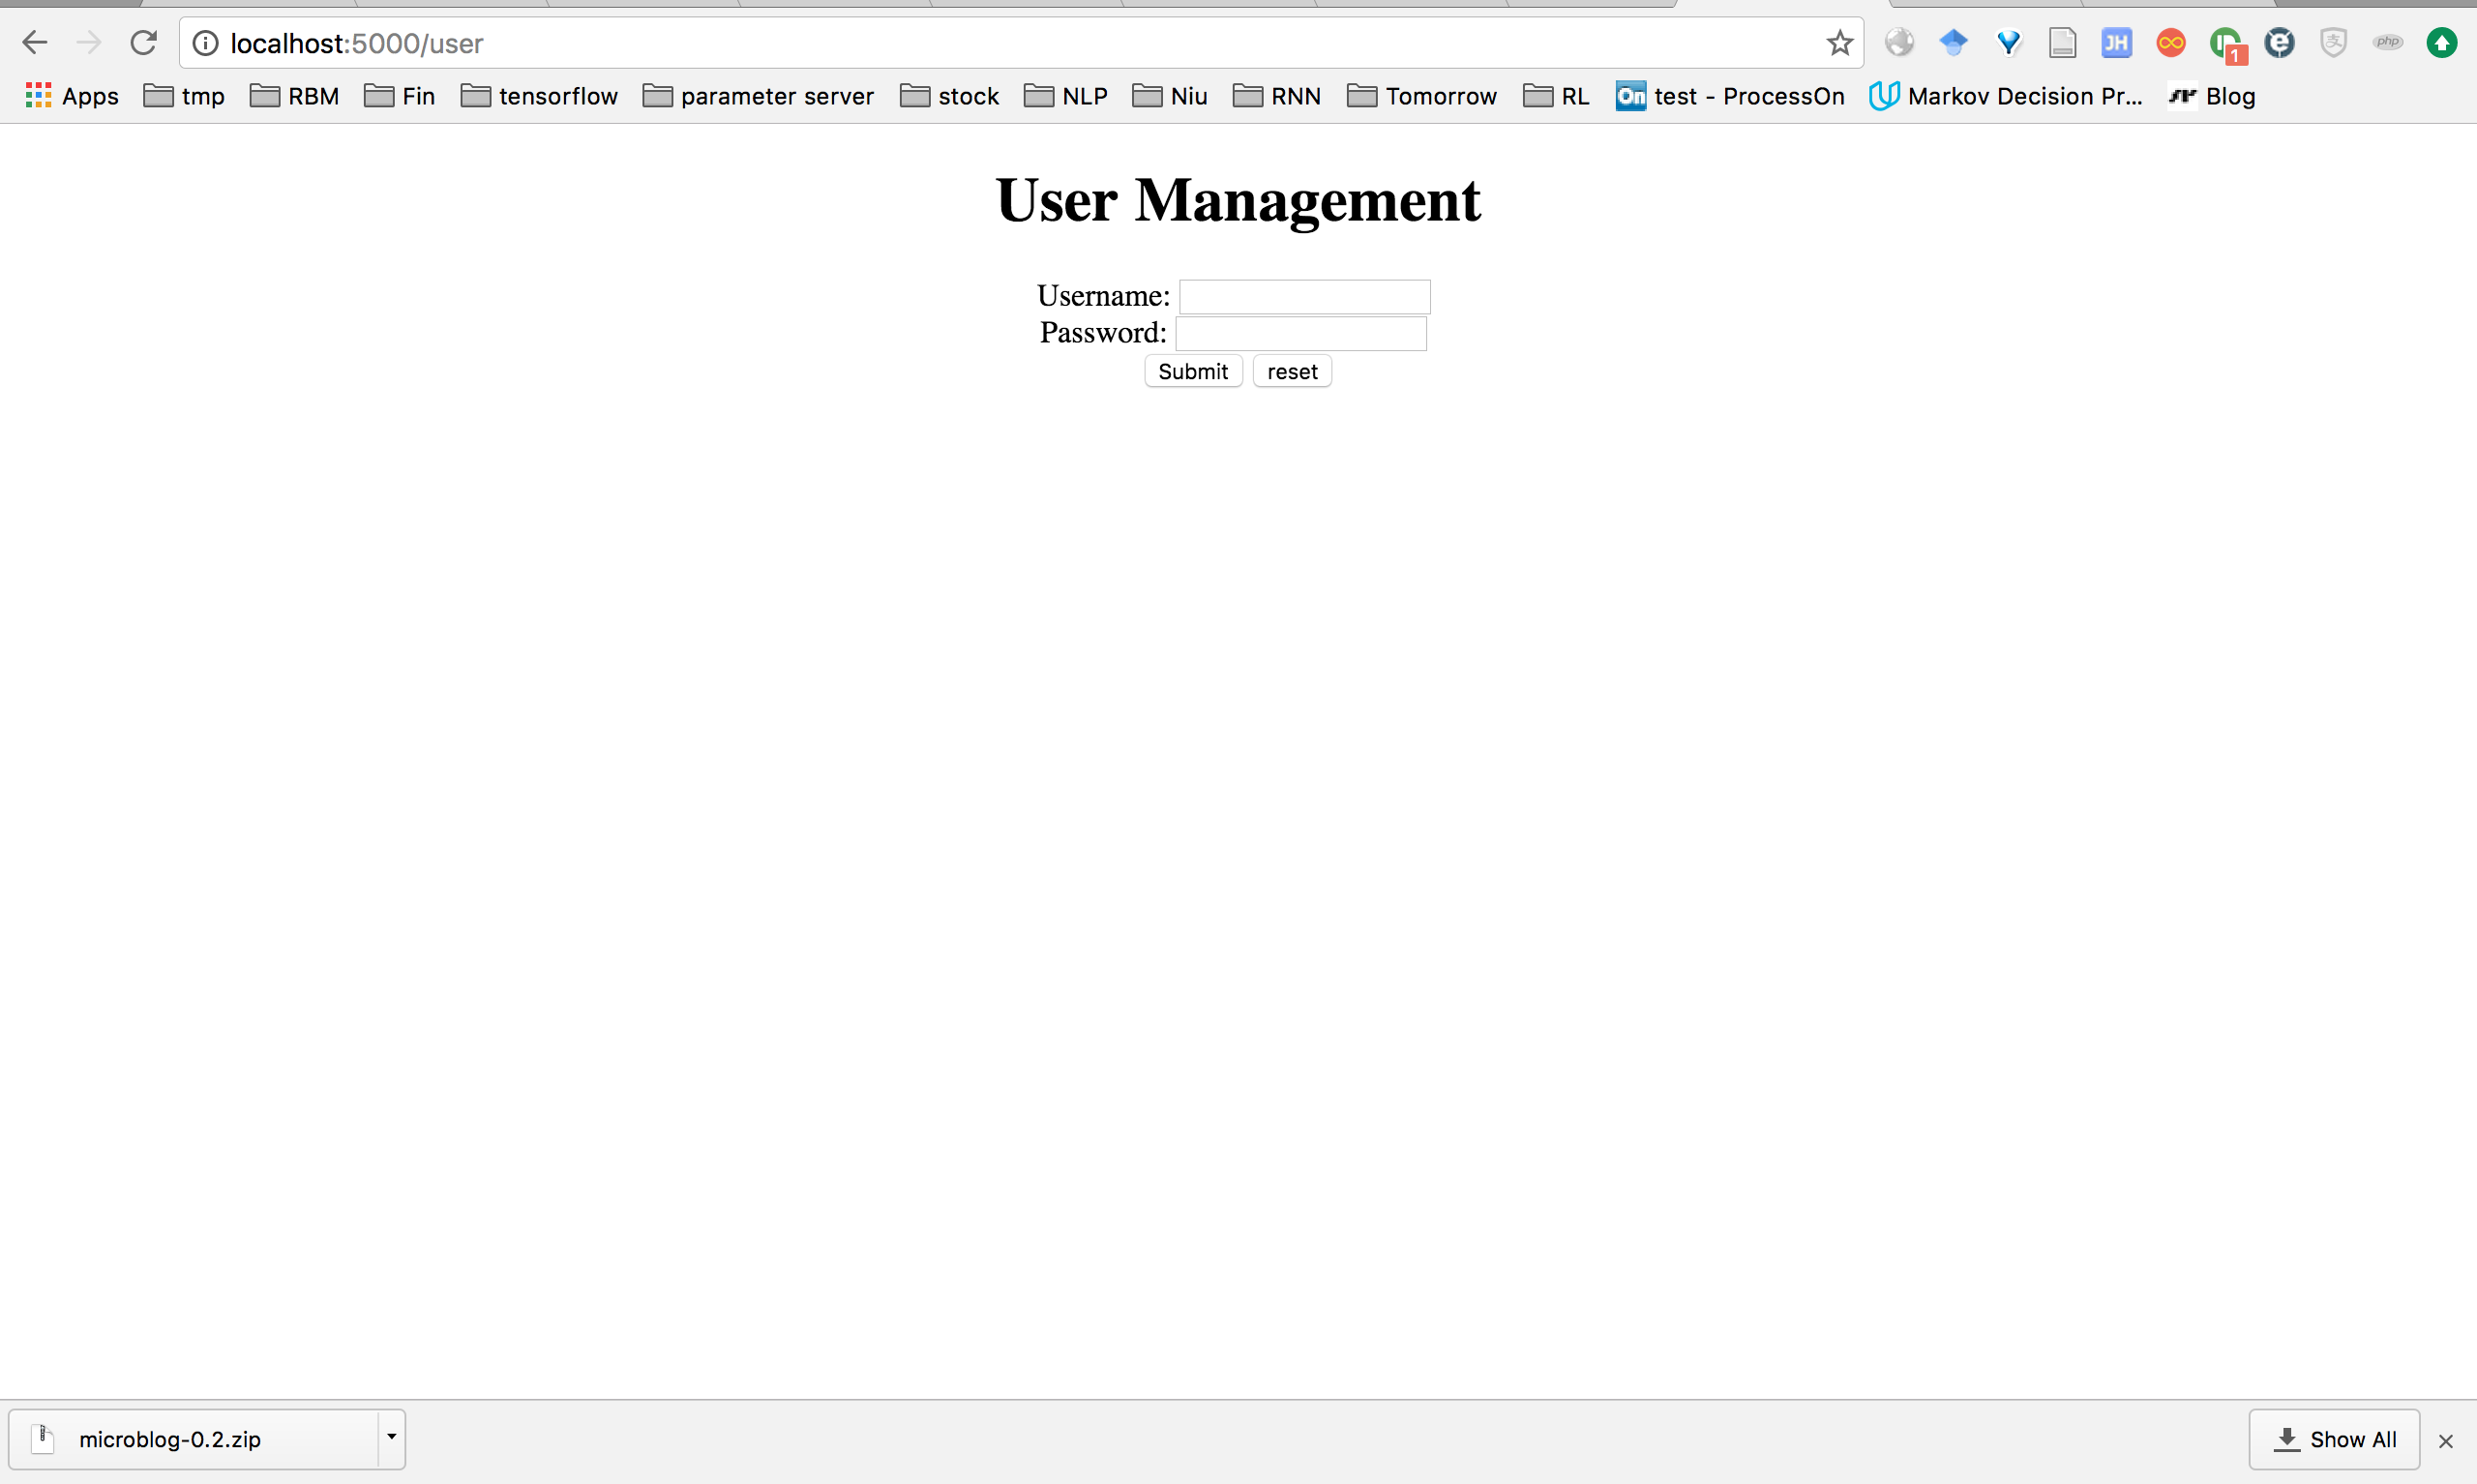
然后,我们运行一下代码,可以得到和上面一样的界面,运行界面如下:

之后,我们向 app.py 中加入验证表单的代码,具体如下:
#!/usr/bin/env python
# -*- coding: utf-8 -*-

from flask import Flask
from flask import request, render_template, redirect

app = Flask(__name__)

# 引入表单类
from wtforms import Form
# 引入文本框
from wtforms import TextField
# 引入密码框
from wtforms import PasswordField
# 引入验证器,验证表单内容是否正确
from wtforms import validators

class LoginForm(Form):
    # 表名 username 是一个必须填入的对象,用验证器来进行验证
    username = TextField("username", [validators.Required()])
    password = PasswordField("password", [validators.Required()])

@app.route('/user', methods = ['GET', 'POST'])
def hello_world():

    myForm = LoginForm(request.form)
    if request.method == 'POST':
        # myForm.validators() 判断表单里面的值是否有效
        if myForm.username.data == 'admin' and myForm.password.data == 'admin' and myForm.validators():
            return redirect('http://www.jianshu.com/notebooks/6873024/latest')
        else:
            message = "Login Failed"
            return render_template('index.html', form = myForm, message = message)
    return render_template('index.html', form = myForm, message = False)

if __name__ == '__main__':
    app.run()
至此,你应该已经学会了,如何使得flask 和表单之间的链接吧。


 128
128

 被折叠的 条评论
为什么被折叠?


