


LNMP架构介绍
LNMP代表的就是:Linux系统下Nginx+MySQL+PHP这种网站服务器架构。Nginx中的PHP是以fastcgi的方式结合Nginx的,可以理解为Nginx代理了PHP的fastcgi。
LNMP工作模式
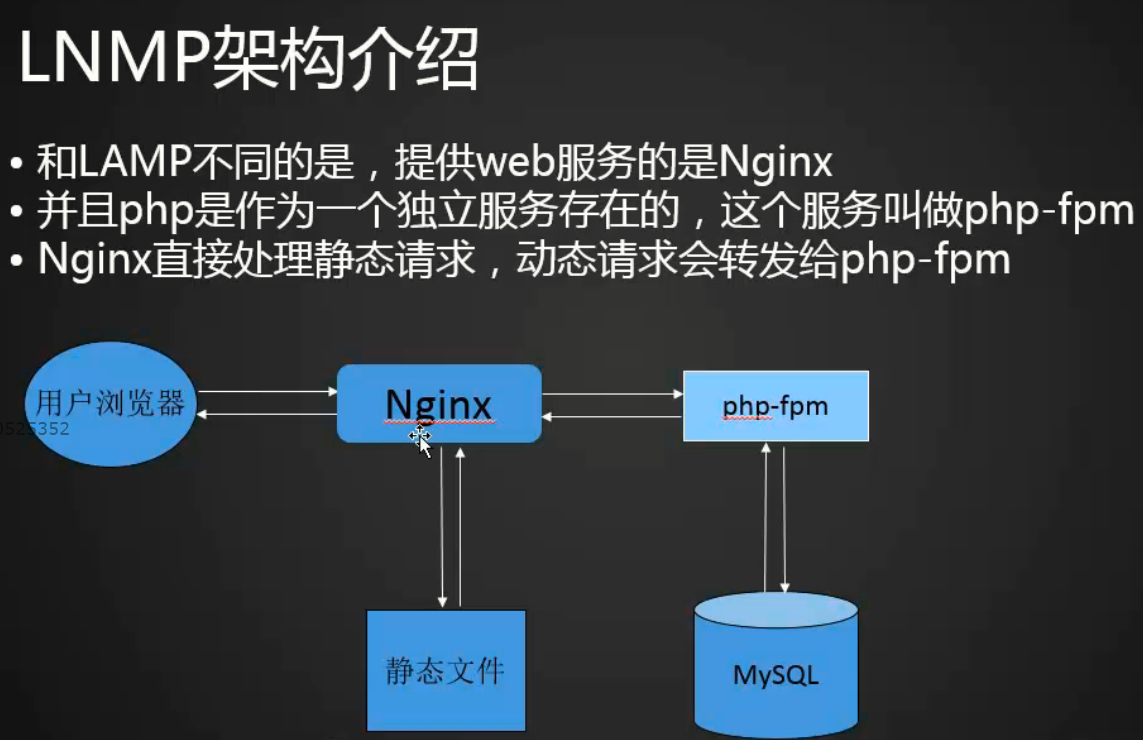
和LAMP不同的是,LNMP中提供web服务的是Nginx
在LNMP架构中PHP是作为一个独立的服务存在的,这个服务叫做php-fpm。
Nginx直接处理静态请求(支持的并发更高,速度比Apache快),动态请求转发给php-fpm处理。
安装MySQL
1. [root@harry-01 ~]# cd /usr/local/src/     //进入目录下,以后会默认把该目录作为软件包的下载存放目录
2. [root@harry-01 src]# ls
3. mysql-5.6.39-linux-glibc2.12-x86_64.tar.gz
4. [root@harry-01 src]# ^C
5. [root@harry-01 src]
 [root@harry-01 src]# tar zxvf mysql-5.6.39-linux-glibc2.12-x86_64.tar.gz  //解压文件[root@harry-01 src]# tar zxvf mysql-5.6.39-linux-glibc2.12-x86_64.tar.gz  //解压文件
[root@harry-01 src]# mv mysql-5.6.39-linux-glibc2.12-x86_64 /usr/local/mysql   //确认/usr/local/mysql没有创建,不然下面的命令会变成移动,而不是重命名

[root@harry-01 src]# cd /usr/local/mysql/
[root@harry-01 mysql]# ls
bin  COPYING  data  docs  include  lib  man  mysql-test  README  scripts  share  sql-bench  support-files
[root@harry-01 mysql]# useradd -s /sbin/nologin mysql  //建立MySQL用户,因为启动MySQL需要该用户
[root@harry-01 mysql]# mkdir -p /data/mysql   // 创建datadir,数据库文件会放到里面
[root@harry-01 mysql]# chown -R mysql:mysql /data/mysql   // 更改权限
[root@harry-01 mysql]# ./scripts/mysql_install_db --user=mysql --datadir=/data/mysql 
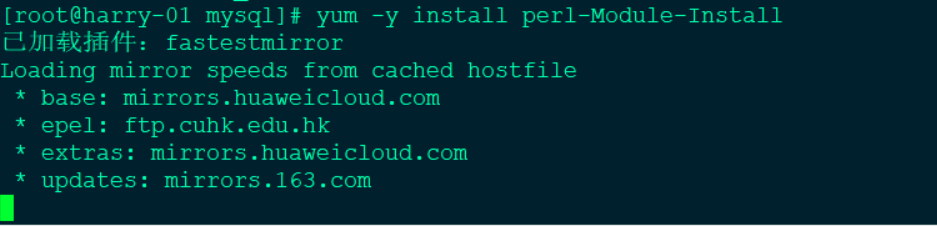
出现错误信息,因为缺少包perl-Module-Install,使用yum 安装它
[root@harry-01 mysql]# ./scripts/mysql_install_db --user=mysql --datadir=/data/mysql
Installing MySQL system tables..../bin/mysqld: error while loading shared libraries: libaio.so.1: cannot open shared object file: No such file or directory
[root@harry-01 mysql]# echo $?
141
//错误原因: 缺少libaio库文件
解决方法:yum -y install libaio*
再次执行 ./scripts/mysql_install_db --user=mysql --datadir=/data/mysql
root@harry-01 mysql]# yum -y install libaio*
[root@harry-01 mysql]# ./scripts/mysql_install_db --user=mysql --datadir=/data/mysql
Installing MySQL system tables...2018-12-01 02:05:05 0 [Warning] TIMESTAMP with implicit DEFAULT value is deprecated. Please use --explicit_defaults_for_timestamp server option (see documentation for more details).
2018-12-01 02:05:05 0 [Note] Ignoring --secure-file-priv value as server is running with --bootstrap.
2018-12-01 02:05:05 0 [Note] ./bin/mysqld (mysqld 5.6.39) starting as process 2735 ...

[root@harry-01 mysql]# echo $?    // 输出结果是0,说明执行正确
0
[root@harry-01 mysql]#
配置mysql
#拷贝配置文件

[root@harry-01 mysql]# cp support-files/my-default.cnf /etc/my.cnf
cp:是否覆盖"/etc/my.cnf"? y
// 因为系统默认就有/etc/my.cnf,所以会提示是否覆盖,直接按y即可。
[root@harry-01 mysql]# vim /etc/my.cnf  //打开配置文件,进行一些配置

配置内容如下:
[mysqld]

# Remove leading # and set to the amount of RAM for the most important data
# cache in MySQL. Start at 70% of total RAM for dedicated server, else 10%.
 innodb_buffer_pool_size = 128M

# Remove leading # to turn on a very important data integrity option: logging
# changes to the binary log between backups.
 log_bin

# These are commonly set, remove the # and set as required.
 basedir = /usr/local/mysql
 datadir = /data/mysql
 port = 3306
 server_id = 128
 socket = /tmp/mysql.sock

# Remove leading # to set options mainly useful for reporting servers.
# The server defaults are faster for transactions and fast SELECTs.
# Adjust sizes as needed, experiment to find the optimal values.
 join_buffer_size = 128M
 sort_buffer_size = 2M
 read_rnd_buffer_size = 2M

sql_mode=NO_ENGINE_SUBSTITUTION,STRICT_TRANS_TABLES
然后复制启动脚本并修改其属性:
[root@harry-01 mysql]# cp support-files/mysql.server /etc/init.d/mysqld
[root@harry-01 mysql]# chmod 755 /etc/init.d/mysqld // 赋予执行权限
[root@harry-01 mysql]# vim /etc/init.d/mysqld //修改启动脚本,内容如下:

basedir = /usr/local/mysql
datadir = /data/mysql

[root@harry-01 mysql]# chkconfig --add mysqld //把mysqld服务加入到系统服务列表里去
[root@harry-01 mysql]# chkconfig mysqld on  //使其开机启动
[root@harry-01 mysql]# service mysqld start  //启动服务
/etc/init.d/mysqld: line 46: basedir: command not found
/etc/init.d/mysqld: line 47: datadir: command not found
Starting MySQL.Logging to '/data/mysql/harry-01.err'.
. SUCCESS!
查看mysql进程是否启动和它的端口
ps aux | grep mysql
netstat -lntp mysql默认端口3306

PHP安装
和LAMP安装PHP有区别,需要开启php-fpm服务。
安装包卸载&解压
[root@harry-01 src]# ls
mysql-5.6.39-linux-glibc2.12-x86_64.tar.gz  php-5.6.30.tar.bz2
[root@harry-01 src]# tar -jxvf php-5.6.30.tar.bz2
创建账户 (该账号用来运行php-fpm服务,因为在LNMP环境中,PHP是以一种服务的形式独立存在的。)
[root@harry-01 php-5.6.30]# useradd -s /sbin/nologin php-fpm环境配置
[root@harry-01 php-5.6.30]# ./configure --prefix=/usr/local/php-fpm --with-config-file-path=/usr/local/php-fpm/etc --enable-fpm --with-fpm-user=php-fpm --with-fpm-group=php-fpm --with-mysql=/usr/local/mysql/ --with-mysqli=/usr/local/mysql/bin/mysql_config --with-pdo-mysql=/usr/local/mysql --with-mysql-sock=/tmp/mysql.sock --with-libxml-dir --with-gd --with-jpeg-dir --with-png-dir --with-freetype-dir --with-iconv-dir --with-zlib-dir --with-mcrypt --enable-soap --enable-gd-native-ttf --enable-ftp --enable-mbstring --enable-exif --with-pear --with-pear --with-curl --with-openssl报错:
checking for xml2-config path...
configure: error: xml2-config not found. Please check your libxml2 installation.
解决办法:
#yum install -y libxml2 libxml2-devel

checking for pkg-config... /usr/bin/pkg-config
configure: error: Cannot find OpenSSL's <evp.h>

解决办法
#yum install -y openssl openssl-devel


configure: error: Please reinstall the libcurl distribution -
    easy.h should be in <curl-dir>/include/curl/

解决办法:
#yum install -y libcurl libcurl-devel


configure: error: jpeglib.h not found.
解决办法:
# yum install -y libjpeg libjpeg-turbo-devel


configure: error: png.h not found.
解决办法:
# yum install -y libpng libpng-devel


configure: error: freetype-config not found.
解决办法:
# yum install -y freetype freetype-devel

configure: error: mcrypt.h not found. Please reinstall libmcrypt.
解决办法:
# yum install -y libmcrypt libmcrypt-devel
配置完成后进行检测:
[root@harry-01 php-5.6.30]# echo $?
0
[root@harry-01 php-5.6.30]#

总结一下需要安装的包:

 yum install  -y  gcc gcc-c++ libxml2-devel openssl-devel libcurl-devel libjpeg-devel libpng-devel freetype libmcrypt-devel
编译&安装
[root@harry-01 php-5.6.30]# make
[root@harry-01 php-5.6.30]# make install
执行PHP相关命令的两种方式:
方法一:
[root@harry-01 php-5.6.30]# /usr/local/php-fpm/sbin/php-fpm -m

方法二:
[root@harry-01 ~]# /usr/local/php-fpm/bin/php -m
配置文件调试
切换至配置文件所在目录:
[root@harry-01 ~]# cd /usr/local/php-fpm/etc/

手动添加配置文件,写入如下内容:
[global]
#定义全局参数
pid = /usr/local/php-fpm/var/run/php-fpm.pid
error_log = /usr/local/php-fpm/var/log/php-fpm.log
[www]
listen = /tmp/php-fcgi.sock
#监听地址,也可以写:listen = 127.0.0.1::9000,本地监听,也可以监听其他IP:port

#此处格式会影响配置Nginx和PHP结合时Nginx寻址PHP的路径

listen.mode = 666
#当监听的为socket文件时该部分才生效,用于指定.sock文件的权限
user = php-fpm
group = php-fpm
#定义php-fpm服务的用户
pm = dynamic
pm.max-children = 50
pm.start_servers = 20
pm.min_spare_servers = 5
p.max_spare_servers = 35
pm.max_requests = 500
rlimit_files = 1024
#以上部分为进程相关信息
配置启动脚本
#切换至文件源目录:
[root@harry-01 etc]# cd /usr/local/src/php-5.6.30

#添加启动脚本到系统配置:
[root@harry-01 php-5.6.30]# cp sapi/fpm/init.d.php-fpm /etc/init.d/php-fpm

#更改文件权限:
[root@harry-01 php-5.6.30]# chmod 755 /etc/init.d/php-fpm
添加到系统服务:
[root@harry-01 php-5.6.30]# chkconfig --add php-fpm
设置开机启动:
[root@harry-01 php-5.6.30]# chkconfig php-fpm on
启动php-fpm服务:
[root@harry-01 php-5.6.30]# service php-fpm start
Nginx介绍
Nginx("engine x")是一款轻量级的Web 服务器/反向代理服务器及电子邮件(IMAP/POP3)代理服务器,并在一个BSD-like 协议下发行。其特点是占有内存少,并发能力强,事实上nginx的并发能力确实在同类型的网页服务器中表现较好,中国大陆使用nginx网站用户有:百度、新浪、网易、腾讯、 淘宝等。
应用场景:
web服务器、反向代理、负载均衡
Nginx分支:
淘宝基于Nginx开发的Tengine,使用上和Nginx一致,服务名,配置文件名都一样,和Nginx的最大区别在于Tengine增加了一些定制化模块,在安全限速方面表现突出,另外它支持对js,css合并。
OpenResty
OpenResty是一个基于Nginx与Lua的高性能Web平台,其内部集成了大量精良的Lua库、第三方模块以及大多数的依赖项。用于方便地搭建能够处理超高并发、扩展性极高的动态 Web 应用、Web 服务和动态网关。OpenResty通过汇聚各种设计精良的Nginx模块(主要由OpenResty团队自主开发),从而将Nginx有效地变成一个强大的通用Web应用平台。这样,Web开发人员和系统工程师可以使用Lua脚本语言调动Nginx支持的各种C以及Lua模块,快速构造出足以胜任10K乃至1000K以上单机并发连接的高性能Web应用系统。
Lua
Lua是一种轻量级、可嵌入式的脚本语言,这样可以非常容易的嵌入到其他语言中使用。另外Lua提供了协程并发,即以同步调用的方式进行异步执行,从而实现并发,比起回调机制的并发来说代码更容易编写和理解,排查问题也会容易。Lua还提供了闭包机制,函数可以作为First Class Value 进行参数传递,另外其实现了标记清除垃圾收集。因为Lua的小巧轻量级,可以在Nginx中嵌入Lua VM,请求的时候创建一个VM,请求结束的时候回收VM
ngx_lua
ngx_lua是Nginx的一个模块,将Lua嵌入到Nginx中,从而可以使用Lua来编写脚本,这样就可以使用Lua编写应用脚本,部署到Nginx中运行,即Nginx变成了一个Web容器;这样开发人员就可以使用Lua语言开发高性能Web应用了。ngx_lua提供了与Nginx交互的很多的API(API就是操作系统留给应用程序的一个调用接口,应用程序通过调用操作系统的API而使操作系统去执行应用程序的命令/动作。),对于开发人员来说只需要学习这些API就可以进行功能开发,而对于开发web应用来说,如果接触过Servlet的话,其开发和Servlet类似,无外乎就是知道接收请求、参数解析、功能处理、返回响应这几步的API是什么样子的。
Nginx安装
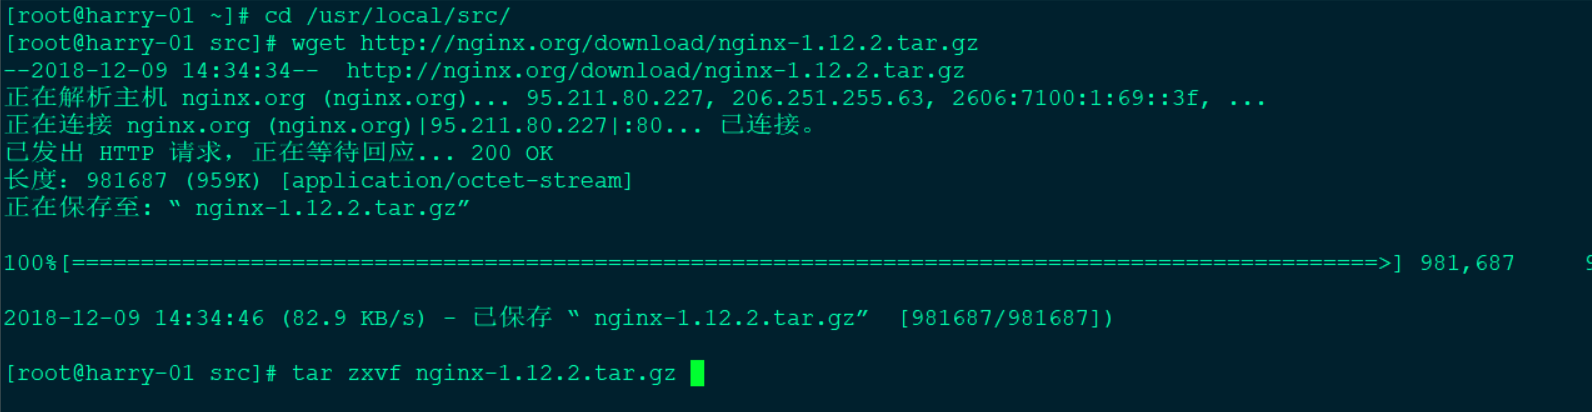
下载并解压安装包
配置编译选项
[root@harry-01 src]# cd nginx-1.12.2
[root@harry-01 nginx-1.12.2]# ./configure --prefix=/usr/local/nginx
编译安装:
[root@harry-01 nginx-1.12.2]# make && make install
编写Nginx启动脚本并加入系统服务和开机启动
[root@harry-01 nginx-1.12.2]# vim /etc/init.d/nginx

内容如下:
#!/bin/bash
# chkconfig: - 30 21
# description: http service.
# Source Function Library
. /etc/init.d/functions
# Nginx Settings

NGINX_SBIN="/usr/local/nginx/sbin/nginx"
NGINX_CONF="/usr/local/nginx/conf/nginx.conf"
NGINX_PID="/usr/local/nginx/logs/nginx.pid"
RETVAL=0
prog="Nginx"

start()
{
    echo -n $"Starting $prog: "
    mkdir -p /dev/shm/nginx_temp
    daemon $NGINX_SBIN -c $NGINX_CONF
    RETVAL=$?
    echo
    return $RETVAL
}

stop()
{
    echo -n $"Stopping $prog: "
    killproc -p $NGINX_PID $NGINX_SBIN -TERM
    rm -rf /dev/shm/nginx_temp
    RETVAL=$?
    echo
    return $RETVAL
}

reload()
{
    echo -n $"Reloading $prog: "
    killproc -p $NGINX_PID $NGINX_SBIN -HUP
    RETVAL=$?
    echo
    return $RETVAL
}

restart()
{
    stop
    start
}

configtest()
{
    $NGINX_SBIN -c $NGINX_CONF -t
    return 0
}

case "$1" in
  start)
        start
        ;;
  stop)
        stop
        ;;
  reload)
        reload
        ;;
  restart)
        restart
        ;;
  configtest)
        configtest
        ;;
  *)
        echo $"Usage: $0 {start|stop|reload|restart|configtest}"
        RETVAL=1
esac

exit $RETVAL

更改Nginx配置文件
[root@harry-01 conf]# ls
fastcgi.conf          fastcgi_params.default  mime.types          nginx.conf.default   uwsgi_params
fastcgi.conf.default  koi-utf                 mime.types.default  scgi_params          uwsgi_params.default
fastcgi_params        koi-win                 nginx.conf          scgi_params.default  win-utf
[root@harry-01 conf]# mv nginx.conf nginx.conf.bak  //改名
[root@harry-01 conf]#

[root@harry-01 conf]# vim nginx.conf
内容如下:
user nobody nobody;
worker_processes 2;
error_log /usr/local/nginx/logs/nginx_error.log crit;
pid /usr/local/nginx/logs/nginx.pid;
worker_rlimit_nofile 51200;

events
{
    use epoll;
    worker_connections 6000;
}

http
{
    include mime.types;
    default_type application/octet-stream;
    server_names_hash_bucket_size 3526;
    server_names_hash_max_size 4096;
    log_format combined_realip '$remote_addr $http_x_forwarded_for [$time_local]'
    ' $host "$request_uri" $status'
    ' "$http_referer" "$http_user_agent"';
    sendfile on;
    tcp_nopush on;
    keepalive_timeout 30;
    client_header_timeout 3m;
    client_body_timeout 3m;
    send_timeout 3m;
    connection_pool_size 256;
    client_header_buffer_size 1k;
    large_client_header_buffers 8 4k;
    request_pool_size 4k;
    output_buffers 4 32k;
    postpone_output 1460;
    client_max_body_size 10m;
    client_body_buffer_size 256k;
    client_body_temp_path /usr/local/nginx/client_body_temp;
    proxy_temp_path /usr/local/nginx/proxy_temp;
    fastcgi_temp_path /usr/local/nginx/fastcgi_temp;
    fastcgi_intercept_errors on;
    tcp_nodelay on;
    gzip on;
    gzip_min_length 1k;
    gzip_buffers 4 8k;
    gzip_comp_level 5;
    gzip_http_version 1.1;
    gzip_types text/plain application/x-javascript text/css text/htm
    application/xml;

    server
    {
        listen 80;
        server_name localhost;
        index index.html index.htm index.php;
        root /usr/local/nginx/html;

        location ~ \.php$
        {
            include fastcgi_params;
            fastcgi_pass unix:/tmp/php-fcgi.sock;
            fastcgi_index index.php;
            fastcgi_param SCRIPT_FILENAME /usr/local/nginx/html$fastcgi_script_name;
        }
    }
}
启动nginx
[root@harry-01 conf]# service nginx start
Starting nginx (via systemctl):                            [  确定  ]
[root@harry-01 conf]# ps aux | grep nginx
root       8307  0.0  0.1 122920  2108 ?        Ss   15:18   0:00 nginx: master process /usr/sbin/nginx
nginx      8308  0.0  0.1 123308  3144 ?        S    15:18   0:00 nginx: worker process
root       8317  0.0  0.0 112724   988 pts/0    R+   15:18   0:00 grep --color=auto nginx
[root@harry-01 conf]#
测试是否正确解析PHP
[root@harry-01 conf]# vim /usr/local/nginx/html/test.php


<?php

echo "This is a test php page!"

;?>


 277
277


 被折叠的 条评论
为什么被折叠?
被折叠的 条评论
为什么被折叠?
 到【灌水乐园】发言


