


一、Spring的由来与好处
Spring是为了解决企业级应用开发的复杂性而创建的,使用Spring可以简化Java开发。为了降低Java开发的复杂性,Spring主要采取了以下4中关键策略:1、基于POJO的轻量级和最小侵入性编程;2、通过依赖注入和面向接口实现松耦合;3、基于切面和惯例进行声明式编程;4、通过切面和模板减少样式代码;
二、依赖注入的好处
依赖注入的最大收益就是松耦合。
三、Spring配置的可选方案
Spring主要提供了三种装配机制:
1、在XML中进行显示配置。
2、在Java中进行显示配置(JavaConfig)。
3、隐式的bean发现机制和自动装配。
我们可以根据自己的喜好来选择配置方案,也可以几种配置方式一起使用。
四、自动化装配bean
Spring从两个角度来实现自动化装配:
- 组件扫描(component scanning):Spring会自动发现应用上下文中的所创建的bean。
- 自动装配(autowiring):Spring自动满足bean之间的依赖。
1、创建可被发现的bean : 可以在类上使用 @Component 注解,告知Spring要为这个类创建bean,bean的ID为类名首字母小写。也可以为bean设置不同的ID,如:@Component("customName")。
@Component是通用的注解,它衍生出来的还有@Controller(一般加在控制层)、@Service(一般加在业务层)、@Repository(一般加在持久层),这些都是Spring提供的注解。
还有另外一种bean命名的方式,使用Java依赖注入规范中所提供的@Named注解来为bean设置ID。@Named和@Component在大多数场景中可以相互替换,但是不推荐使用@Named。
2、为bean添加注解实现自动装配:使用@Autowired 可以自动装配,@Autowired可以加在构造方法上,setter方法上,其他方法上,成员变量上,都可以自动装配。它有一个required参数,默认为true,表示如果没有匹配的bean,那么在应用上下文创建的时候,Spring会抛出一个异常。设置为false时,Spring会尝试执行自动装配,如果没有匹配的bean,会让这个bean处于为装配的状态,要注意进行null检查。
如果有多个bean匹配的话,我们可以使用@Primary与@Component组合使用,@Primary表示最喜欢的方案,但是多个类型相同的bean,都被标记了@Primary,Spring还是会分辨不出来。我们可以使用@Qualifier表示指定想要注入哪个bean,它可以与@Autowired和@Inject(Java依赖注入规范的注解)配合使用,如:
    //@Inject
    @Autowired
    @Qualifier("customName")
    private UserDao userDao;
也可以使用javax.annotation.Resource,直接指定名字,如:
    @Resource(name="customName")
    private UserDao userDao;
还有一种解决方案就是可以利用@Qualifier自定义注解,例如
@Target({ElementType.CONSTRUCTOR, ElementType.FIELD, ElementType.METHOD, ElementType.TYPE})
@Retention(RetentionPolicy.RUNTIME)
@Qualifier
public @interface TestAnno {
}
然后,发现类上:
@Component
@TestAnno
public class AnnoTestClass implements  CompactDisc {

    public void play() {
        System.out.println("test anno");
    }
}
注入上:
   @Autowired
   @TestAnno
   private UserDao userDao;
这样就可以自定义注解解决类型一致问题了。
3、开启注解扫描:组件扫描默认是不启用的,我们需要显示的配置以下Spring,从而让它去扫描带有上面注解的类,并为其创建bean。
方式一:通过JavaConfig配置:使用@ComponentScan注解,会默认扫描与配置类相同的包(包括下面的子包)。
@Configuration
@ComponentScan
public class UserConfig {
}
也可以配置基础包,在@ComponentScan的value属性中指明包的名称,如:@ComponentScan("com.caofanqi") ;也可以通过basePackages来指明,如:@ComponentScan(basePackages = "com.caofanqi") ,指定多个包,如:@ComponentScan(basePackages = {"com.caofanqi","org.spring"});还有指定包中所包含的类或接口:@ComponentScan(basePackageClasses = {UserService.class,ProductService.class}) ,这些类(UserService、ProductService)所在的包,会作为基础包,我们可以创建一个专门用于进行扫描的空标记接口。通过这个空接口,可以很好的避免后期重构修改类名。
方式二:如果使用XML来启动组件扫描的话,可以使用Spring Context命名空间的 <context:component-scan> 元素。如下所示:
<?xml version="1.0" encoding="UTF-8"?>
<beans xmlns="http://www.springframework.org/schema/beans"
  xmlns:xsi="http://www.w3.org/2001/XMLSchema-instance"
  xmlns:context="http://www.springframework.org/schema/context"
  xmlns:c="http://www.springframework.org/schema/c"
  xmlns:p="http://www.springframework.org/schema/p"
  xsi:schemaLocation="http://www.springframework.org/schema/beans http://www.springframework.org/schema/beans/spring-beans.xsd
		http://www.springframework.org/schema/context http://www.springframework.org/schema/context/spring-context.xsd">

  <!-- 开启注解扫描 -->
  <context:component-scan base-package="soundsystem" />

</beans>
<context:component-scan> 元素会有与@ComponentScan注解相对应的属性和元素。
4、代码测试
接口:
/**
 * 用户服务接口
 */
public interface UserService {

    void buy();
}

/**
 * 产品服务接口
 */
public interface ProductService {

    void show();
}
实现类:
@Component //通用的
//@Controller  一般用在控制层
//@Service   一般用在业务层
//@Repository  一般用在持久层
//@Named  Java注入依赖规范
public class UserServiceImpl  implements UserService {

    //@Resource
    //@Inject
    @Autowired
    //@Qualifier("productService")
    private ProductService productService;

    public void buy() {
        productService.show();
    }
}


//@Component("productService")
@Component
public class ProductServiceImpl implements ProductService {


    public void show() {
        System.out.println("产品展示!");
    }
}
配置类:
@Configuration
@ComponentScan(basePackages = "com.caofanqi")
public class UserConfig {
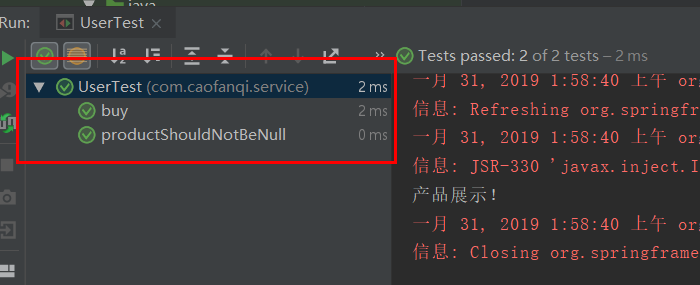
}测试类:
@RunWith(SpringJUnit4ClassRunner.class)
@ContextConfiguration(classes= UserConfig.class)
public class CDPlayerTest {


    //可以将打印到控制台的值进行比较
    @Rule
    public final SystemOutRule systemOutRule = new SystemOutRule().enableLog();

    @Autowired
    private ProductService productService;

    @Autowired
    private UserService userService;


    //测试productService是否装载成功
    @Test
    public void productShouldNotBeNull(){
        assertNotNull(productService);
    }

    //测试Autowired是否注入成功
    @Test
    public void buy() {
        userService.buy();
        assertEquals("产品展示!\r\n", systemOutRule.getLog());
    }

}
测试结果:
五、通过Java代码装配bean
虽然自动化配置很方便,但是有的时候还是需要显示的配置Spring,比如,使用第三方库中的组件,是没有在它的类上加@Component和@Autowired的。显示配置有两种,我们先来看Java代码装配。
1、创建配置类(JavaConfig):在类上添加@Configuration注解,表明这个类是一个配置类,该类应该包含在Spring应用上下文中如何创建bean的细节。尽管我们可以同时使用自动扫描和显示配置,但是为了学习JavaConfig,我们要把@ComponentScan注解移除。
2、声明bean:在JavaConfig中声明bean,需要编写一个方法,这个方法会创建所需类型的实例,然后在方法上添加@Bean注解,如下代码声明了ProductService bean :
    @Bean
    public ProductService productService(){
        return new ProductServiceImpl();
    }
默认情况下,bean的ID与带有@Bean注解的方法名是一样的;如果有需要也可以指定,如:@Bean(name="product") ;
3、JavaConfig实现注入:带有@Bean注解的方法可以采用任何必要的Java功能来产生bean实例。构造器,setting方法等等;换句话说,就是怎么创建都行,只要Java语言能创建出来。
①引用创建Bean的方法:虽然说看起来是调用了productService()方法得到的bean,但是并不是这样的,因为添加了@Bean注解,Spring会拦截所有对它的调用,并且确保直接返回该方法创建的bean,而不是每次都进行实际的调用。如果有另一个地方引用到了productService(),也会得到相同的bean,因为Spring中的bean默认是单例的。Spring会保证返回相同的实例。
    @Bean
    public UserServiceImpl userService(){
        UserServiceImpl userService = new UserServiceImpl();
        userService.setProductService(productService());
        return userService;
}②上面的容易让人误解,还可是使用方法传参:在这里userService方法请求一个ProductService作为参数。当Spring调用userService方法创建UserService bean 时,它会自动装配一个ProductService到配置方法中去,然后方法体就可以使用它。这种方式引用其他bean通常是最佳的选择。
    @Bean
    public UserServiceImpl userService(ProductService productService){
        UserServiceImpl userService = new UserServiceImpl();
        userService.setProductService(productService);
        return userService;
    }
六、通过XML装配bean
XML方式是存在最久远的方式,从Spring刚出现开始,就是用XML配置,但是XML配置相对来说比较繁琐。
1、创建XML配置规范:需要一个XML文件,如下
<?xml version="1.0" encoding="UTF-8"?>
<beans xmlns="http://www.springframework.org/schema/beans"
  xmlns:xsi="http://www.w3.org/2001/XMLSchema-instance"
  xmlns:context="http://www.springframework.org/schema/context"
  xsi:schemaLocation="http://www.springframework.org/schema/beans http://www.springframework.org/schema/beans/spring-beans.xsd
		http://www.springframework.org/schema/context http://www.springframework.org/schema/context/spring-context.xsd">


</beans>
2、声明bean:当Spring发现这个<bean>元素时,会调用默认构造器来创建bean。明显不如JavaConfig想怎么创建就怎么创建爽。
<bean class="com.caofanqi.service.impl.UserServiceImpl" />3、构造器注入bean:ref注入引用,value注入字面量
①<constructor-arg>元素:
  <bean id="userService" class="com.caofanqi.service.impl.UserServiceImpl">
      <constructor-arg ref="productService"/>
  </bean>
②Spring的c-命名空间:需要在头部引入声明模式;
xmlns:c="http://www.springframework.org/schema/c"然后:属性名以 c:开头,加构造器的参数名,加-ref,最后时需要引用bean的ID。
<bean id="userService" class="com.caofanqi.service.impl.UserServiceImpl" c:productService-ref="productService" />或则:使用参数的索引位置,从0开始,如果只有一个构造器参数,可以不用传,直接使用_-ref。
<bean id="userService" class="com.caofanqi.service.impl.UserServiceImpl" c:_0-ref="productService"/>4、构造器注入:字面量
①:
  <bean id="productService" class="com.caofanqi.service.impl.ProductServiceImpl" >
      <constructor-arg value="花花卡" />
      <constructor-arg value="1.0" />
  </bean>
②:
<bean id="productService" class="com.caofanqi.service.impl.ProductServiceImpl" c:name="花花卡" c:price="1.0" />或使用参数索引,只有一个参数可以使用_。
<bean id="productService" class="com.caofanqi.service.impl.ProductServiceImpl" c:_0="花花卡" c:_1="1.0" / >5、构造器注入 :集合
①:直接给null,但是会引起NPE
  <bean id="userService" class="com.caofanqi.service.impl.UserServiceImpl">
      <constructor-arg ref="productService"/>
    <constructor-arg><null/></constructor-arg>
</bean>②:<list>元素,它是<constructor-arg>的子元素,表明一个包含值的列表将会传递到构造器中。其中<value>元素用来指定列表中的每一个元素。也可以使用<ref>来替代<value>元素,实现bean的装配。<list>元素也可以使用<set>元素,区别是,Spring进行装配时,Set会去重,存放顺序没有保证。
  <bean id="userService" class="com.caofanqi.service.impl.UserServiceImpl">
      <constructor-arg ref="productService"/>
    <constructor-arg>
      <list>
        <value>张三</value>
        <value>李四</value>
        <value>王五</value>
      </list>
    </constructor-arg>
  </bean>
c-命名空间无法实现集合的装配。
6、设置属性
①:<property >元素标签
  <bean id="userService" class="com.caofanqi.service.impl.UserServiceImpl">
    <property name="productService" ref = "productService"/>
    <property name="userName" value="Tom" />
    <property name="friends">
      <list>
         <value>张三</value>
         <value>李四</value>
         <value>王五</value>
      </list>
    </property>
  </bean>
②:p-标签:
<bean id="userService" class="com.caofanqi.service.impl.UserServiceImpl" p:productService-ref="productService" />七、导入和混合配置
关于混合配置,需要知道的是,在自动装配是,它并不在意要装配的bean来自哪里。会考虑到Spring容器中所有的bean,不管它是在JavaConfig或XML中声明的还是通过组建扫描获取的。
1、JavaConfig:
①JavaConfig导入JavaConfig使用@Import注解,将配置导入,一般创建一个类,将多个配置放在一起。
@Import({UserConfig.class,ProductConfig.class})②JavaConfig导入XML配置,使用@ImportResource注解导入XML配置
@ImportResource(locations = "classpath:/META-INF/spring/spring.xml")2、XML:
①XML导入XML:使用<import>元素
<import resource="product.xml" />
②XML中使用JavaConfig:可以将JavaConfig配置成一个<bean>,然后在XML中使用。


 838
838

 被折叠的 条评论
为什么被折叠?
被折叠的 条评论
为什么被折叠?
 到【灌水乐园】发言


