


spring 提供了2 种AOP 实现方式:
1.1 Schema-based
1.1.1 每个通知都需要实现接口或类
1.1.2 配置spring 配置文件时在<aop:config>配置
2.2 AspectJ
2.2.1 每个通知不需要实现接口或类
2.2.2 配置spring 配置文件是在<aop:config>的子标签<aop:aspect>中配置
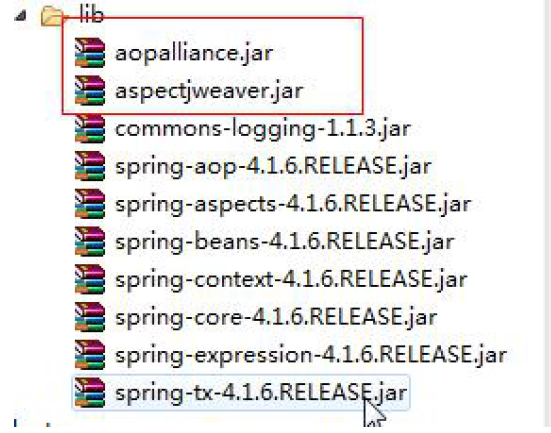
Schema-based 实现步骤:
1. 导入jar
2. 新建通知类
2.1 新建前置通知类
2.1.1 arg0: 切点方法对象Method 对象
2.1.2 arg1: 切点方法参数
2.1.3 arg2:切点在哪个对象中
public class MyBeforeAdvice implements MethodBeforeAdvice {
@Override
public void before(Method arg0, Object[] arg1, Objectarg2) throws Throwable {
System.out.println("执行前置通知");
}
}
2.2 新建后置通知类
2.2.1 arg0: 切点方法返回值
2.2.2 arg1:切点方法对象
2.2.3 arg2:切点方法参数
2.2.4 arg3:切点方法所在类的对象
public class MyAfterAdvice implementsAfterReturningAdvice {
@Override
public void afterReturning(Object arg0, Method arg1,Object[] arg2, Object arg3) throws Throwable {
System.out.println("执行后置通知");
}
}
3. 配置spring 配置文件
3.1 引入aop 命名空间
3.2 配置通知类的<bean>
3.3 配置切面
3.4 * 通配符,匹配任意方法名,任意类名,任意一级包名
3.5 如果希望匹配任意方法参数(..)
<?xml version="1.0" encoding="UTF-8"?>
<beans
xmlns="http://www.springframework.org/schema/beans"
xmlns:xsi="http://www.w3.org/2001/XMLSchema-instance"
xmlns:aop="http://www.springframework.org/schema/aop"
xsi:schemaLocation="http://www.springframework.org/schema/beans
http://www.springframework.org/schema/beans/spring-beans.xsd
http://www.springframework.org/schema/aop
http://www.springframework.org/schema/aop/spring-aop.xsd">
<!-- 配置通知类对象,在切面中引入-->
<bean id="mybefore" class="com.bjsxt.advice.MyBeforeAdvice"></bean>
<bean id="myafter" class="com.bjsxt.advice.MyAfterAdvice"></bean>
<!-- 配置切面-->
<aop:config>
<!-- 配置切点-->
<aop:pointcut expression="execution(* com.bjsxt.test.Demo.demo2())" id="mypoint"/>
<!-- 通知-->
<aop:advisor advice-ref="mybefore"
pointcut-ref="mypoint"/>
<aop:advisor advice-ref="myafter"
pointcut-ref="mypoint"/>
</aop:config>
<!-- 配置Demo 类,测试使用-->
<bean id="demo" class="com.bjsxt.test.Demo"></bean>
</beans>
4. 编写测试代码
public class Test {
public static void main(String[] args) {
   ApplicationContext ac = new
   ClassPathXmlApplicationContext("applicationContext.xml");
   Demo demo = ac.getBean("demo",Demo.class);
   demo.demo1();
   demo.demo2();
   demo.demo3();
 }
}


 6923
6923


 被折叠的 条评论
为什么被折叠?
被折叠的 条评论
为什么被折叠?
 到【灌水乐园】发言


