[版权申明:本文系作者原创,转载请注明出处]
文章出处:http://blog.csdn.net/sdksdk0/article/details/53151462
作者:朱培 ID:sdksdk0--------------------------------------------------------------------------------------------
最近在做一个移动电子商城的项目,在商品详情页处理这里处理的时候,因为我项目基本上都是用的jsp来写的页面,但是对于一个大型的购物网站来说,要解决掉速度的问题,所以需要把jsp换成html,这里我们可以使用Freemarker模板引擎来把jsp换成html供用户来访问.本文主要介绍的是如何使用Freemarker模板引擎来构建商品详情页,以及使用 CXF 做 webservice 发布服务,供后台添加商品时自动发布html网页。使用的是maven+SSM框架
一、FreeMarker
FreeMarker模板文件主要由如下4个部分组成:
1,文本:直接输出的部分
2,注释:<#-- ... -->格式部分,不会输出
3,插值:即${...}或#{...}格式的部分,将使用数据模型中的部分替代输出
4,FTL指令:FreeMarker指定,和HTML标记类似,名字前加#予以区分,不会输出
关于FreeMarker的语法使用等这里不再重复说明,有需要的朋友可以自行查阅相关资料。
步骤:1,在core项目的resource文件下新建:productDetail.ftl文件,放在cn.tf.ecps.ftl目录下。
关键代码内容如下:就是通过FreeMarker的语法进行取值。
<div class="r wr">
		<div class="product">
        	<h2>${item.itemName }<span class="gray f14">${item.promotion }</span></h2>
			<div class="showPro">
				<div class="big"><a id="showImg" class="cloud-zoom" href="${file_path }${item.imgs}" rel="adjustX:10,adjustY:-1"><img title="optional title display" alt="" src="${file_path }${item.imgs}"></a></div>
				<div class="small">
					<span class="smallL" title="向左"> </span>
					<div class="smallBox">
						<div class="smallList">
							<a class="cloud-zoom-gallery here" title="red" href="${file_path }${item.imgs}" rel="useZoom: 'showImg', smallImage: '${file_path }${item.imgs}'"><img alt="thumbnail 1" src="${file_path }${item.imgs}"></a>
							<a class="cloud-zoom-gallery" title="blue" href="${file_path }${item.imgs}" rel="useZoom: 'showImg', smallImage: '${file_path }${item.imgs}'"><img alt="thumbnail 2" src="${file_path }${item.imgs}"></a>
							<a class="cloud-zoom-gallery" title="blue" href="${file_path }${item.imgs}" rel="useZoom: 'showImg', smallImage: '${file_path }${item.imgs}'"><img alt="thumbnail 3" src="${file_path }${item.imgs}"></a>
							<a class="cloud-zoom-gallery" title="blue" href="${file_path }${item.imgs}" rel="useZoom: 'showImg', smallImage: '${file_path }${item.imgs}'"><img alt="thumbnail 4" src="${file_path }${item.imgs}"></a>
							<a class="cloud-zoom-gallery" title="blue" href="${file_path }${item.imgs}" rel="useZoom: 'showImg', smallImage: '${file_path }${item.imgs}'"><img alt="thumbnail 5" src="${file_path }${item.imgs}"></a>
						</div>
					</div>
					<span class="smallR" title="向右"> </span>
				</div>
				<div class="share mt">

					<div id="ecpsShareIcon">
						<div class="iconSmall iconRight">
							<span>分享到:</span><a href="javascript:void(0);" target="_blank" class="sinawb" title="分享到新浪微博"></a><a href="javascript:void(0);" target="_blank" class="qqwb" title="分享到腾讯微博"></a><a href="javascript:void(0);" target="_blank" class="renren" title="分享到人人网"></a><a href="javascript:void(0);" target="_blank" class="qqzone" title="分享到QQ空间"></a><a href="javascript:void(0);" target="_blank" class="sohuwb" title="分享到搜狐微博"></a><a href="javascript:void(0);" class="copy" title="复制链接">复制链接</a>
						</div>
					</div>
				</div>
			</div>

			<form method="post" action="" name="" class="infor">
				<ul class="uls form">

				<li><label>移 动 价:</label><span class="word"><b id="skuPrice" class="f14 red mr">¥3999.00</b>(市场价:<del id="marketPrice">¥5789.00</del>)</span></li>
				<li><label>商品编号:</label><span class="word">${item.itemNo }</span></li>
				<li><label>商品评价:</label><span class="word"><span class="val_no val3d4" title="4分">4分</span><var class="blue">(已有17人评价)</var></span></li>
				<li><label>运  费:</label><span class="word">包邮    <a href="javascript:void(0);" class="blue">配送区域</a></span></li>
				<li><label>库  存:</label><span id="stockState" class="word">有货</span></li>
				<li><label>支付方式:</label><div class="pre word p16x16">
					<span title="网银支付" class="bank">网银支付</span>
					<span title="支付宝" class="pay">支付宝</span>
					<span title="手机支付" class="moblie">手机支付</span>
				</div></li>
				</ul>
				<div class="box_orange">
					<ul class="uls form">
					<li><label>规  格:</label><div class="pre spec">
					<#list item.skuList as sku>
							<#if sku_index == 0>
								<a href="javascript:void(0);"  class="here" skuId="${sku.skuId?c }">
									<#list sku.specList as spec>
										${spec.specValue }
									</#list>
								</a>
							<#else>
								<a href="javascript:void(0);" skuId="${sku.skuId?c }">
									<#list sku.specList as spec>
										${spec.specValue }
									</#list>
								</a>
							</#if>
					</#list>
					</div></li>
<li><label>我 要 买:</label><a href="javascript:void(0);" class="inb sub"></a><input readonly type="text" name="" value="1" class="num" size="3" /><a href="javascript:void(0);" class="inb add"></a><em id="sub_add_msg" class="red"></em></li><li class="submit"><input id="buyNow" type="button" value="" class="hand btn138x40" onclick="buy();"/><input id="addMyCart" type="button" value="" class="hand btn138x40b" onclick="addCart()"/><a href="#" title="加入收藏" class="inb fav">加入收藏</a></li></ul></div></form></div>
2、FMUtils文件
在/src/main/java/目录中新建一个util文件,这是用来处理的一个工具类。
public class FMutil {

	/**
	 *
	 * @param ftlName:模板名字
	 * @param fileName:生成的html的名字
	 * @param map:数据,在freemarket模板中取数据都使用map
	 * @throws Exception
	 */
	public void ouputFile(String ftlName, String fileName,  Map<String, Object> map) throws Exception{
		//创建fm的配置
		Configuration config = new Configuration();
		//指定默认编码格式
		config.setDefaultEncoding("UTF-8");
		//设置模板的包路径
		config.setClassForTemplateLoading(this.getClass(), "/cn/tf/ecps/ftl");
		//获得包的模板
		Template template = config.getTemplate(ftlName);
		//指定文件输出的路径
		String path = "E:/myeclipse_work/ECPS/ecps-parent/ecps-portal/src/main/webapp/html";
		//定义输出流,注意的必须指定编码
		Writer writer = new BufferedWriter(new OutputStreamWriter(new FileOutputStream(new File(path+"/"+fileName)),"UTF-8"));
		//生成模板
		template.process(map, writer);
	}
}
3、测试
@Autowired
	private EbItemService itemService;

	@Test
	public void testGeneraHtml() throws Exception {
		Map<String,Object>  map=new HashMap<String,Object> ();
		EbItem item=itemService.selectItemDetailById(3080);
		map.put("item", item);

		map.put("path", ECPSUtil.readProp("portal_path"));
		map.put("file_path", ECPSUtil.readProp("FILE_PATH"));
		FMutil fm=new FMutil();

	     fm.ouputFile("productDetail.ftl", item.getItemId()+".html", map);

	}
这个时候我们就可以看到页面效果出来了,在我们设置好的html目录下:就可以找到生成的html文件3080.html了
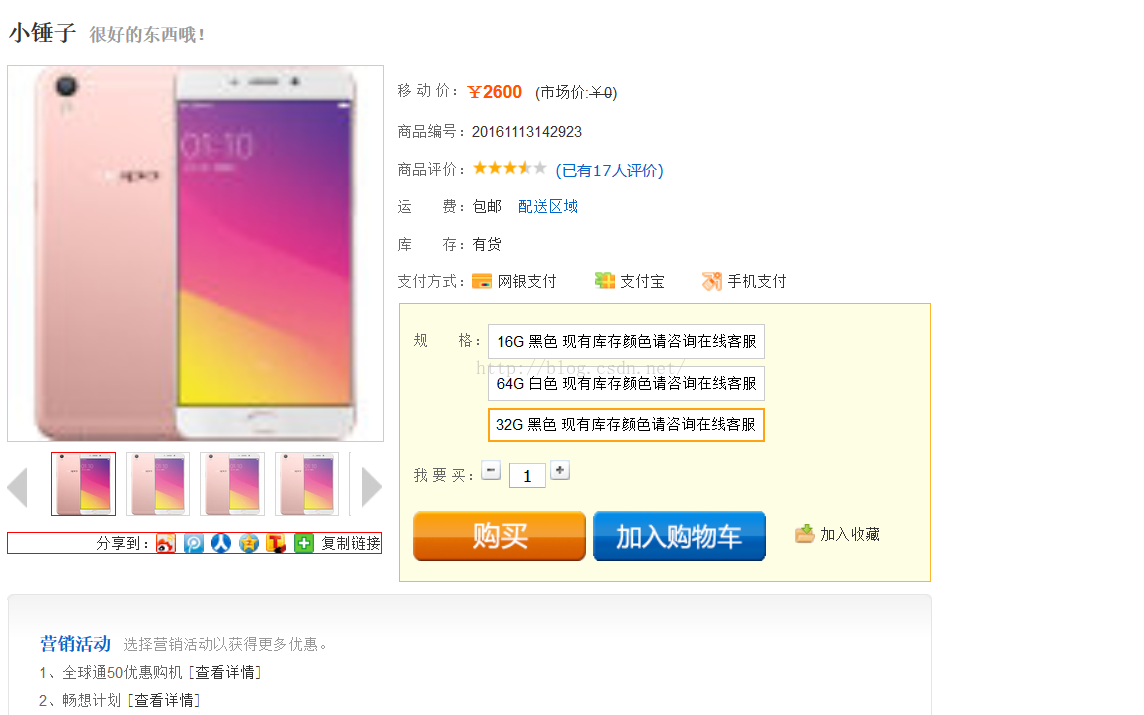
当然,在这里提一句的是,这个项目非常复杂,我只是简要的介绍一下使用FreeMarker的流程,而不是要介绍怎么做这个详情页最小单元的处理。
二、CXF服务调用
我们在做完这个模板处理之后,记u需要后台通过添加商品之后就可以将这个页面生成出来,例如我后台有10万个商品,那么我就需要生成10万个静态的html页面保存在我的html文件服务器上面。
例如我这个后台,点击发布按钮之后,就可以自动生成一个html文件,把商品下相关信息保存在那个html中,每次更新商品时重新点击发布就可以了,非常方便。
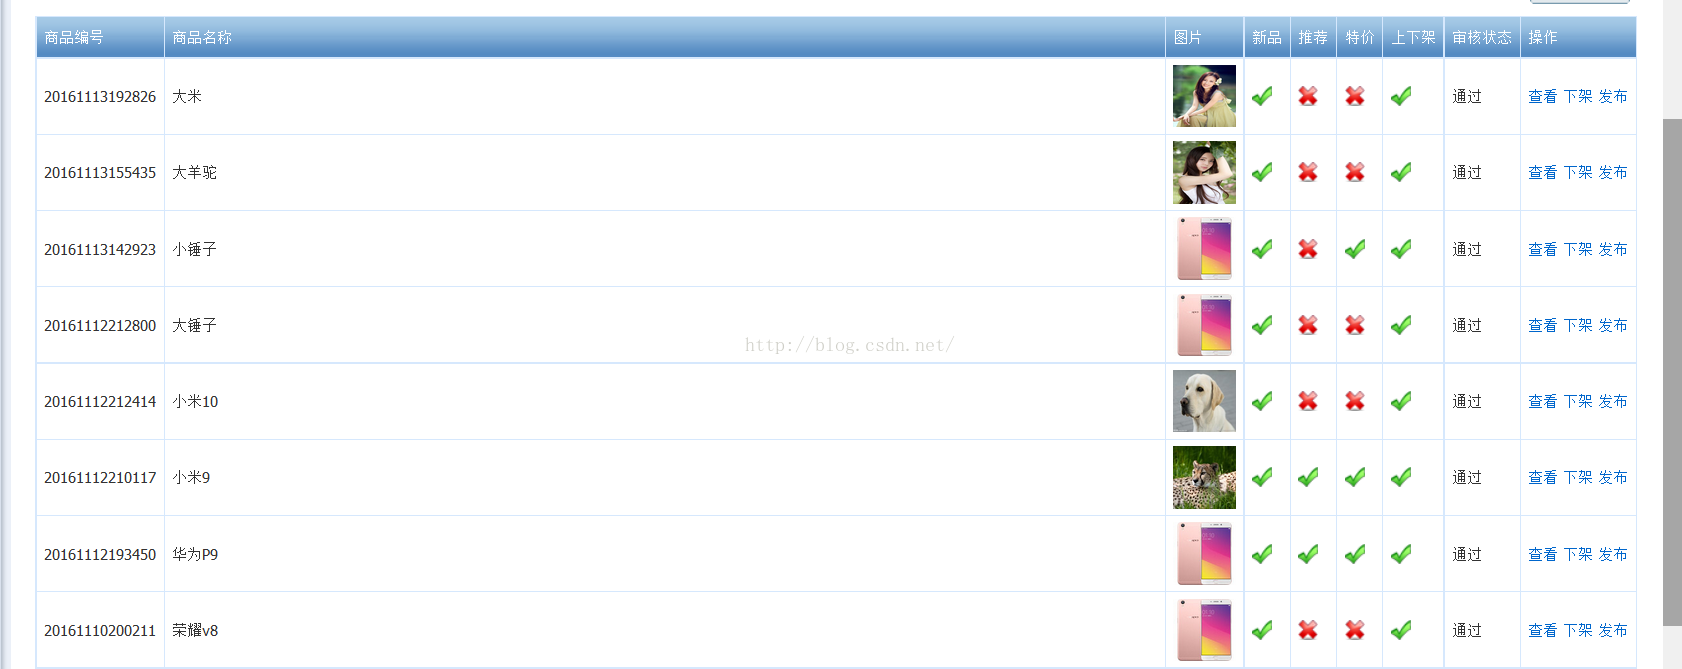
那么我们想要点击发布按钮之后就要生成代码,自然需要我们的FreeMarker了,在真实生产环境中,都是分布式的,不在同一台机器上面,所以这就涉及到了我们的webService调用了。这里使用的是appach的cxf来处理。
下载地址:http://cxf.apache.org/download.html
1、新建一个ws的接口类:EbWSItemService,这里的接口我使用了md5加密加盐处理。
@WebService
public interface EbWSItemService {

	public String publishItem(Long itemId,String password);

}
实现其方法
@Service
public class EbWSItemServiceImpl  implements EbWSItemService {

	@Autowired
	private EbItemService itemService;


	public String publishItem(Long itemId, String password) {
		String isOK="success";

		String wsPass=GetMD5.getMD5(itemId);
		if(StringUtils.equals(password, wsPass)){
			//发布
			Map<String,Object>  map=new HashMap<String,Object> ();
			EbItem item=itemService.selectItemDetailById(itemId);
			map.put("item", item);

			map.put("path", ECPSUtil.readProp("portal_path"));
			map.put("file_path", ECPSUtil.readProp("FILE_PATH"));
			FMutil fm=new FMutil();
			try {
				fm.ouputFile("productDetail.ftl", item.getItemId()+".html", map);
			} catch (Exception e) {
				e.printStackTrace();
			}
		}else{
			isOK="fail";
		}

		return isOK;
	}
}
属性文件内容为:ecps.properties
FILE_PATH=http://localhost:8080/ecps-file

#操作类型
AUDIT_ITEM_TYPE=\u5546\u54C1\u5BA1\u6838
show_item_type=\u5546\u54C1\u4E0A\u4E0B\u67B6

portal_path=http://localhost:8080/ecps-portal

#接口加密
slat=xvzbnxsd^&&*)(*()kfmv4165323DGHSBJ
2、在项目中新建一个文件cxf-servlet.xml
内容如下:
<?xml version="1.0" encoding="UTF-8"?>
<beans xmlns="http://www.springframework.org/schema/beans"
	xmlns:xsi="http://www.w3.org/2001/XMLSchema-instance" xmlns:jaxws="http://cxf.apache.org/jaxws"
	xmlns:jaxrs="http://cxf.apache.org/jaxrs" xmlns:cxf="http://cxf.apache.org/core"
	xsi:schemaLocation="http://www.springframework.org/schema/beans
          http://www.springframework.org/schema/beans/spring-beans.xsd
            http://cxf.apache.org/jaxrs http://cxf.apache.org/schemas/jaxrs.xsd
            http://cxf.apache.org/jaxws http://cxf.apache.org/schemas/jaxws.xsd
            http://cxf.apache.org/core http://cxf.apache.org/schemas/core.xsd">
	<!-- 引入CXF Bean定义如下,早期的版本中使用 -->
	<import resource="classpath:META-INF/cxf/cxf.xml" />
	<import resource="classpath:META-INF/cxf/cxf-extension-soap.xml" />
	<import resource="classpath:META-INF/cxf/cxf-servlet.xml" />
	<!--
		webservice服务地址:http://localhost:8080/ecps-portal/[url-patten]/address
		serviceClass:服务接口类
		jaxws:serviceBean:服务接口的实现类

	 -->
	<jaxws:server id="publishItem" address="/publishItem" serviceClass="cn.tf.ecps.ws.service.EbWSItemService">
		<jaxws:serviceBean>
			<bean class="cn.tf.ecps.ws.service.impl.EbWSItemServiceImpl"></bean>
		</jaxws:serviceBean>
	</jaxws:server>

</beans>
3、在前台工程的web.xml中进行配置
<servlet>
		<servlet-name>cxf</servlet-name>
		<servlet-class>org.apache.cxf.transport.servlet.CXFServlet</servlet-class>
	</servlet>
	<servlet-mapping>
		<servlet-name>cxf</servlet-name>
		<url-pattern>/services/*</url-pattern>
	</servlet-mapping>
里面就是一个wsdl文件。我们都知道wsdl都是从下往上读的,所以这里需要调用EbWSItemServiceService
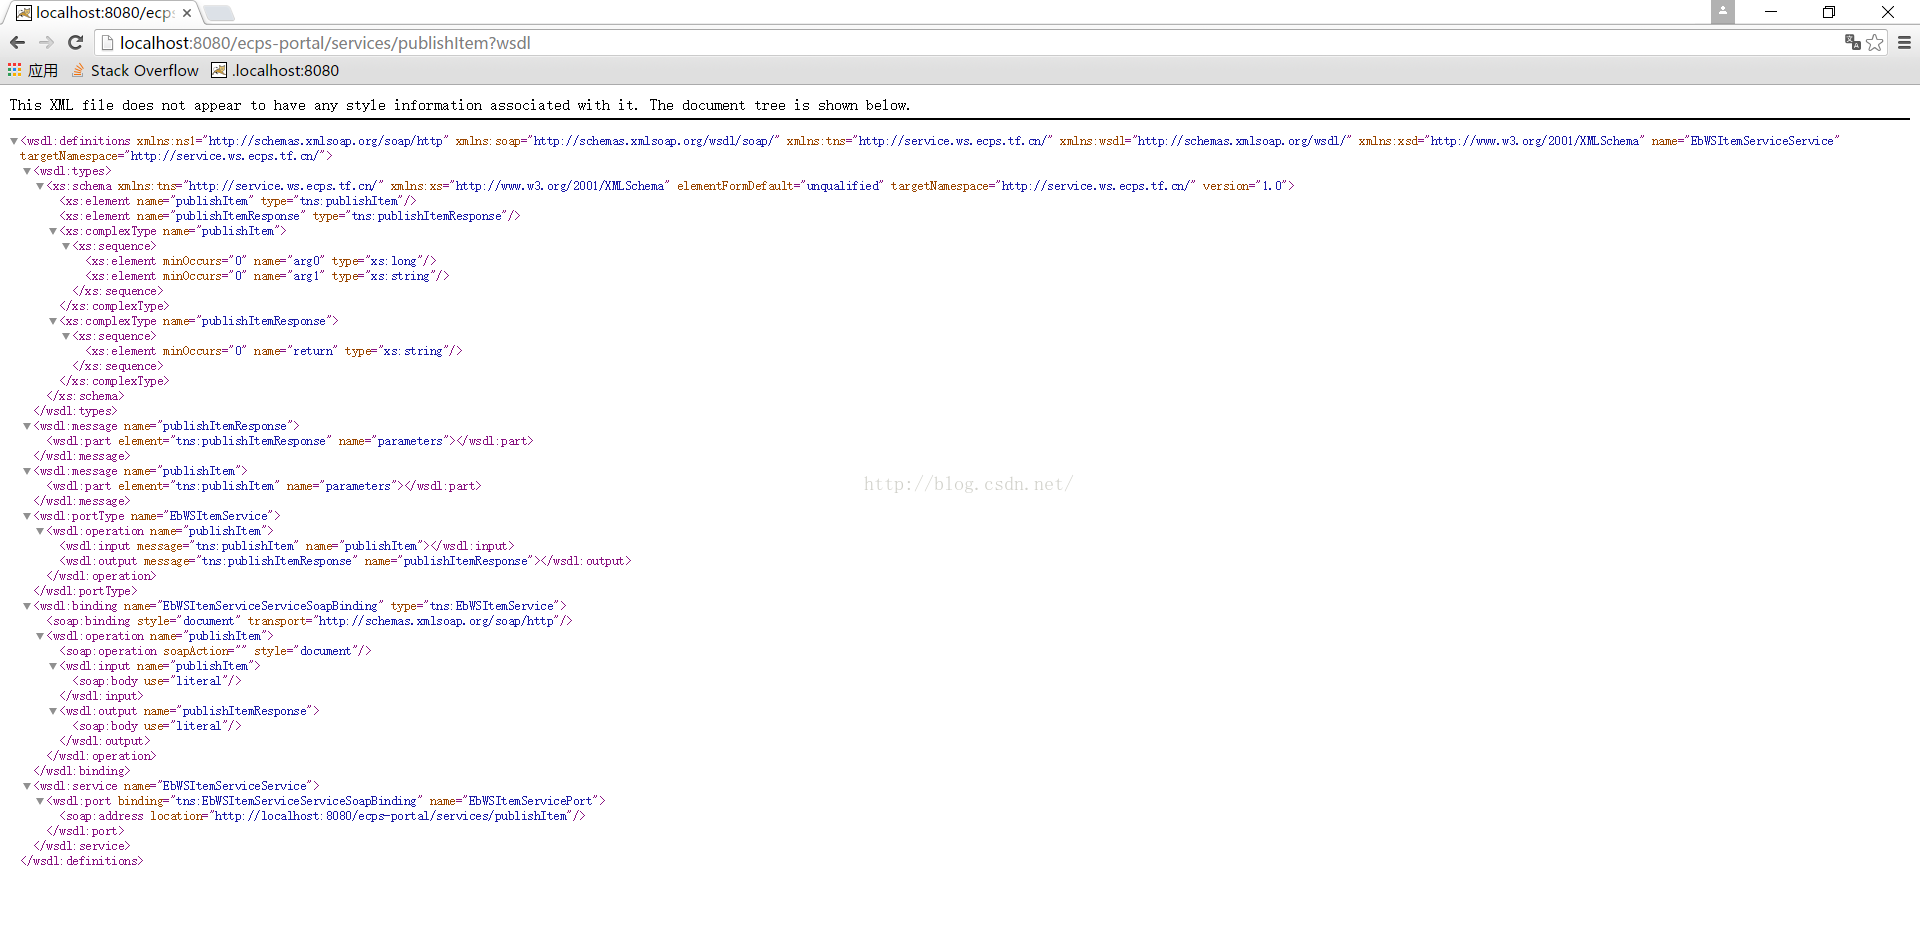
发布服务之后我们需要使用这个cxf来生成java代码:
wsdl2java -d . -p cn.tf.ecps.stub http://localhost:8080/ecps-portal/services/publishItem?wsdl

生成好之后,将生成好的代码复制进你的工程即可。
然后在我们的port工程中,对service进行处理:
//调用服务
	public String publishItem(Long itemId, String password) {
		//创建服务访问点的集合
		EbWSItemServiceService  itemServiceService=new EbWSItemServiceService();
		//获得服务端的接口,通过服务访问点的name在前面加上get这个方法就是获得webService服务的接口方法
		EbWSItemService service = itemServiceService.getEbWSItemServicePort();
		//调用webService的发布方法
		return service.publishItem(itemId, password);
	}
最后在controller中调用那个这个service就可以了
//调用服务
	@RequestMapping("/publish.do")
	public void publish(Long itemId,PrintWriter out){
		String wsPass=GetMD5.getMD5(itemId);
		String result = null;
		try {
			result = itemService.publishItem(itemId,wsPass);
		} catch (Exception e) {
			e.printStackTrace();
		}
		out.write(result);

	}
这样整个过程就完成了。
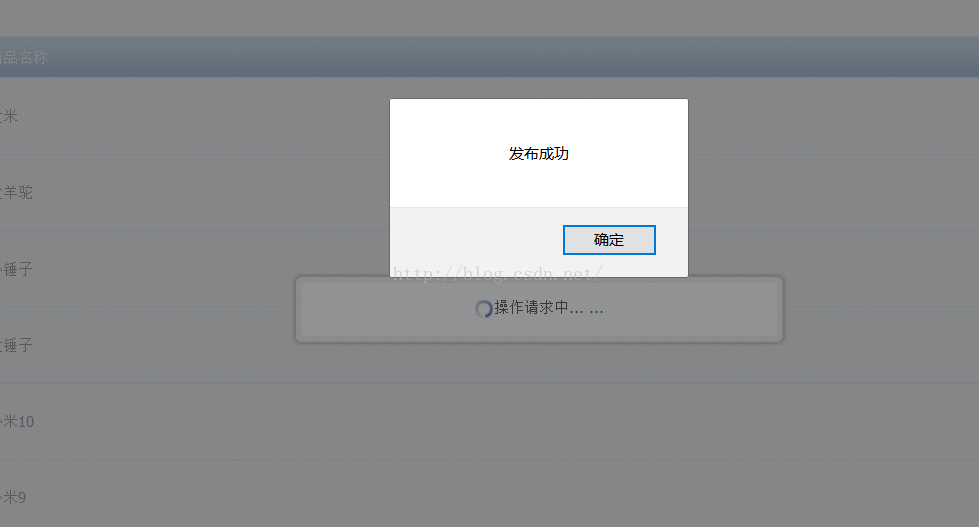
这里值得一提的是如果你发布的服务是用的localhost:8080,那么在前台工程也要用localhost:8080,否则会报错,我就是因为这个原因折腾了几个小时,原因是跨域问题。
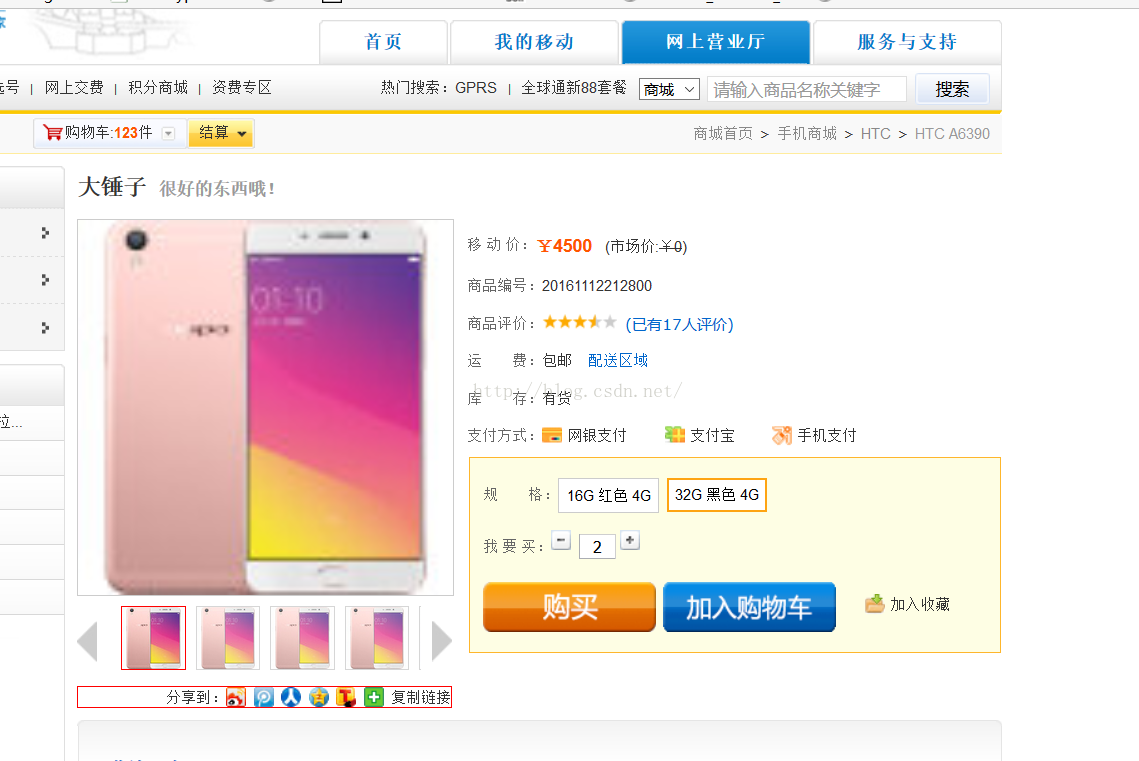
可以通过前台来看到生成好的html页面。

项目地址:https://github.com/sdksdk0/ECPS


 3283
3283

 被折叠的 条评论
为什么被折叠?


