


一、下载 solr
下载地址 ,选择你想要下载的版本
http://archive.apache.org/dist/lucene/solr/7.5.0/ 下载解压
二、启动 solr
solr 的启动方式有多种,可以结合 tomcat,新版本的 solr 可以直接启动。这里通过命令行启动。
打开 cmd,启动项目

这里记下两个常用命令
启动 bin\solr.cmd start
停止 bin\solr.cmd stop -all
注意:如果启动失败 提示 缺少 managed-schema 的话,解决办法如下
把 \server\resources 下的 conf 文件夹 复制到新建的 core 中 \server\solr\new_core
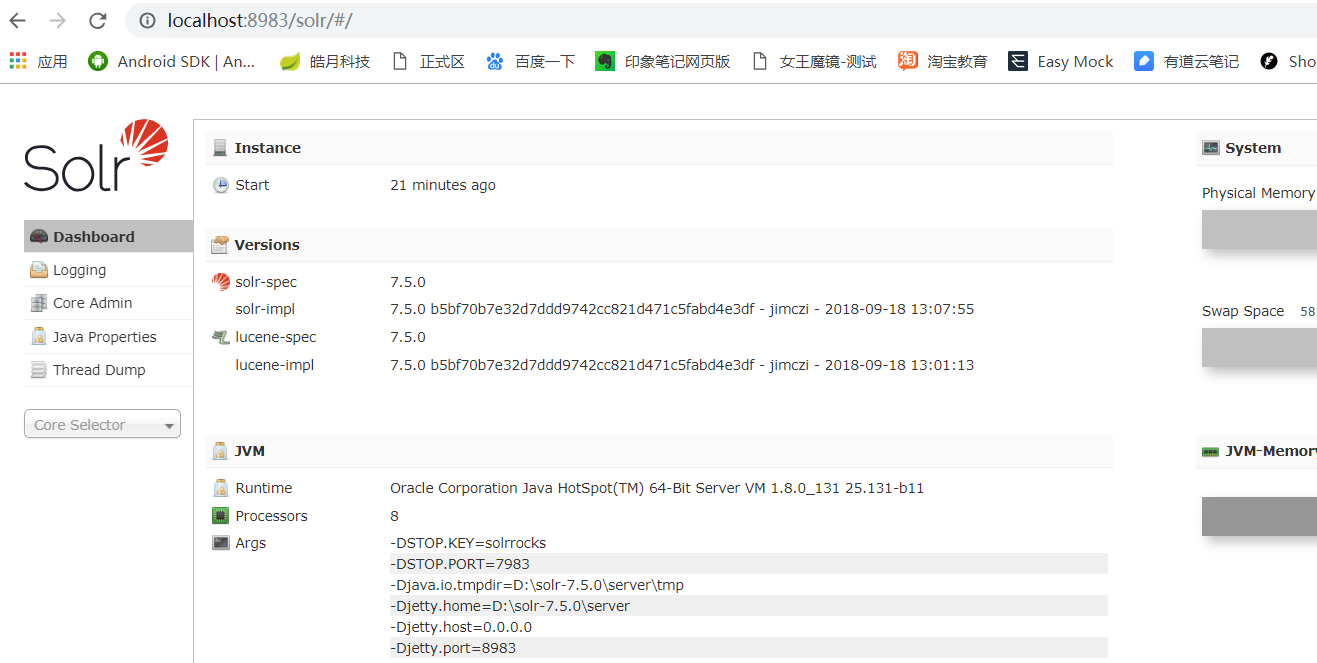
启动成功后,打开浏览器进入 solr 控制台 http://localhost:8983/solr/#/
三 、添加 core 和 字段
core相当于数据表,我们可以对 core 进行管理
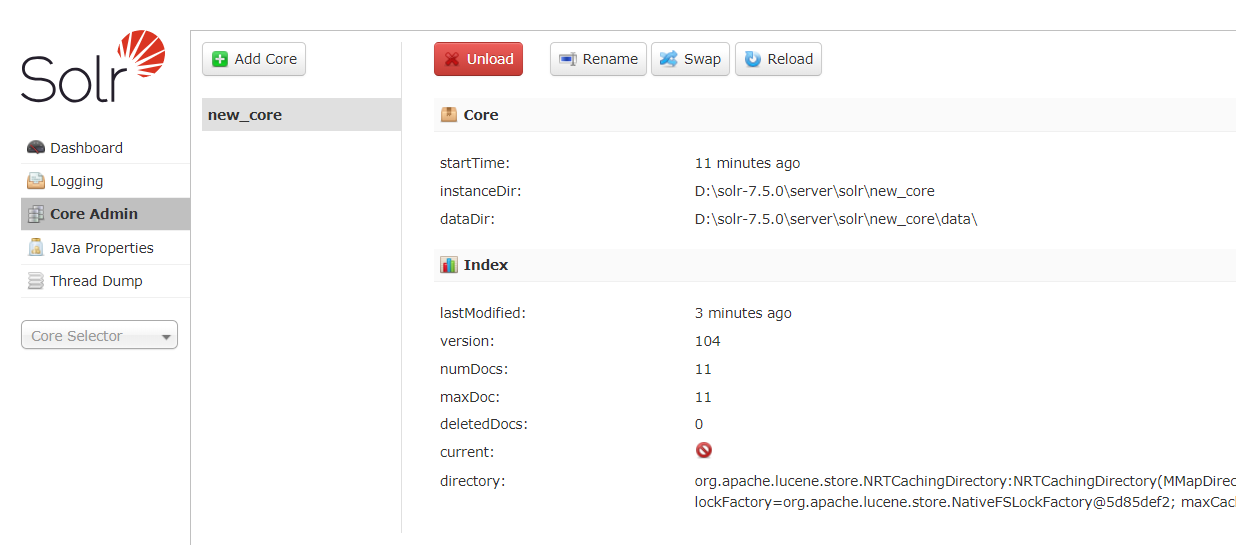
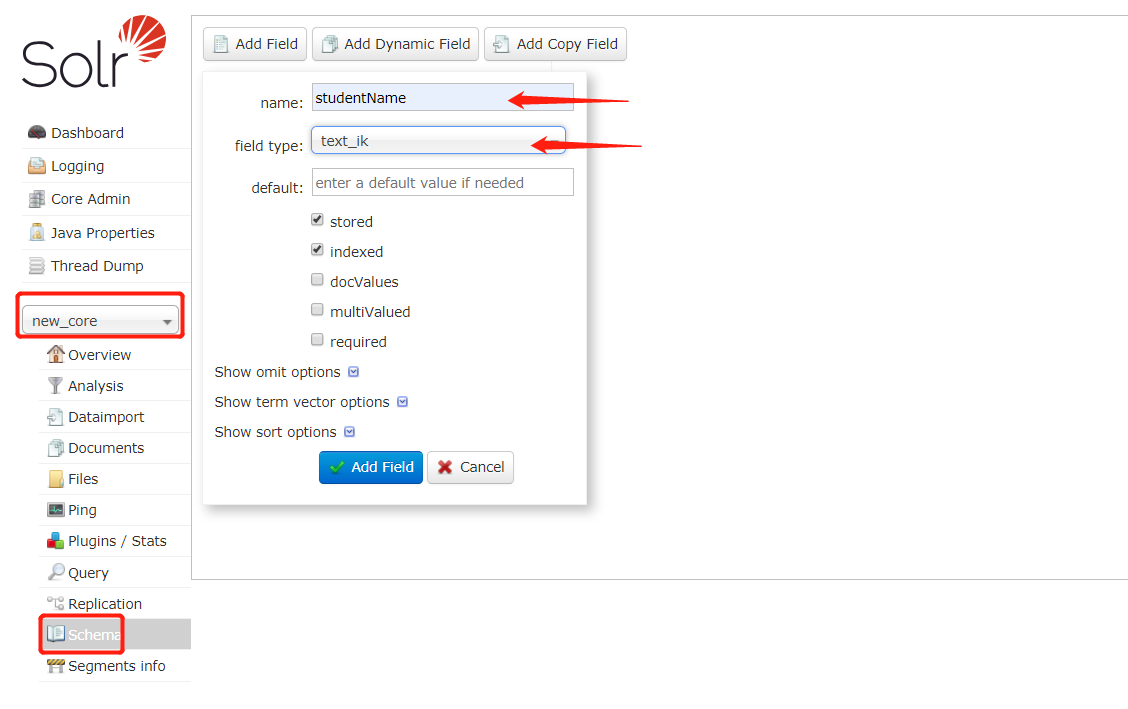
选中 core ,创建字段,输入字段名和所对应的分词器
四、数据操作演示
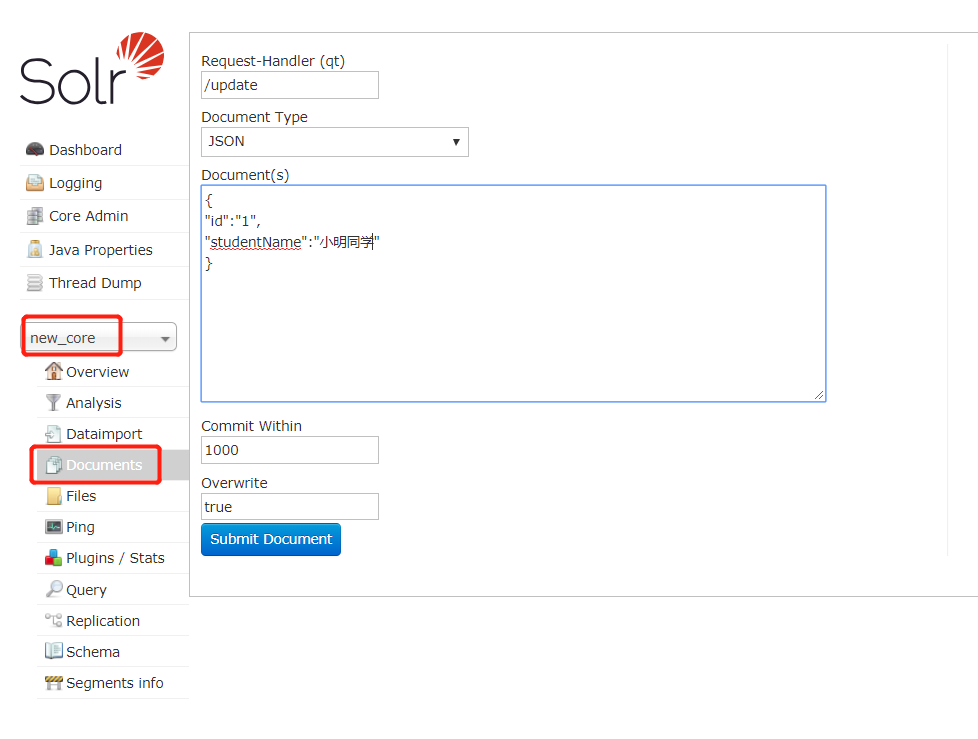
/update : 添加或更新数据
JSON : 以 json 格式添加数据
添加成功后,我们查询一下
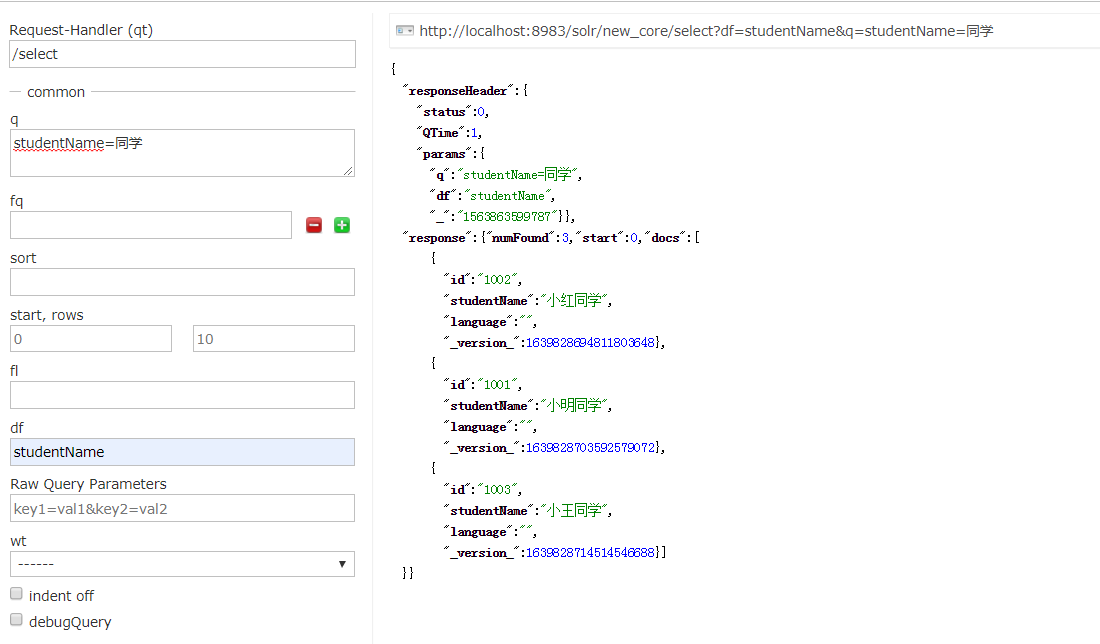
q :查询关键字 ,可以通过 字段名=key 指定查询字段名
sort : 排序
start  rows : 分页查询
fl:指定返回结果需要显示的字段
df:默认域 指定需要查询的字段
五、中文分词器
链接:https://pan.baidu.com/s/1i5DJbj0lBeaJpgd1BInMxg
提取码:prfe
下载后,放到 \server\solr-webapp\webapp\WEB-INF\lib 目录下
然后编辑 managed-schema.xml。增加以下内容 ,最后重启 solr
<fieldType name="text_ik" class="solr.TextField">
        <analyzer class="org.wltea.analyzer.lucene.IKAnalyzer"/>
</fieldType>
<field name="text_ik"  type="text_ik" indexed="true"  stored="true"  multiValued="false" />
现在来测试一下未使用中文分词器之前和之后的区别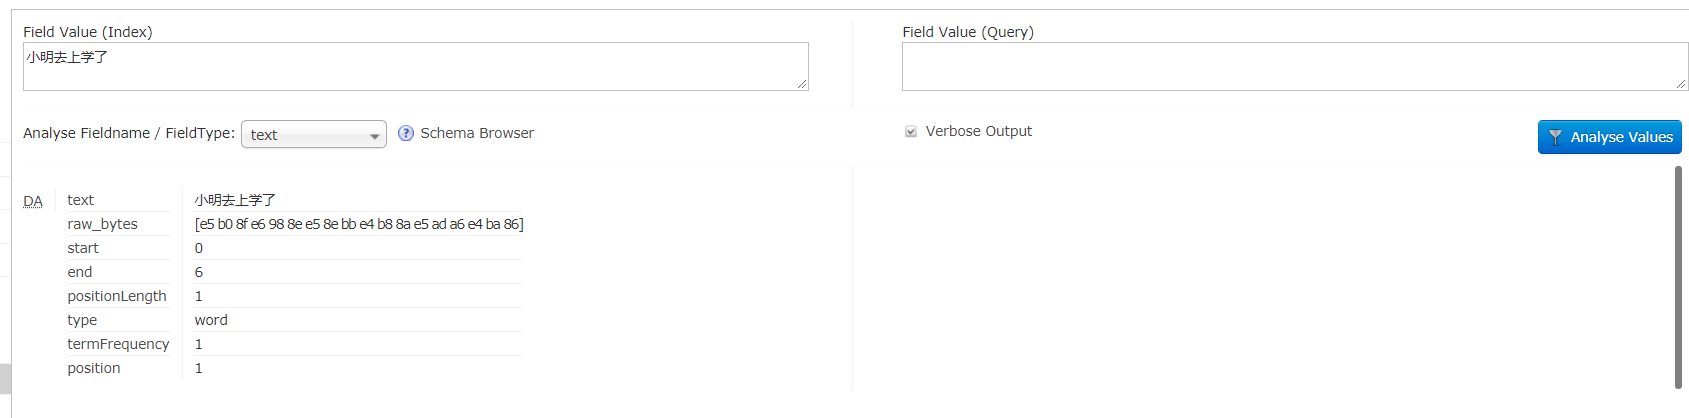
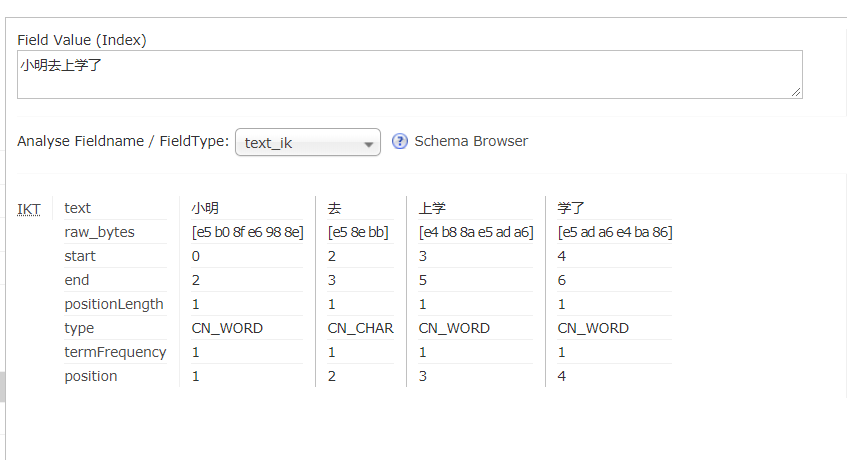
可以看到 text_ik 分词器更加符合汉字的分词习惯
六、springboot 整合 solr
jar包依赖
<!-- 引入solr依赖 -->
		<dependency>
			<groupId>org.springframework.boot</groupId>
			<artifactId>spring-boot-starter-data-solr</artifactId>
		</dependency>
application.properties配置,这是指定了 core 的情况,也可以不指定,在操作的时候再指定
spring.data.solr.host=http://localhost:8983/solr/new_core测试用例
package org.elvin.mysolr.controller;

import org.apache.solr.client.solrj.SolrClient;
import org.apache.solr.client.solrj.SolrQuery;
import org.apache.solr.client.solrj.response.QueryResponse;
import org.apache.solr.common.SolrDocument;
import org.apache.solr.common.SolrDocumentList;
import org.apache.solr.common.SolrInputDocument;
import org.springframework.beans.factory.annotation.Autowired;
import org.springframework.web.bind.annotation.RequestMapping;
import org.springframework.web.bind.annotation.RestController;

import java.util.List;
import java.util.Map;
import java.util.UUID;

@RestController
@RequestMapping("solr")
public class SolrController {

    @Autowired
    private SolrClient client;

    /**
     * 新增/修改 索引
     * 当 id 存在的时候, 此方法是修改(当然, 我这里用的 uuid, 不会存在的), 如果 id 不存在, 则是新增
     * @return
     */
    @RequestMapping("add")
    public String add() {
        String uuid = UUID.randomUUID().toString().replaceAll("-", "");
        try {
            SolrInputDocument doc = new SolrInputDocument();
            doc.setField("id", uuid);
            doc.setField("studentName", "小王同学");

            /* 如果spring.data.solr.host 里面配置到 core了, 那么这里就不需要传 new_core 这个参数
             * 下面都是一样的
             */

            client.add("new_core", doc);
            //client.commit();
            client.commit("new_core");
            return uuid;
        } catch (Exception e) {
            e.printStackTrace();
        }

        return "error";
    }

    /**
     * 根据id删除索引
     * @param id
     * @return
     */
    @RequestMapping("delete")
    public String delete(String id)  {
        try {
            client.deleteById("new_core",id);
            client.commit("new_core");

            return id;
        } catch (Exception e) {
            e.printStackTrace();
        }


        return "error";
    }

    /**
     * 删除所有的索引
     * @return
     */
    @RequestMapping("deleteAll")
    public String deleteAll(){
        try {

            client.deleteByQuery("new_core","*:*");
            client.commit("new_core");

            return "success";
        } catch (Exception e) {
            e.printStackTrace();
        }
        return "error";
    }

    /**
     * 根据id查询索引
     * @return
     * @throws Exception
     */
    @RequestMapping("getById")
    public String getById() throws Exception {
        SolrDocument document = client.getById("new_core", "536563");
        System.out.println(document);
        return document.toString();
    }

    /**
     * 综合查询: 在综合查询中, 有按条件查询, 条件过滤, 排序, 分页, 高亮显示, 获取部分域信息
     * @return
     */
    @RequestMapping("search")
    public Map<String, Map<String, List<String>>> search(){

        try {
            SolrQuery params = new SolrQuery();

            //查询条件, 这里的 q 对应 下面图片标红的地方
            params.set("q", "手机");

            //过滤条件
            params.set("fq", "product_price:[100 TO 100000]");

            //排序
            params.addSort("product_price", SolrQuery.ORDER.asc);

            //分页
            params.setStart(0);
            params.setRows(20);

            //默认域
            params.set("df", "product_title");

            //只查询指定域
            params.set("fl", "id,product_title,product_price");

            //高亮
            //打开开关
            params.setHighlight(true);
            //指定高亮域
            params.addHighlightField("product_title");
            //设置前缀
            params.setHighlightSimplePre("<span style='color:red'>");
            //设置后缀
            params.setHighlightSimplePost("</span>");

            QueryResponse queryResponse = client.query(params);

            SolrDocumentList results = queryResponse.getResults();

            long numFound = results.getNumFound();

            System.out.println(numFound);

       //获取高亮显示的结果, 高亮显示的结果和查询结果是分开放的
            Map<String, Map<String, List<String>>> highlight = queryResponse.getHighlighting();

            for (SolrDocument result : results) {
                System.out.println(result.get("id"));
                System.out.println(result.get("product_title"));
                //System.out.println(result.get("product_num"));
                System.out.println(result.get("product_price"));
                //System.out.println(result.get("product_image"));

                Map<String, List<String>> map = highlight.get(result.get("id"));
                List<String> list = map.get("product_title");
                System.out.println(list.get(0));

                System.out.println("------------------");
                System.out.println();
            }
            return highlight;
        } catch (Exception e) {
            e.printStackTrace();
        }
        return null;
    }

}


 721
721

 被折叠的 条评论
为什么被折叠?
被折叠的 条评论
为什么被折叠?
 到【灌水乐园】发言


