


最后一步添加springMVC
-
首先加入springweb文件下的两个包 springMVC
 JSON支持
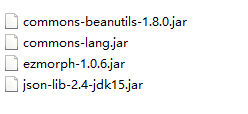
-
配置web.xml
<!-- lang: xml --> <display-name></display-name> <!-- load spring context --> <context-param> <param-name>contextConfigLocation</param-name> <param-value>classpath:spring/applicationContext.xml</param-value> </context-param> <listener> <listener-class>org.springframework.web.context.ContextLoaderListener</listener-class> </listener> <!-- end --> <!-- encodeing filter --> <filter> <filter-name>encoding-filter</filter-name> <filter-class> org.springframework.web.filter.CharacterEncodingFilter </filter-class> <init-param> <param-name>encoding</param-name> <param-value>UTF-8</param-value> </init-param> </filter> <filter-mapping> <filter-name>encoding-filter</filter-name> <url-pattern>/*</url-pattern> </filter-mapping> <!-- end --> <!-- spring mvc --> <servlet> <servlet-name>springMVC</servlet-name> <servlet-class>org.springframework.web.servlet.DispatcherServlet</servlet-class> <!-- 配置springMVC配置文件的路径 --> <init-param> <param-name>contextConfigLocation</param-name> <param-value>classpath*:springMVC/spring-servlet.xml</param-value> </init-param> <!-- 配置springMVC在tomcat启动时启动 --> <load-on-startup>1</load-on-startup> </servlet> <servlet-mapping> <servlet-name>springMVC</servlet-name> <url-pattern>/</url-pattern> </servlet-mapping> <!-- end --> <welcome-file-list> <welcome-file>index.jsp</welcome-file> </welcome-file-list> </web-app> -
配置spring-servlet.xml
<!-- lang: xml -->
<!-- 注解驱动器 --> <mvc:annotation-driven/> <!-- 注解扫描器 --> <context:component-scan base-package="com.wyk.sh4.controller"/> <!-- 静态文件过滤 --> <mvc:resources location="/img/" mapping="/img/**"/> <bean id="viewResolver" class="org.springframework.web.servlet.view.InternalResourceViewResolver"> <property name="prefix" value="/"></property> <property name="suffix" value=".jsp"></property> </bean> -
添加Controller
<!-- lang: java -->
@Controller
@RequestMapping("/test")
public class HelloController {
    @RequestMapping("/helloWorld")
    public String helloWorld(){
	    return "helloworld";
    }
}
github地址:https://github.com/w-cloud-k/DemoSSH


 497
497

 被折叠的 条评论
为什么被折叠?
被折叠的 条评论
为什么被折叠?
 到【灌水乐园】发言


