


1,问题描述
上传压缩图片报错:org.csource.common.MyException: getStoreStorage fail, errno code: 2
原因是dns域名ping不通traker,改成ip地址OK了,如下所示:
[root@localhost logs]# vim/etc/fdfs/storage_group2.conf
#tracker_server=tracker.mytest.com:22122
tracker_server=192.168.121.219:22122
然后重启storeage服务
/usr/local/bin/fdfs_storaged/etc/fdfs/storage_group2.conf &
2,check,进去/home/plocc/fastdfs_group2目录下面有logs目录
再进去看日志信息,一切正常,如下所示:
[root@localhost ~]# ll/home/plocc/fastdfs_group2/
total 8
drwxr-xr-x. 259 root root 4096 May 4 2014data
drwxr-xr-x. 2 root root 4096 May 4 2014logs
[root@localhost ~]#
cd /home/plocc/fastdfs_group2/logs
[root@localhost logs]# tail -f storaged.log
......
[2015-03-30 09:41:07] INFO - file:storage_param_getter.c, line: 187, use_storage_id=0, id_type_in_filename=ip,storage_ip_changed_auto_adjust=1, store_path=0, reserved_storage_space=20.00%,use_trunk_file=0, slot_min_size=256, slot_max_size=16 MB, trunk_file_size=64MB, trunk_create_file_advance=0, trunk_create_file_time_base=02:00,trunk_create_file_interval=86400, trunk_create_file_space_threshold=20 GB,trunk_init_check_occupying=0, trunk_init_reload_from_binlog=0,store_slave_file_use_link=0
[2015-03-30 09:41:07] INFO - file:storage_func.c, line: 174, tracker_client_ip: 192.168.121.220,my_server_id_str: 192.168.121.220, g_server_id_in_filename: -596006720
[2015-03-30 09:41:07] INFO -local_host_ip_count: 2, 127.0.0.1 192.168.121.220
[2015-03-30 09:41:08] INFO - file:tracker_client_thread.c, line: 308, successfully connect to tracker server192.168.121.219:22122, as a tracker client, my ip is 192.168.121.220
[2015-03-30 09:41:08] INFO - file:tracker_client_thread.c, line: 1124, tracker server 192.168.121.219:22122, settracker leader: 192.168.121.219:22122
3,新问题来了,然后图片下载的时候,报错如下:
下载图片group2/M00/00/B4/wKh53FUYq1eAPeAWAABs0PIXl7w885.jpg 时出错.
先去查下fastdfs服务器上是否有这个文件,查询到确实有这个文件的
[root@localhost data]# find . -namewKh53FUYq1eAPeAWAABs0PIXl7w885.jpg
./00/B4/wKh53FUYq1eAPeAWAABs0PIXl7w885.jpg
[root@localhost data]# pwd
/home/plocc/fastdfs_group2/data
[root@localhost data]#
问题在哪里呢?,我们通过网站上一个能访问的图片地址,来检查判断。随意打开网站一个图片,在图片上面右键点击,选择“复制图片地址”,得到如下信息:
http://static.mytest.com/group1/M00/03/AF/wKi0d1QGA0qANZk5AABawNvHeF0411.png
4,ping下static.mytest.com,去上面检查nginx配置
ping一下这个static.mytest.com,去看下是在哪一台服务器上面:
[root@localhost ~]# ping static.mytest.com
PING static.mytest.com (192.168.121.221)56(84) bytes of data.
64 bytes from 192.168.121.221: icmp_seq=1ttl=64 time=0.251 ms
64 bytes from 192.168.121.221: icmp_seq=2ttl=64 time=0.326 ms
64 bytes from 192.168.121.221: icmp_seq=3ttl=64 time=0.305 ms
64 bytes from 192.168.121.221: icmp_seq=4ttl=64 time=0.299 ms
^C
--- static.mytest.com ping statistics ---
4 packets transmitted, 4 received, 0%packet loss, time 3762ms
rtt min/avg/max/mdev =0.251/0.295/0.326/0.030 ms
[root@localhost ~]#
然后进去192.168.121.221里面去查看里面的nginx配置,进入
[root@localhost ~]# cd/usr/local/nginx/conf
[root@localhost conf]# vim nginx.conf #进去检索/group2或者group1
会发现如下配置:
location ~* ^/group1/.*$ {
proxy_pass http://filebackend;
}
location ~* ^/group2/.*$ {
proxy_pass http://filebackend;
}
然后再继续在nginx.cnf里面需找filebackend的配置,会看到如下配置:
upstream filebackend{
server dfs.mytest.com:8090;
}
5,去检查nginx里面filebackend所对应的dfs.mytest.com
去ping下dfs.mytest.com,看看去访问那个地址
[root@localhost ~]# ping dns.mytest.com
PING dns.mytest.com (192.168.121.212)56(84) bytes of data.
64 bytes from 192.168.121.212: icmp_seq=1ttl=64 time=0.081 ms
64 bytes from 192.168.121.212: icmp_seq=2ttl=64 time=0.110 ms
64 bytes from 192.168.121.212: icmp_seq=3ttl=64 time=0.104 ms
^C
--- dns.mytest.com ping statistics ---
3 packets transmitted, 3 received, 0%packet loss, time 2275ms
rtt min/avg/max/mdev =0.081/0.098/0.110/0.014 ms
[root@localhost ~]#
然后去192.168.121.212里面去看下nginx配置,需找/group1或者group2,发现有group1没有group2
location ~* ^/group1/.*$ {
proxy_pass http://filebackend;
include proxy.conf;
error_log logs/file_error.loginfo;
access_log logs/file_access.log main;
}
所以追加一个group2
location ~* ^/group2/.*$ {
proxy_pass http://filebackend;
include proxy.conf;
error_log logs/file_error.loginfo;
access_log logs/file_access.log main;
}
我们在继续在nginx.conf里面检索filebackend,看看指向哪里
upstream filebackend{
server 192.168.121.220:8090;
}
6,去upstream服务器121.220上面查看nginx服务8090
看到指向192.168.121.220,然后我们去192.168.121.220上找fastdfs文件服务器,先去查看下后台进程找到fastdfs的配置文件路径
[root@localhost bin]# ps -eaf|grepfdfs_storaged
root 25036 1 0 09:41 ? 00:00:00 /usr/local/bin/fdfs_storaged/etc/fdfs/storage_group2.conf
root 25176 25121 0 11:00 pts/2 00:00:00 grep fdfs_storaged
[root@localhost bin]#
然后再去配置文件里面/etc/fdfs/storage_group2.conf去查看图片文件存放路径
[root@localhost bin]# vim /etc/fdfs/storage_group2.conf
# the base path to store data and log files
base_path=/home/plocc/fastdfs_group2
然后去/home/plocc/fastdfs_group2路径下面查找下载图片保存的图片是否存在这里:
然后图片下载的时候,报错如下:下载图片
group2/M00/00/B4/wKh53FUYq1eAPeAWAABs0PIXl7w885.jpg 时出错.
[root@localhost fastdfs_group2]# find .-name wKh53FUYq1eAPeAWAABs0PIXl7w885.jpg
./data/00/B4/wKh53FUYq1eAPeAWAABs0PIXl7w885.jpg
[root@localhost fastdfs_group2]#
文件是存在的,所以然后需要在fastdfs本地提供的服务 server 192.168.121.220:8090;去找8090端口
[root@localhost conf]# netstat -anp |grep8090
tcp 0 0 0.0.0.0:8090 0.0.0.0:* LISTEN 1266/nginx
[root@localhost conf]#
是在nginx上面,我们去看nginx的配置
server {
listen 8090;
server_name localhost;
#charset koi8-r;
#access_log logs/host.access.log main;
location /group1/M00 {
root /home/plocc/fastdfs/data;
ngx_fastdfs_module;
}
location /group2/M00 {
root /home/plocc/fastdfs_group2;
ngx_fastdfs_module;
}
看到里面有/group2/M00,我们再去/home/plocc/fastdfs_group2里面看下图片是否存在这里面
[root@localhost conf]# cd/home/plocc/fastdfs_group2
[root@localhost fastdfs_group2]# find .-name wKh53FUYq1eAPeAWAABs0PIXl7w885.jpg
./data/00/B4/wKh53FUYq1eAPeAWAABs0PIXl7w885.jpg
[root@localhost fastdfs_group2]#
图片是存在的,那么我们套用下group1的地址前缀http://static.mytest.com,套在下载失败的那个上面,url如下
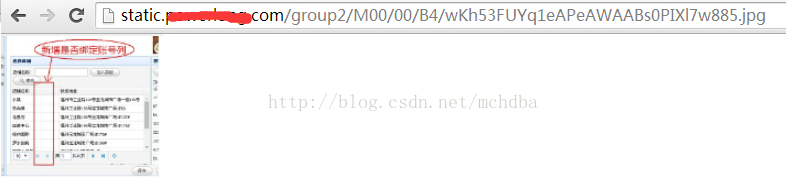
http://static.mytest.com/group2/M00/00/B4/wKh53FUYq1eAPeAWAABs0PIXl7w885.jpg,如下1.png所示:
跟开发人员说地址能正常访问,开发人员去查看了下代码,结果发现问题出在他配置的图片下载host地址的路径不对,修改正常的host路径,就能访问图片了。
7,Nginx报错:open log file "/home/plocc/fastdfs/logs/mod_fastdfs.log"to write fail,
PS:一个报错总结记录
[root@localhost logs]# tail -f error.log
2015/03/30 14:52:22 [alert] 26293#0: workerprocess 26297 exited with fatal code 2 and cannot be respawned
open log file"/home/plocc/fastdfs/logs/mod_fastdfs.log" to write fail, errno: 13,error info: Permission denied2015/03/30 14:52:22 [alert] 26293#0: workerprocess 26294 exited with fatal code 2 and cannot be respawned
ngx_http_fastdfs_process_init pid=26305
ngx_http_fastdfs_process_init pid=26306
open log file"/home/plocc/fastdfs/logs/mod_fastdfs.log" to write fail, errno: 13,error info: Permission deniedngx_http_fastdfs_process_init pid=26308
ngx_http_fastdfs_process_init pid=26307
open log file"/home/plocc/fastdfs/logs/mod_fastdfs.log" to write fail, errno: 13,error info: Permission deniedopen log file "/home/plocc/fastdfs/logs/mod_fastdfs.log"to write fail, errno: 13, error info: Permission denied2015/03/30 14:53:50[alert] 26304#0: worker process 26305 exited with fatal code 2 and cannot berespawned
2015/03/30 14:53:50 [alert] 26304#0: workerprocess 26306 exited with fatal code 2 and cannot be respawned
open log file"/home/plocc/fastdfs/logs/mod_fastdfs.log" to write fail, errno: 13,error info: Permission denied2015/03/30 14:53:50 [alert] 26304#0: workerprocess 26308 exited with fatal code 2 and cannot be respawned
2015/03/30 14:53:50 [alert] 26304#0: workerprocess 26307 exited with fatal code 2 and cannot be respawned
^C
[root@localhost logs]#
需要赋予777的权限
chmod 777/home/plocc/fastdfs/logs/mod_fastdfs.log
然后重启fastdfs storage服务,搞定。
----------------------------------------------------------------------------------------------------------------
原博客地址: http://blog.itpub.net/26230597/viewspace-1479382/
原作者:黄杉 (mchdba)
----------------------------------------------------------------------------------------------------------------
来自 “ ITPUB博客 ” ,链接:http://blog.itpub.net/26230597/viewspace-1479382/,如需转载,请注明出处,否则将追究法律责任。
转载于:http://blog.itpub.net/26230597/viewspace-1479382/


 542
542


 被折叠的 条评论
为什么被折叠?
被折叠的 条评论
为什么被折叠?
 到【灌水乐园】发言


