


此博客来自:http://blog.csdn.net/lmj623565791/article/details/24252901,感谢博客的无私奉献,在这拿来自己学习下。
自定义控件一直对我来说都比较恐怖,就此有时间好好学习下,
我们知道一个View对象要经过onMeasure()测量 ,onLayout()计算大小,onDraw()到屏幕上,然后根据你的需求看需要那方面就使用了,这是最简单的自定义view,先从最简单的做起
新建一个项目customview1
第一步:先自定义view的属性,首先在res/values/ 下建立一个attrs.xml , 在里面定义我们的属性和声明我们的整个样式。
声明属性有二种方法
第一种:
<?xml version="1.0" encoding="utf-8"?>
<resources>
    <attr name="titleText" format="string" />
    <attr name="titleTextColor" format="color" />
    <attr name="titleTextSize" format="dimension" />
    <declare-styleable name="CustomView">
        <attr name="titleText" />
        <attr name="titleTextColor" />
        <attr name="titleTextSize" />
    </declare-styleable>
</resources> <?xml version="1.0" encoding="utf-8"?>
<resources>
<declare-styleable name="CustomView">
<attr name="titleText" format="string" />
<attr name="titleTextColor" format="color"/>
<attr name="titleTextSize" format="dimension" />
</declare-styleable>
</resources>
其实都是一样的,只是把定义的属性和属性值分开写了而已,在这说下,就是怕以后有人这么写不明白,
我们定义了字体,字体颜色,字体大小3个属性,format是值该属性的取值类型:
一共有:string,color,demension,integer,enum,reference,float,boolean,fraction,flag;不清楚的可以google一把。
然后在布局中声明我们的自定义View
<RelativeLayout xmlns:android="http://schemas.android.com/apk/res/android"
xmlns:custom="http://schemas.android.com/apk/res/com.example.customview1"
android:layout_width="match_parent"
android:layout_height="match_parent"
>
<com.example.customview1.CustomView
android:layout_width="200dp"
android:layout_height="100dp"
custom:titleText="1199"
custom:titleTextColor="#ff0000"
custom:titleTextSize="40sp" />
</RelativeLayout>
一定要引入 xmlns:custom="http://schemas.android.com/apk/res/com.example.customview1"我们的命名空间,后面的包路径指的是项目的package
第二步:在View的构造方法中,获得我们的自定义的样式
package com.example.customview1;

import java.util.HashSet;
import java.util.Random;
import java.util.Set;


import android.content.Context;
import android.content.res.TypedArray;
import android.graphics.Canvas;
import android.graphics.Color;
import android.graphics.Paint;
import android.graphics.Rect;
import android.util.AttributeSet;
import android.util.TypedValue;
import android.view.View;

public class CustomView extends View {
	/**
	 * 文本
	 */
	private String mTitleText;
	/**
	 * 文本的颜色
	 */
	private int mTitleTextColor;
	/**
	 * 文本的大小
	 */
	private int mTitleTextSize;

	/**
	 * 绘制时控制文本绘制的范围
	 */
	private Rect mBound;
	private Paint mPaint;

	public CustomView(Context context, AttributeSet attrs)
	{
		this(context, attrs, 0);
	}

	public CustomView(Context context)
	{
		this(context, null);
	}

	/**
	 * 获得我自定义的样式属性
	 *
	 * @param context
	 * @param attrs
	 * @param defStyle
	 */
	public CustomView(Context context, AttributeSet attrs, int defStyle)
	{
		super(context, attrs, defStyle);
		/**
		 * 获得我们所定义的自定义样式属性
		 */
		TypedArray a = context.getTheme().obtainStyledAttributes(attrs, R.styleable.CustomView, defStyle, 0);
		int n = a.getIndexCount();
		for (int i = 0; i < n; i++)
		{
			int attr = a.getIndex(i);
			switch (attr)
			{
			case R.styleable.CustomView_titleText:
				mTitleText = a.getString(attr);
				break;
			case R.styleable.CustomView_titleTextColor:
				// 默认颜色设置为黑色
				mTitleTextColor = a.getColor(attr, Color.BLACK);
				break;
			case R.styleable.CustomView_titleTextSize:
				// 默认设置为16sp,TypeValue也可以把sp转化为px
				mTitleTextSize = a.getDimensionPixelSize(attr, (int) TypedValue.applyDimension(
						TypedValue.COMPLEX_UNIT_SP, 16, getResources().getDisplayMetrics()));
				break;

			}

		}
		a.recycle();

		/**
		 * 获得绘制文本的宽和高
		 */
		mPaint = new Paint();
		mPaint.setTextSize(mTitleTextSize);
		// mPaint.setColor(mTitleTextColor);
		mBound = new Rect();
		mPaint.getTextBounds(mTitleText, 0, mTitleText.length(), mBound);
	}


	@Override
	protected void onDraw(Canvas canvas)
	{
		mPaint.setColor(Color.YELLOW);//设置矩形颜色
		canvas.drawRect(0, 0, getMeasuredWidth(), getMeasuredHeight(), mPaint);//画一个矩形
		mPaint.setColor(mTitleTextColor);//设置字体颜色
		canvas.drawText(mTitleText, getWidth() / 2 - mBound.width() / 2, getHeight() / 2 + mBound.height() / 2, mPaint);
	}
}
我们重写了3个构造方法,默认的布局文件调用的是两个参数的构造方法,所以记得让所有的构造调用我们的三个参数的构造,我们在三个参数的构造中获得自定义属性
我们想要在屏幕上显示文字,那必须要重写onDraw()方法,然后通过canvas(画布)画在屏幕上
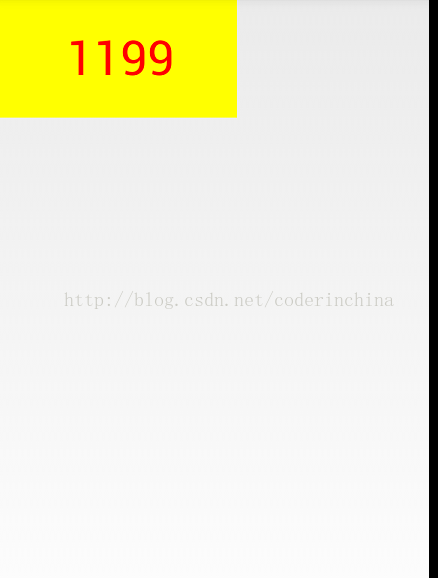
	@Override
	protected void onDraw(Canvas canvas)
	{
		mPaint.setColor(Color.YELLOW);//设置矩形颜色
		canvas.drawRect(0, 0, getMeasuredWidth(), getMeasuredHeight(), mPaint);//画一个矩形
		mPaint.setColor(mTitleTextColor);//设置字体颜色
		canvas.drawText(mTitleText, getWidth() / 2 - mBound.width() / 2, getHeight() / 2 + mBound.height() / 2, mPaint);
	}
效果图:
如果想让这个显示在屏幕的中间,有2个办法
1:把他的父布局为RelativeLayout,就很好搞定,
2:计算屏幕的宽和高,自身控件的宽和高,,因为在屏幕上画一个矩形其实就是定义2个坐标点,
我们自定义宽和高都是写死的在布局文件中是这么写的
android:layout_width="200dp"
android:layout_height="100dp"
一般在开发中很少去这么做,那我们一般写成wrap_content,现在把宽和高改成wrap_content试试
效果出乎我们的意料:
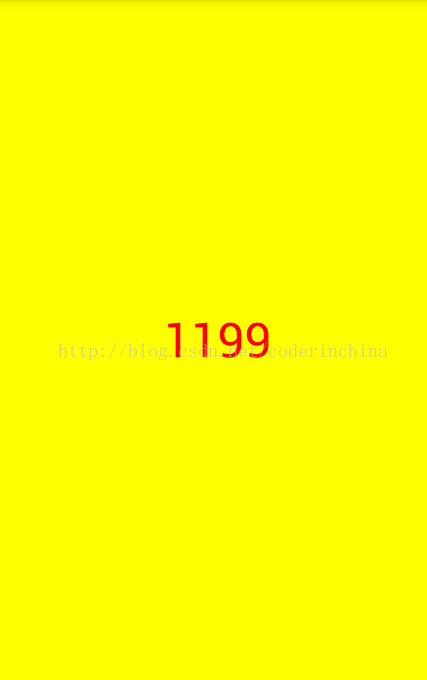
这是为什么呢?
所有的子view的宽和高都是父view给定的
系统帮我们测量的高度和宽度都是MATCH_PARNET,当我们设置明确的宽度和高度时,系统帮我们测量的结果就是我们设置的结果,当我们设置为WRAP_CONTENT,或者MATCH_PARENT系统帮我们测量的结果就是MATCH_PARENT的长度。
记得在开头说过一个测量的方法onMeasure()
这个时候就要重写这个方法了,先看下View.java源码中的测量方法
 public final void measure(int widthMeasureSpec, int heightMeasureSpec) {
        if ((mPrivateFlags & FORCE_LAYOUT) == FORCE_LAYOUT ||
                widthMeasureSpec != mOldWidthMeasureSpec ||
                heightMeasureSpec != mOldHeightMeasureSpec) {

            // first clears the measured dimension flag
            mPrivateFlags &= ~MEASURED_DIMENSION_SET;

            if (ViewDebug.TRACE_HIERARCHY) {
                ViewDebug.trace(this, ViewDebug.HierarchyTraceType.ON_MEASURE);
            }

            // measure ourselves, this should set the measured dimension flag back
            onMeasure(widthMeasureSpec, heightMeasureSpec);

            // flag not set, setMeasuredDimension() was not invoked, we raise
            // an exception to warn the developer
            if ((mPrivateFlags & MEASURED_DIMENSION_SET) != MEASURED_DIMENSION_SET) {
                throw new IllegalStateException("onMeasure() did not set the"
                        + " measured dimension by calling"
                        + " setMeasuredDimension()");
            }

            mPrivateFlags |= LAYOUT_REQUIRED;
        }

        mOldWidthMeasureSpec = widthMeasureSpec;
        mOldHeightMeasureSpec = heightMeasureSpec;
    }
我们看到measure()方法被final修饰了,所以这个方法不能重写,但是在阅读代码时发现
onMeasure(widthMeasureSpec, heightMeasureSpec);方法,.这就是为什么我们要重写这个方法的原因,
在onMeasure()方法中是调用了setMeasuredDimension()实现的
protected void onMeasure(int widthMeasureSpec, int heightMeasureSpec) {
setMeasuredDimension(getDefaultSize(getSuggestedMinimumWidth(), widthMeasureSpec),
getDefaultSize(getSuggestedMinimumHeight(), heightMeasureSpec));
}
getDefaultSize()方法
public static int getDefaultSize(int size, int measureSpec) {
int result = size;
int specMode = MeasureSpec.getMode(measureSpec);
int specSize = MeasureSpec.getSize(measureSpec);
switch (specMode) {
case MeasureSpec.UNSPECIFIED:
result = size;
break;
case MeasureSpec.AT_MOST:
case MeasureSpec.EXACTLY:
result = specSize;
break;
}
return result;
}
发现一个控件的宽和高是由size和mode构成的,而mode有三个MeasureSpec.UNSPECIFIED, MeasureSpec.AT_MOST,MeasureSpec.EXACTLY
这是什么意思呢,看下面解释
MeasureSpec.UNSPECIFIED:表示子布局想要多大就多大,很少使用
MeasureSpec.AT_MOST:表示子布局限制在一个最大值内,一般为WARP_CONTENT
MeasureSpec.EXACTLY:一般是设置了明确的值或者是MATCH_PARENT
现在我们来重写onMeasure()方法
	@Override
	protected void onMeasure(int widthMeasureSpec, int heightMeasureSpec)
	{

		int width = 0;
		int height = 0;

		/**
		 * 设置宽度
		 */
		int specMode = MeasureSpec.getMode(widthMeasureSpec);//获取宽度的mode
		int specSize = MeasureSpec.getSize(widthMeasureSpec);//获取宽度大小

		Log.e("onMeasure","specMode="+specMode);
		Log.e("onMeasure","specSize="+specSize);
		switch (specMode)
		{
		case MeasureSpec.EXACTLY:// 明确指定了
			width = getPaddingLeft() + getPaddingRight() + specSize;
			break;
		case MeasureSpec.AT_MOST:// 一般为WARP_CONTENT
			width = getPaddingLeft() + getPaddingRight() + mBound.width();
			break;
		}

		/**
		 * 设置高度
		 */
		specMode = MeasureSpec.getMode(heightMeasureSpec);//获取高度的mode
		specSize = MeasureSpec.getSize(heightMeasureSpec);//获取高度大小
		Log.e("onMeasure","specMode="+specMode);
		Log.e("onMeasure","specSize="+specSize);
		switch (specMode)
		{
		case MeasureSpec.EXACTLY:// 明确指定了
			height = getPaddingTop() + getPaddingBottom() + specSize;
			break;
		case MeasureSpec.AT_MOST:// 一般为WARP_CONTENT
			height = getPaddingTop() + getPaddingBottom() + mBound.height();
			break;
		}
		Log.e("onMeasure","width="+width+"height="+height);
		setMeasuredDimension(width, height);//重写测量
	}
记得我们的博客标题么.要实现验证码效果,其实就是几个数字在循环的变动,这个很简单
给view设置一个点击事件:
this.setOnClickListener(new OnClickListener()
{
@Override
public void onClick(View v)
{
mTitleText = randomText();
postInvalidate();
}
});
生成四个随机数的方法
private String randomText()
{
Random random = new Random();
Set<Integer> set = new HashSet<Integer>();
while (set.size() < 4)
{
int randomInt = random.nextInt(10);
set.add(randomInt);
}
StringBuffer sb = new StringBuffer();
for (Integer i : set)
{
sb.append("" + i);
}
return sb.toString();
}
我们的验证码效果就出来了
ok 休息下,累死了


 454
454


 被折叠的 条评论
为什么被折叠?
被折叠的 条评论
为什么被折叠?
 到【灌水乐园】发言


