


前一段时间的时候在.NET 4.5中集成了一次CAS客户端,使用的是耶鲁大学的CAS Apereo,然后发表了一篇博客,希望帮到了.net的程序员,最近我又在.NET Core中集成了一次CAS,同样用的依然是耶鲁大学的CAS,这套CAS基本上已经是行业标准,
首先在开始集成之前,我需要向一些不太懂CAS的人纠正一个错误,CAS是一种规范,并是一个写死的项目,也就说只要我们按照这个规范来走,都可以实现单点登录。
话不多说,开始集成,这次的代码环境是.NET Core 2.0,开发工具是VS2017的企业版。
在Web项目中添加Nuget包,搜索cas:
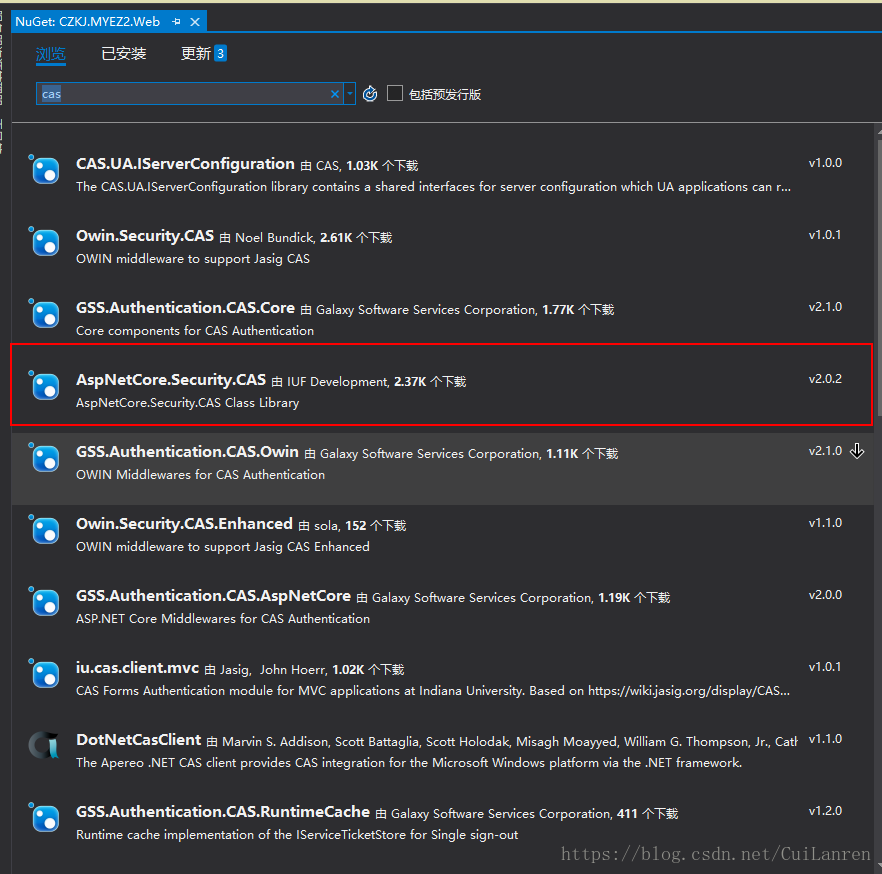
可以看到结果有很多,我们选择.NET Core版本的,这里我选择了AspNet.Sercurity.CAS没什么别的原因,就是觉得它的名字言简意赅。
点击下载,把Nuget包加载到我们的程序里,在做项目的时候我为了看源码,就从git上下载了程序集然后直接放进去的,如果大家想看源码的话可以这样,在这里我给大家贴上地址:https://github.com/IUCrimson/AspNet.Security.CAS。
添加完之后在Startup中配置CAS客户端的信息,这个配置教程在我上面的git地址中也有,可以点开查看
在ConfigureServices中添注入CAS的配置信息
services.AddAuthentication(CookieAuthenticationDefaults.AuthenticationScheme)
.AddCookie(o =>
{
o.LoginPath = new PathString("/Home/Login");
o.AccessDeniedPath = new PathString("/access-denied");
o.Cookie = new CookieBuilder
{
Name = ".AspNetCore.CasSample"
};
o.Events = new CookieAuthenticationEvents
{
// Add user roles to the existing identity.
// This example is giving every user "User" and "Admin" roles.
// You can use services or other logic here to determine actual roles for your users.
OnSigningIn = context =>
{
// Use `GetRequiredService` if you have a service that is using DI or an EF Context.
// var username = context.Principal.Identity.Name;
// var userSvc = context.HttpContext.RequestServices.GetRequiredService<UserService>();
// var roles = userSvc.GetRoles(username);
// Hard coded roles.
var roles = new[] { "User", "Admin" };
// `AddClaim` is not available directly from `context.Principal.Identity`.
// We can add a new empty identity with the roles we want to the principal.
var identity = new ClaimsIdentity();
foreach (var role in roles)
{
identity.AddClaim(new Claim(ClaimTypes.Role, role));
}
context.Principal.AddIdentity(identity);
return Task.FromResult(0);
}
};
})
.AddCAS(options =>
{
options.CasServerUrlBase = Configuration["CasBaseUrl"]; // Set in `appsettings.json` file.
options.SignInScheme = CookieAuthenticationDefaults.AuthenticationScheme;
});
在appsettings配置文件中添加CasBaseUrl节点,节点的内容为CAS服务端的地址
例如:"CasBaseUrl": "https://localhost:8080/cas"
添加完成之后在应用启动后第一个访问的控制器的Action上添加 [Authorize]特性
这时如果你没有通过CAS服务端的身份验证的话就会跳转到CAS登录页面
当你登录成功之后你可以通过HttpContext.User.Identity.Name;获取出当前登录用户的用户名
通过用户名你就可以进行接下来的所有操作了,至此.NET Core集成CAS客户端完毕。
希望.NET Core发展的越来越好,希望广大.NET程序员万事如意,微软大法好!


 301
301


 被折叠的 条评论
为什么被折叠?
被折叠的 条评论
为什么被折叠?
 到【灌水乐园】发言


