


pods 使用
If someone mentions the term Content Management System, probably WordPress, Joomla, Drupal, and others come to mind. But the only content types supported by WordPress out of the box are pages and articles, which is fine for most websites, but what if you want more? Luckily you can use the Pods Framework; it’s a WordPress plugin which enables you to add custom content types and their management to your WordPress installation.
如果有人提到“内容管理系统”一词,可能会想到WordPress,Joomla,Drupal等。 但是WordPress所支持的唯一现成的内容类型是页面和文章,这对大多数网站都很好,但是如果您想要更多呢? 幸运的是,您可以使用Pods框架; 它是一个WordPress插件,可让您向WordPress安装中添加自定义内容类型及其管理。
I’ll show you some of Pods Framework’s functionality by giving you a quick tutorial on how you we can use it to make a library site. The site will contain an overview page with all of the books we currently have, and when the user clicks on a book link he’ll see its details.
我将通过快速教程向您展示Pods Framework的一些功能,介绍如何使用它来创建图书馆站点。 该站点将包含一个概述页面,其中包含我们当前拥有的所有书籍,当用户单击书籍链接时,他会看到其详细信息。
添加内容类型 (Adding Content Types)
First you have to install the framework. Just use the plugin installer in your WordPress backend like you always do; the full name of the plugin is Pods CMS Framework.
首先,您必须安装框架。 像往常一样,只需在WordPress后端中使用插件安装程序即可; 插件的全名是Pods CMS Framework 。
After installation, click on the Pods menu item in the side menu. Like the description says, a pod is a named group of input fields, which means that it’s a custom content type with properties which you define. Click the “Add new pod” button and create a pod named “books”.
安装后,单击侧面菜单中的Pods菜单项。 就像描述中说的那样,窗格是一组命名的输入字段,这意味着它是具有定义的属性的自定义内容类型。 单击“添加新窗格”按钮,然后创建一个名为“书”的窗格。

After you make the book pod, the screen changes to show its properties:
制成书夹后,屏幕将更改以显示其属性:

By default, our new pod already has the columns name and slug. In this example, we won’t need slug, so just click the red X to the left of it to delete it. The book does however need some more information, such as its publisher, description, genre, author, publication date, and the book cover. Let’s create them now.
默认情况下,我们的新容器已经具有列名和子段。 在此示例中,我们不需要塞子,因此只需单击它左侧的红色X即可将其删除。 但是,这本书确实需要更多信息,例如出版商,描述,体裁,作者,出版日期和书的封面。 现在创建它们。
At the right you’ll see the ‘Add Column’ section. Enter appropriate column names in the Machine Name field and use ‘Single Line Text’ for the Column Type, except for the publication date and description. The type for the publication date should be Date, and the description should be ‘Paragraph Text’. As for the cover, we can just store an URL string to the image.
在右侧,您会看到“添加列”部分。 在机器名称字段中输入适当的列名称,并使用“单行文本”作为列类型,但发布日期和说明除外。 发布日期的类型应为“日期”,描述应为“段落文本”。 至于封面,我们只需将URL字符串存储到图像即可。
页面和模板 (Pages and Templates)
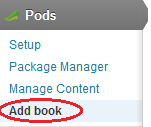
Once the pod is configured, go back to the side Pods menu and click Add book.
设定好广告连播后,返回侧面的“广告连播”菜单,然后单击“添加书籍”。
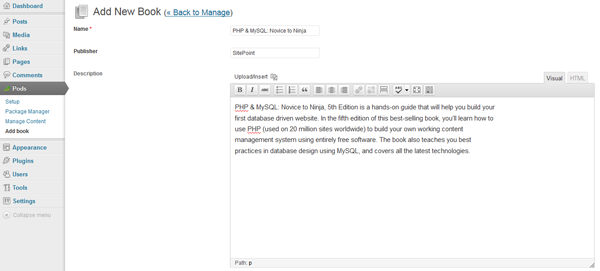
Add a few of your favorite books as an example, providing the necessary information and saving your work.
添加一些您喜欢的书作为示例,提供必要的信息并保存您的工作。
To display our pages correctly, we’ll need to make a small theme modification. Go to the theme’s directory (I’m using Twentyeleven for this example) and create a new file named pods.php. The content should be:
为了正确显示我们的页面,我们需要进行一些小的主题修改。 转到主题的目录(在此示例中,我使用的是Twentyeleven)并创建一个名为pods.php的新文件。 内容应为:
<?php
/*
Template Name: Custom Pods template
*/

get_header();
?>
<div id="primary">
<div style="width: 93%;" id="content" role="main">
<article id="post-0" class="post page hentry">
<?php pods_content(); ?>
</article>
</div>
</div>
<?php
get_sidebar();
get_footer();
?>
Be sure to include the Template Name comment at the top of the file. This way, WordPress will detect it as template file and name it the same way you named it.
确保在文件顶部包含模板名称注释。 这样,WordPress会将其检测为模板文件,并以与您命名相同的方式对其进行命名。
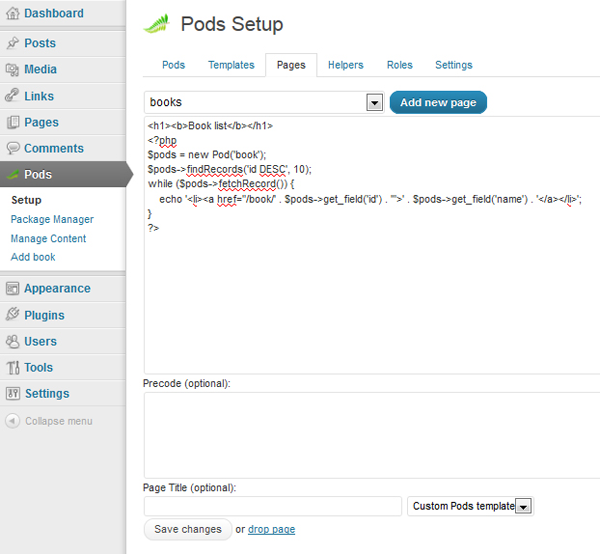
Now for our visitors to see the book collection we need to create the listing page to show all the books which are currently in the database. Go to Pods’ Setup menu, then the Pages tab, and then click ‘Add new page’. Name it ‘books’.
现在,为了让访问者看到图书集合,我们需要创建列表页面以显示数据库中当前的所有图书。 转到Pods的“设置”菜单,然后转到“页面”标签,然后单击“添加新页面”。 将其命名为“书”。
You should now see a text field where you can enter the code you want for that page. You can include HTML, Javascript, CSS and PHP. Use the following:
现在,您应该看到一个文本字段,您可以在其中输入该页面所需的代码。 您可以包括HTML,Javascript,CSS和PHP。 使用以下内容:
<h1><b>Book List</b></h1>
<?php
$pods = new Pod('book');
$pods->findRecords('id DESC', 10);
while ($pods->fetchRecord()) {
echo '<li><a href="/book/' . $pods->get_field('id') . '">' . $pods->get_field('name') . '</a></li>'; //Create a link to each different book
}
?>
Then, set the Page Template select to ‘Custom Pods Template’ and save your work.
然后,将页面模板选择设置为“自定义窗格模板”并保存您的工作。
In order to view the pages correctly, there’s one additional configuration change we need to make. Go to Settings > Permalinks, select ‘Custom Structure’, and in the text field type ‘/%postname%/’. Now you should be able to view the page you just created by going to yoursite.com/books.
为了正确查看页面,我们需要进行另一项配置更改。 转到“设置”>“永久链接”,选择“自定义结构”,然后在文本字段中键入“ /%postname%/”。 现在,您应该可以访问yoursite.com/books来查看刚刚创建的页面。
We still need to create a page which displays the book information, so click Pods’ ‘Add new page’ button again and use the name ‘book/*’. The * is important because it is a wildcard in the URL, in our case the id of the book.
我们仍然需要创建一个显示书籍信息的页面,因此再次单击Pods的“添加新页面”按钮,并使用名称“ book / *”。 *很重要,因为它是URL中的通配符,在本例中是书的ID。
We can retrieve the first wildcard value (and in our case the only one) by with the pods_url_variable() function.
我们可以使用pods_url_variable()函数检索第一个通配符值(在本例中为唯一的pods_url_variable() 。
This is the code to use for our books/* page:
这是用于我们的book / *页面的代码:
<?php
// store the book’s id into $bookId
$bookId = pods_url_variable(1);

// retrieves all book entries which fullfill the parameter requirement
$params = array('where'=>'t.id = '. $bookId);
$book = new Pod('book', $params);

// the pods is mostly a data class which contains multiple pod objects
while ($book->fetchRecord()) {
// use get_field() to retrieve the value of a specific field
echo '<h1>' . $book->get_field('name') . '</h1><br />';
echo '<img src="' . $book->get_field('cover') . '" /><br />';
echo 'Autor: ' . $book->get_field('autor') . '<br />';
echo 'Publisher: ' . $book->get_field('publisher') . '<br />';
echo 'Release date: ' . $book->get_field('release') . '<br />';
}
?>
Now we can easily manage our book collection and show it to the world. You can see that with the Pods Framework you can easily create a powerful website using WordPress. Actually, the possibilities are almost unlimited since with wildcards you can emulate a routing system that other frameworks might use.
现在,我们可以轻松地管理我们的藏书并将其展示给全世界。 您可以看到,使用Pods Framework,您可以使用WordPress轻松创建功能强大的网站。 实际上,可能性几乎是无限的,因为使用通配符,您可以模拟其他框架可能使用的路由系统。
For more information about the different Pod methods, you can visit the Pods Codex and ask for support in the Pods Forums.
有关不同Pod方法的更多信息,您可以访问Pods Codex,并在Pods论坛上寻求支持 。
Image via Fotolia
图片来自Fotolia
翻译自: https://www.sitepoint.com/turn-wordpress-into-a-cms-with-pods-framework/
pods 使用


 被折叠的 条评论
为什么被折叠?
被折叠的 条评论
为什么被折叠?
 到【灌水乐园】发言


