


three.js 粒子
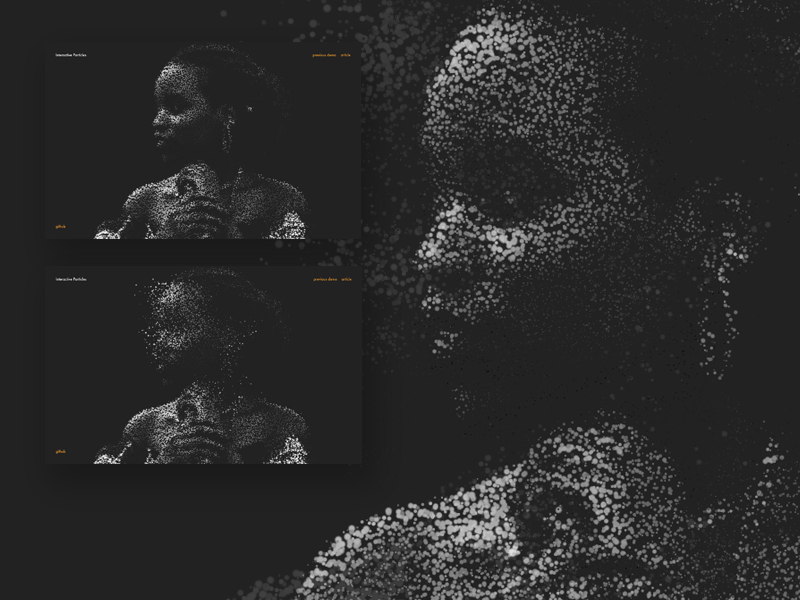
This tutorial is going to demonstrate how to draw a large number of particles with Three.js and an efficient way to make them react to mouse and touch input using shaders and an off-screen texture.
本教程将演示如何使用Three.js绘制大量粒子,以及使用着色器和屏幕外纹理使它们对鼠标和触摸输入做出React的有效方法。

实例几何 (Instanced Geometry)
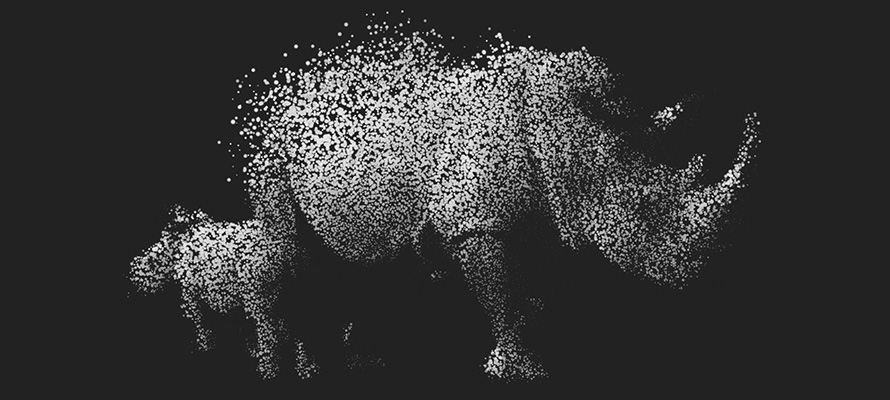
The particles are created based on the pixels of an image. Our image’s dimensions are 320×180, or 57,600 pixels.
粒子是基于图像的像素创建的。 我们的图像尺寸为320×180或57,600像素。
However, we don’t need to create one geometry for each particle. We can create only a single one and render it 57,600 times with different parameters. This is called geometry instancing. With Three.js we use InstancedBufferGeometry to define the geometry, BufferAttribute for attributes which remain the same for every instance and InstancedBufferAttribute for attributes which can vary between instances (i.e. colour, size).
但是,我们不需要为每个粒子创建一个几何。 我们只能创建一个,并使用不同的参数渲染57,600次。 这称为几何实例化。 通过Three.js,我们使用InstancedBufferGeometry来定义几何形状,对于每个实例都保持相同的属性,使用BufferAttribute对于因实例(例如颜色,大小)而异的属性,使用InstancedBufferAttribute 。
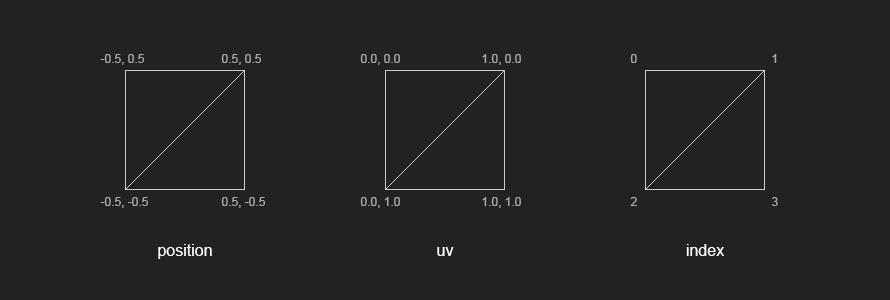
The geometry of our particles is a simple quad, formed by 4 vertices and 2 triangles.
我们粒子的几何形状是一个简单的四边形,由4个顶点和2个三角形组成。
const geometry = new THREE.InstancedBufferGeometry();

// positions
const positions = new THREE.BufferAttribute(new Float32Array(4 * 3), 3);
positions.setXYZ(0, -0.5, 0.5, 0.0);
positions.setXYZ(1, 0.5, 0.5, 0.0);
positions.setXYZ(2, -0.5, -0.5, 0.0);
positions.setXYZ(3, 0.5, -0.5, 0.0);
geometry.addAttribute('position', positions);

// uvs
const uvs = new THREE.BufferAttribute(new Float32Array(4 * 2), 2);
uvs.setXYZ(0, 0.0, 0.0);
uvs.setXYZ(1, 1.0, 0.0);
uvs.setXYZ(2, 0.0, 1.0);
uvs.setXYZ(3, 1.0, 1.0);
geometry.addAttribute('uv', uvs);

// index
geometry.setIndex(new THREE.BufferAttribute(new Uint16Array([ 0, 2, 1, 2, 3, 1 ]), 1));
Next, we loop through the pixels of the image and assign our instanced attributes. Since the word position is already taken, we use the word offset to store the position of each instance. The offset will be the x,y of each pixel in the image. We also want to store the particle index and a random angle which will be used later for animation.
接下来,我们遍历图像的像素并分配实例属性。 由于单词position已被占用,因此我们使用单词offset来存储每个实例的位置。 偏移量将是图像中每个像素的x,y。 我们还希望存储粒子索引和随机角度,这些稍后将用于动画制作。
const indices = new Uint16Array(this.numPoints);
const offsets = new Float32Array(this.numPoints * 3);
const angles = new Float32Array(this.numPoints);

for (let i = 0; i < this.numPoints; i++) {
	offsets[i * 3 + 0] = i % this.width;
	offsets[i * 3 + 1] = Math.floor(i / this.width);

	indices[i] = i;

	angles[i] = Math.random() * Math.PI;
}

geometry.addAttribute('pindex', new THREE.InstancedBufferAttribute(indices, 1, false));
geometry.addAttribute('offset', new THREE.InstancedBufferAttribute(offsets, 3, false));
geometry.addAttribute('angle', new THREE.InstancedBufferAttribute(angles, 1, false));颗粒材质(Particle Material)
The material is a RawShaderMaterial with custom shaders particle.vert and particle.frag.
该材质是RawShaderMaterial带有自定义着色器particle.vert和particle.frag 。
The uniforms are described as follows:
制服描述如下:
uTime: elapsed time, updated every frameuTime:经过的时间,每帧更新一次uRandom: factor of randomness used to displace the particles in x,yuRandom:用于替换x,y中的粒子的随机性因子uDepth: maximum oscillation of the particles in zuDepth:z中粒子的最大振荡uSize: base size of the particlesuSize:粒子的基本大小uTexture: image textureuTexture:图像纹理uTextureSize: dimensions of the textureuTextureSize:纹理的尺寸uTouch: touch textureuTouch:触摸纹理
const uniforms = {
	uTime: { value: 0 },
	uRandom: { value: 1.0 },
	uDepth: { value: 2.0 },
	uSize: { value: 0.0 },
	uTextureSize: { value: new THREE.Vector2(this.width, this.height) },
	uTexture: { value: this.texture },
	uTouch: { value: null }
};

const material = new THREE.RawShaderMaterial({
	uniforms,
	vertexShader: glslify(require('../../../shaders/particle.vert')),
	fragmentShader: glslify(require('../../../shaders/particle.frag')),
	depthTest: false,
	transparent: true
});
A simple vertex shader would output the position of the particles according to their offset attribute directly. To make things more interesting, we displace the particles using random and noise. And the same goes for particles’ sizes.
一个简单的顶点着色器将直接根据粒子的offset属性输出粒子的位置。 为了使事情变得更有趣,我们使用random和noise替换了粒子。 粒子的大小也是如此。
// particle.vert

void main() {
	// displacement
	vec3 displaced = offset;
	// randomise
	displaced.xy += vec2(random(pindex) - 0.5, random(offset.x + pindex) - 0.5) * uRandom;
	float rndz = (random(pindex) + snoise_1_2(vec2(pindex * 0.1, uTime * 0.1)));
	displaced.z += rndz * (random(pindex) * 2.0 * uDepth);

	// particle size
	float psize = (snoise_1_2(vec2(uTime, pindex) * 0.5) + 2.0);
	psize *= max(grey, 0.2);
	psize *= uSize;

	// (...)
}
The fragment shader samples the RGB colour from the original image and converts it to greyscale using the luminosity method (0.21 R + 0.72 G + 0.07 B).
片段着色器从原始图像中采样RGB颜色,并使用光度法(0.21 R + 0.72 G + 0.07 B)将其转换为灰度。
The alpha channel is determined by the linear distance to the centre of the UV, which essentially creates a circle. The border of the circle can be blurred out using smoothstep.
Alpha通道由到UV中心的线性距离确定,UV中心实际上形成一个圆。 可以使用smoothstep将圆的边界模糊掉。
// particle.frag

void main() {
	// pixel color
	vec4 colA = texture2D(uTexture, puv);

	// greyscale
	float grey = colA.r * 0.21 + colA.g * 0.71 + colA.b * 0.07;
	vec4 colB = vec4(grey, grey, grey, 1.0);

	// circle
	float border = 0.3;
	float radius = 0.5;
	float dist = radius - distance(uv, vec2(0.5));
	float t = smoothstep(0.0, border, dist);

	// final color
	color = colB;
	color.a = t;

	// (...)
}优化(Optimisation)
In our demo we set the size of the particles according to their brightness, which means dark particles are almost invisible. This makes room for some optimisation. When looping through the pixels of the image, we can discard the ones which are too dark. This reduces the number of particles and improves performance.
在我们的演示中,我们根据粒子的亮度设置粒子的大小,这意味着深色粒子几乎是不可见的。 这为优化提供了空间。 当遍历图像的像素时,我们可以丢弃太暗的像素。 这减少了颗粒数量并提高了性能。
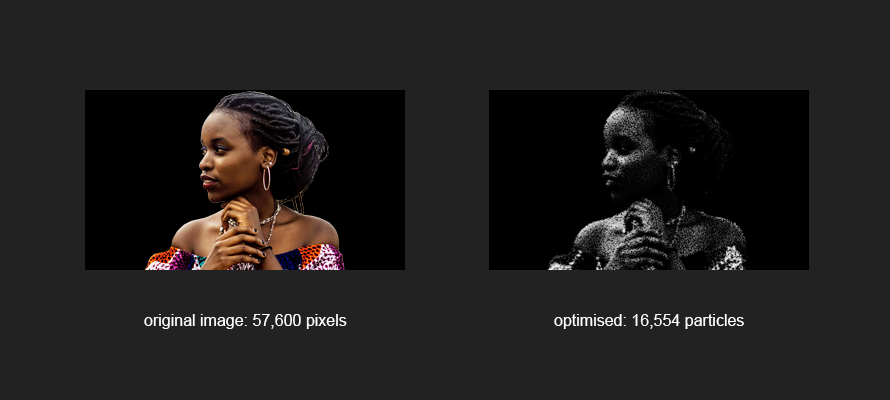
The optimisation starts before we create our InstancedBufferGeometry. We create a temporary canvas, draw the image onto it and call getImageData() to retrieve an array of colours [R, G, B, A, R, G, B … ]. We then define a threshold — hex #22 or decimal 34 — and test it against the red channel. The red channel is an arbitrary choice, we could also use green or blue, or even an average of all three channels, but the red channel is simple to use.
优化开始于创建InstancedBufferGeometry之前。 我们创建一个临时canvas ,在其上绘制图像并调用getImageData()以检索颜色数组[R, G, B, A, R, G, B … ] 。 然后,我们定义一个阈值(十六进制#22或十进制34),并针对红色通道进行测试。 红色通道是一个任意选择,我们也可以使用绿色或蓝色,甚至是所有三个通道的平均值,但是红色通道易于使用。
// discard pixels darker than threshold #22
if (discard) {
	numVisible = 0;
	threshold = 34;

	const img = this.texture.image;
	const canvas = document.createElement('canvas');
	const ctx = canvas.getContext('2d');

	canvas.width = this.width;
	canvas.height = this.height;
	ctx.scale(1, -1); // flip y
	ctx.drawImage(img, 0, 0, this.width, this.height * -1);

	const imgData = ctx.getImageData(0, 0, canvas.width, canvas.height);
	originalColors = Float32Array.from(imgData.data);

	for (let i = 0; i < this.numPoints; i++) {
		if (originalColors[i * 4 + 0] > threshold) numVisible++;
	}
}
We also need to update the loop where we define offset, angle and pindex to take the threshold into account.
我们还需要更新定义了offset , angle和pindex的循环,以考虑阈值。
for (let i = 0, j = 0; i < this.numPoints; i++) {
	if (originalColors[i * 4 + 0] <= threshold) continue;

	offsets[j * 3 + 0] = i % this.width;
	offsets[j * 3 + 1] = Math.floor(i / this.width);

	indices[j] = i;

	angles[j] = Math.random() * Math.PI;

	j++;
}互动性(Interactivity)
注意事项(Considerations)
There are many different ways of introducing interaction with the particles. For example, we could give each particle a velocity attribute and update it on every frame based on its proximity to the cursor. This is a classic technique and it works very well, but it might be a bit too heavy if we have to loop through tens of thousands of particles.
引入与粒子相互作用的方法有很多。 例如,我们可以给每个粒子一个速度属性,并根据其与光标的接近程度在每帧上对其进行更新。 这是一种经典技术,效果很好,但是如果我们必须循环遍历成千上万个粒子,则可能会有些沉重。
A more efficient way would be to do it in the shader. We could pass the cursor’s position as a uniform and displace the particles based on their distance from it. While this would perform a lot faster, the result could be quite dry. The particles would go to a given position, but they wouldn’t ease in or out of it.
一种更有效的方法是在着色器中执行此操作。 我们可以均匀地传递光标的位置,并根据其与粒子的距离来移动粒子。 尽管这样做的速度要快得多,但结果可能非常干燥。 粒子将到达给定的位置,但不会缓和或缓和。
选择方法 (Chosen Approach)
The technique we chose in our demo was to draw the cursor position onto a texture. The advantage is that we can keep a history of cursor positions and create a trail. We can also apply an easing function to the radius of that trail, making it grow and shrink smoothly. Everything would happen in the shader, running in parallel for all the particles.
我们在演示中选择的技术是将光标位置绘制到纹理上。 好处是我们可以保留光标位置的历史记录并创建轨迹。 我们还可以将缓动函数应用于该路径的半径,以使其平滑地增长和收缩。 一切将在着色器中发生,所有粒子并行运行。
In order to get the cursor’s position we use a Raycaster and a simple PlaneBufferGeometry the same size of our main geometry. The plane is invisible, but interactive.
为了获得光标的位置,我们使用了与主几何体相同大小的Raycaster和简单的PlaneBufferGeometry 。 飞机是看不见的,但是是互动的。
Interactivity in Three.js is a topic on its own. Please see this example for reference.
Three.js中的交互性本身就是一个主题。 请参阅此示例以供参考。
When there is an intersection between the cursor and the plane, we can use the UV coordinates in the intersection data to retrieve the cursor’s position. The positions are then stored in an array (trail) and drawn onto an off-screen canvas. The canvas is passed as a texture to the shader via the uniform uTouch.
当光标和平面之间存在相交时,我们可以使用相交数据中的UV坐标来检索光标的位置。 然后将位置存储在数组中(尾部)并绘制到屏幕外的画布上。 画布通过统一的uTouch作为纹理传递到着色器。
In the vertex shader the particles are displaced based on the brightness of the pixels in the touch texture.
在顶点着色器中,粒子基于触摸纹理中像素的亮度而移位。
// particle.vert

void main() {
	// (...)

	// touch
	float t = texture2D(uTouch, puv).r;
	displaced.z += t * 20.0 * rndz;
	displaced.x += cos(angle) * t * 20.0 * rndz;
	displaced.y += sin(angle) * t * 20.0 * rndz;

	// (...)
}结论(Conclusion)
Hope you enjoyed the tutorial! If you have any questions don’t hesitate to get in touch.
希望您喜欢本教程! 如果您有任何疑问,请随时与我们联系。
翻译自: https://tympanus.net/codrops/2019/01/17/interactive-particles-with-three-js/
three.js 粒子


 816
816


 被折叠的 条评论
为什么被折叠?
被折叠的 条评论
为什么被折叠?
 到【灌水乐园】发言


