


前端懒加载示例
If you are developing a live android application then you will surely need to load image from URL or internet and set it into ImageView. You will find various methods to do this, but all those methods are difficult to understand. In this tutorial I am sharing the simplest way to fetch image from internet.
如果您正在开发一个实时的android应用程序,那么您肯定需要从URL或Internet加载图像并将其设置为ImageView。 您会找到各种方法来执行此操作,但是所有这些方法都很难理解。 在本教程中,我将分享从Internet获取图像的最简单方法。
For doing this we first create an object of URL class and pass this object to decodeStream() method of BitmapFactory class. decodeStream() method decode an input stream into a bitmap. Finally we set this bitmap image into ImageView using setImageBitmap() method.
为此,我们首先创建URL类的对象,然后将该对象传递给BitmapFactory类的解码流()方法。 encodeStream()方法将输入流解码为位图。 最后,我们使用setImageBitmap()方法将此位图图像设置为ImageView。
You should always keep in mind that network related work must be done using AsyncTask class. It is a class used to perform task in background. We will show a progress dialog until the image is loading.
您应始终牢记,必须使用AsyncTask类完成与网络相关的工作。 它是用于在后台执行任务的类。 我们将显示一个进度对话框,直到图像加载完毕。
Android从URL加载图像(Internet)示例 (Android Load Image from URL (Internet) Example)
Create a new project with application name Android Example and package name thecrazyprogrammer.androidexample
使用应用程序名称Android Example和程序包名称thecrazyprogrammer.androidexample创建一个新项目
Now add following code in respective files.
现在,在相应文件中添加以下代码。
activity_main.xml (activity_main.xml)
<LinearLayout xmlns:android="http://schemas.android.com/apk/res/android"
    xmlns:tools="http://schemas.android.com/tools" android:layout_width="match_parent"
    android:layout_height="match_parent" tools:context=".MainActivity"
    android:orientation="vertical">

    <Button
        android:layout_width="wrap_content"
        android:layout_height="wrap_content"
        android:text="Load Image"
        android:id="@+id/button"
        android:onClick="buttonAction"/>

    <ImageView
        android:layout_width="match_parent"
        android:layout_height="wrap_content"
        android:id="@+id/image"/>

</LinearLayout>
MainActivity.java (MainActivity.java)
package thecrazyprogrammer.androidexample;
import android.app.Activity;
import android.app.ProgressDialog;
import android.graphics.Bitmap;
import android.graphics.BitmapFactory;
import android.os.AsyncTask;
import android.os.Bundle;
import android.view.View;
import android.widget.Button;
import android.widget.ImageView;
import java.io.InputStream;
import java.net.URL;
public class MainActivity extends Activity {
ImageView image;
Button button;
ProgressDialog progress;
@Override
protected void onCreate(Bundle savedInstanceState) {
super.onCreate(savedInstanceState);
setContentView(R.layout.activity_main);
image=(ImageView)findViewById(R.id.image);
button=(Button)findViewById(R.id.button);
}
public void buttonAction(View view) {
new LoadImage().execute();
}
public class LoadImage extends AsyncTask <Void,Void,Bitmap> {
@Override
protected Bitmap doInBackground(Void... params) {
Bitmap bitmap=null;
try {
bitmap= BitmapFactory.decodeStream((InputStream)new URL("https://www.thecrazyprogrammer.com/wp-content/uploads/2015/07/The-Crazy-Programmer.png").getContent());
} catch (Exception e) {
e.printStackTrace();
}
return bitmap;
}
@Override
protected void onPreExecute() {
//show progress dialog while image is loading
progress=new ProgressDialog(MainActivity.this);
progress.setMessage("Loading Image....");
progress.show();
}
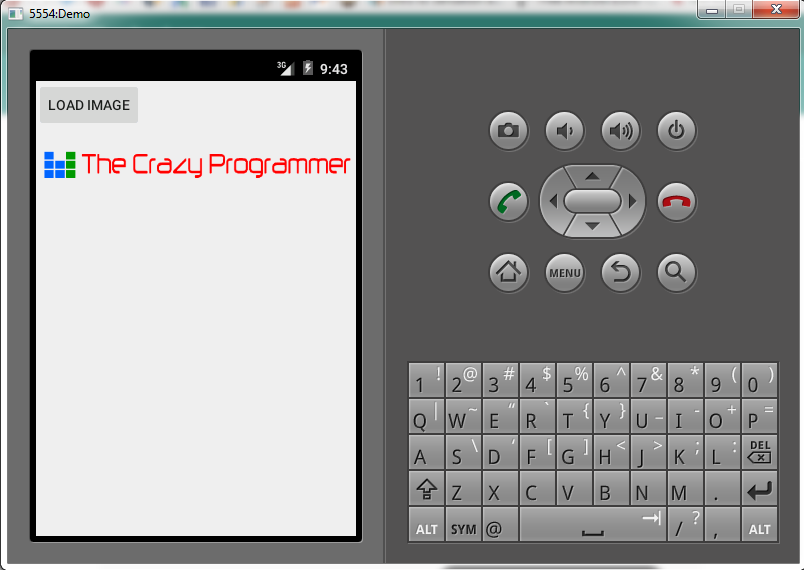
@Override
protected void onPostExecute(Bitmap bitmap) {
if(bitmap!=null) {
image.setImageBitmap(bitmap);
progress.dismiss();
} else {
progress.dismiss();
Toast.makeText(MainActivity.this,"Some error occurred!",Toast.LENGTH_LONG).show();
}
}
}
}As we are using internet so we need to add internet access permission. Add following line of code to AndroidManifest.xml.
由于我们正在使用互联网,因此我们需要添加互联网访问权限。 将以下代码行添加到AndroidManifest.xml 。
<uses-permission android:name="android.permission.INTERNET" />AndroidManifest.xml (AndroidManifest.xml)
<?xml version="1.0" encoding="utf-8"?>
<manifest xmlns:android="http://schemas.android.com/apk/res/android"
    package="thecrazyprogrammer.androidexample" >
    <uses-permission android:name="android.permission.INTERNET" />
    <application
        android:allowBackup="true"
        android:icon="@mipmap/ic_launcher"
        android:label="@string/app_name"
        android:theme="@style/AppTheme" >
        <activity
            android:name=".MainActivity"
            android:label="@string/app_name" >
            <intent-filter>
                <action android:name="android.intent.action.MAIN" />

                <category android:name="android.intent.category.LAUNCHER" />
            </intent-filter>
        </activity>
    </application>

</manifest>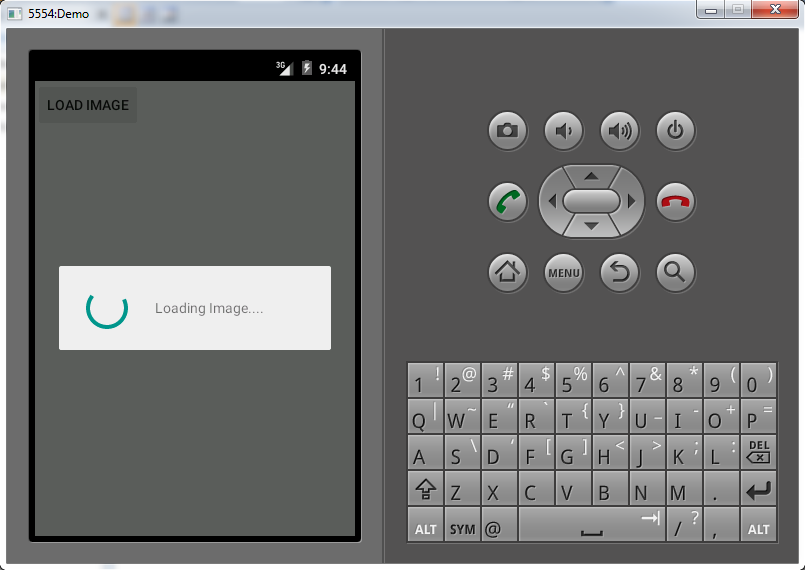
We have used an AsyncTask here to perform the loading operation. AsyncTask make your code a bit longer. If you want to simply it more you can use a 3rd party libraries like volley or picasso for android.
我们在这里使用了AsyncTask来执行加载操作。 AsyncTask使您的代码更长一些。 如果您想更简单一点,可以使用第3方库,例如android的 volley或picasso 。
In case you are facing any difficulty or have any doubts regarding above android load image from url tutorial then feel free to comment below.
如果您遇到任何困难或对上面的url教程中的android加载图像有任何疑问,请在下面随意评论。
翻译自: https://www.thecrazyprogrammer.com/2015/10/android-load-image-from-url-internet-example.html
前端懒加载示例


 135
135


 被折叠的 条评论
为什么被折叠?
被折叠的 条评论
为什么被折叠?
 到【灌水乐园】发言


