


joomla 重新安装
Joomla is among the most popular free Content Management Systems (CMS) in the world. It helps in creating and managing dynamic websites with its intuitive management interface. In short, it is a collection of PHP (Hypertext Preprocessor) scripts.
Joomla是世界上最受欢迎的免费内容管理系统(CMS)。 它以其直观的管理界面帮助创建和管理动态网站。 简而言之,它是PHP(超文本预处理器)脚本的集合。
Installing Joomla is not a rocket science if you know how to move ahead step-by-step. However, before you start installing, it is wise to choose web hosting provider carefully. Once you choose the hosting for Joomla, it’s high time to go with installing it on your web hosting account.
如果您知道如何逐步进行,那么安装Joomla并不是一门火箭科学。 但是,在开始安装之前,明智地选择网络托管服务提供商。 为Joomla选择托管后 ,就该将其安装到您的虚拟主机帐户中了。
So, without further delay, let’s talk about the steps to install Joomla on a web hosting account.
因此,在不拖延的情况下,让我们讨论在虚拟主机帐户上安装Joomla的步骤。
Let’s get started…
让我们开始吧…
如何在虚拟主机上安装Joomla 3 (How to Install Joomla 3 on Web Hosting)
步骤1 –下载Joomla安装包 (Step 1 – Download the Joomla Installation Pack)
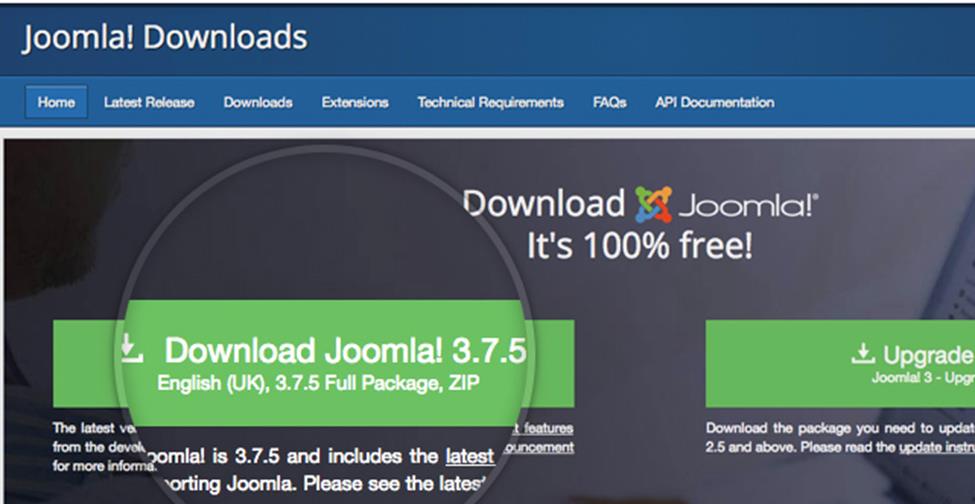
This is the first step to start with the installation process. Make sure to download it from the official site of Joomla because if you download it from other sites, chances are your setup files will be at the risk of malicious code. After clicking on the “Download” icon, the installation package will be moved and saved directly to your hard disk. Save the installation with the name Joomla_xxx package or same like this and save to the new folder so that you will locate it easily when needed.
这是从安装过程开始的第一步。 确保从Joomla的官方网站下载它,因为如果从其他网站下载它,则您的安装文件很可能会受到恶意代码的威胁。 单击“下载”图标后,安装包将被移动并直接保存到您的硬盘中。 使用名称为Joomla_xxx的软件包或类似的名称保存安装,然后保存到新文件夹,以便您在需要时可以轻松找到它。
第2步–将Joomla文件上传到您的服务器 (Step 2 – Upload the Files of Joomla to Your Server)
The next step to install Joomla is to upload the withdrawal files and folders to the server. To make it easier, upload the Joomla installation files through FTP. File Transfer Protocol is the convenient yet fast way to transfer files online. Many webmasters use FTP to upload their websites files on their hosting account. To know more about how to upload Joomla files through FTP, checkout the link.
安装Joomla的下一步是将提款文件和文件夹上传到服务器。 为了简化操作,请通过FTP上传Joomla安装文件。 文件传输协议是在线传输文件的便捷方法。 许多网站管理员使用FTP将其网站文件上传到其托管帐户。 要了解有关如何通过FTP上传Joomla文件的更多信息,请查看链接。
步骤3 –创建一个MySQL数据库 (Step 3 – Create a MySQL Database)
Moving to the third step to install Joomla, you need to create a MySQL database and assign it to the user with full permissions. You can choose the MySQL database wizard in order to create a user account. To access this tool, access your cPanel and click on the icon of the tool. Create an account by following the steps and you will get a message on successful user account creation.
转到安装Joomla的第三步,您需要创建一个MySQL数据库并将其分配给具有完全权限的用户。 您可以选择MySQL数据库向导来创建用户帐户。 要访问此工具,请访问cPanel,然后单击该工具的图标。 按照以下步骤创建一个帐户,您将收到有关成功创建用户帐户的消息。
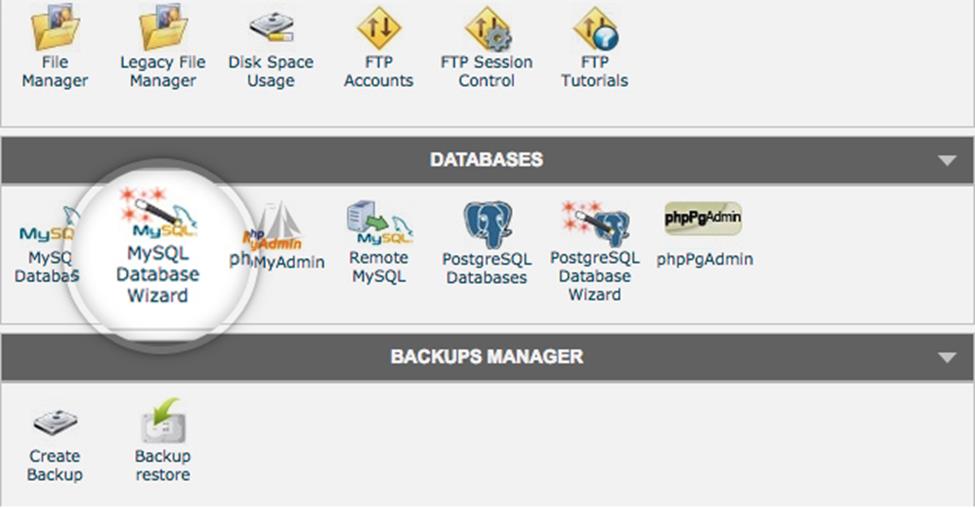
After creating the MySQL Database and user account, write down the name of the database, username and password. For installation process, you need these details.
创建MySQL数据库和用户帐户后,记下数据库名称,用户名和密码。 对于安装过程,您需要这些详细信息。
步骤4 –继续进行安装过程 (Step 4 – Proceed with the Installation Process)
Here comes the final step- The Installation Process. To install Joomla 3 on the web hosting account, you need to open your browser and navigate it to the main domain, depending on where you have installed the package. After this, you will be directed to the first screen of the Joomla web installer. Now add your important information like your site name and username and get set go. Have a look at the image below
这是最后一步-安装过程。 要在虚拟主机帐户上安装Joomla 3,您需要打开浏览器并将其导航到主域,具体取决于安装软件包的位置。 之后,您将被带到Joomla Web安装程序的第一个屏幕。 现在添加您的重要信息,例如您的站点名称和用户名,然后开始设置。 看看下面的图片
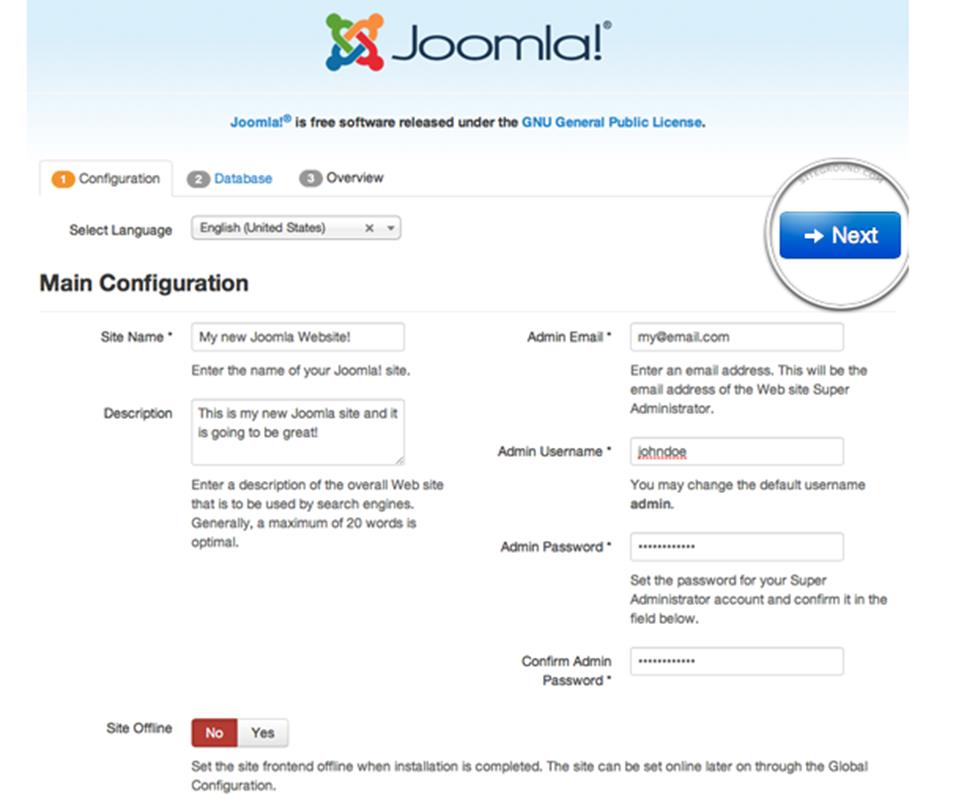
What to Fill in the boxes above?
在上面的框中填写什么?
Select your language you are comfortable in.
选择您喜欢的语言 。
Enter the site name
输入网站名称
In the description box, write a brief description.
在说明框 x中,写一个简短说明。
In the admin email section, enter a valid email address that will be used for system messages and for password recovery.
在管理员电子邮件部分中,输入将用于系统消息和密码恢复的有效电子邮件地址。
In the Admin username box, add your administrative username
在“ 管理员用户名”框中,添加您的管理用户名
Admin Password – Make sure the password is strong
管理员密码 –确保密码安全
In the site offline box choose if you want your site to be offline after installation.
在“ 站点脱机”框中,选择是否要让站点在安装后脱机。
- After filling the required details, click on the Next button and go ahead with the installation. 填写所需的详细信息后,单击“下一步”按钮并继续进行安装。
步骤5: (Step 5:)
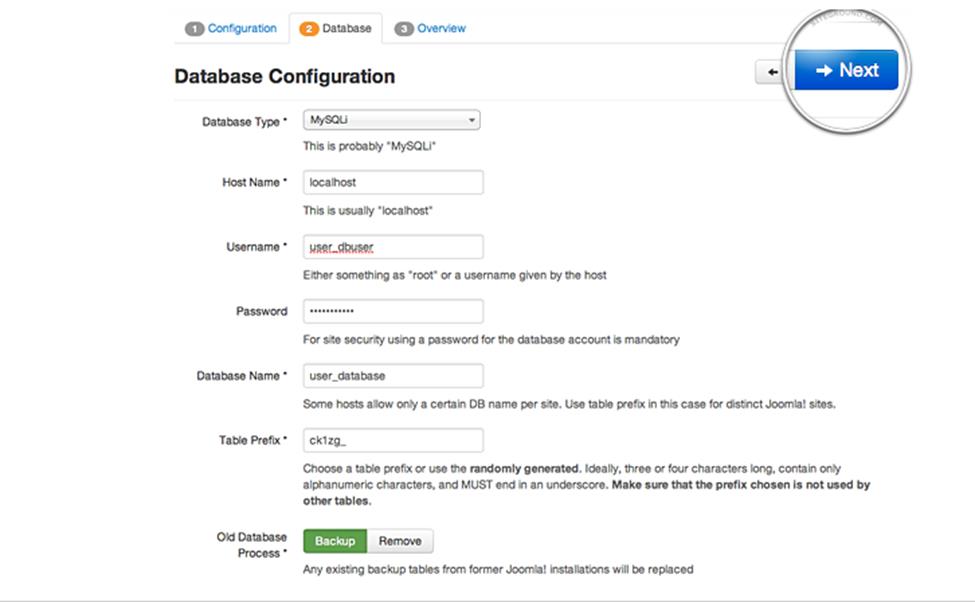
You will be directed to this screen when you click on the next!
当您单击下一个时,您将被定向到该屏幕!
What to fill in the boxes above?
在上面的框中填写什么?
In the Database Type, set it to MySQL which is by default
在“ 数据库类型”中 ,将其设置为默认情况下MySQL
In the next box, Host name, leave it default.
在下一个框中, 主机名,保留默认值。
Then in the Username box, enter your username for MySQL database
然后在“ 用户名”框中,输入您MySQL数据库用户名
In the Password box, fill the strong password
在“ 密码”框中,输入强密码
In the Database box, enter the MySQL database name you want to use
在“ 数据库”框中,输入要使用MySQL数据库名称
In the Table Prefix, Joomla will adds to its database tables. This is helpful for those who want to host different Joomla sites on a sole database.
在表前缀中 ,Joomla将添加到其数据库表中。 对于希望在单一数据库上托管不同Joomla网站的用户而言,这很有用。
Click on the Next button to move forward and you will be directed to the last page of the final installation process.
单击下一步按钮继续前进,您将被引导至最终安装过程的最后一页。

When you move to the second part of the page, you will see pre-installation checks. You will see a green check after each line and moreover, SiteGround servers meet all the requirements of the Joomla.
当您移至页面的第二部分时,将看到安装前检查。 每行之后都会显示一个绿色的勾号,此外,SiteGround服务器符合Joomla的所有要求。
Lastly, click on the Install button and in a few minutes, you will be directed to the Joomla Web Installer, which is the last screen. Press Remove Installation folder button which is essential for security sake. Remember, you won’t be able to use the site unless you remove this folder. So do it as soon as possible.
最后,单击“安装”按钮,几分钟后,您将被定向到Joomla Web Installer,这是最后一个屏幕。 按“删除安装文件夹”按钮,这对安全性至关重要。 请记住,除非删除此文件夹,否则将无法使用该网站。 因此,请尽快进行。
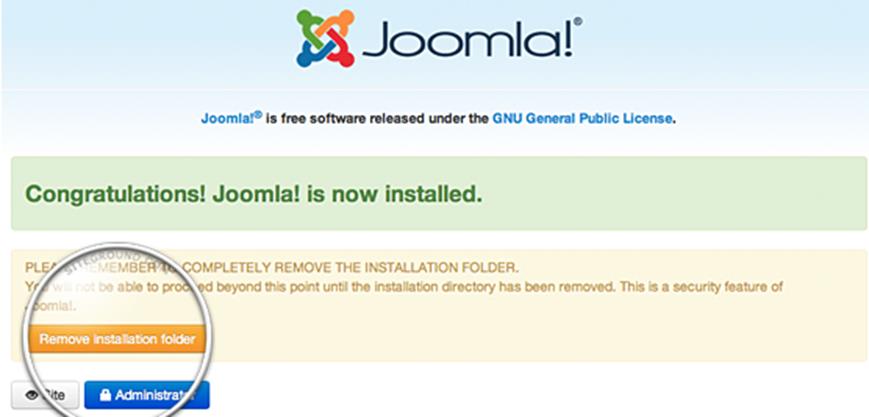
Now after removing the installation folder, you are done with Joomla installation process! Congratulations as now you have a fully access to your Joomla website!
现在,在删除安装文件夹之后,Joomla安装过程就完成了! 恭喜,您现在可以完全访问Joomla网站!
翻译自: https://www.thecrazyprogrammer.com/2019/02/how-to-install-joomla-3-on-web-hosting.html
joomla 重新安装


 2674
2674

 被折叠的 条评论
为什么被折叠?
被折叠的 条评论
为什么被折叠?
 到【灌水乐园】发言


